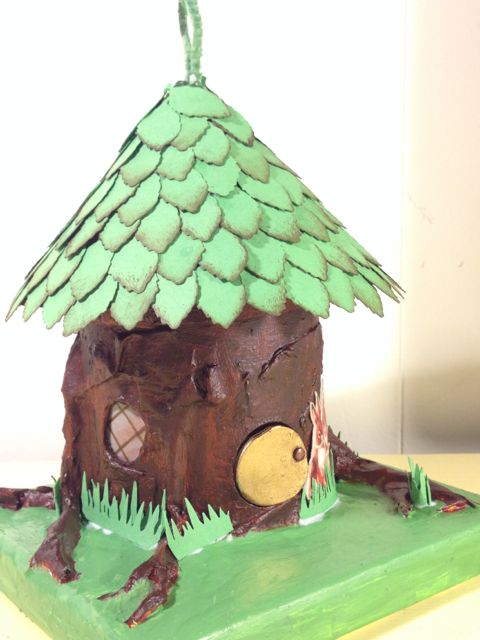
I've been working on this little Easter house for awhile. I meant to take step by step photos so I could show you how to make it, but looking back I see that I missed an awful lot of steps.

The Easter Tree House is not really done yet. You can see the glue drying at the base of the grass, the easter eggs have not been distributed yet and there will 2 little birds on the roof. It's been awhile since I posted so I wanted you to know I have not been idle.
Here are the approximate steps in making this house.
First I got a cardboard cylinder which is the inside of industrial strength toilet paper from the hospital. It is about 3 ½ inches in diameter and 3 ½ inches tall. I cut open one side so I could more easily cut windows and the door in the cardboard. You can't really tell from this view but there are 4 windows and the round gold front door. Then I ripped some newspaper and coated it with glue and applied it to the surface of the cylinder to simulate bark. I did the same thing to make the roots except that I roll and twist the paper to make roots.
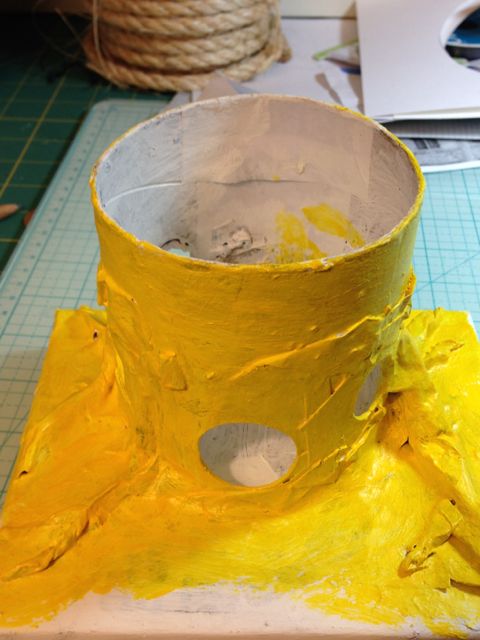
It doesn't have to be pretty because you are going to paint it and bark is rough anyway. I first painted with gesso and then ochre acrylic paint. This forms the under layer color that I want to show through a little bit to give depth to the bark.

I made a cone to function as the top of the house. Notice how the top of the cylinder doesn't have any paper mache there. That is so the top can come off. I want to be able to put a tea light in there and let people see the bunny portraits inside. One critical feature is make sure the band on the top is loose enough to be easily removed. I cut a strip of cardboard and loosely tape it so I can make sure I have the right size. After that I glue the strip together, I adhere the band to a thick cardboard circle which gives support to the cone on top. I wanted the cone to extend past the band so it was not so obvious.
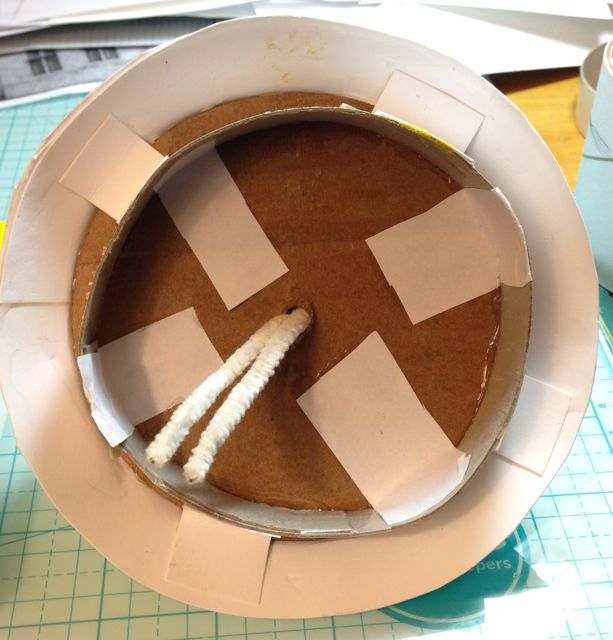
Next I glued strips to reinforce the attachment of the base to the cardboard cone. The pipe cleaner in the center forms a stem which functions as a handle to take the top off. I knotted it at the bottom when I had the stem at the correct length.

I dyed the pipe cleaner. I used 2 layers of cardstock to make the cone. This doesn't have to be too strong because it doesn't really support anything. I didn't worry about how neat the cardstock was because it was all going to be covered up (unlike when I did the Black Hat Inn many months ago - that cone had to look good because it was just painted.)
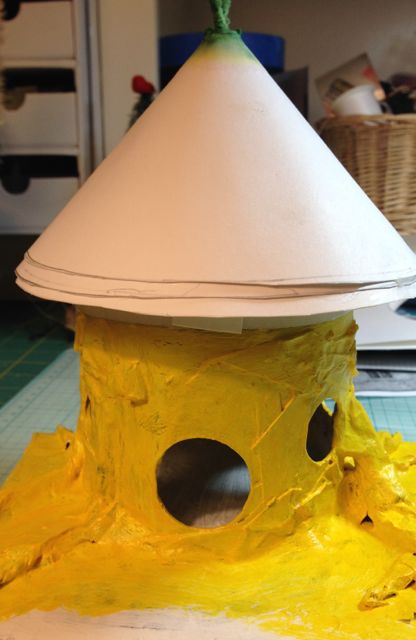
I tested to make sure it still fits.
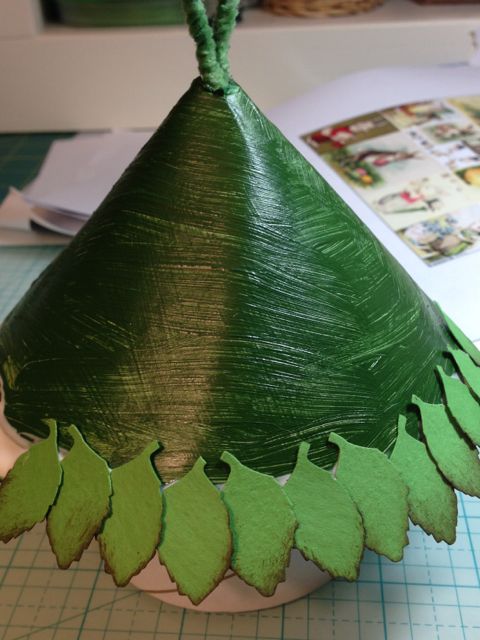
I painted the cone green, punched out a lot of leaves and edged them with Ground Espresso distress paint to give them a little more depth. See why I didn't worry about how the cone looked?
Inside I put some bunny portraits from Bunny Clip Art that I got from Alpha Stamps. I made little gold frames for the portraits.
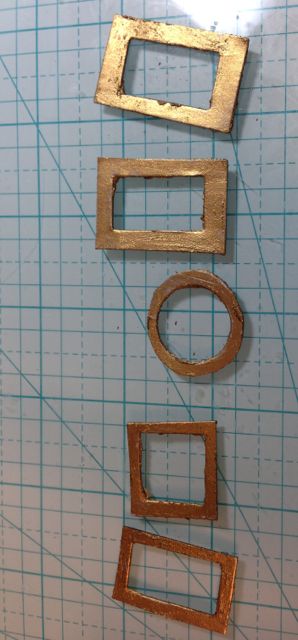
I don't have a good photo of the inside of the house yet. When I post the completed house I will be sure and let you see the portraits. I am making this for a 3 year old boy. I think he will be really tickled about the house.
The door actually opens. I adhered it with some fancy air sealing tape (Pro Clima's Tescon Vana if you are curious) left over from building my brother's house - his real house. It's really flexible and adheres to anything really well. I've even patched a pair of jeans with it and it has stayed on for months.
When I have all the decorations done, I'll post the finished house. I think this little house is going to be seriously cute.
Keep warm everybody.
Leave a Reply