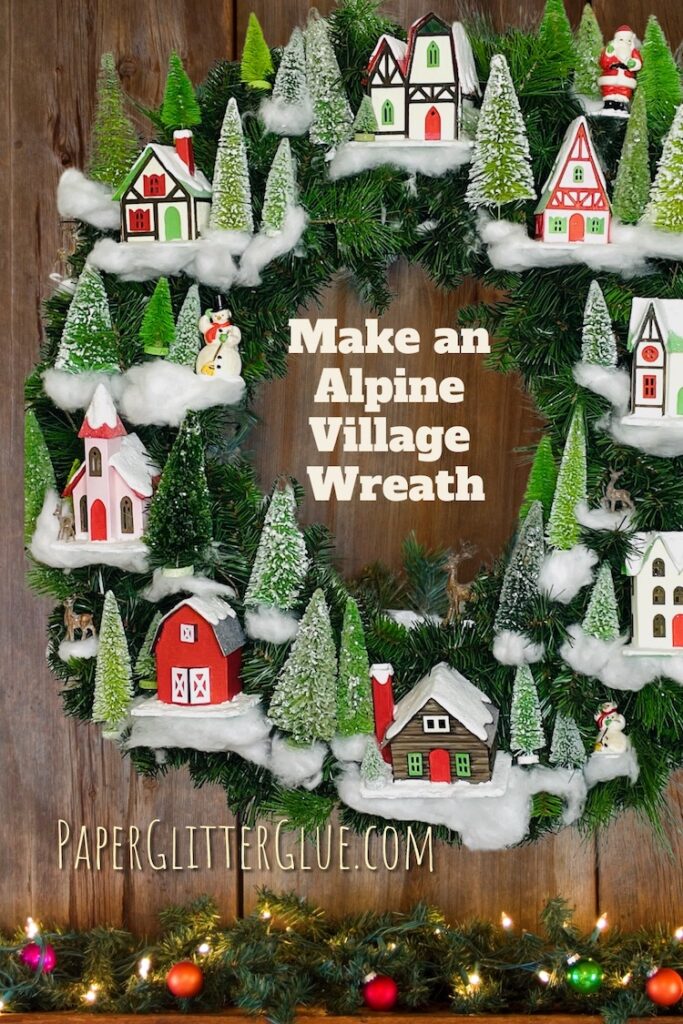
In 2014, I fell in love with the idea of making little houses when I saw the cover of the December issue of Martha Stewart Living. It was a gorgeous wreath with decorated with little Putz houses on clouds of cotton snowbanks. Just adorable. When I saw that wreath I decided that some day, I would make little houses.
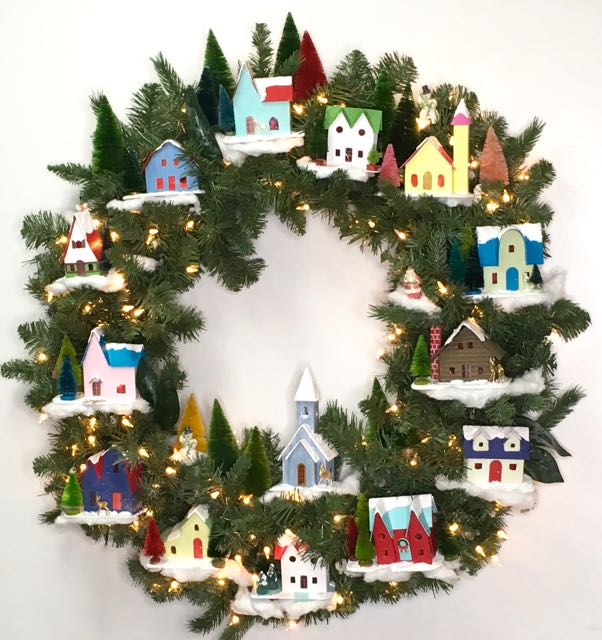
Then a few years ago, I made a Winter Village Wreath.
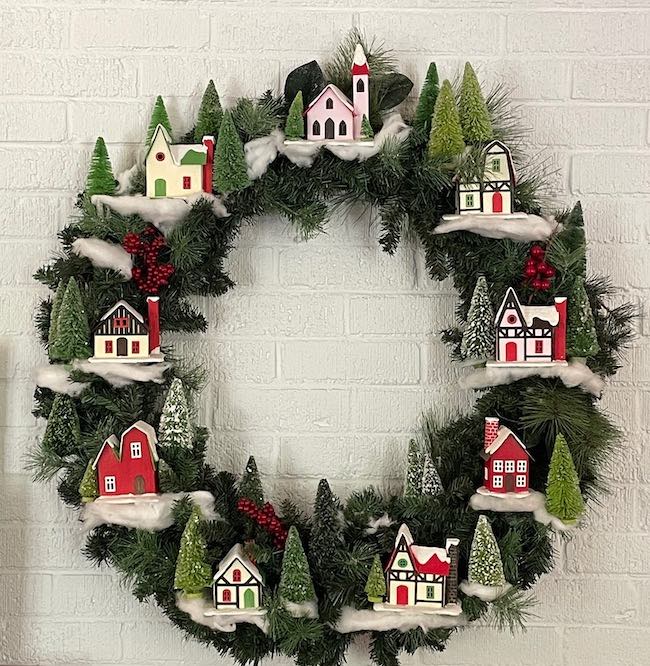
But recently I've been busy updating my wreath into the Alpine Village Wreath. There are 12 house patterns with variations to make a completely different-looking wreath. I am so happy with how it turned out.
I've made the workshop to show you exactly how to make a wreath like this - an heirloom, really - a special project that your family will pass down for generations. Now on sale for $37.
In addition to the 12 patterns for each of the houses, the workshop consists of 21 short videos including:
- Materials and supplies - what is necessary to make the wreath
- How to cut out the houses with a Cricut
- Assemble the houses - general tips
- How to apply snow to the houses
- How to apply glitter
- Separate videos for how to make each house 1-12
- How to embellish the wreath
- How to attach the houses to the wreath
- Decorate your wreath with bottlebrush trees
Buy Now for Only $37!
This post contains some affiliate links for your convenience. Click here to read my full disclosure policy.
Materials and Supplies to Make the Alpine Village Wreath
Wreath materials:
- Artificial Christmas Wreath without lights - I made mine with 30 inch and 32 inch wreaths. Also, it may be easier to find wreaths at your local hobby store.
- Artificial Christmas Wreath with lights
- Pine greenery to spruce up your wreath - I used branches I found at HobbyLobby. Even though these branches were heavily glittered and shed glitter all over my house, I liked them better than what I found online.
- Floral wire to attach houses
- Other embellishments
Materials and Supplies to Make the Alpine Village Houses
- A way to cut out the patterns - I used a Cricut Maker, but any of these Cricut cutting Machines can work:
- Cricut Maker 3
- Cricut Maker
- Cricut Explore 3
- Cricut Explore Air 2
- Cricut Joy Xtra
- Cricut Joy - will work for the houses but you need a way to score (using the foil tool to score is the easiest way)
- Cricut Fine Point Blade
- Green Standard Grip Mat for Cricut Maker and Cricut Explore Machines
- Green Standard Grip Mat for Cricut Joy Xtra
- Green Standard Grip Mat for Cricut Joy 4.5" x 12"
- Scoring Stylus - my preferred way to score
- Blue painter's tape to tape down cardboard or card stock
- Cardboard for the sturdiest houses
- 30 pt cardboard - Amazon calls this medium weight chipboard
- 22 pt cardboard - slightly thinner cardboard
- Single face corrugated cardboard for the log cabin
- Card stock - cuts much easier and much faster to assemble since you don't have to paint the card stock
- 110# card stock is heavier and pretty sturdy. I used this for the body of my card stock houses
- 65# card stock works for the houses as well, but they will not be as sturdy
- Acrylic Paint
- Gesso primer for cardboard houses
- This is my favorite brand of acrylic paint, though it is expensive:
- Candied Apple - a beautiful red
- Mowed Lawn - nice green shade, not blue-green, contrast well with the darker green on the wreath
- Twisted Citron - a light yellow-green, again contrasts well with the wreath
- Walnut Stain - a medium brown for wood trim on houses
- Ground Espresso - dark brown for wood trim on houses
- Light cream or yellow for the base color on many houses - I mixed mine from gesso and a yellow paint
- Other sets of acrylic paints:
- Apple Barrel Acrylic Paint Set - a nice, inexpensive set of 18 different craft paint colors
- Craft Smart Acrylic Paint Set - 24 colors for a good price
- Glue
- Bearly Art Glue - my current favorite glue for small details and for gluing card stock. Dries fast and holds well
- Aleene's Quick Dry Tacky Glue - strong glue for gluing the structure together
- Hot glue to adhere the trees and figures to the wreath
- Glitter and Mica - despite the name of my website, I'm not really a big fan of glitter. I like to use it sparingly. For the wreath, I used it on the snowy roof of the houses and the base of the house and on the trees.
- My favorite glitter is Clear Rock Candy Glitter
- Distress Mica Flakes - Mica is not perfectly clear, but it adds a nice variation in shine to the trees on the wreath
What is included in the Alpine Village Wreath Workshop?
There are 12 different putz house videos and patterns in both SVG and PDF formats. Additionally there are videos on materials needed, how to jazz up the greenery on the wreath, how to construct each house, how to attach the houses to the wreath, and how to decorate the wreath.
Some of the houses are based on vintage putz houses and most are decorated with trim to look like a Tudor house or a half-timbered houses.
No. 1 Easy Alpine Starter House
This is the simplest structure, but still with a lot of personality.

No. 2 Alpine Christmas House
I tried to come up with a good name for this house, but really couldn't think of one, but it is one of my favorite house shapes.

And here is the red version of No. 2 Alpine House. I left off the trim because the red color is so bright. Notice that there are two different window shapes for this house.

No. 3 The Barn
I made this version of the barn by cutting cardboard strips for the siding. I really like it.
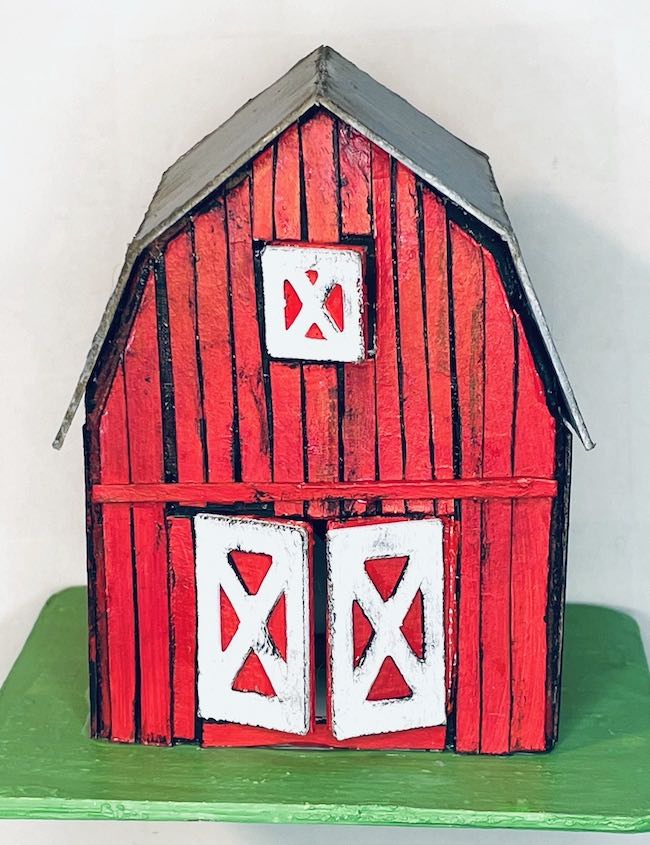
Here's the easier, plain version of the barn on one of my wreaths.

No. 4 Twin Gable Front House
This is a relatively simple house with no trim because it's pretty small. It's nice to fit in a smaller space.

No. 5 Tall Twin Gable Front House (the Alpine Hotel)
House No. 5 is one of my favorite houses. With all the windows, I call it the Alpine Hotel. It's a taller version of the house no. 4.

No. 6 Spun Sugar Church
I named this church the Spun Sugar church based on the pink Distress paint used on the church.

No. 7 Alpine Chalet (3 variations including the Log Cabin)
I love these versions of the Alpine Chalet. The log cabin variation on the right is made with corrugated cardboard which gives it a great texture and dimension.

No. 8 Happy Holiday House
I love the trim on this house.

No. 9 Swiss Chalet
I've made different variations of this house in past, but I think this version is the best.

No. 10 Double Dormer House
This trim makes this little Putz house, I think.

No. 11 Split Level House
The Split Level Putz house is another house with no trim because the roof line is interesting on its own.

No. 12 Church with Front Tower
And last, the little church that has the tower in the front.

Buy the Alpine Village Wreath Workshop for only $37!
If you have any questions, please email me - [email protected].
Thank you for stopping by.

April
Love this! So pretty. Your house #2 reminds me of the priest's house next door to the Catholic church in my hometown. I would call it "The Manse".
All your houses are great. I wish I could join you in the workshop.
Have a very Merry Christmas.
Lucy
April,
I made a different version several years ago. You can read the tutorial here.
All of those patterns are free in the library. The patterns in the workshop are updated with a few variations. But you can still make a wreath with the tutorial I linked above.
Merry Christmas to you, too.
Lucy
Shirl
Cannot wait for your class on this wreath! My Martha Stewart inspired wreath needs a make-over too. Some of the little trees that you linked are white. Did you spray paint yours green? If so, what kind of paint/color did you use? I am getting my supplies lined up for this workshop! Happy Thanksgiving!
Jenny A
Your little houses are always so wonderful! What are your suggestions on making them weather-proof? So that they can be on an outdoor wreath? A different "building" material and spray sealant of some sort? Thanks for any advice!
Lucy
Jenny,
I haven't ever tried to make my little houses waterproof. But I think it would be challenging to make the little cardboard houses waterproof. Here are some ideas: Paint them with an exterior paint. Then coat them inside and out with a polyurethane. I would use a waterproof glue like a wood glue during construction.
You could make them out of polymer clay which is waterproof. That might be a simpler option than coating paper with layers and layers of polyurethane.
If you try it, please let me know how it turns out.
Lucy
Jennie
I will keep you updated once I begin .Thank you
Lucy
Thank you, Jennie.