Here is the Fixer Upper variation of the Pasta Box House. Starting with a recycled pasta box, you can make this adorable miniature Fixer Upper house to the delight of any new homeowner.
Read the story below or see the video that shows the Pasta Box House Fixer Upper Journey in a nutshell.
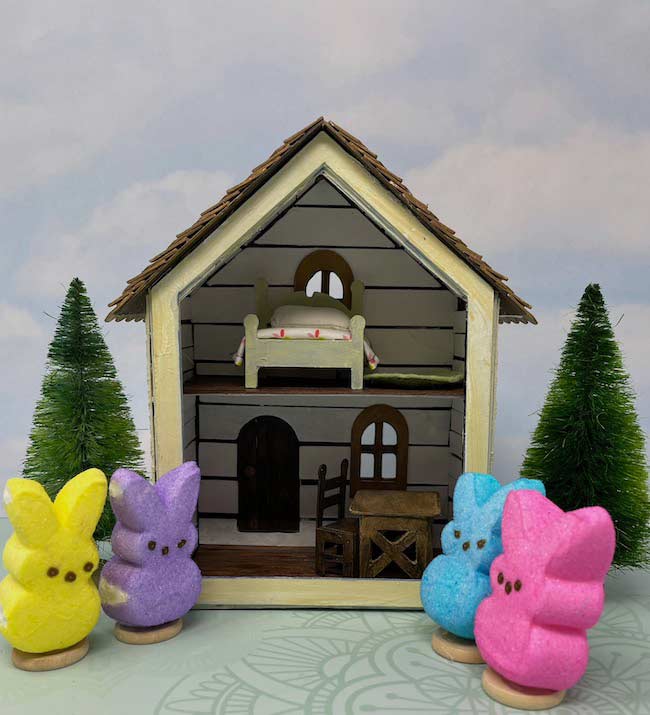
Jo and ChipPeep are showing Sonny and Betty BoPeep fixer upper houses to help them find the home of their dreams. Their wish list includes an open concept and luxurious master bedroom. ChipPeep tells us that they call this house the Pasta Box House for obvious reasons.
The purchase price is $1.71 and for the BoPeeps with all in budget of $10.00, Jo and ChipPeep are sure they can open up the first floor and make a master suite that is everything they want. And ChipPeep says they can even bring it in under budget.
Jo notes that she would move the door to the front of the house, add more windows and new siding as well as install a new roof to give the Pasta Box House more curb appeal. Betty BoPeep can't really see much potential in this house, but she trusts Jo's design skills and vision.
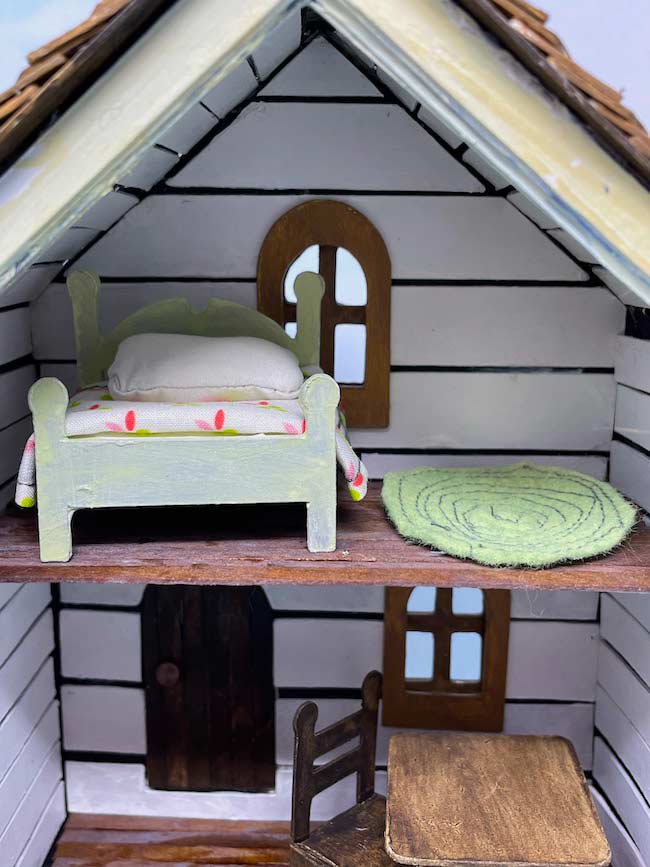
Let's check out the inside of the Pasta Box house before renovation.
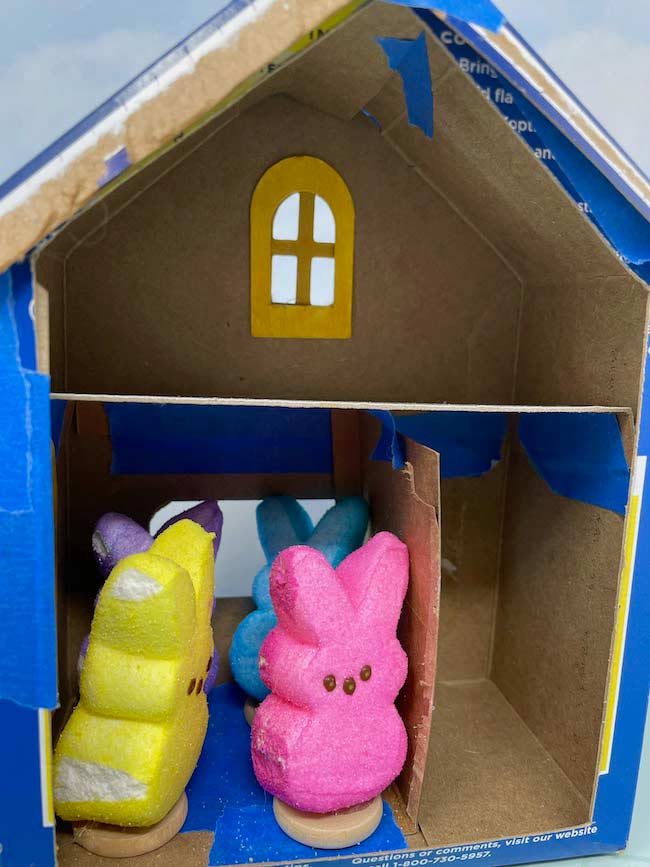
Obviously, the floor plan on the first floor is not the open concept that the BoPeeps desire. ChipPeep is anxious to take out the wall because he loves demo day. With the wall removed, Jo will ask Clint HarpPeep to make a custom table for the downstairs. She also intends to add hardwood floors and shiplap. Fortunately, the BoPeeps love shiplap.
Upstairs Jo plans to the vault the ceiling to make the room seem bigger. She also will add shiplap and add new hardwood floors.
Do you have the guts to take on a Fixer Upper? If so, get the free pattern and read the tutorial below.
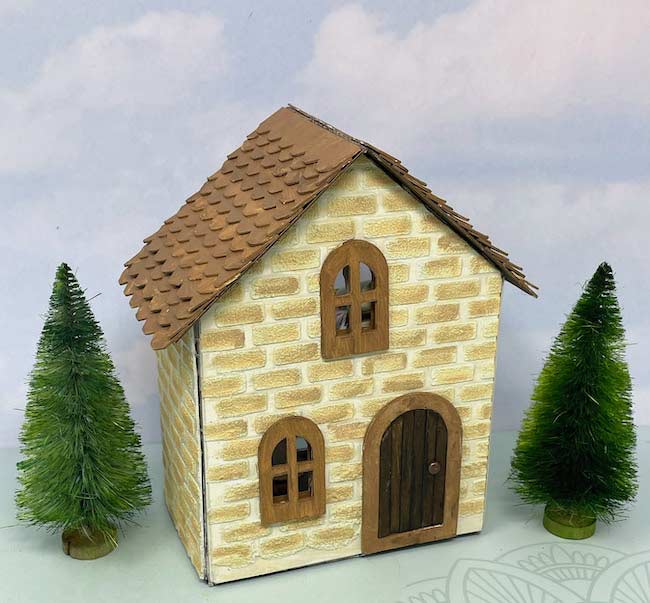
Table of Contents
What do you need to Make the Fixer Upper Pasta Box House?
- Free Pattern for the Fixer Upper House - Design No. 115
- Cardboard - this is my favorite when I purchase online
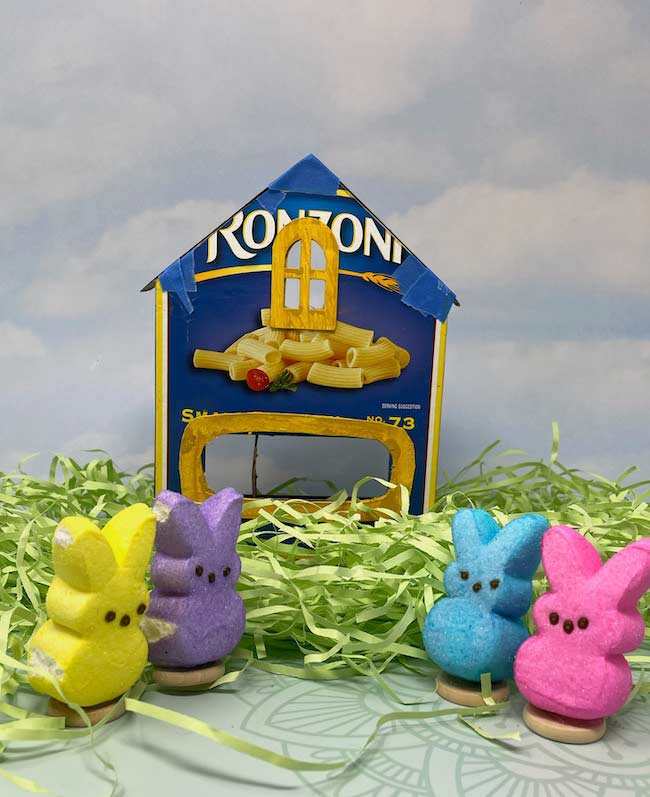
- Recycled box - I used a pasta box 8" x 3" like this to give you an idea
- Glue - Aleene's Original Tacky Glue worked well for this project
- Gesso primer - black and white primer
- Stencil material - I used some Yupo paper I had on hand, but you can use stencil acetate or even cardboard as a temporary stencil
- Ranger Grit Paste
- Paint colors of your choice. These are the ones I've used:
- Ground Espresso Distress Paint - one of my very favorite shades of paint
- Brushed Corduroy Distress Paint
- Bundled Sage Distress Paint
- Walnut Stain Distress Paint
- Mod Podge
- Coffee Stirrers for flooring
- Walnut Stain Distress Spray Stain
- Tiny bits of fabric for your furniture
- A way to cut out your pattern - I used my Cricut, but you can use a Silhouette or Brother Scan N Cut if you like.
How to make the Fixer Upper Pasta Box House
- COPY AND CUT OUT THE THE PATTERN
- Copy the pattern for the Fixer Upper Pasta Box House - Design No. 115
- Cut out the cardboard templates
- MAKE THE DECORATIVE DETAILS FOR THE FIXER UPPER PASTA BOX HOUSE
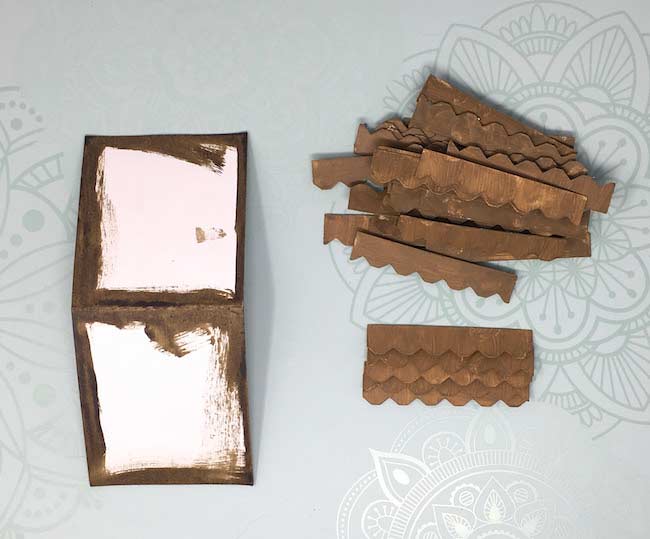
- Prepare the shingles
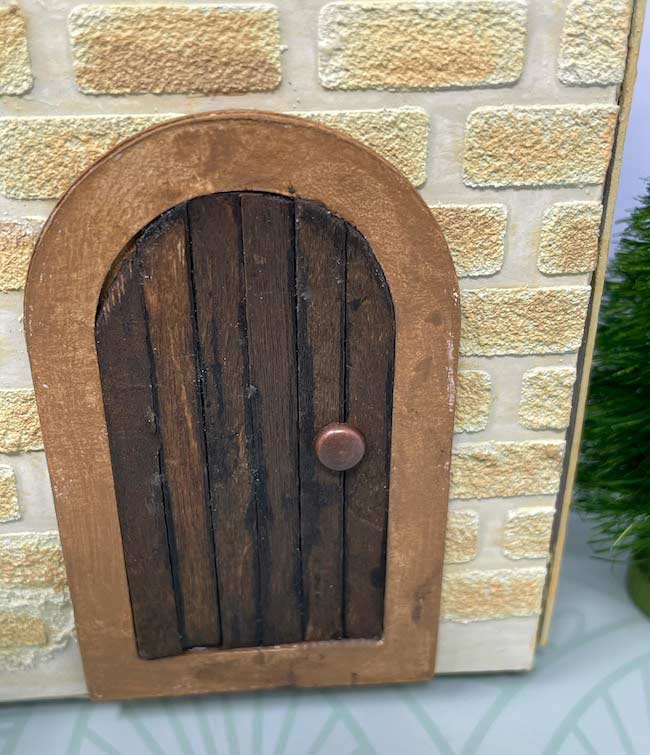
- Paint the windows and door
- Make the brick siding
- Prepare the shiplap
- Stain the floor
- Make the door
- MAKE THE MAIN STRUCTURE OF THE MINIATURE ON THE PASTA BOX
- Trace the outline on the opened pasta box
- Cut out the shape of the house
- Glue the house-shaped cardboard templates to pasta box
- Make the bedroom floor
- Prime the cardboard house
- Draw a line for the bedroom floor
- DECORATE THE HOUSE EXTERIOR
- Adhere the brick to the house
- Glue the windows to the exterior
- DECORATE THE FIXER UPPER INTERIOR
- Glue the shiplap in place
- Add the interior details like window frames
- GLUE THE HOUSE TOGETHER
- Adhere the bedroom floor in place
- Glue the side tab to make the house structure
- Glue the roof flaps in place
- Adhere the roof in place
- MAKE THE FURNITURE TO DECORATE YOUR HOUSE
Copy and Cut out the Pattern
To get the free pattern from the Paper Glitter Glue library, just go here and type in the password to get access to the files in the library.
If you don't have the password, all you have to do is subscribe to the Paper Glitter Glue newsletter and you will get the password right away.
This pattern is listed in the April 2021 section of the library as Design No. 115.
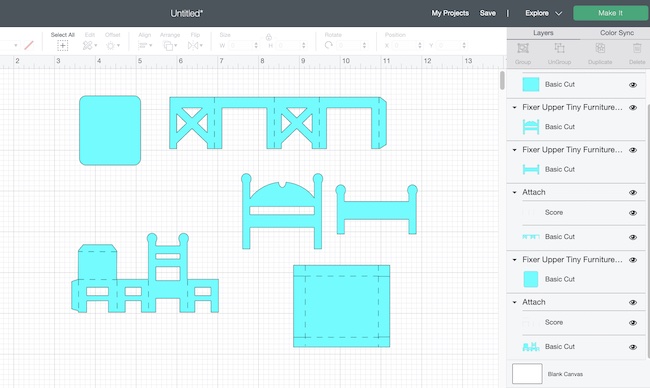
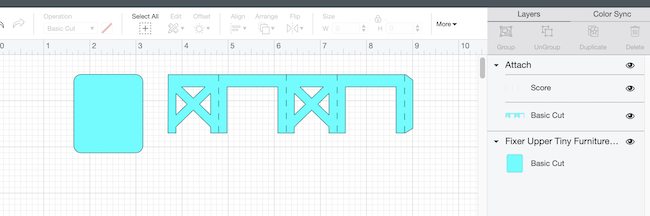
If you use a Cricut to cut out your pattern, here is how the house pattern looks in Cricut Design Space. The score lines on the roof and the bedroom floor are already designated as score lines and attached.
The pattern includes:
- Front house support
- Back house support
- Side support (cut 2)
- Roof Piece
- Door frame
- Door support
- Smaller door to fit within frame
- Outside windows
- Inside window frames
- Shiplap for the front of the house
- Shiplap for the side (you have cut out 2)
- Roof shingles

In addition, there is a pattern for the furniture - a chair, table, and bed. Again, if you use a Cricut Maker or a Cricut Explore, the pattern has score lines already designated and attached.
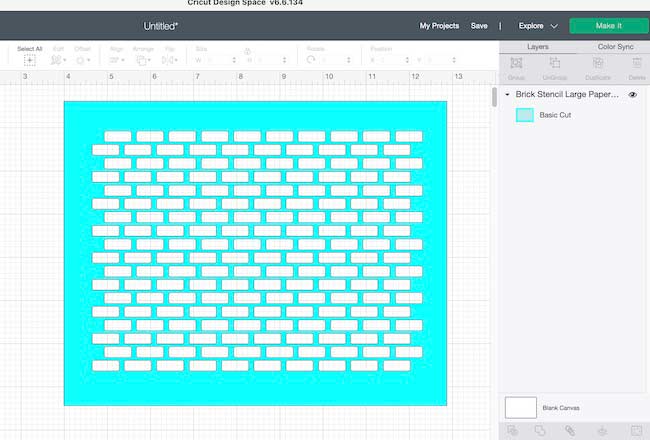
If you would like to add a brick exterior to the house, there is also a brick stencil within the folder. I cut my stencil out from a sheet of Yupo paper, but you could use stencil material which would probably be better.
Make the Decorative Details for the House
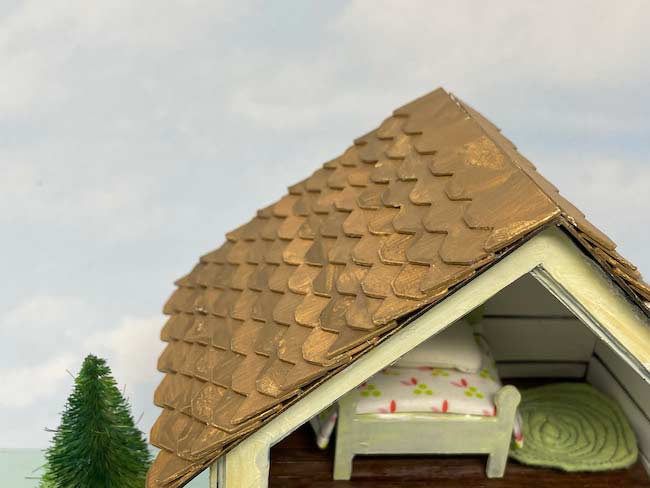
For the shingles, I used cardboard primed with gesso followed by paint. But you can use card stock if you want. Because this is a very simple roof, glue the shingles on before you adhere the roof to the miniature house structure
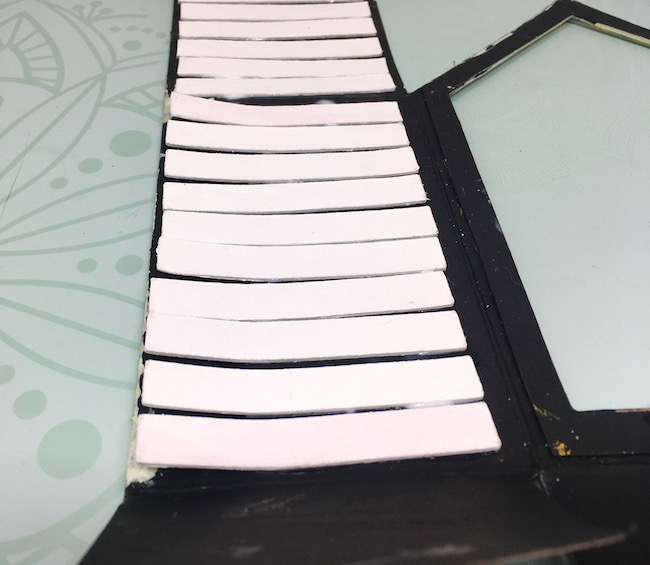
Basically, I make the shiplap the same way as shingles - prime, then paint. To make the shadow between the strips of shiplap, paint the inside of the house with black primer.
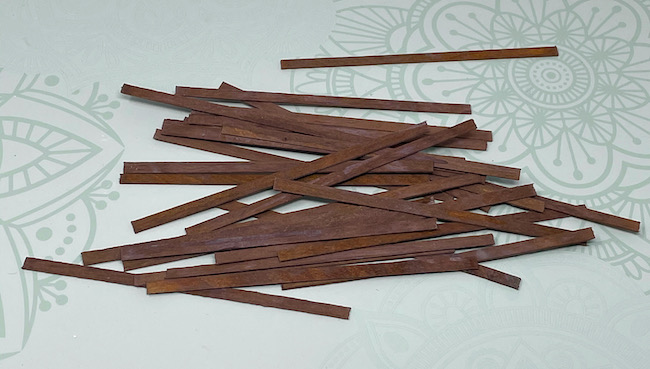
It's fun to make flooring with coffee stirrers. Just spray them with a dark spray stain or paint them the color of your choice. After binge-watching the Fixer Upper series, I decided on a dark wood floor to match Jo's aesthetic.
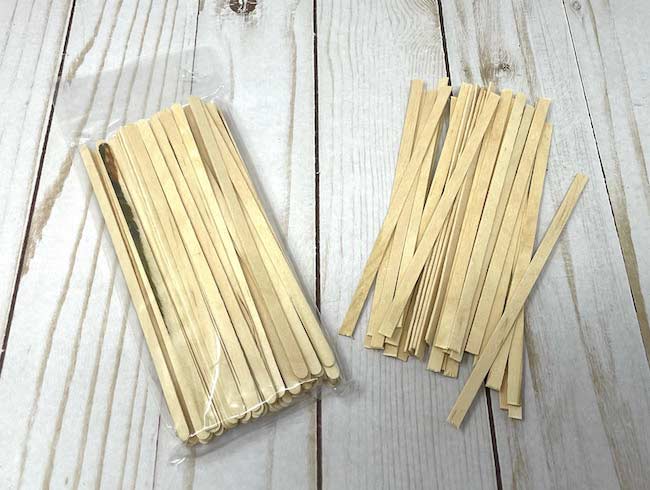
It's easy to cut the coffee stirrers with scissors, but don't use your Mom's fabric scissors or you will be in trouble. Use some inexpensive scissors.
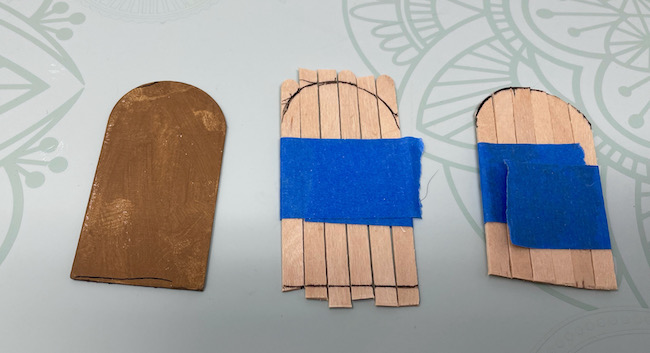
Coffee stirrers can be used to make a great wood door. I used the same stain to color the door. Glue the tiny coffee stirrers to the background door for support. Use a brad if you like for the door knob.
Make the Main Structure of the Miniature Fixer Upper House
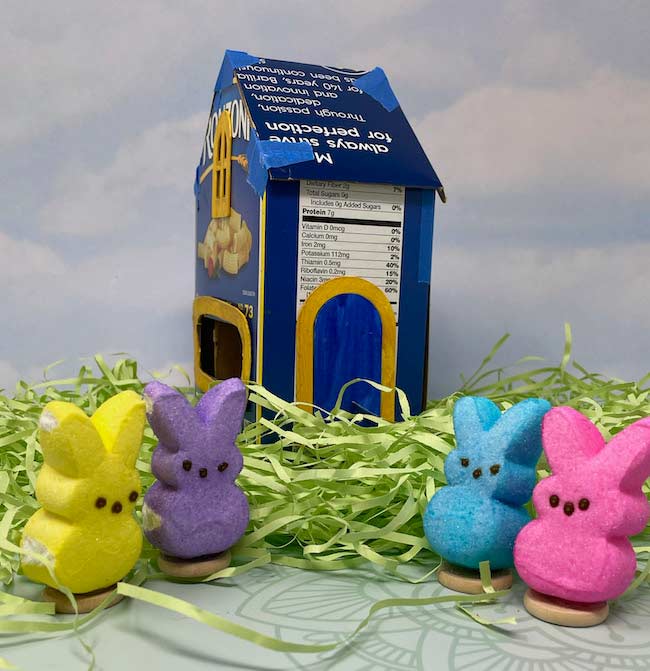
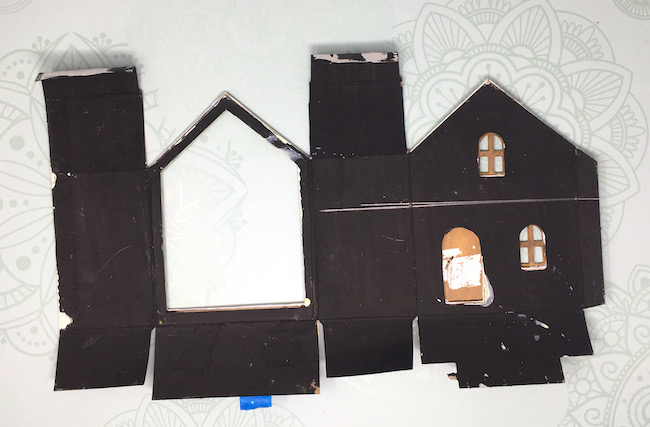
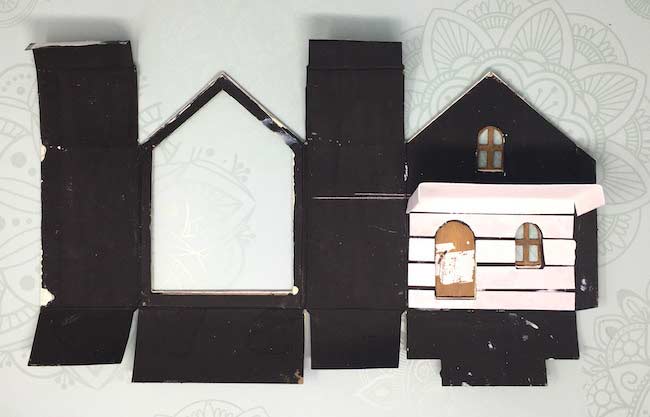
First, open up your pasta box. Be sure to save the glue flap that holds the box together because you are going to use it again to hold your house together. If it tears, you can glue a flap of card stock on that side. You can see it on the left side below.
Use the front and back pieces as templates to trace the shape on the pasta box.
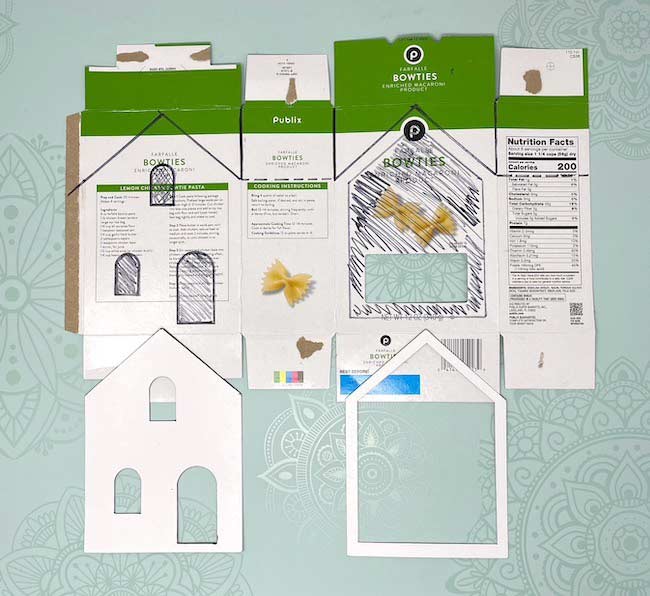
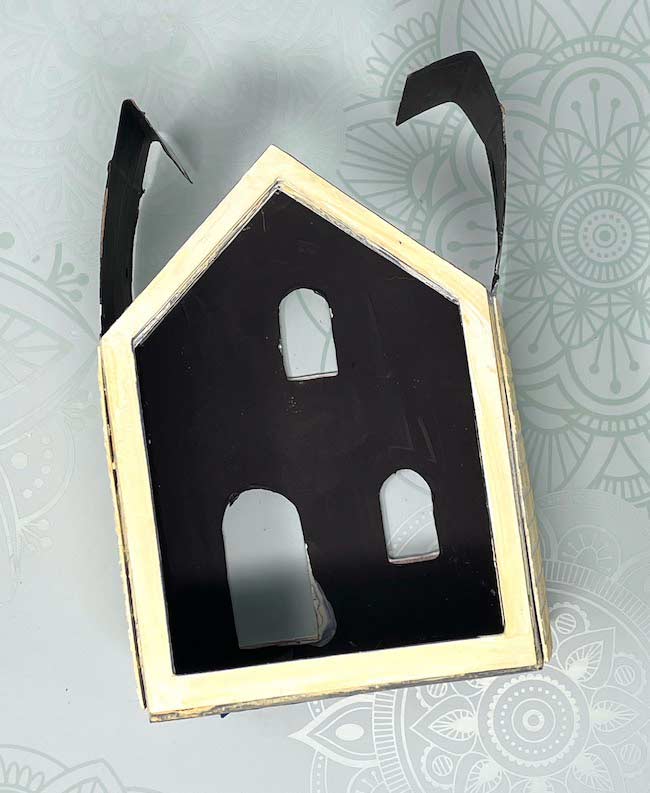
The photo below shows how the pasta box looks when you cut out the house shape.
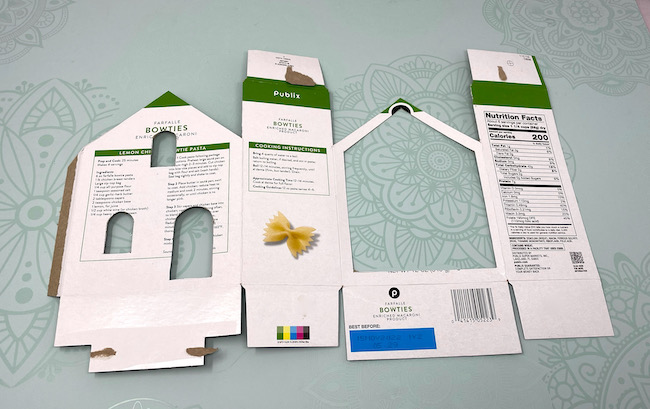
I haven't glued the front and back templates to the house yet because I want to stencil them first. Be sure to cut out 2 side pieces as well.
Also, I like to use 2 layers of cardboard for the thin back piece for extra support.
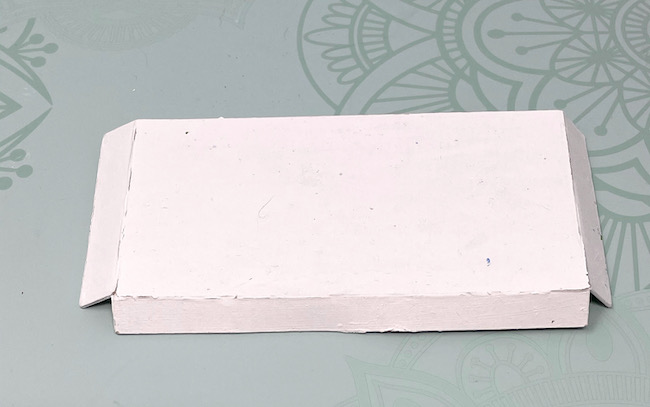
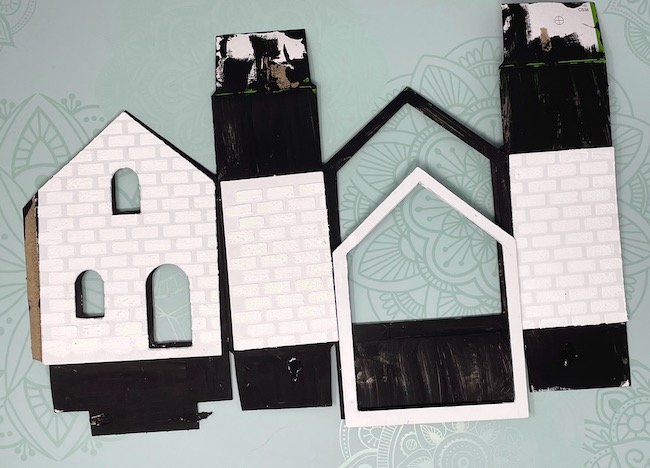
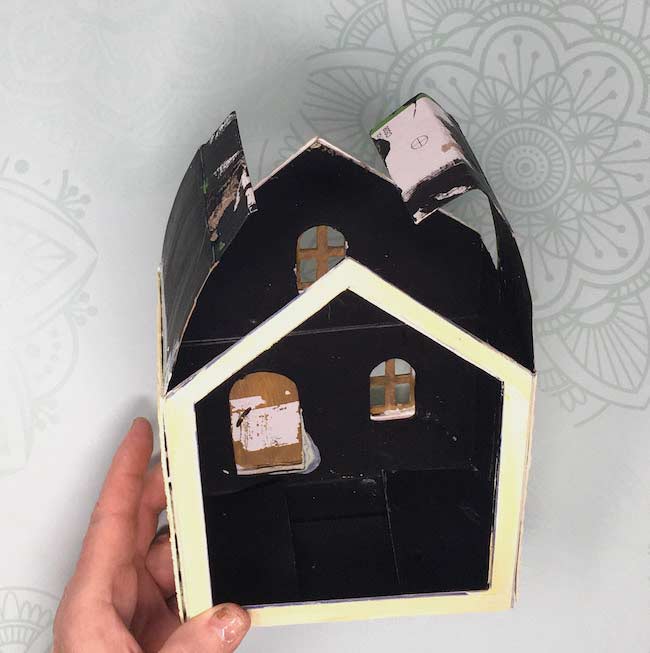
Next, make the bedroom floor. It has 3 flaps which will support the floor when you assemble the house. Prime both sides with white primer since the underside of the bedroom floor forms the roof of the first floor.
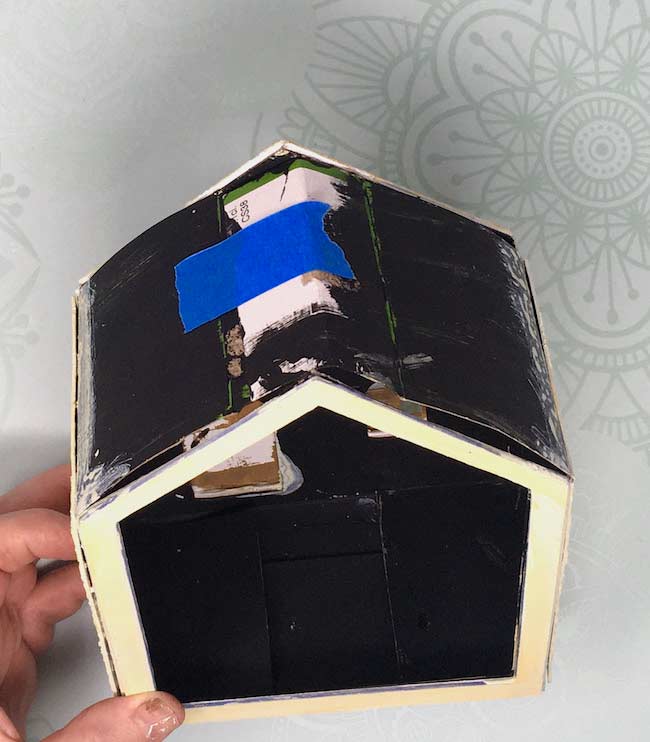
You also need to prime the house at this point. I primed the entire pasta box structure with black gesso to provide shadow for the shiplap.
Finally, draw a line so you will know where to put the bedroom floor. I put it about ½ way between the top of the first floor door and window and the second story window.
Decorate the House Exterior
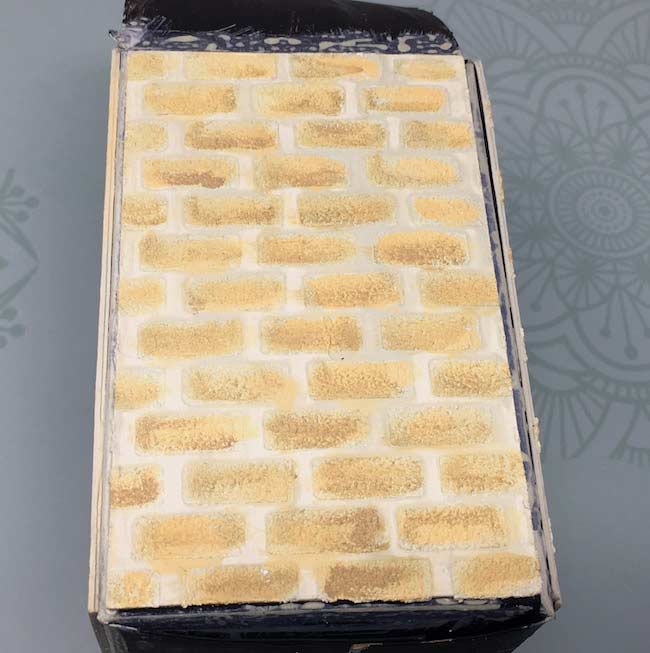
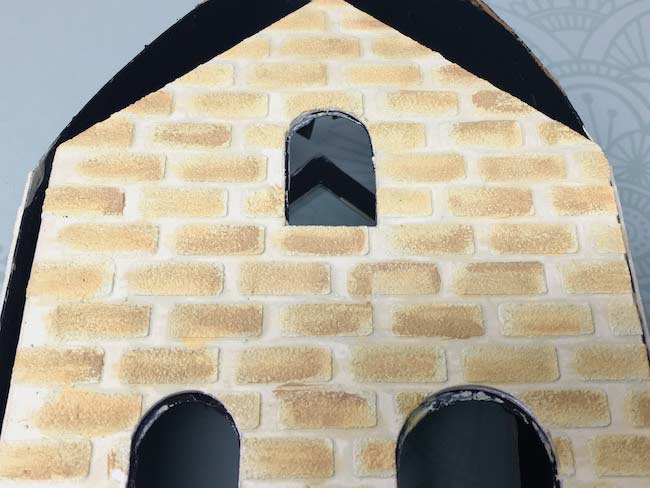
If you want a brick exterior on your Fixer Upper house, then stencil the front and two side pieces. I didn't stencil the back piece because the sides are so thin. Paint the brick with layers of color. I started with a light color, Antique Linen, then Scattered Straw, and finished with light dry brush painting of Brushed Corduroy Distress Paint.
Below you see the front stenciled and painted with the base color and a second darker color on top.
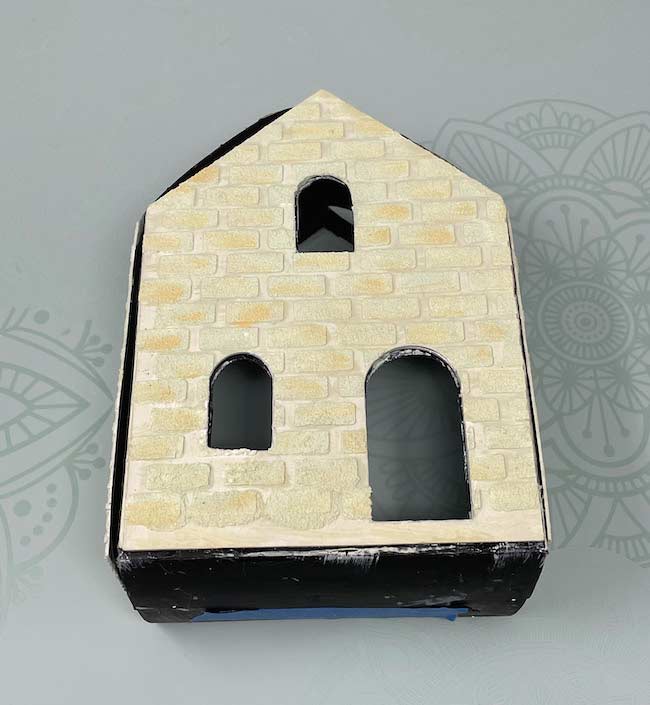
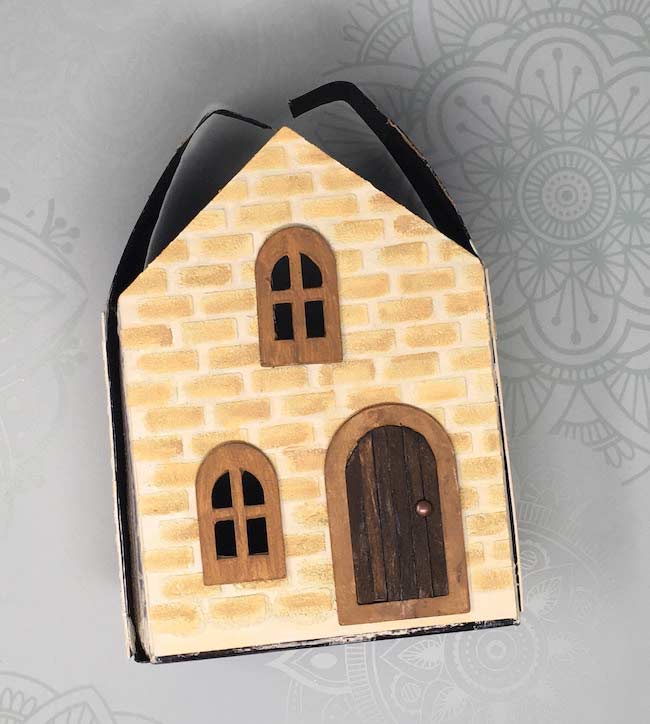
Adhere the brick stenciled front and back pieces to the house if you haven't already done that.
Next, glue the windows to the exterior.
Decorate the Fixer Upper House Interior
Glue the shiplap in place lining the entire interior. Pay attention to where the bedroom floor goes. When you reach the line you drew for the bedroom floor, glue the back flap along that line.
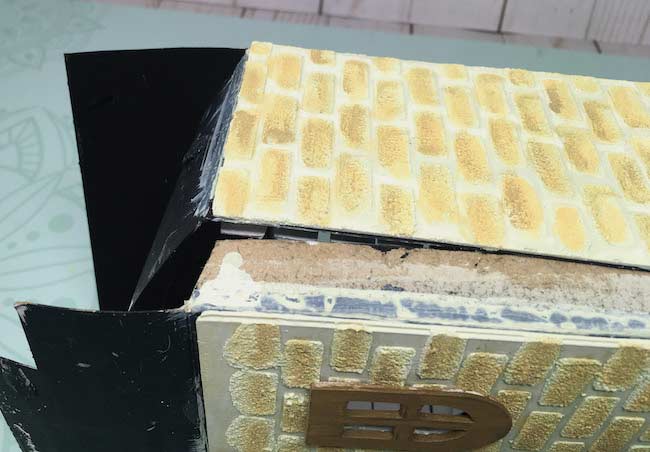
One important point - on the left side of the house as shown above, don't glue down the outside part of the shiplap. That will let you slide the glue tab under the shiplap so the tab won't show. The photo below shows you how I kept that edge lifted up a bit.
The next important point is to measure the roof flaps and see where they intersect. Make a fold where the two flaps overlap, then trim one side so when you glue the house together, one flap will glue on top of the other one. Apply the shiplap up to the top, but not on the glue flap part.
You can see the shiplap extending up the vaulted roof.
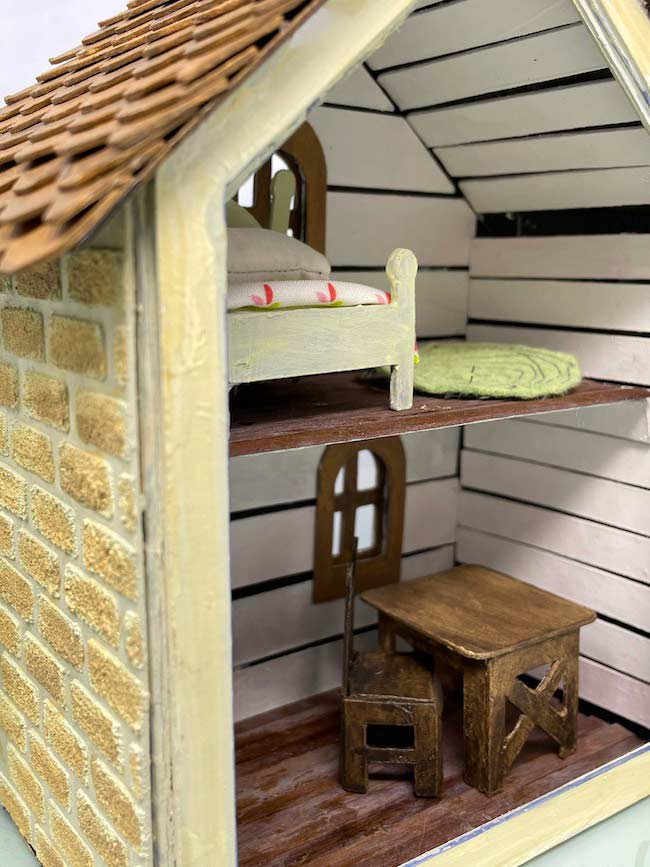
Finally, add the interior details like window frames and the inside door. Or use whatever you imagine - pictures or a fireplace, for example.
Glue the House together
Before you glue the house together, apply glue to both sides of the bedroom floor.
Then apply glue to each sides of the side tab to make the house structure because you want to glue down the shiplap. Slide the glue tab between the shiplap and the side of the house as shown below.
Use some painter's tape to help hold the house together.
Then apply glue to the folded part of the roof flap.
After that, apply a bead of glue to the front and back of the house where it intersects the roof flaps. Tape to hold it in place.
After the house structure is glued together and dry, adhere the roof in place.
Make the Tiny Furniture to Decorate the House
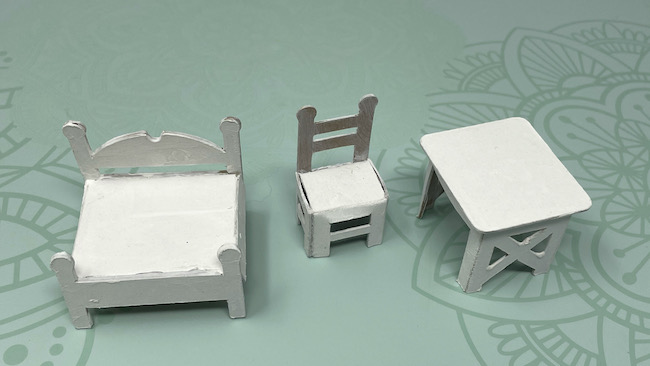
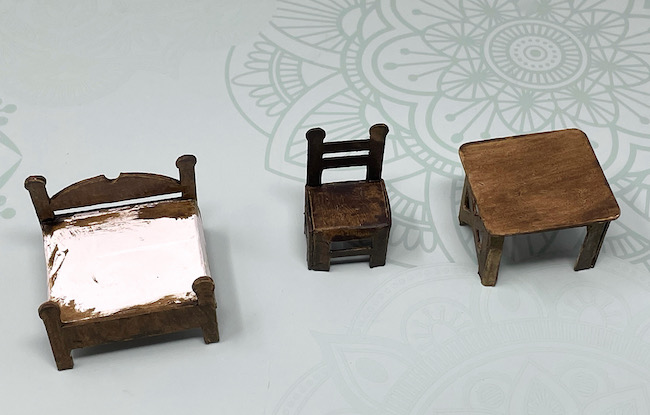
The tiny furniture is a little fiddly, but still fun to make and certainly adds a lot to the house. The pattern includes a tiny bed, chair and a table.
The table is the easiest. Score along the score lines and fold into a rectangle. Next glue along the glue tab on the side. After the table base is dry, glue the top to the table.
Now make the bed. Score and fold along the score lines to make the mattress. Line up the top of the mattress with the straight supports on the top and bottom bed posts. If you find that your bedposts are a little weak or floppy, just cut an extra bedpost and glue it to the other piece.

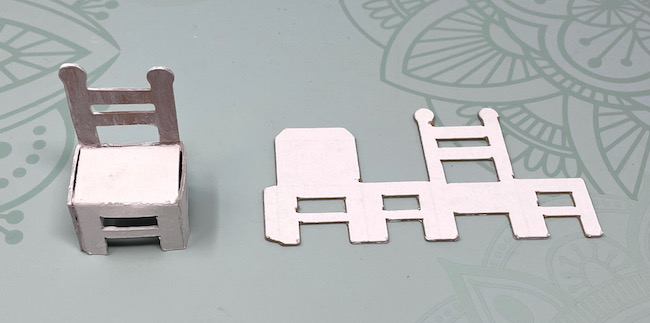
Finally, make the chair which is a little more challenging. Score along the score lines and fold into a rectangle. The seat folds into the back. It's the hardest, but if your folds are good, it's not very hard.
Paint your furniture. At first I painted them all brown (Walnut Stain Distress Paint), but I decided the a light green would work better for the bed.
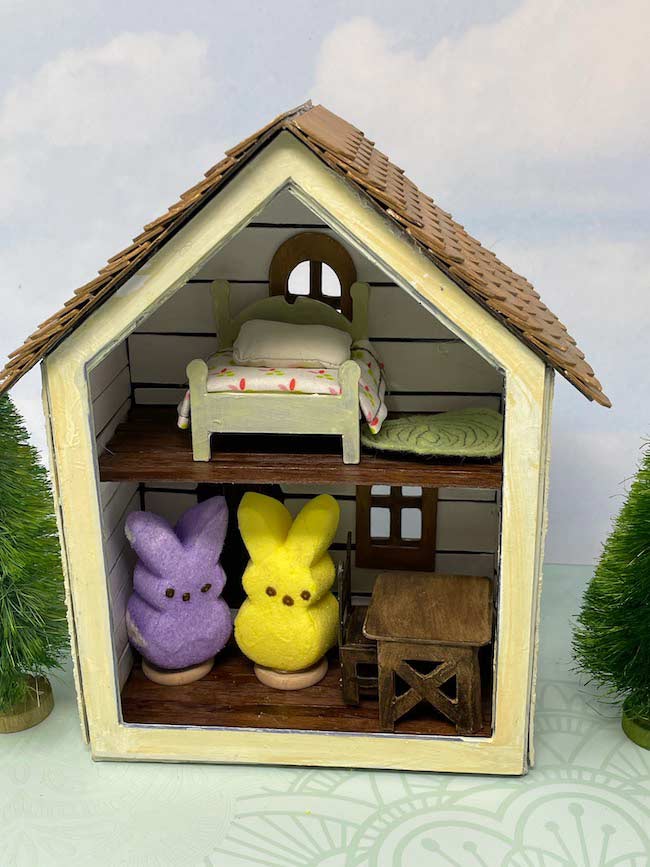
And that is how you make the Fixer Upper Pasta Box House. I hope it was fun for you. Sonny and Betty BoPeep are very happy in their new home.
Are you ready to take on a Fixer Upper?
Please let me know if you have any questions. You can email me at [email protected]
Lucy
Stephanie Sheridan
Lucy this is so cute. I cannot wait to work on mine. Fun time.
Lucy
Thank you, Stephanie.
Lucy
Helen J Roberts
Cute project and I am loving the stencil for the brickwork. Thank you for sharing!
Lucy
Helen,
I hope that you get to crafting soon. And thank you for the kind words on the Fixer Upper house.
Lucy
Tina Rodriguez
such a cute story and concept house. You made me smile. I am excited to make this with my grandkids. Thank you
Chelle
You're so creative Lucy, love the story that goes along with this house! It turned out great! 🙂
Linda S
Thanks for another fun file! The furniture is so cute.
And I just love your sense of humor with Jo & Chip.
What is your secret to creating the svg cut files with the score lines already attached? I've been waiting for Jennifer Maker to release the secret to her students, but I've yet to see a post about it. Would you be willing to share the secret?
Lucy
Hello Linda,
I am so glad you like the little fixer upper house.
The way to make score lines that are already attached to your SVG design is in the layers panel. The score line must be on top of the area it is to be attached to. In the layers panel - fore example, specify Roof SCORE for the score line or lines (they need to be combined if it is more than one line). Then for the body of the roof name the layer Roof CUT.
Play around with that to see how it works. I hope that helps you.
Lucy