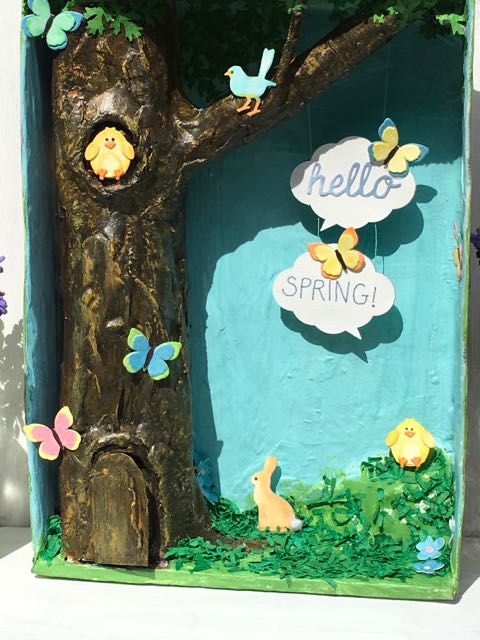
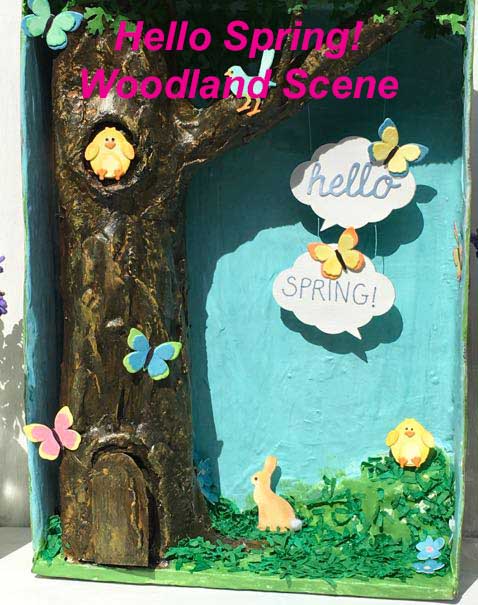
Springtime Greetings - Hello Spring! Woodland Scene - A Shadow box to welcome Spring
Here's how to make a fun Springtime shadow box with lots of cute details like butterflies and chicks and bunnies and a door that really opens with a bunny hidden inside.
This project was inspired by a specific online challenge, the Frilly and Funkie "Get in on the Action" to add an interactive element to your project. I love to make trees so I thought about making a woodland scene with a bunny behind a door that opened and the concept blossomed from there. But I missed the deadline for that challenge. The good news is that the current challenge is "Knock on Wood" so I'm good.
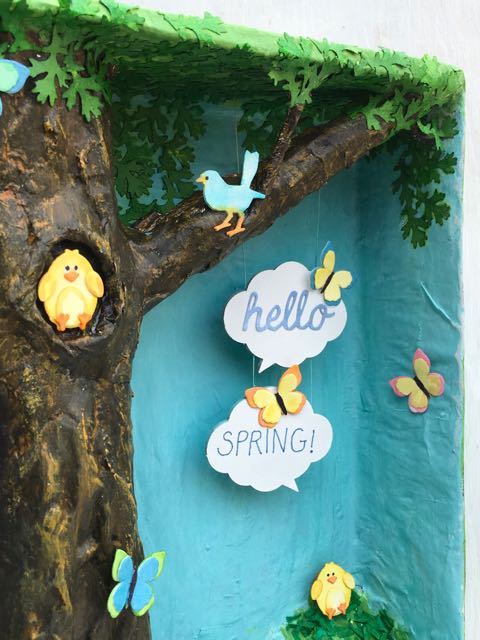
Corner view of Hello Spring! Woodland Scene
My Hello Spring! Woodland Scene is a continuation in my 3-D tree series (Easter houses, Owl Houses and even a Witch's Inn) using the tree as the main design element of a paper crafting project. Another continuing theme is using a cat food box for the foundation of the shadow box. I have access to lots of cat food boxes and they are a good size for things like this.
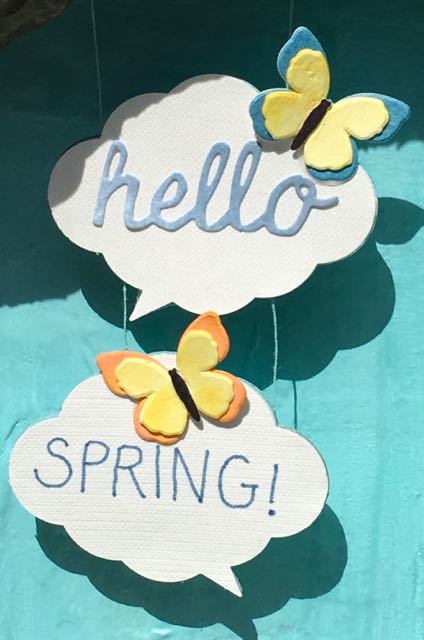
Hello Spring! hanging clouds suspended from thread painted the same color as the background
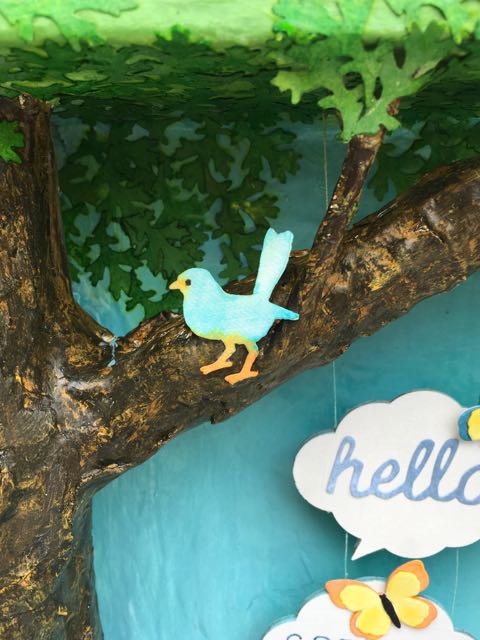
The birds are chirping to greet Spring!
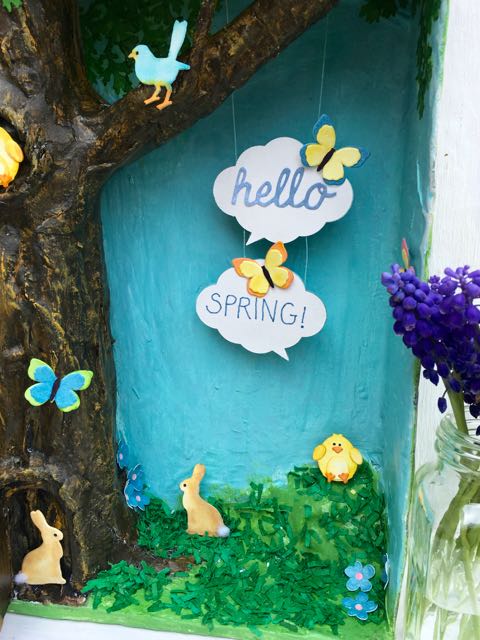
The hidden bunny behind the door on the tree is visible in this view. Both bunnies have a little cotton tail glued on.
And then I have been just itching to use some of my new supplies from Tim Holtz - the Springtime Sidekick dies because they are so seriously cute.
Materials List:
- Cardboard box as foundation of project
- Cardboard for tree
- Newspaper
- Glue for paper mache and to adhere elements
- Thread - buttonhole thread to support the word bubble clouds
- Watercolor paper for die cuts
- Paints
- Gesso - white
- Gesso - black
- Acrylic paints in ochre, burnt sienna and burnt umber
- Distress Paints and Stains:
- Mowed Lawn
- Tumbled Glass
- Distress Inks:
- Mowed Lawn
- Cracked Pistachio Oxide
- Fossilized Amber Oxide
- Worn Lipstick Oxide
- Broken China Oxide
- Spiced Marmalade Oxide
- Vintage Photo Oxide
- Broken China Oxide
- Dies and Punches:
- EK Success Large Word Bubble
- Tim Holtz Large Bird Punch by Sizzix
- Tim Holtz Oak Leaf Punch by Sizzix
- Tim Holtz Sidekick Springtime order set by Sizzix
- Tim Holtz Funky Flowers Thinlits by Sizzix
- Stencil - Tim Holtz Stamper's Anonymous Layer Stencil Leafy
Briefly, here are steps involved in making the Woodland vignette:
- Make cardboard tree
- Glue tree in box, add hill for chick to sit on
- Add bark, limbs to tree
- Cover foundation box with torn newspaper
- Punch holes to hang clouds
- Paint with white gesso
- Paint crevasses in tree with black gesso for deep shadows
- Paint tree to mimic bark
- Paint background colors and sides of the box. Stencil leaf pattern outside of box
- Die cut Spring creatures, color with distress inks
- Adhere leaves, animals, flowers, leaves in place.
- Make word cloud bubbles
- Adhere word cloud bubbles to thread
- Hang word cloud bubbles
In this post, I'm going to focus on showing you how to make the 3-D tree in the shadow box and talk about how to make the hanging Hello Spring! word bubble clouds.

Unpainted cardboard and paper mache tree for the Hello Spring! project.
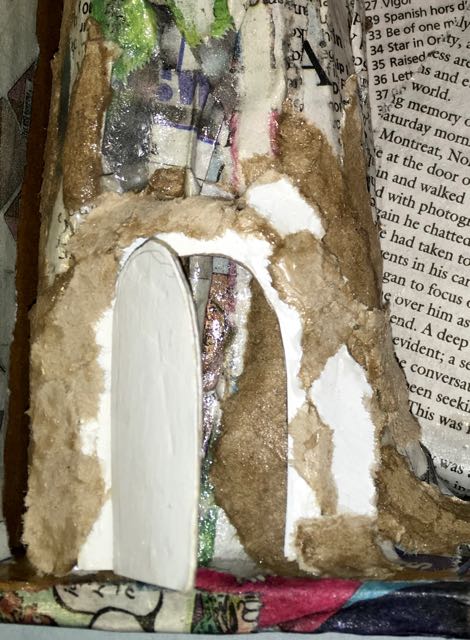
Close-up showing how the cardboard door was made for the Hello Spring! Woodland Scene
Roll cardboard to make the tree trunk for your shadow box
I altered the way I made the tree for this project. Normally, I just roll up a cone of cardboard and then glue on paper mache to make the bark. I wanted this tree to be a more organic, more irregular than the previous cardboard trees. So I soaked the cardboard in water until it was pliable and then rolled it roughly into the shape of a tree. I had to let it dry a little bit because it was too soft to hold its shape. I was also able to flare the bottom of the tree better to make roots.
The tree branch was made the same way as the tree itself. I had to glue strips of newspaper around it to make it hold its shape because it was a little floppy. I added a few side branches on the main branch for extra dimension.
The next thing I discovered by wetting the cardboard was that when I tore it, it made incredible irregular layers that looked like bark. You can see some of that effect on the unpainted tree above. I love this effect which I will be exploring more in the future.
Glue door on the base of the 3-D tree
The door is just a piece of cardboard with the door partially cut out. I left one side attached so the door could open. I also curved it slightly to fit on the tree.
Make a knot hole to add more dimension to your paper mache tree
The knot hole was make by rolling and twisting a strip of newspaper into a circle and gluing it on the tree.
The torn cardboard was then glued around the edges of the knothole and the door. I like how that cardboard merges this knothole and the door into the tree.
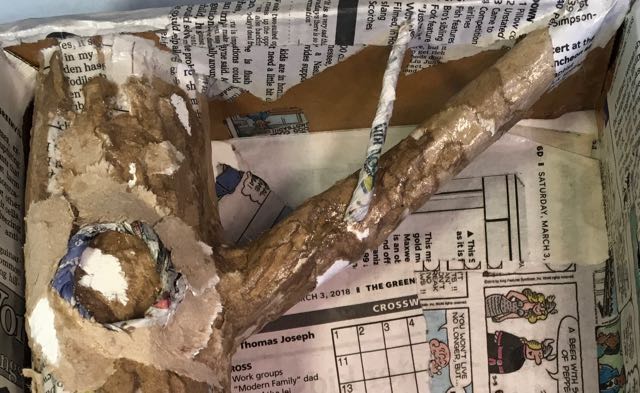
Making knot hole for the paper mache tree in Hello Spring!
Paint Your 3-D tree for Your Shadow Box
After tree was completed, then it was painting time. To simulate bark, I always use several different colors. For this particular tree I started with the darkest color first. So I painted black in the crevasses of the tree, then burnt umber, then burnt sienna and finally Fossilized Amber distress paint on top.
Paint the Elements around Your Tree in the Shadow Box
I used my favorite blue for the sky - Tumbled Glass Distress Paint. I love this shade. And the green for the trees and the ground - why, Mowed Lawn, of course.
Make the Hello Spring Word Bubble suspended on thread
I cannot remember exactly what order I glued on the figures, but I do know what I waited awhile before I hung the Hello Spring! word bubble. And that's because I am messy and alwaysI get paint everywhere. I wanted all the touch-ups done before I put my little signs in place.
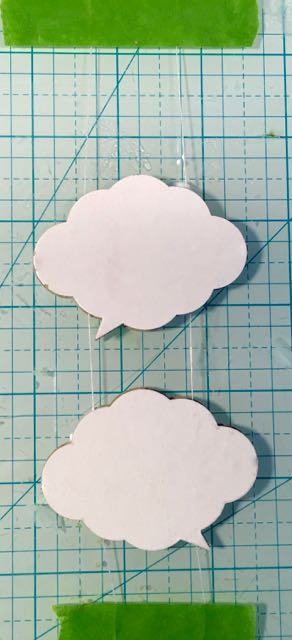
Here's how I made the hanging word bubbles. Each word bubble consists of 2 layers of cardboard. You need to use cardboard rather than paper to give it a little heft so it will hang appropriately. I put the two clouds face down and drew 2 lines of glue for the thread.
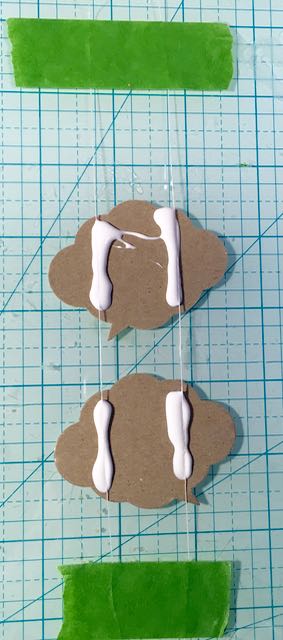
Apply 2 rows of glue where you want the thread to go on the word bubble clouds.
I chose blue thread because it was less conspicuous on the blue sky background. The thread was placed on the parallel lines of glue and pulled taut enough to straighten out the thread. Then the thread was taped to a solid surface.
A second layer of the word bubble clouds were glued on top. I didn't wait for the glue to dry before I adhered that layer on.
Two layers of cardboard glued together for the hanging word bubble cloud.
Now you have to let it dry or your hanging cloud will slip and twist and just cause a terrible crooked mess.
When dry, paint the thread and the edges of the word bubble the background color. Don't worry about messing up the face of the cardboard word bubble because the finished word bubble is made from a separate piece of paper glued on as the very last step. Again, I do it this way because I am messy.
How to Hang the Hello Spring Clouds
Next hang the word bubble by threading a needle with the top half of the thread. I actually threaded 2 needles so I could put put them in place at the same time without re-threading.
Tape the thread to the top of your box and make sure that your word bubble hangs straight, but don't cover the hole and don't glue it until you are sure it is hanging the way you want it to.
When you are satisfied with the placement of the word bubble, put a big blob of glue on the hole in top and paper mache over the hole and the tape.
Paint the top of the box to cover up the paper mache patches for thread.
Cut off the bottom extra length of thread. Glue on your finished word bubble to your cloud.
And that's it. A fun Spring project. I would like to share this project with 3 of my very favorite challenges:
Frilly and Funkie "Knock on Wood"
Simon Says Stamp Monday Challenge "Easter/Spring Inspiration"
Simon Says Stamp Wednesday Challenge "Easter Inspired"
If you have any questions about how to make this project, please let me know.
Hello Spring! Woodland Scene
Julia Aston
What a clever clever tree you have made here Lucy! I love all your little animals flitting and hopping about here - I have those new dies too - and you have inspired me to get them out! Julia xx
Lucy
Julia, I love the little creatures in this particular Sidekick die set. They seem to have personality to me. I just used them again on another Easter project which I will post today.
Thank you for your comment. It is always so nice to know that someone likes your stuff.
Zoe Hillman
This is such a beautiful and clever project Lucy. I just love all the details and the tree looks so realistic. Love the use of the new side-order dies too. Thanks for joining the "Knock on Wood" challenge over on the Frilly and Funkie Challenge Blog.
Lucy
Thank you, Zoe. I am getting better at making trees.
teresa kline
super cute, fun details and 3d look! I am so glad you played along with us at simon says stamp wednesday challenge!
blog-paperie blooms
ig-2klines
sparkle & shine, kindness *~*
Lucy
Thank you, Teresa.
barbara
Stunning work! the tree is outstanding! The whole design of this 3d project is amazing and I love so much how you used Tim's dies! Thanks for joining us this week on Simon says Stamp Monday Challenge Blog! Barbara
Lucy
Barbara, thank you for your comments. This is my best tree, by far. I am actually getting better at making cardboard trees. Tim's little Springtime dies are adorable, perfect for the woodland scene.
Sara Emily Barker
Lucy, thank you for sharing this wonderful Springtime shadow box! I adore the tree with that added surprise of the opening door that makes this even more special! Your bunnies are colored perfectly and those little cottontails just make me smile! What a labor of love you have shared with us at Frilly and Funkie! I'm so pleased it worked out for the Knock on Wood challenge. I know these types of projects take so much time, it's easy to miss a two week challenge deadline. Hugs!
Lucy
Sara Emily, I had some fake snow that looked like little bunny tails so that is what I used on the bunnies. Yes, I was so glad when I saw that this challenge was "Knock on Wood" after I had missed the interactive Frilly and Funkie challenge.. The other major interactive part is how the Hello Spring! sign swings.
Thank you for stopping by.
Laney
Hi Lucy! Whar a great project - I am ready for Spring to be here, so I was happy to see this colorful project. I really enjoyed reading about how you made the tree and hanging word bubbles. Your crafting techniques are always interesting to read about and your projects seem so solidly put together. Great idea about using the cat food box! Cereal boxes are my mainstay source for cardboard - I love being "green" and upcycling the cardboard that makes it's way into the house. Oh - and your new blog remembered who I am! 🙂
Lucy
Thank you, Laney. I can't use cereal boxes because I can't eat cereal - too many carbs. I do miss it though. I'm on the oatmeal plan at my age.
Sometimes a project really tickles me and this one does. I just like to look at it. It seems happy to me. I hope other people agree. I am going to give it to a friend of mine who has 3 little children and who recently moved away. I never had time to make her a house before she moved, so I am going to mail this to her for Easter.
Thank you again for commenting. That makes me happy, too.