Inspiration
You know I love to make 3-D stuff whether it is a little cardboard house or a shadow box or a pop-up card. I love 3-D projects. And I like to share my inspiration for my projects because I hope it helps inspire your own creative journey. There are 3 main inspirations that started me on this project:
- The current PaperArtsy challenge is Nautical Colors
- Jan Hobbins' Waves and Bubbles Mini Configuration's Book
- Ti'Bout Chloe Remiat, paper artist
So when I think of nautical colors, shades of blue come to mind. Those are the colors that speak to me when I think of the sea and that's where this project started.
I knew I wanted to make a shadow box for the PaperArtsy challenge because the 3-D aspect appeals to me so much. The Tim Holtz stamp set "Sea Life" and the Tim Holtz "Sand and Sea" dies are perfect for this project. The other beautiful stamp I have that suits this project is a Butterfly Fish stamp from Designs by Ryn. These are the elements that provide interest in my shadow box. Nobody wants to look at boring objects; you have to have objects that compel people to look at them.
One project by Jan Hobbins stuck in my mind. It is the cover of a book she made in 2014 which had the Sea Horse and a Sand Dollar on the cover.
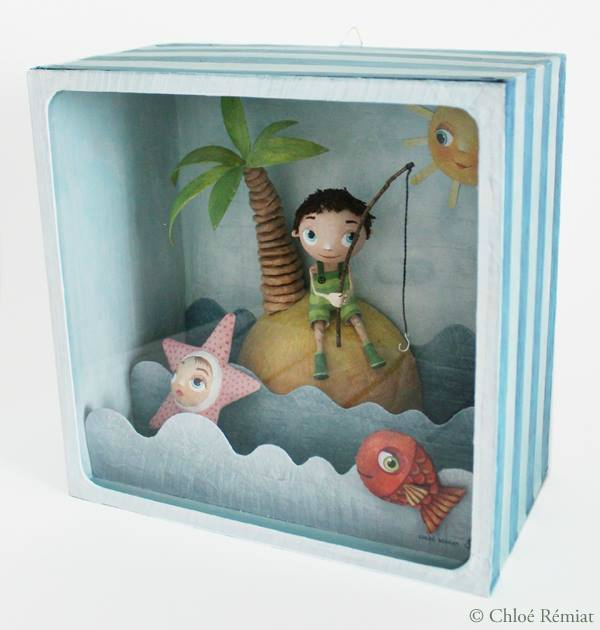
"A la mer" by Chloe Remiat, illustratrice de papier.
And whenever I think of shadow boxes I think of Chloe's paper boxes. She makes these incredible shadow boxes that always stimulate your imagination.
Putting It All Together
So we've got the idea, now it's time to put these elements together.
The Box
First, the box. Yes, you guessed it. It is a cat food box. Again. That's what I have available. And it seems to be a good size for the decorative elements that will go inside.

Base box is painted with gesso to seal it and to make it sturdier.
I coat the entire box with gesso because it seals the box well, makes it much sturdier and helps paper adhere better.

Background for the "Under the Sea" shadow box made with watercolor paper inked with Distress Oxide sea colors
The Background
Next, I love watercolor paper for backgrounds because it takes paint and ink so beautifully. The Ranger Distress Oxides colors are absolutely perfect to mimic the colors of the sea. Whenever I make a background like this I often make several samples because the inking process can vary so much, then I pick the one that looks most like what I am trying to achieve. I save the other samples for later projects.
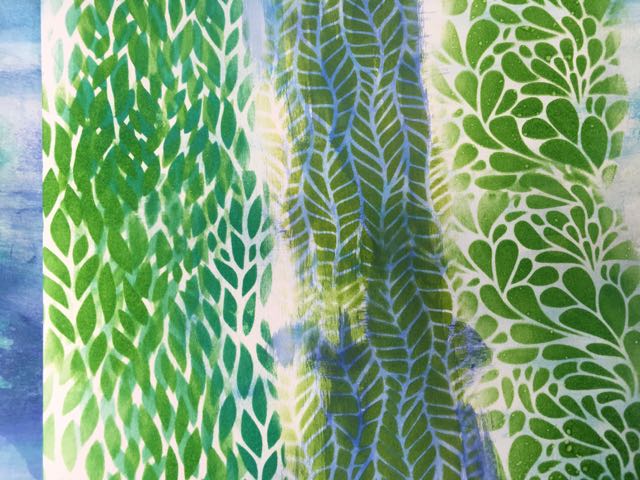
Watercolor paper stenciled to look like seaweed for the sides of the shadow box
This particular box size is about 11 inches wide so I need to make some extra papers for the sides which I made to look like kelp or seaweed. I used three different Tim Holtz Stampers Anonymous stencils for this process. These will cover the sides of the box inside and out and make an interesting border to mimic seaweed.
The Interesting Elements to Your Shadow Box
Now, one of the fun parts of shadow box making is making it come alive with living elements, elements that command attention - the sea life.
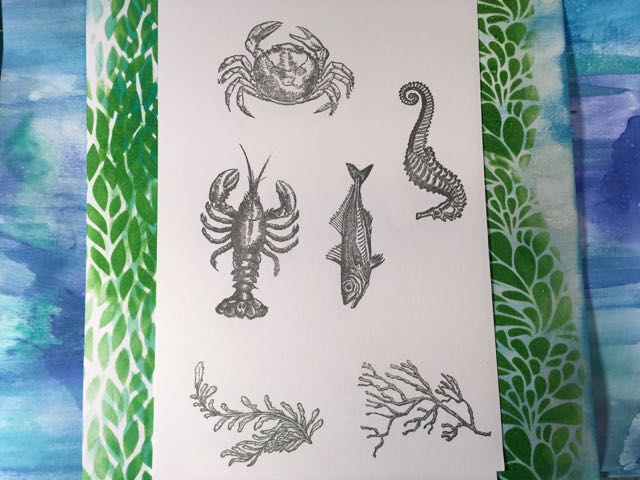
Stamped images for the Sea life for the "Under the Sea" shadow box
Stamped Elements for the Shadow Box
The Butterfly fish, the fish in the background, the crab, the small seahorse and the lobster were stamped on watercolor paper and colored with Distress Oxides inks and a water brush. All of these had to be fussy cut after coloring.
Die Cut Elements for the Shadow Box
The fun objects at the base of the shadow box include 2 sand dollars and 2 starfish which were made from the Sand and Sea Sizzix die set from Tim Holtz. I followed Jan Hobbins directions to make the sand dollars look realistic - coating them with texture paste and sand, painting them with Antique Linen distress paint and edging them with Ground Espresso distress paint. I also borrowed ideas from her on making the Sea Horse as well, though realism wasn't the goal in this case.
Placing Your Elements in the Shadow Box
I played around with the placement of the sand dollars and star fish. One set was placed behind the kelp on the right side of the shadow box. I really should have angled my kelp in the corner a little more and pulled the sand dollar out so that it stood out better. All of these elements were glued in place.
To provide interest to the sea floor, grit texture paste was applied then coated with Mod Podge and sand was sprinkled on top.
Suspend the Fish and the Seahorse
To suspend the Butterfly fish and the Seahorse, I followed the same plan as I did in the Hello Spring! word bubbles. I glued the thread between 2 layers of cardboard and when it was dry, I glued the colored fish and the painted seahorse to the front. I punched holes in the top of the box and inserted the thread through the holes. You have to play around a little bit to figure out the correct height for both of them. When you have them at the height you want, tape the thread on the top of the box, put glue on the top and bottom of the holes and let dry.
I patched the holes from suspending the fish and seahorse with Tim Holtz Idea-ology tissue paper. It is so easy to glue it down and smooth over the holes. And the best thing is that it lets the color below it show through. I love this stuff. You can see an example below where seaweed was stamped on tissue paper and adhered to the side.
Decorate the Outside of the Shadow Box
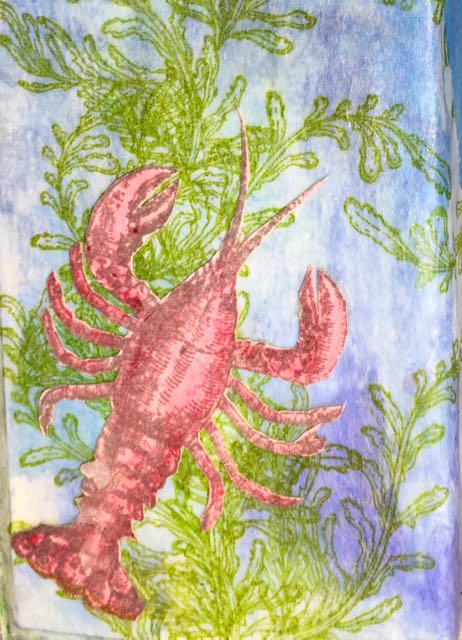
Lobster stamp adhered on the side of the "Under the Sea" shadow box
The leftover paper was glued to the outside of the box and I added a lobster to one side and a sand dollar to the other.
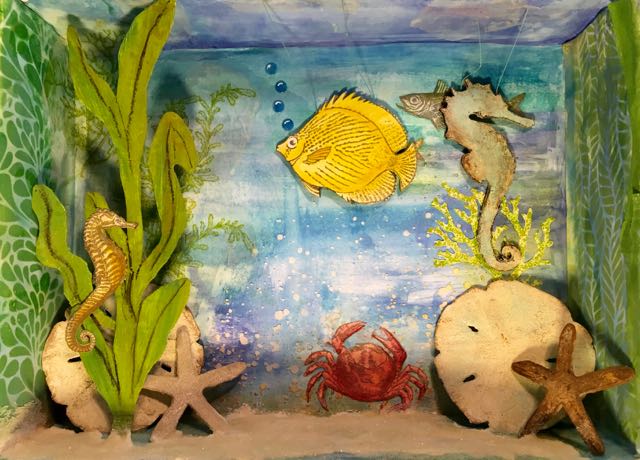
The "Under the Sea" shadow box before the frame was added. It needs a little more to finish it better. Please ignore the shadow in this photo. I had to take this photo with the shadow box on its back. The photo below shows the colors better.
I thought I was finished, but I reconsidered and decided to make a frame for the shadow box.
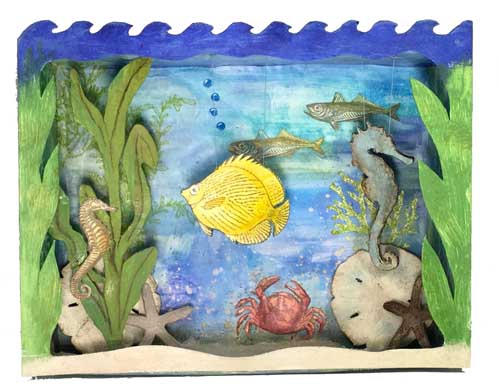
Frame added to "Under the Sea" shadow box. I like the waves on the top. I may trim the kelp a little and may add more bubbles.
The frame is simply painted cardboard glued to the edge, but I did coat the bottom edge with sand just like the base of the shadow box. And that's it. Children, in particular, love these shadow boxes about as much as I love to make them. I hope you find some inspiration here.
Summary
We've gone step-by-step through the process of making an "Under the Sea" shadow box. Here are the general steps we've covered.
- Prepare the box
- Prepare the background
- Assemble interesting elements that are fun to look at
- Arrange the decorative elements within the shadow box
- Suspend the sea life so they can "swim"
- Frame the shadow box if desired
- Enjoy looking at your shadow box
Thank you for stopping by. I hope you have a lovely, creative day.
corrie
Great project, Love it !
Corrie x
Julia
A stunning shadow box project and it was really interesting reading about how you put it all together. That lobster is amazing, I wish I had that stamp!
Lucy
Thank you, Julia.
I think I bought the lobster stamp as a part of a bundle and didn't really expect to use it, but the whole set is really fun. Thank you for reading the post as well. I think most people just look at the pictures (which is what I do most often also).
Lucy
Christine Alexander
so much dimension to your shadow box, such perfect layering of images 🙂
Lucy
Thank you, Christine.
Julia Aston
What a wonderful underwater vignette you've created here Lucy! Love how you have suspended the images in different depths - what a lovely creation! Julia xx
Lucy
Thank you, Julia. It was a bit of a challenge trying to get the fish and the seahorse to hang the way I envisioned them. The fish actually tilted a little bit before I realized it.
Lucy
Laney
This is a great shadow box Lucy. I love the stenciled sides that look like seaweed. You always do such a great job with the painting. The frame you added at the end really finishes it off - and makes a great deal of difference in the look of the project! Photography is always interesting, isn't it? Trying to get the right angles and the right lighting. I was taking pictures of a glitter house on my front porch yesterday. 😉
Lucy
Thank you, Laney. Those particular stencils are really cool for making leaf-like backgrounds. I love to use them. I appreciate your compliment on my painting. I've never really painted before I started making the little houses, but I am really enjoying playing around with it. And yes, photography for non-photographers is interesting to say the least. I look forward to the day when I can get the lighting better at a minimum. I hope you will show your glitter house soon. I love to see your designs.