

While I was working on my Halloween event, I thought it might be fun to make a Vulture Cake Topper because why not. It's just a fun addition for a Halloween party.
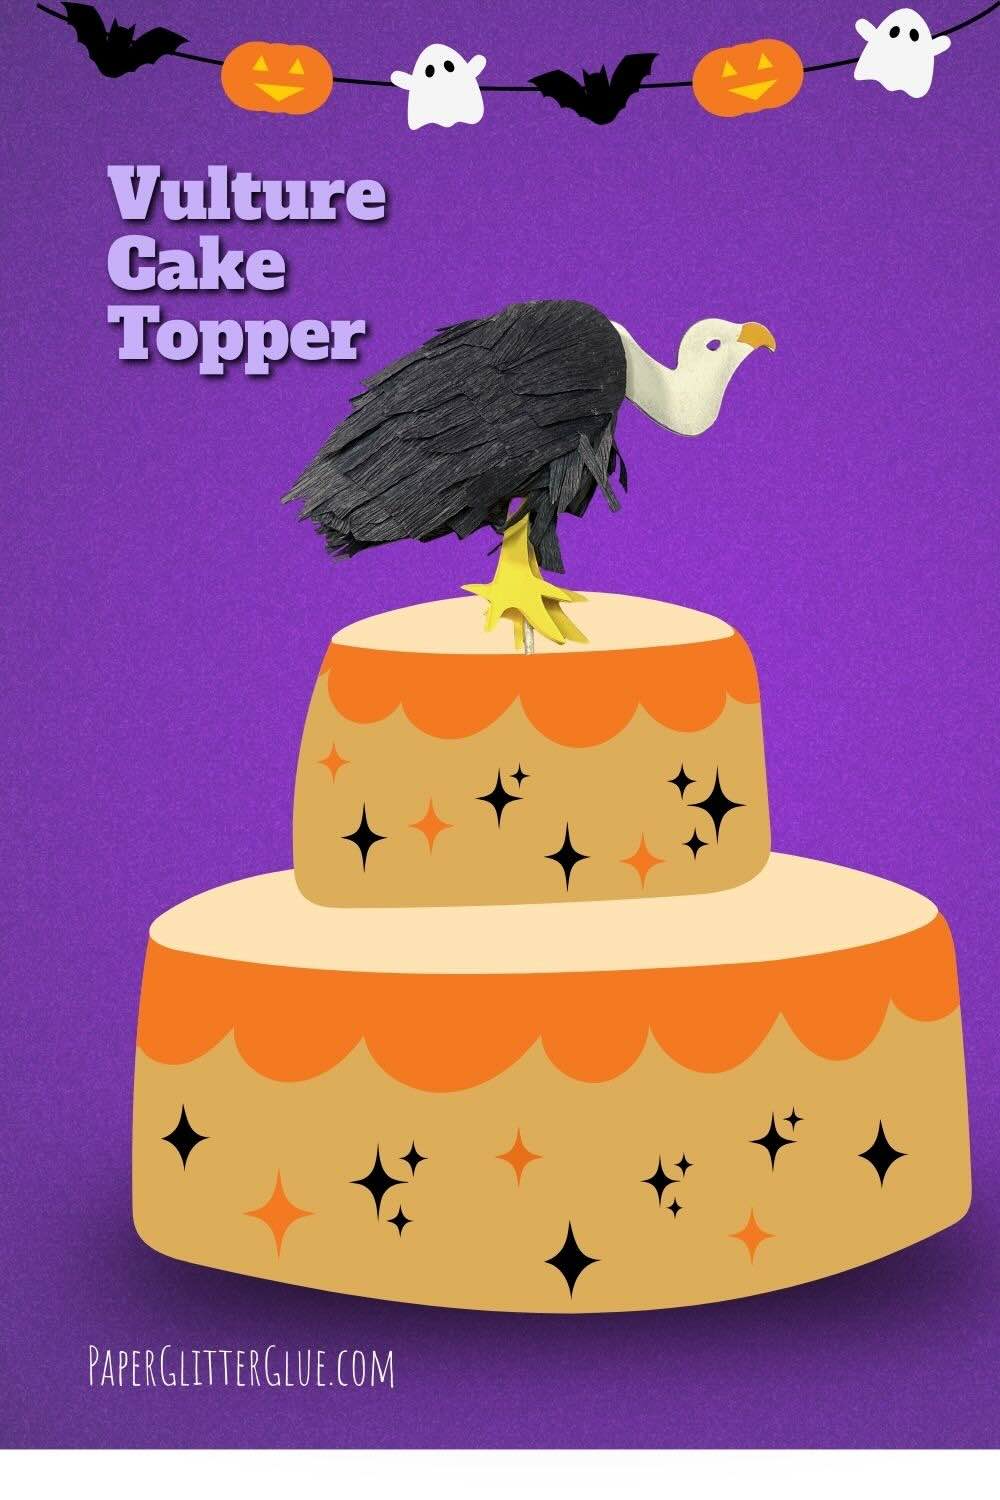
The Vulture Cake Topper is design no. 216 in the free Paper Glitter Glue library. You will receive the library password right away and in every email. If you have not subscribed yet, simply sign up using the form below.
This post contains some affiliate links for your convenience. Click here to read my full disclosure policy.
Vulture Cake Topper Supplies - Design No. 216
- Cardstock or Watercolor paper - white for the vulture head, black for the Vulture head background and the wings, and yellow for the Vulture's beak and legs
- Glue - Bearly Art Glue or hot glue for gluing the wings in place
- Crepe paper
- Styrofoam ball for the body of the Vulture
- Toothpicks - party toothpicks work best
- Scissors for cutting thee crepe paper
- Craft knife to cut slots in styromfoam ball
- Optional - ink to distress the head and legs of the Vulture
- Cutting machine - I used my Cricut Maker
- Design No. 216 from the Paper Glitter Glue library
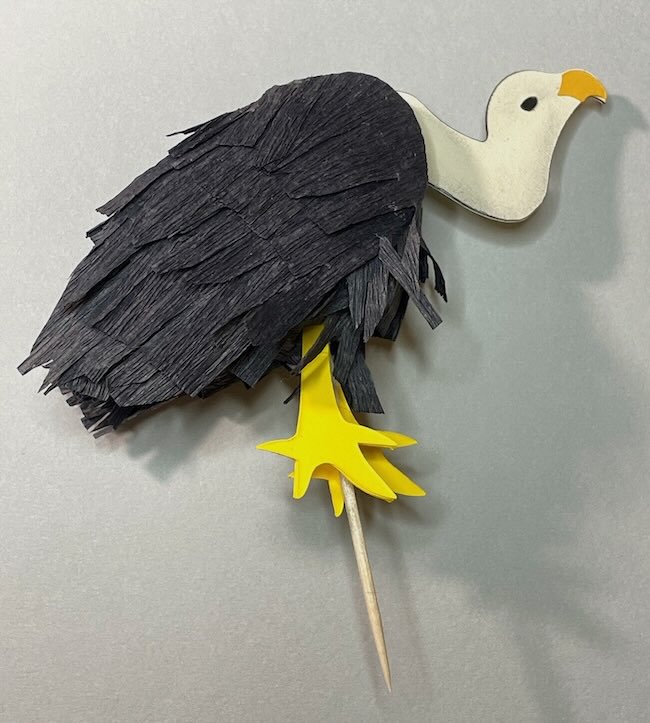
Steps to Make the Vulture Cake Topper
- Download the pattern for the Vulture Cake Topper
- Cut out all the pattern pieces for the Vulture
- Glue the black Vulture head and neck piece behind one of outside Vulture pieces
- Adhere the two outer pieces together
- Glue on the vulture's beak to the Vulture head
- Cut a slot in the styrofoam ball to insert the neck piece
- Apply glue to the slot to hold the neck in place
- Cut crepe paper strips about 1-1.5 inches tall to mimic feathers
- Cover the wings with crepe paper feathers starting at the bottom narrow end of the wing
- Gently curve the wings to fit the rounded ball of the vulture body. Let dry.
- Start wrapping crepe paper around the body of the swan, starting with the tail end of the vulture.
- Adhere the wings to the sides of the vulture.
- Insert toothpick to complete the cake topper.
Download Pattern - Design No. 216 from the Paper Glitter Glue library
If you don't have the password to my library, simply subscribe to my crafty newsletter and you will get the password to the library right away. And don't worry, I'll never send you any spam. You can unsubscribe at any time.
Cut out the Vulture pattern pieces
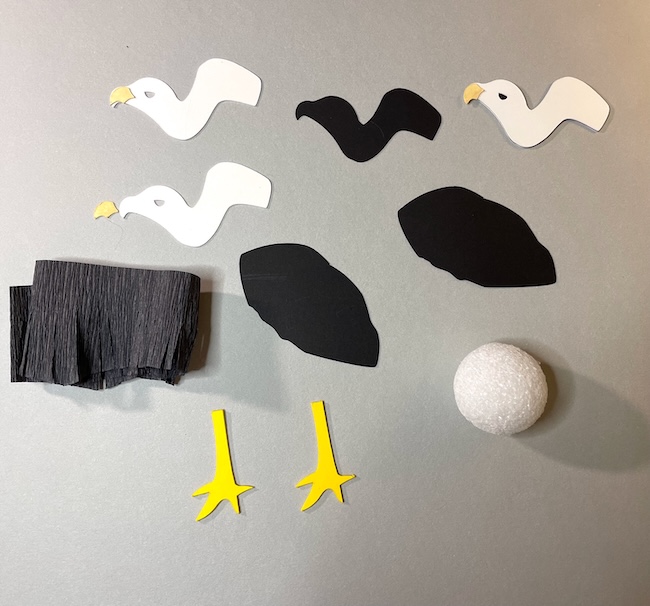
This is a pretty simple pattern in that there are no score lines so setting up the SVG file with your cutting machine is easy.
My favorite cardstock is110# cardstock or 140# watercolor paper (300gsm) to make it stronger. If you use a lighter weight cardstock, I recommend that you cut out two extra layers to glue together so your vulture figure is stronger. This is especially important for the legs.
Make the Head of the Vulture Cake Topper
The black piece gives the eyes dimension. It also strengthens the neck. Glue it behind two outer vulture pieces.
Glue the Beak in place to each side of the Vulture Head pieces
Then adhere the other side to the vulture. Be sure to apply some pressure to adhere both sides well.
Cut a slot in the styrofoam ball to insert the Vulture neck piece
Apply glue to adhere the slot so the neck piece is firmly in place.
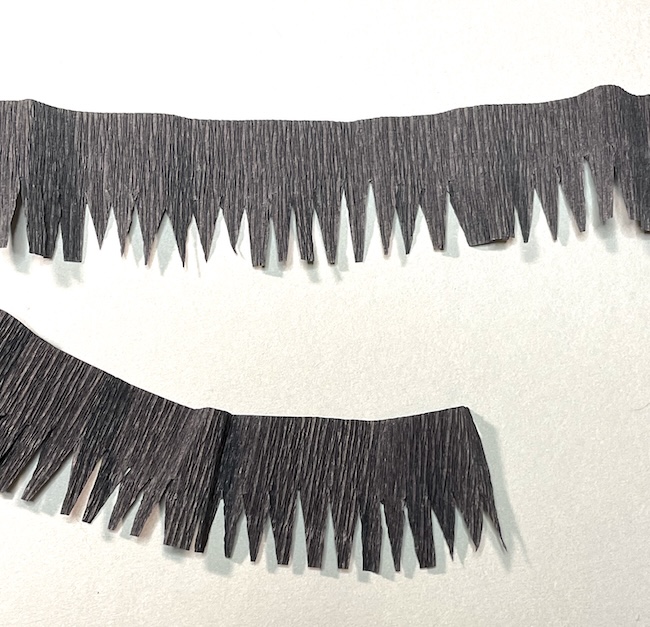
Cut crepe paper strips to mimic feathers
You can make the strips about 1 to 1.5 inches tall so you can vary the feathers. I use the smaller strips on the wings. I like to cut the feathers so they are angled.
Start making the tail of the Vulture by starting at the back end of the Vulture.
Apply a thick blob of glue to the back end of the styrofoam ball (the opposite end from the Vulture head). Start curving the crepe paper around the ball. Cover the entire ball, but not the Vulture neck.
Cover the wings with crepe paper feathers starting at the narrow end of the wing
While you let the glue dry on the tail, cover the wings with crepe paper feathers. Start at the narrow part of the wing so the feathers overlap nicely.
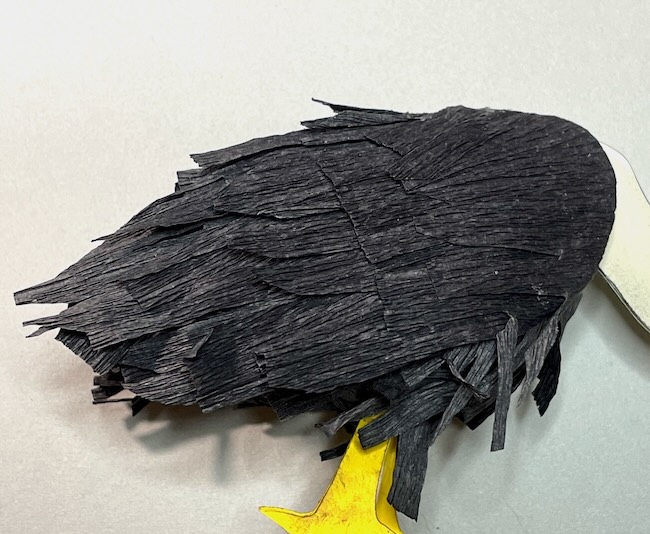
Gently curve the wings to fit the styrofoam ball - the body of the Vulture.
Since the wings have to adhere to a rounded surface, I gently bend the front of the wing to mimic the curve of the swan's body.
Adhere the wings to the Vulture
This is kind of a fiddly step. This is a good place to use hot glue to help the wings adhere better. I did use regular tacky glue to hold them in place, but you have to hold them to the ball for a few minutes.
Insert toothpick to complete the cake topper
To finish the cake topper insert a toothpick in the bottom of the Vulture body. Apply glue on the toothpick so it will stay in place. Be sure that you don't push the toothpick all the way through the ball.
Insert the Vulture legs on each side of the toothpick.
Questions?
If you have any questions, please ask in the comments or email me - Lucy@paperglitterglue.com. I am always happy to help.
Join me in my private Papercraft Facebook group. That's a good place to ask questions as well.
Leave a Reply