Make a Pop-Up House Business Card or Invitation
Here's a fun idea for you - turn your pop-up house into a business card or an invitation. I recently attended a conference where I knew there would be a lot of crafters so I made a pop-up house business card with my blog name. You could use this idea to make invitations for a party - an open house, for example. Or a realtor might like a card that stands out from the crowd. Those are just a couple of my ideas, but I am sure you can come up with many more ideas of your own.
This project is easier than the Halloween pop-up house card because you don't have to perfectly situate the house in the crease of the card so it will pop-up and close easily.
However, the basic instructions are the same. In my opinion, the single best video for making a pop-up house is by Duncan Birmingham of the Pop-Up Channel if you would like to take a look.
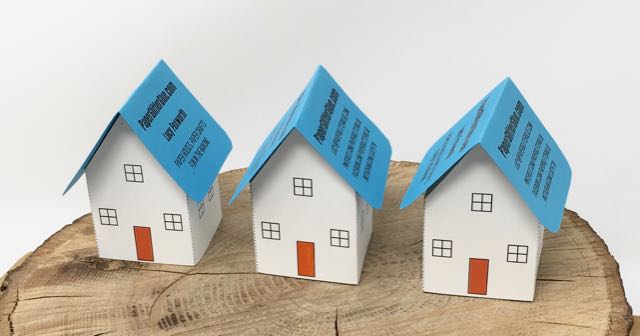
Three little pop-up houses used as business cards
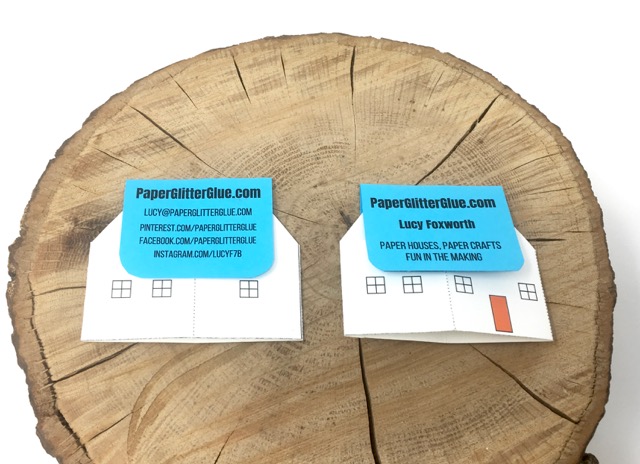
Folded pop-up house business card - free pattern in my resource library
How to Make a Pop-Up House Business Card
You make the little pop-up house exactly like you make the Halloween pop-up card.
The major difference is that I used my own pattern for the house structure. This pop-up house pattern is in my resource library if you would like to download it. All you have to do is subscribe to my newsletter to get the password to the free library.
What Do You Need?
- Pop-up House Pattern from the Resource Library - Design No. 10
- Printer
- Cardstock
- Glue
- Scissors or craft knife
- Scoring tool
- Ruler
Directions to make the Pop-Up House Business Card
- Print the pop-up house pattern on cardstock - Design No. 10
- Score the dotted fold lines before you cut the house out
- Cut out the pop-up house and the roof support beams
- Fold along the score lines
- Glue the house together
- Adhere the roof support beam paper to the gables of the house
- Glue the roof to the flaps on the roof support beam
Score before you cut the pattern out
Unfortunately, I don't always remember to do this, but if you score along the dotted lines to make the fold lines before you cut out the house, you can score three houses at once.
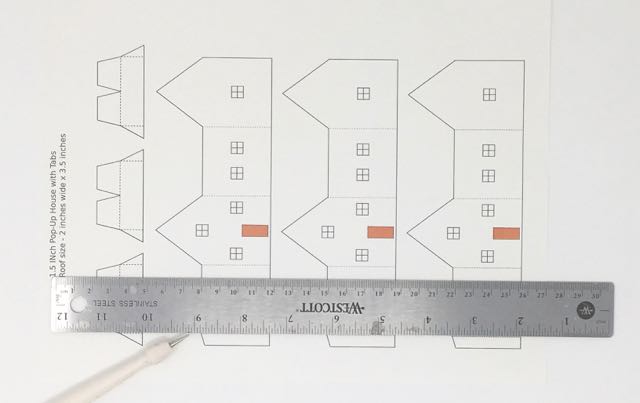
Score along the dotted lines - the fold lines - on the pattern before you cut out the little houses
Cut out the house patterns
Below you can see the pattern sheet with the roof support pieces on the top of the page on the guillotine cutter.
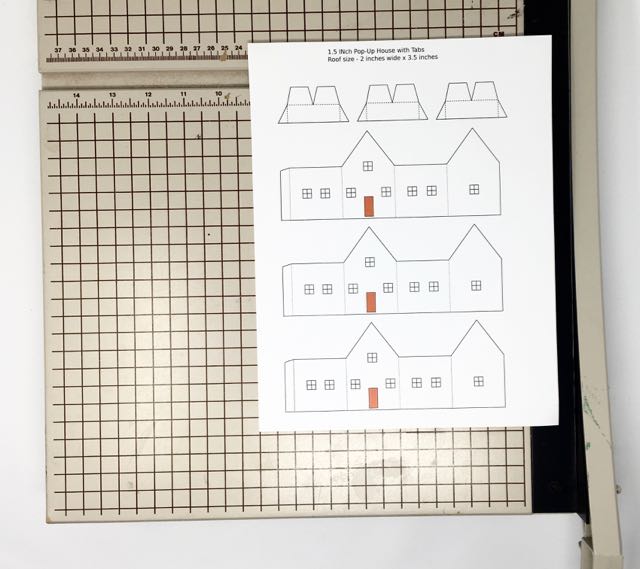
Pop-up house pattern sheet showing the little houses and the roof support beam at the top.
Cut out each pop-up house. I use a guillotine cutter to make a little easier to cut out many pop-up houses fairly quickly. I made 57 pop-up house business cards for this conference. It did take some time I must admit.
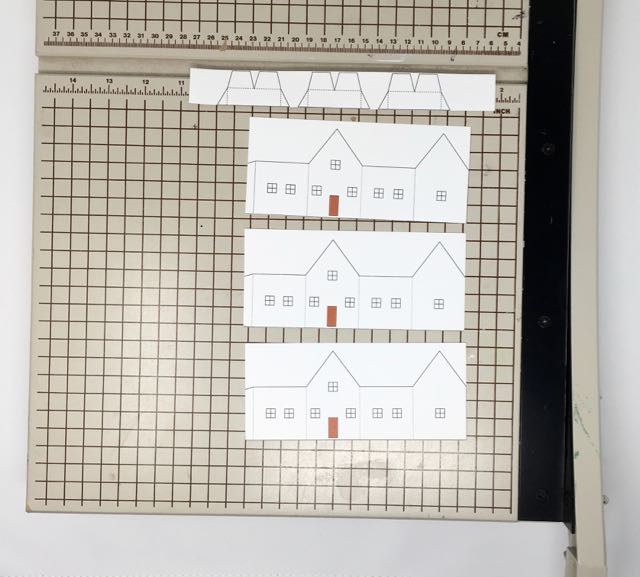
Cut out the framework of each pop-up house
Now cut out the entire house and the roof support beams. You can use scissors or a craft knife - whichever you find easier to use. These are all straight lines so either tool works well.
I made a tiny spidery sample house while I was writing this post to illustrate things a little better. Here are the only 3 pieces you need for a pop-up house - the house itself, the roof piece folded in half and the roof support beam with 2 angled side tabs and roof support tabs on the top.
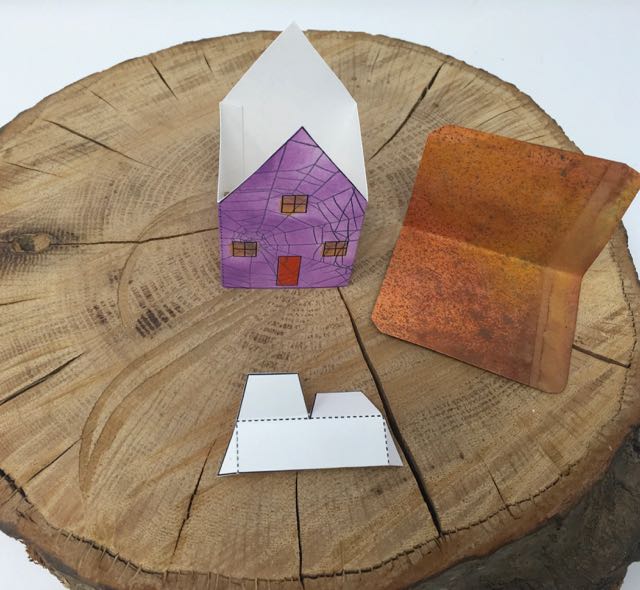
Tiny spidery pop-up house sample showing the 3 pieces for the pop-up house
Fold along the dotted scored lines and glue the house together
Next, fold along the scored lines and glue the house together. Make sure the glue is dry before you try to glue the little roof support beams in place. They are a little tricky just because the angled tabs that glue them to the house are small with not a lot of surface area to attach to the house.
Fold the house flat so you know that everything is lined up properly. If it folds nice and flat with the bottom perfectly straight you know your house will fold correctly by the time you glue the roof on.
Adhere the roof support beams to the gable ends of the house
I find this to be the trickiest part of the whole process of making the pop-up house structure because each roof beam glue tab must be glued in the middle of the gable and perpendicular to the base of the house. Otherwise the house won't fold right.
Here's a photo to show you how the angled roof tabs fit within the house. The line of the angled tab needs to be situated in the middle of the gable. Allow the glue to dry completely before you try to glue the roof on. You don't want it shifting on you in the next step.
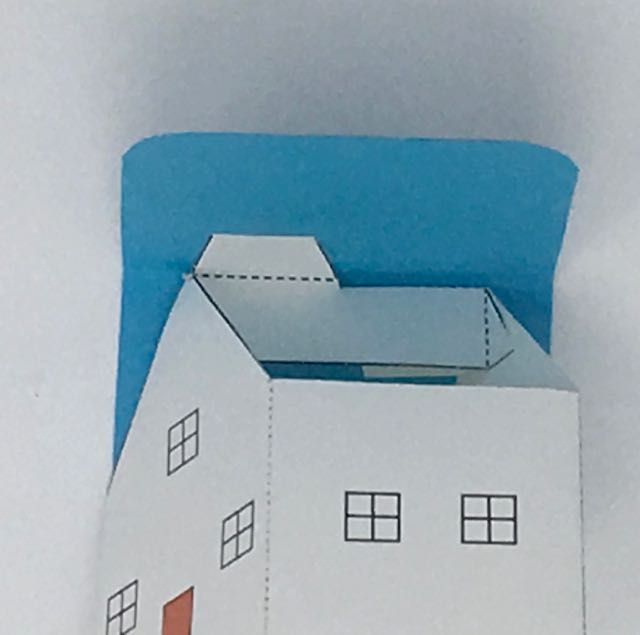
Paper roof support beam glued in place on the pop-up business card
Here's another view of the roof support beam glued in place showing how the roof support tabs fit on the roof and how roof support beam fits in the crease of the roof piece.
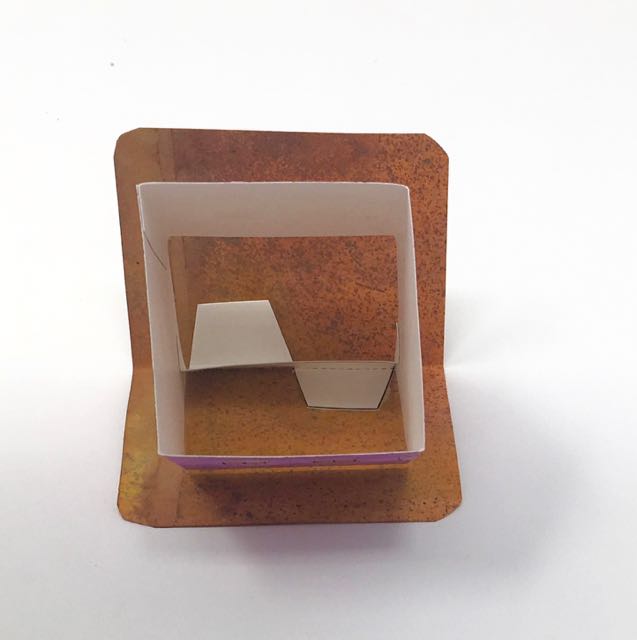
Another view of how the roof support beam works to hold the roof on the pop-up house
Glue the scored roof piece to the roof support tabs
If you are making a business card like I did, design your business information to fit on the little roof and place on the pdf template, then print. One important detail is to make one side upside down so when the roof is in place both sides are readable.
Now, cut out and score the roof in the middle.
One roof support tab folds forward and one folds backwards. Each tab supports one half of the roof.
And finally, glue the roof to the roof support tabs. Let dry.
You're done! And you have a little freestanding pop-up house that you can use for an invitation or for a business card. Or you could make place cards for a holiday meal. Just write or print the name on the roof of the house.
Your imagination can come up with lots of options for using this little pop-up house.
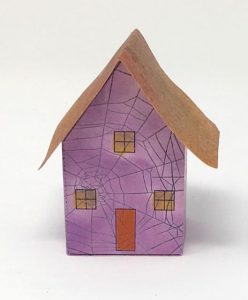
The tiny spidery pop-up sample house
Lucy
P.S. Let me know if you have any questions about using the pattern because I will happily help you if you get stuck.
Also you can use this little house in a card like we did in the Halloween Pop-Up House card.
Pin to your favorite crafty Pinterest board so you can remember where you found this idea
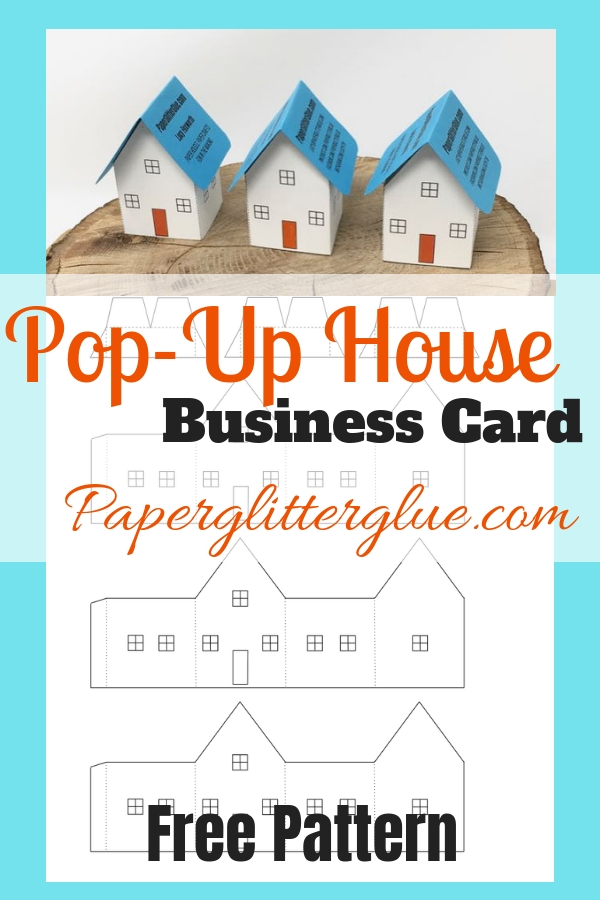
Pin to your favorite crafty Pinterest board so you can remember where you found this idea


Robin Whitney
Love this! Going to try it out for myself. Thank you for creating this.
Robin
Lucy
Very good. I am so glad you like the pattern. Thank you.
Sheila
A lot of work for a business card but so perfect for you and also completely adorable! I love it!
I think it would make a fun housewarming invitation or change of address notice.