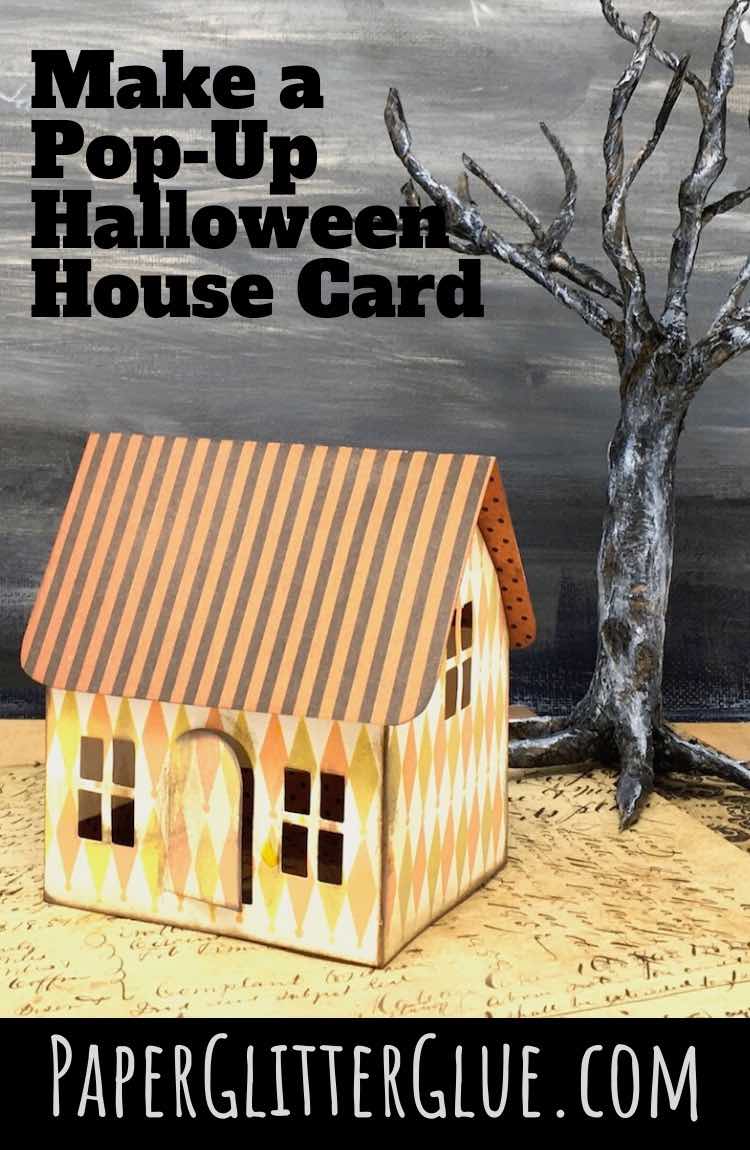
You know I love 3-D paper craft projects. Sometimes that means my crafts go in different directions such as making pop-up houses. I have experimented with using the Tim Holtz Village Dwelling house from Sizzix as a pop-up in the Gingerbread house Christmas card. Well, it's time to do it again. Here is the latest version of a pop-up house with a Halloween twist - it's a Halloween Village Dwelling Pop-up.

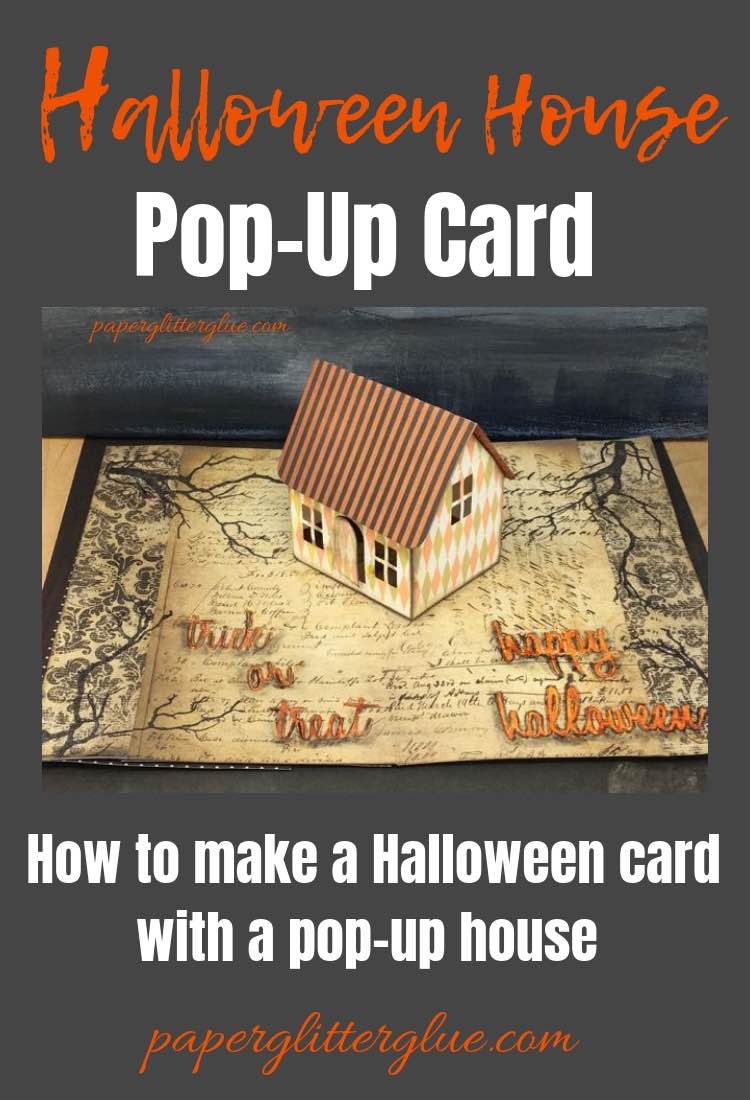
The Halloween Village Dwelling pop-up house on the inside of the Halloween card
Brief video to show you how the modified Village Dwelling Halloween house pops-up in the middle of the card.
How to make the Halloween Village Dwelling Pop-up card
This post contains some affiliate links for your convenience. Click here to read my full disclosure policy.
Materials:
- Sizzix Village Dwelling die
- Cardstock for the base and front
- Decorative Halloween Paper
- Halloween decorations such as:
- Glue - Aleene's Fast Grab Tacky Glue or any PVA glue
- Distress crayons, inks, stains, crackle paste and paints from Ranger:
Outline of steps to make the Halloween Village Dwelling Pop-Up card:
- Make the House itself
- Cut out the Village Dwelling house in a heavy cardstock
- Trim off the roof tabs and the front gable from the Village Dwelling die cut
- Glue the house so it forms one long strip
- Decorate the house with paint or ink
- Crease corners well
- Glue the house together making sure it folds FLAT in both directions
- Glue tabs to the Village Dwelling Halloween house on the 2 adjacent sides in the back
- Make sure glue tabs do not overlap
- Next make the Roof Components
- Make roof beam
- Cut out roof
- Trim corners of roof
- Now make the Base of the Card
- Make a sharp fold in the base of the card
- Decorate the base of the card
- Adhere the house to the card
- Measure a 90 degree angle on the base of the card about 2 inches from back edge of card. The angle should be centered right in the crease of the card (45 degrees to the spine)
- Adhere the glue tabs along the 90 degree angle on the base of the card
- Glue in the roof beam
- Glue the roof on the roof tabs of the roof beam
- Decorate the front of the card and add embellishments
- Finally, check out your cool Halloween Village Dwelling pop-up card
Now I'll go into more detail about making a pop-up card using the Village Dwelling for the structure of your house. The very best online videos for making pop-up cards are by Duncan Birmingham. He is a pop-up genius. Not only that, he makes it easy for those of us who are less pop-up inclined to understand these pop-up principles. Here's the link to his wonderful house pop-up video.
First Make the Village Dwelling House
Cut out the Village Dwelling
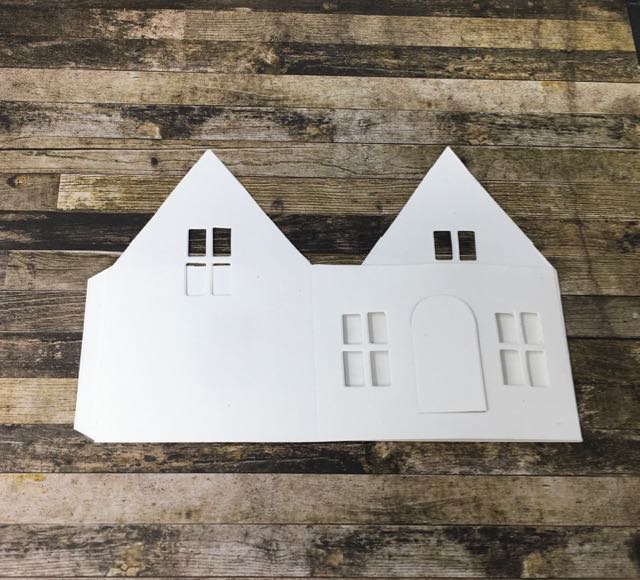
For this little Village Dwelling pop-up house, I used 65 pound cardstock because it folds so nicely. You need sharp creases for the pop-up house to work so for this card you really can't use cardboard.
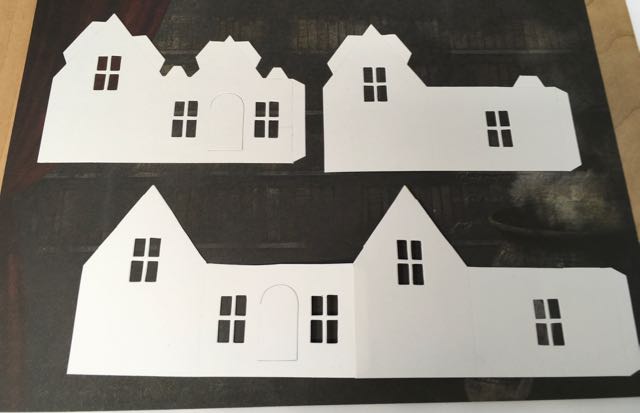
The top 2 pieces are the Village Dwelling die cuts. The bottom shows the two pieces glued together after trimming off roof tabs and the front gable.
You must trim off the roof tabs because during the pop-up mechanism the house rotates from being flat to rectangular. Therefore, the relationship of the walls to the roof changes so you cannot adhere the roof in the traditional manner. You have to adhere the roof to the house by a cardstock roof beam.
One other thing is that you must trim off the front gable. There is no way to keep the gable with the pop-up mechanism. Fortunately, it is easy to trim these tabs and the gable.
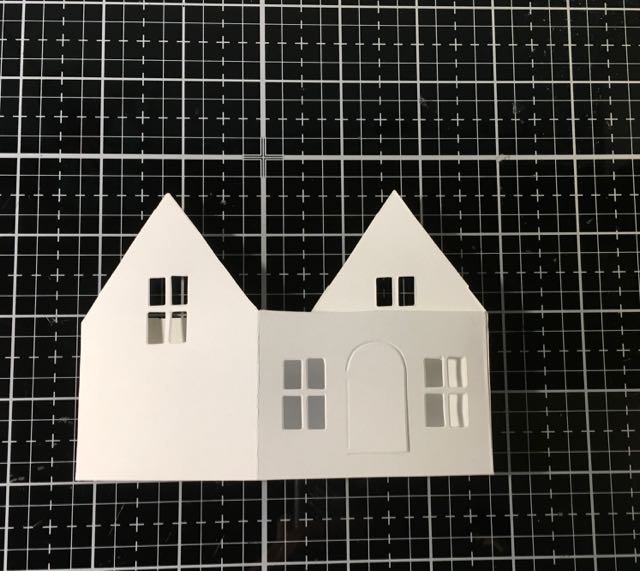
Decorate the house with paint or ink
Decorate your little paper house. You can do this many ways. First, you can cut out your house from decorative paper. I used one of Tim Holtz' Paper Stash papers for the background. Any of these papers would work great as the cut out for the little house. However, I chose to decorate the house with Distress Oxide inks and a new shifter stencil from Stampers Anonymous because I love this stencil. Just want to note here that it is MUCH easier to color or paint the house before you glue it together.
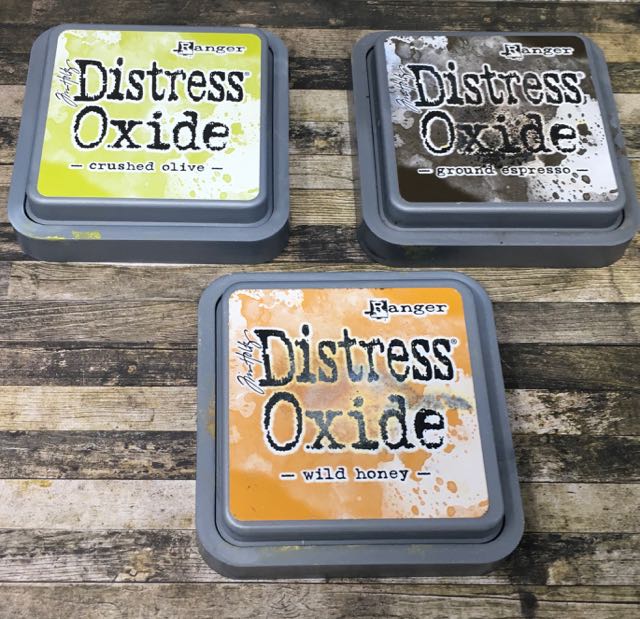
Perfect Halloween colors for the Village Dwelling pop-up card
Glue the house together making sure it folds FLAT in both directions
Before you glue the house together at the glue tabs, make sure you crease the folds well so the house will unfold and fold back together easily.
Crease the cardstock very well so it will lay flat when you make the card.
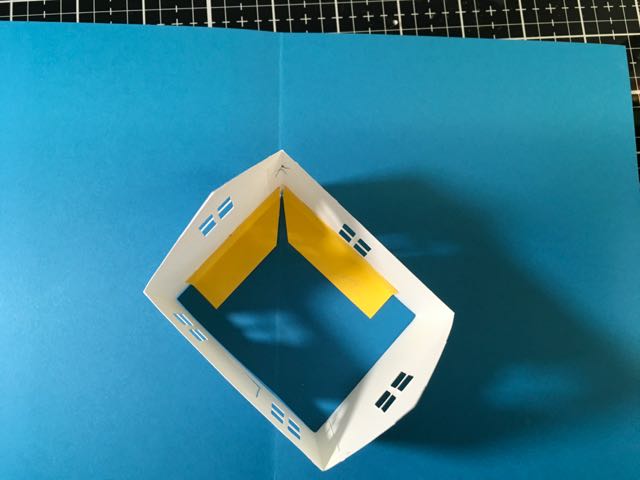
After gluing your decorated Village Dwelling house together, make sure that it folds flat in both directions.
Cardstock village dwelling house glued together and folded so make sure it lays flat
Glue tabs to the Halloween Village Dwelling pop-up house on the 2 adjacent sides in the back
The photo below shows how the glue tabs are adhered to the house so it can be glued onto the cardstock. Now you may not be able to see the penciled X in the back, but I put that there because I didn't want to glue the tabs on the wrong walls. As you might guess, I've done that before.
This photo shows how the tabs are glued to the house which will hold it on the base card and allow the house to move when the card is folded.
One other important detail about the glue tabs is that they must be angled so they don't overlap in the fold line. And then make a small enough tab that it doesn't extend up to the window. These tabs are just under ½ inch wide.
In a minute I'll talk in detail about adhering the house to the card base.
Make the Components for the Roof
First, Roof Beam to Support the Roof
Here's a pattern for making the roof beam. The long side of the Village Dwelling is 2 ⅝ inches long so that is the length of the roof beam itself. Two glue tabs where the beam attaches to the gable ends add a little extra length and then the top tabs are what you actually glue the roof to. But I'll show you this is a later step.
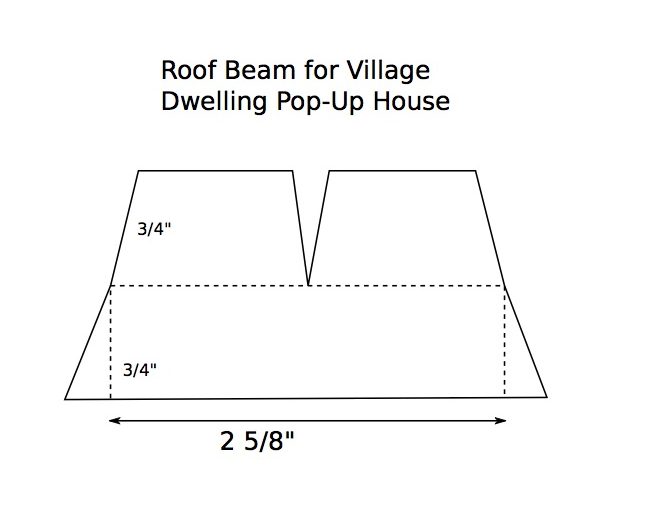
Roof beam pattern to convert the Village Dwelling die cut into a pop-up house
Cut out roof
The roof is simply a rectangle measuring 3.25 inches x 4.5 inches. You will trim it down a little bit so that gives you a little extra room to play with. Rounding the corners of the roof just a little bit helps prevent the corners from sticking when you fold the house back down. But I didn't make a pattern for this because it's easier just to cut out a rectangle than follow a pattern.
Trim the corners of the roof
If you don't round the corners of the roof a little bit, they will stick when you fold the card. You'll find that they slide better when the corners are rounded.
Now you see why we round the corners on the paper roof. If the roof had a sharp corner there it pokes into the paper and doesn't slide nearly as easily.
Finally, you'll adhere the roof beam and the roof after you glue the house to the base.
Now make the Base of the Halloween Village Dwelling Pop-up Card
Make a sharp fold in the base of the card
To make the base of the card, take a piece of 8.5 x 11 inch cardstock and fold it in half. Crease it tightly. You must make a sharp crease here just like you've done on all the other creases for this pop-up card.
Decorate the base of the card
Here is one of the funnest parts - decorating your card. For this specific Halloween pop-up card, I didn't use many die cuts within the card because I didn't want to add any more thickness. I chose some coordinating papers from the Tim Holtz Paper Stash to make the base.
First I chose the decorative paper that the house would actually sit on. Then I glued some side pieces to a folded piece of cardstock that would form the base for the decorative paper and house. Yes, lots of layers here.
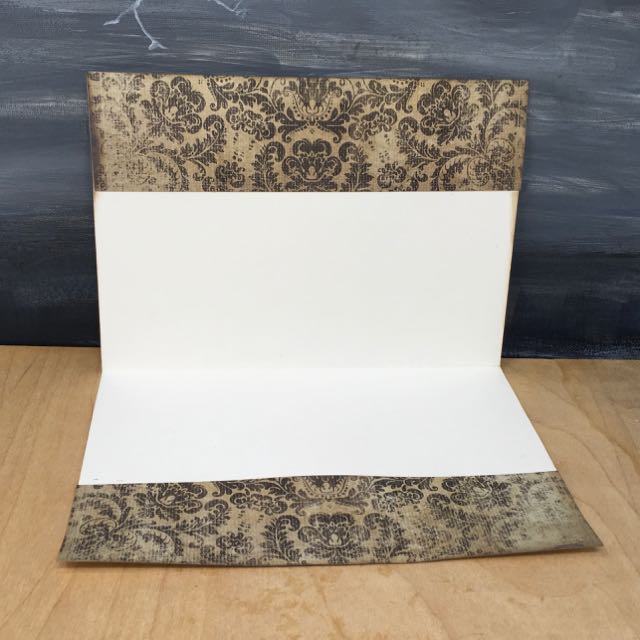
Sharply creased background paper for Halloween Village Dwelling pop-up card
Here's a short video of the house on the 8 x 8 decorative paper temporarily taped to the background paper. I made this brief video while testing the folding mechanism.
After all the layers were adhered together, I added more decoration to the inside of the card. I waited to do that to avoid messing with the pop-up mechanism. In other words, I had to make sure the house popped up properly before I added more decor within the card.
Adhere the house to the card
Now we get to the real nitty gritty of making the house pop-up. Here are the instructions for adhering your little Halloween Village Dwelling pop-up to the card base so it opens up nicely.
First measure a 90 degree angle on the card base
Measure a 90 degree angle on the base of the card about 2.25 inches from back edge of card. The angle should be centered right in the crease of the card (45 degrees to the spine). When the house is folded, the top of the roof might extend past the edge of the card if you do not move it at least 2.25 inches down the background page.
Here is a sample card showing the measurements for placing your pop-up house on the card.
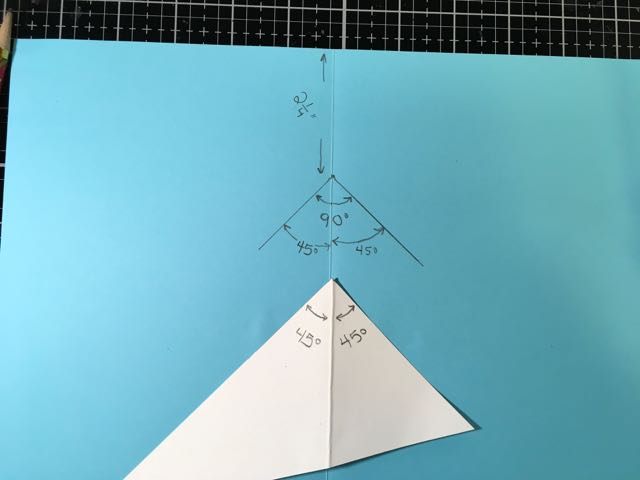
Critical measurements for placing your little pop-up house properly on the card base
Center the crease of the card so that there is a 45 degree angle on both sides when you draw your lines. To measure the angles either use a protractor or cut off a angle from a piece of cardstock and fold it in half.
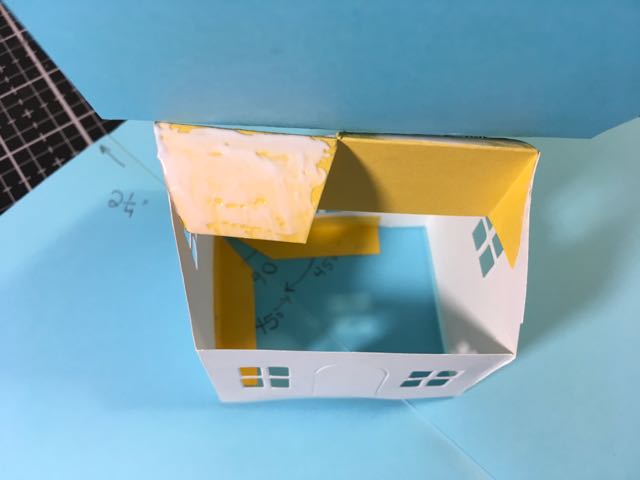
Adhere the glue tabs along the 90 degree angle on the base of the card

Notice how the glue tabs fit on the crease of your pop-up card. But also notice that the front corner does not align with the crease. The house will NOT fold properly if you try to align that corner.
Next glue in the roof beam
Glue the roof beam to the house with the angled tabs. Then glue the roof on.
For this step you glue the angled tabs to each gable end of the little Village dwelling house. One angled tab faces forward and one tab is glued facing the back. Be sure to glue the roof beam perpendicular to the base of the card for the roof sit on the house accurately.
Finally, glue the roof on the roof tabs of the roof beam. Just like the angled tabs, the top tabs where the roof is attached has one tab facing forward and one tab facing backwards.
Decorate the front of the card and add any extra embellishments to the inside of the card
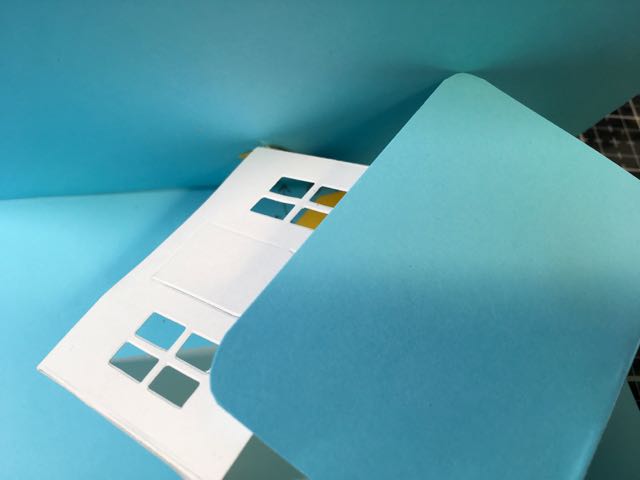
Now for the very last steps to complete your card. Make a front piece to glue to the card base. For this pop-up card, I made a separate front piece in case I messed up the pop-up mechanism so I wouldn't have to do the whole thing over. After I was sure the house would fold correctly, I glued the front of the card to the cardstock base.
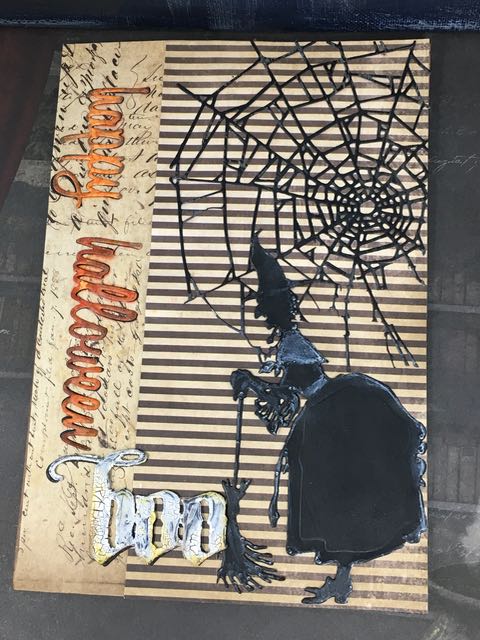
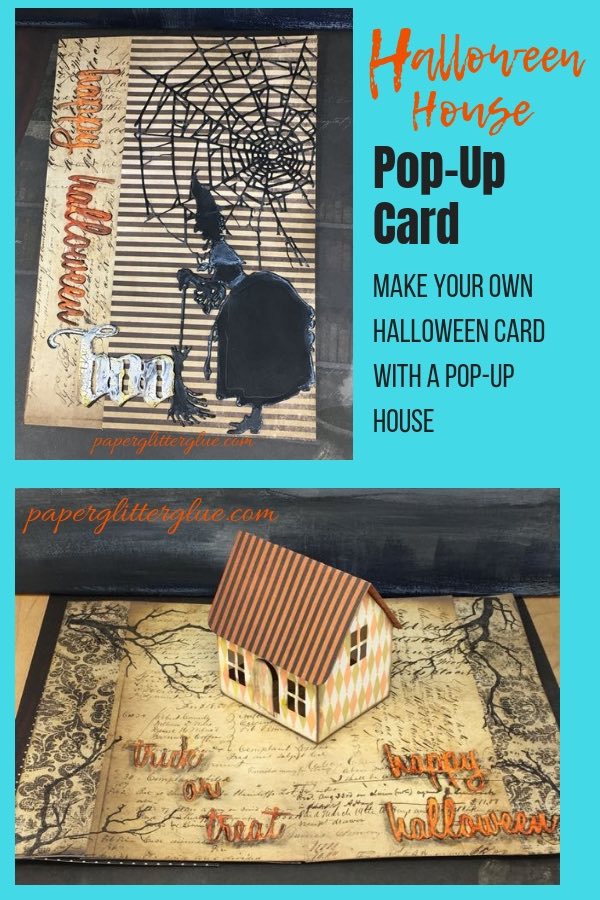
Coordinating Tim Holtz Idea-ology papers, an old witch and spider web die cut, and several Halloween words decorate the front of the pop-up card
Halloween elements to decorate the card are in the Materials list
In the materials list, you will find all the elements I used to make the front of the card. The background papers are left over sections from the making the inside base of the card. Each word element is backed with black cardstock for extra dimension. In addition, the witch is outlined with a Picket Fence Distress crayon. For the spider web, I may add a stamped element in the center because it needs a little something. AND it's Stamptember and this week's Simon Says Stamp Monday Challenge is "Stamp It On". I will be entering my card in that challenge. So far the only stamping is the tree limbs inside the card which really adds great detail, I think. But I may add something more.
So that's the Halloween Village Dwelling Pop-Up card. Not the easiest card to make and it doesn't fold as flat as I would like, but I think the kids who are going to get the card will enjoy it anyway.
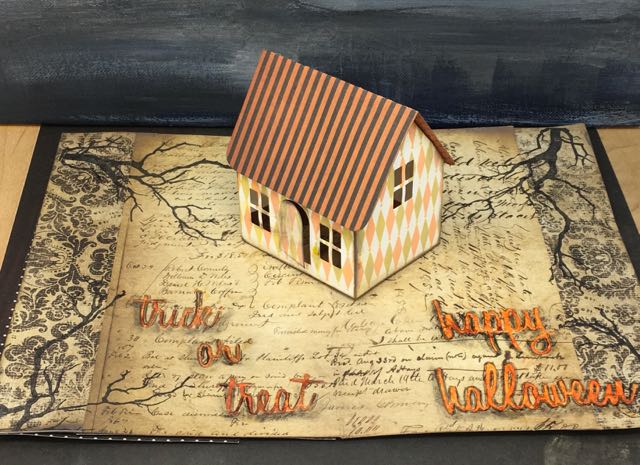
Completed inside of the Village Dwelling pop-up card.
P.S. I would love to know what you think about this variation on my usual houses. If you have any problems making this card, I will be glad to help.
And here are links to 2 other pop-up houses - my business card pop-up house and an invitation I made to my Christmas craft party.
Lucy
Pin this Halloween card to your favorite Pinterest board
Meihsia Liu
This is such a fun and awesome creation! Love the beautiful Halloween elements and the cute pop-up house. Thank you so much for sharing with us at Simon Says Stamp Monday Challenge. 🙂
Sara Emily Barker
Lucy, I have just spent the last 1/2 hour poring over your post and gawking at your fabulous Halloween pop up card! I have to say, you missed your calling as an architect! You are so talented and generous for sharing each step along the way. Your description and photos are EXTREMELY helpful to understand how this mechanism works, and just how much work goes into one of these. Your card cover is just delightful, too! Love the spider web, witch and how you finished BOO! Fabulous make! Sending hugs!
Lucy
Sara Emily, I am so glad you like the Halloween Village Dwelling pop-up house. It's a fun element to add to any card. And thank you for your comments on the showing the steps in making this card. I hope I organized it in such a way that it makes sense.