

• Skip to primary navigation
  • Skip to main content
  • Skip to primary sidebar
  • Skip to footer
Paper Glitter Glue
  • Shop
  • Favorite Supplies
  • Tutorials
  • About
  • Contact Me
  • Free Library
menu icon
go to homepage
search icon
Homepage link
  • Shop
  • Favorite Supplies
  • Tutorials
  • About
  • Contact Me
  • Free Library
×
Home » Uncategorized » DIY Stencil for Your Paper Crafts

DIY Stencil for Your Paper Crafts

June 30, 2018 by Lucy Leave a Comment

Be sure to Pin to your Favorite Pinterest Board!

22 shares
  • Share

Sometimes you need a stencil for a specific idea you have and you don't have the stencil but you do have some dies that would work. However, you just don't want to cut out 20 objects to glue individually on your project. What to do? Make a DIY stencil. Yes, you have to run it through the die cut machine several times, but in the end you have the perfect stencil that you can use over and over.
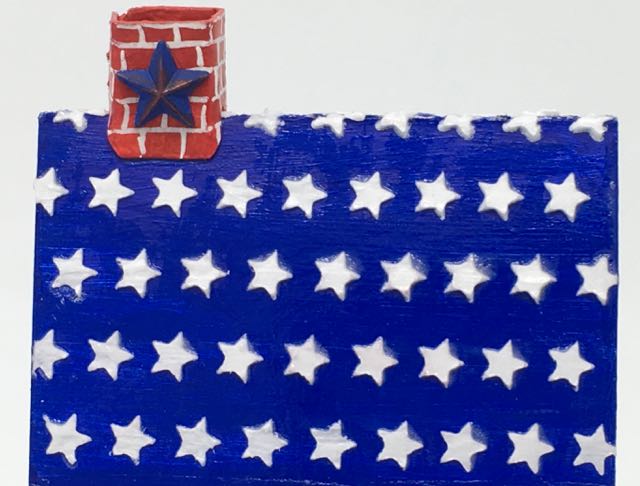
Stenciled roof made with DIY stencil pattern #howtomake #papercrafts #stencilideas #stencilpatterns

Little paper house roof with stenciled with stars made from a DIY star stencil on Yupo paper

I needed a star stencil for a roof on one of my little houses, but I didn't have a stencil that would work for a little roof, but what I did have was a good star die in a strip form that would be perfect. What material to make a stencil out of? Yupo! Yupo is a waterproof, synthetic paper that made from polypropylene that is mostly used for painting with alcohol ink and watercolors. But because it is waterproof it makes a durable stencil. So here's how I made it.

Here are steps to make your own stencil using Yupo paper.

Make Your DIY Stencil - Materials:

  • Yupo paper (Alcohol Ink Yupo from Ranger Ink)
  • Cutting Die for Stencil - I used Tim Holtz Sizzix Shape Strips #660226
  • Scrap paper
  • Pencil
  • Maybe a ruler - I just marked the lines with the die strip itself rather than use a ruler

First make a Sample Stencil

You want to make sure you like the layout before you start cutting your Yupo paper. Get a piece of scrap paper and design your specific stencil layout.

Mark the strips where you want them to go on the sample paper pattern.
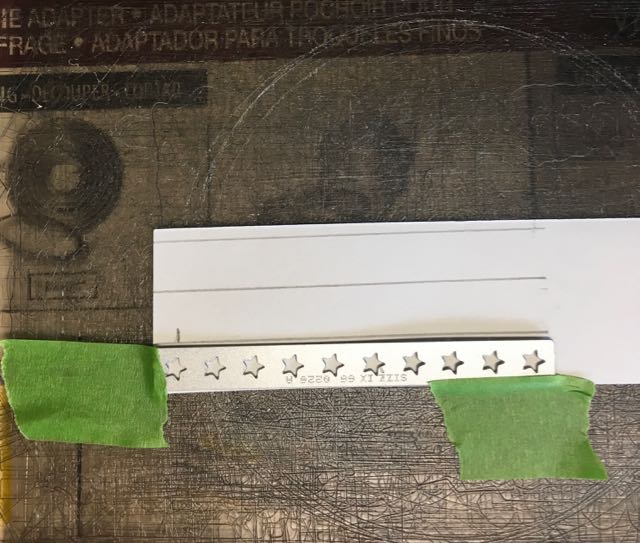
Practice piece for the DIY stencil on plain paper #DIYstencil #papercrafts #stenciltips #howtomakestencil

Arrange the die where you want it on your practice sample. Draw lines to help you plan where the next die cut is to go

For the star stencil, I wanted the stars to be offset a bit so I moved the die over a little for the second row. It didn't really make much of a difference for this particular die.
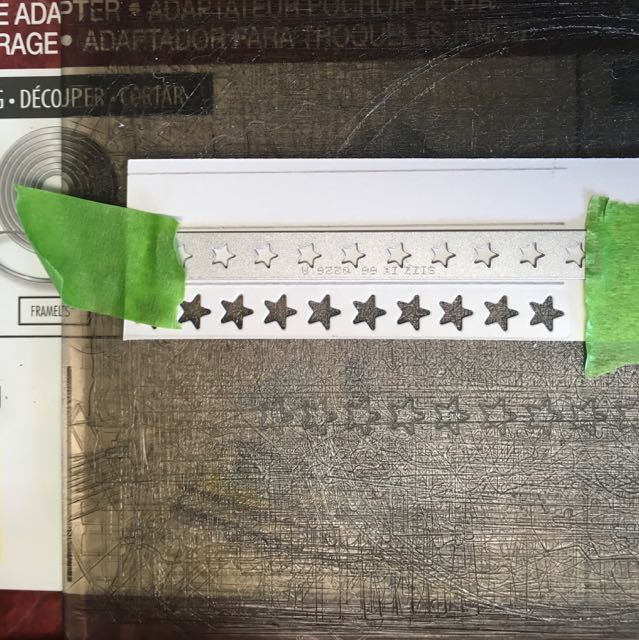
Practice piece for DIY stencil on scrap paper. #DIY stencil #howtomakestencil #stenciltutorial

Second row slightly offset from the first row of the practice stencil.

Once the sample is cut out, evaluate how you like it. I decided to try to offset the stars a little bit better.

DIY stencil practice piece #stenciltips #DIYstencil #stenciltutorials

Practice stencil template cut out. By using a practice sample, I can see that the second row needs to be offset a little less. In other words, the second row of the die cut needs to be moved to the left.

Make Your Own Stencil - Specific for Your Paper Crafts

Now we know what we want to do to make the custom Yupo stencil.

Mark the location for the die strips on the Yupo with a pencil.
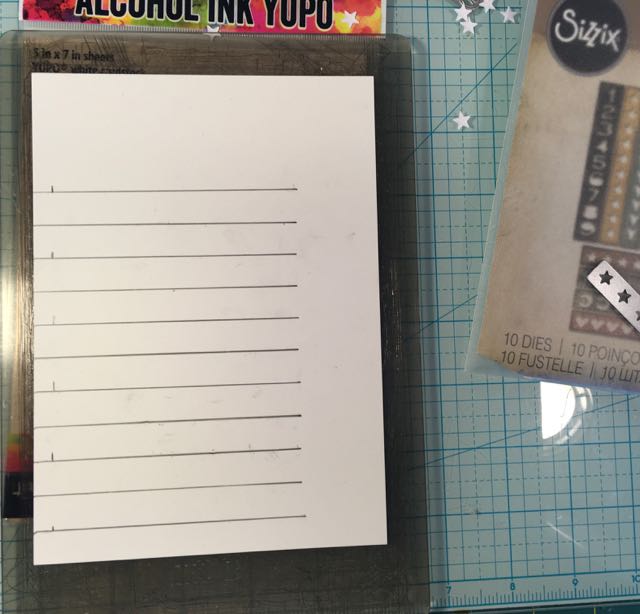
Layout for the DIY stencil marked with pencil on the Yupo waterproof paper #DIYstencil #howtomakestencil #stenciltips

Location for the die strips for the custom stencil marked on Yupo waterproof paper

See how I've marked the location for each row of the die strip and the offset line. The practice sample on scrap paper taught me the I need to offset every other row a little bit less for final DIY stencil.

Run the die strip through your die cutting machine multiple times. Tape the die strip down each time you run it through the machine for accuracy.
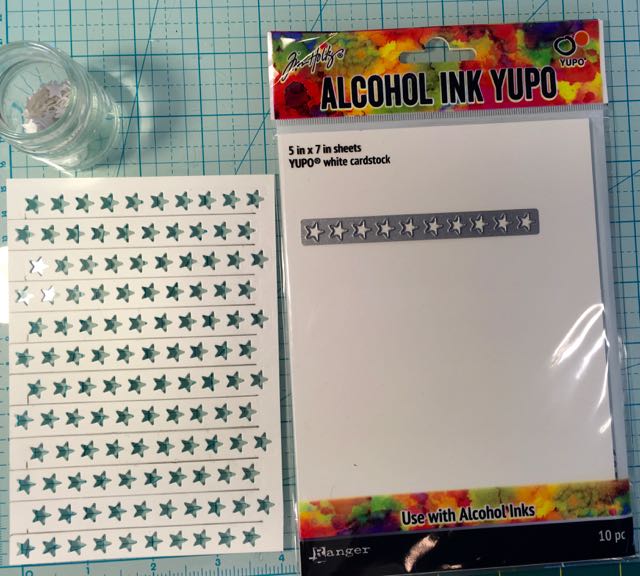
DIY stencil done on Yupo waterproof paper for my paper crafts #DIYstencil ##stenciltips #howtomakestencil

And here is the final DIY stencil - perfect for the design I have in mind.

Now I have my own DIY stencil that I can use over and over. Use the stencil just like you use a purchased stencil. Wash it off after stenciling so texture paste won't get all gunked up in the stencil. That's what you do with your regular stencils, right? Meaning, wash them after using them - not leave the texture paste to dry on the stencil.

See the Starry Patriotic House in the next post.
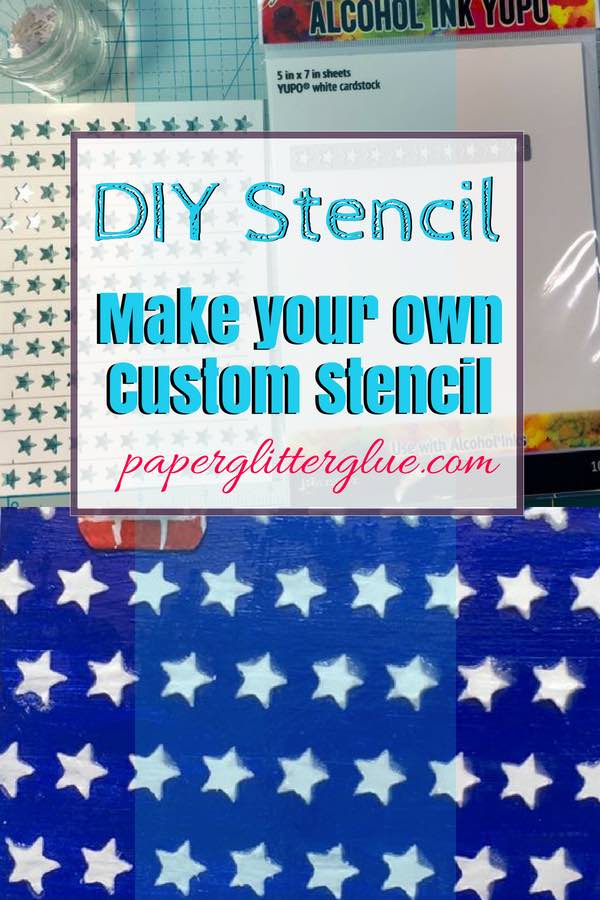
Tutorial to make your own stencil for paper crafts. #DIYstencil #stenciltips #howtomakestencil

Want to remember these instructions? Pin this to your favorite Pinterest board.

« Patriotic Putz House for the Fourth of July
Starry Patriotic House for the Fourth of July »

Be sure to Pin to your Favorite Pinterest Board!

22 shares
  • Share

Reader Interactions

Leave a Reply Cancel reply

Your email address will not be published. Required fields are marked *

Primary Sidebar

Lucy holding a small putz house

I'm Lucy - the paper architect behind the captivating tiny house designs at PaperGlitterGlue.com.

While I am often found covered in glue and cat hair and obsessing about the details of my projects, I love sharing my designs so anyone can craft seriously awesome paper crafts.

So look around and find something to MAKE.

You can read more about me here.

Want to make a beautiful Village Wreath?

You can do it step-by-step with my Alpine Village Wreath Workshop. Just let your creativity flow as create your own little village proudly displayed on a wreath. You'll create a heirloom that your family will treasure for years.

Wreath with alpine village houses and bottlebrush trees

And if you are a Halloween fan - you'll love my Halloween book! 13 Handcrafted Halloween Houses

This book contains 13 different Halloween designs with embellishments like crooked windows, fences, and shingles.

13 Handcrafted Halloween Houses book cover

What is a Putz House and How Do You Make One?

Halloween house putz house

Learn to make the best House Pop-Up Cards! with the Playful Pop-Up Houses book.

Cover for Playful Pop-Up Houses book
Lucy holding a small putz house

I'm Lucy - the paper architect behind the captivating tiny house designs at PaperGlitterGlue.com.

While I am often found covered in glue and cat hair and obsessing about the details of my projects, I love sharing my designs so anyone can craft seriously awesome paper crafts.

So look around and find something to MAKE.

You can read more about me here.

Want to make a beautiful Village Wreath?

You can do it step-by-step with my Alpine Village Wreath Workshop. Just let your creativity flow as create your own little village proudly displayed on a wreath. You'll create a heirloom that your family will treasure for years.

Wreath with alpine village houses and bottlebrush trees

And if you are a Halloween fan - you'll love my Halloween book! 13 Handcrafted Halloween Houses

This book contains 13 different Halloween designs with embellishments like crooked windows, fences, and shingles.

13 Handcrafted Halloween Houses book cover

What is a Putz House and How Do You Make One?

Halloween house putz house

Learn to make the best House Pop-Up Cards! with the Playful Pop-Up Houses book.

Cover for Playful Pop-Up Houses book

Footer

You are welcome to link to PaperGlitterGlue.com or use a single image with a brief description and a link back to any post. Do not republish any post. That's not allowed. But I do like it when you share my photos to Pinterest.

Amazon Associates Disclosure

Lucy Foxworth of PaperGlitterGlue.com is a participant in the Amazon Services LLC Associates Program, an affiliate advertising programs designed to provide a means for sites to earn advertising fees by advertising and linking to Amazon.com. So as an Amazon Associate I earn from qualifying purchases. Thank you.

Footer

↑ back to top

About

  • Privacy Policy
  • Disclaimer

Newsletter

  • Sign up with the form below for emails and updates.

Contact

  • Contact

As an Amazon Associate I earn from qualifying purchases.

Copyright © 2023 Paper Glitter Glue