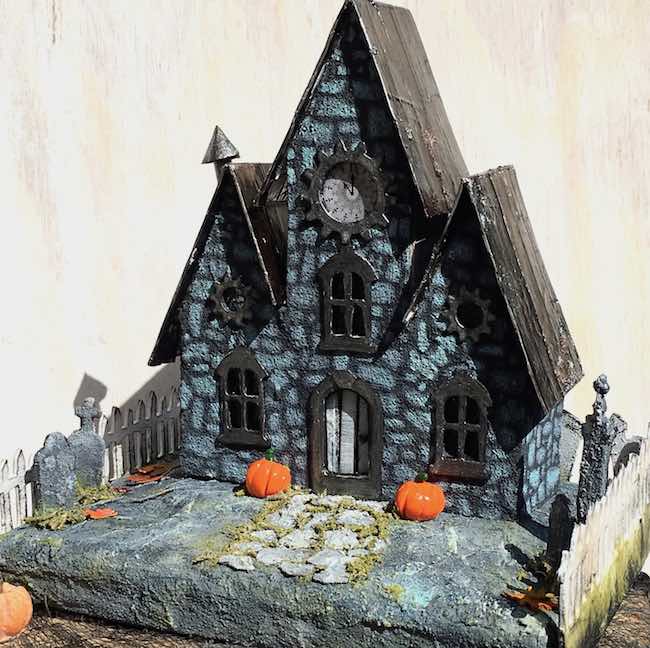
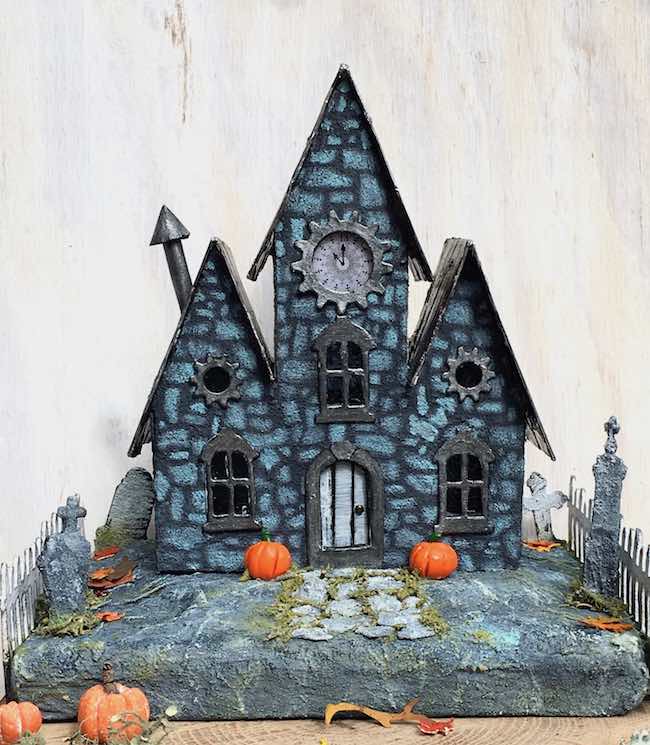
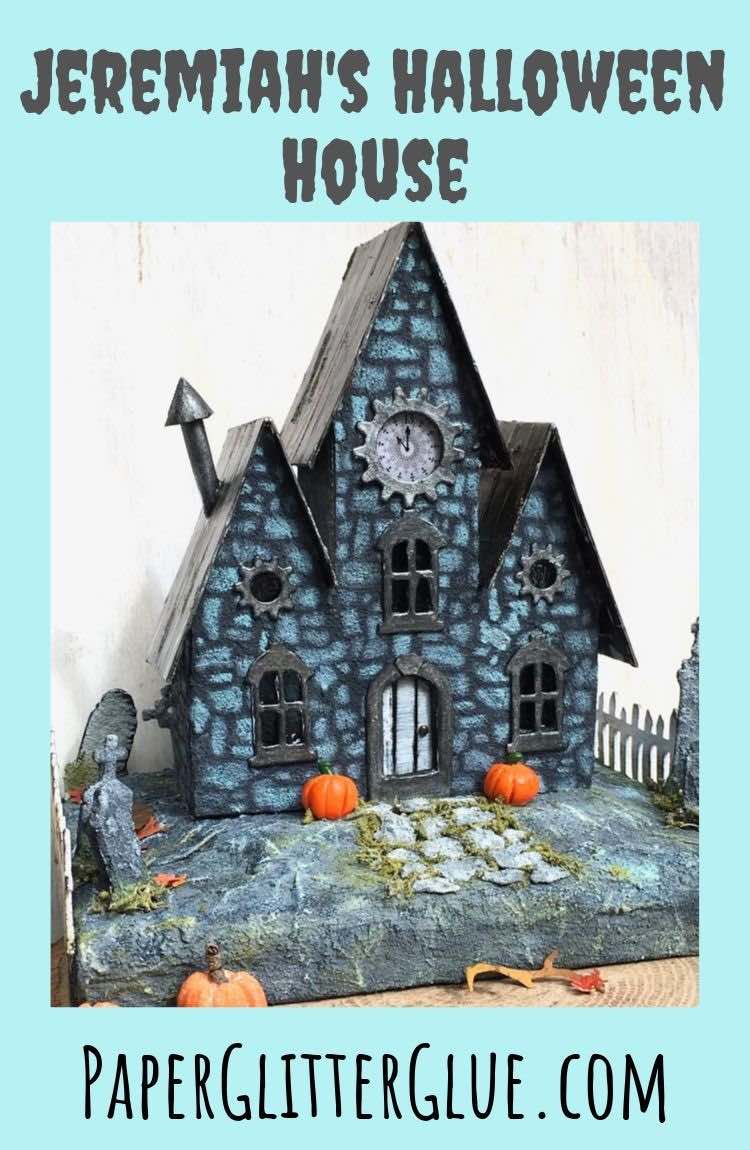
Jeremiah's Stone House is a custom miniature Halloween house I made for someone who didn't get their first choice last year. It's a modified pattern from the Stone Stenciled Clock House. His requests for this house included a clock in the tower and a stone base - easy to incorporate both of those features.
This post contains some affiliate links for your convenience. Click here to read my full disclosure policy.
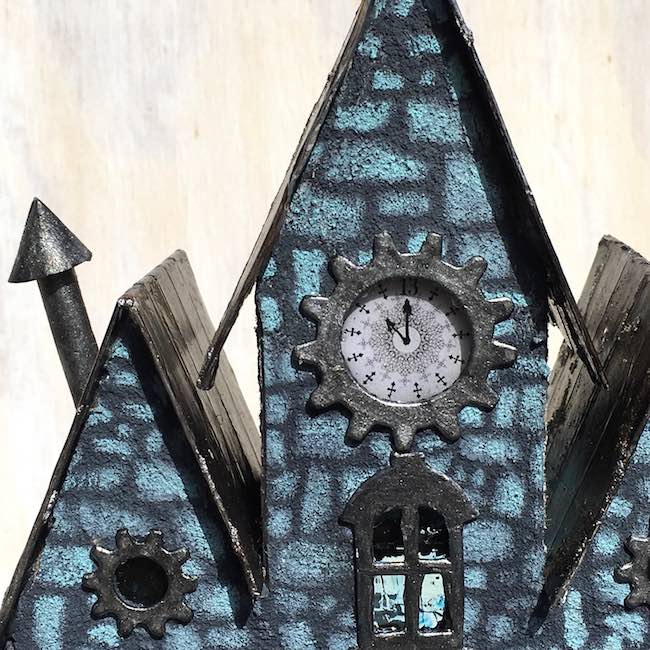
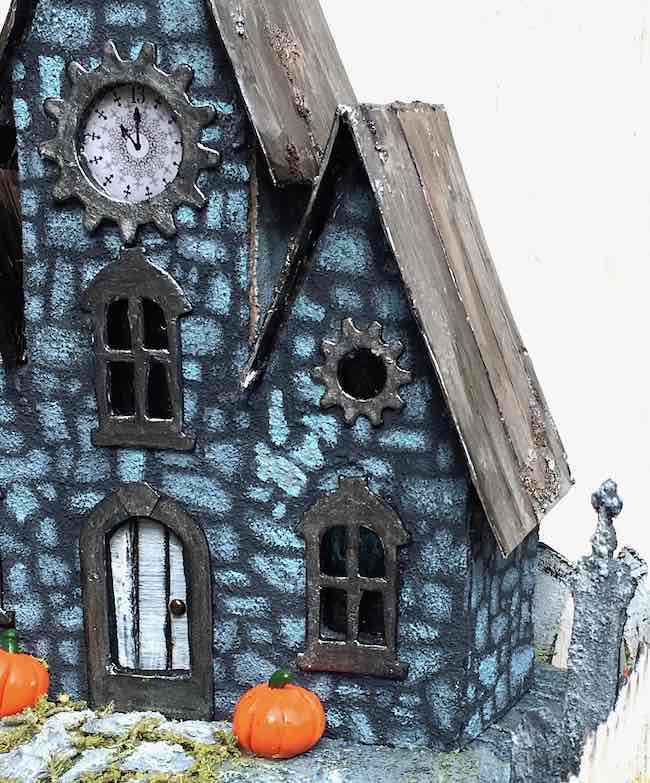
Spooky Clock on Jeremiah's Stone House
Here is a close-up of the clock he requested. It's a 13-hour clock I found online. I just enlarge it or shrink it to fit the circular opening of whatever Halloween house I use it on. I framed the clock with one of the gears from the Sizzix Bigz dies called "Industrial".
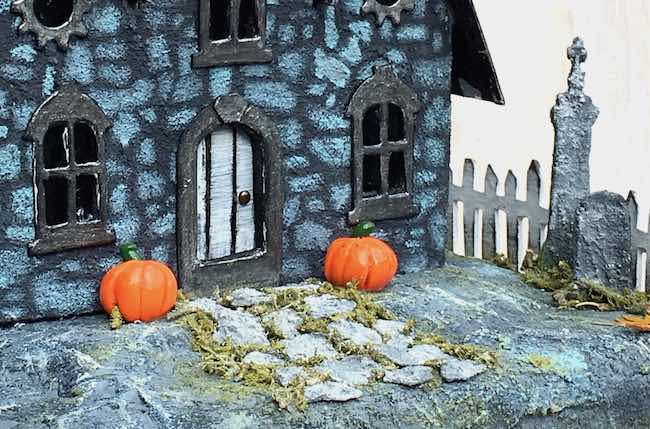
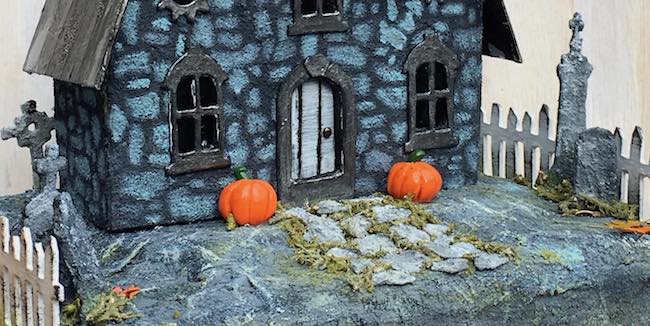
Landscaping Jeremiah's Stone House
And the mandatory rocky outcropping as the base is seen below. It's paper mache over corrugated cardboard painted with various layers of paints to mimic stone. I decided it was a little too barren so I cut some stepping stones from Tim Holtz Sizzix Thinlits Dies Set - Mixed Media #4. I wanted them to really look like stone so I painted them with thick grey paint heavily laced with sand. They are bumpy and have a stone-like texture. I highlighted them a little bit with Picket fence paint. In order to make the stepping stones stand out better, I ground up some moss I found, mixed it with Peeled Paint and mushed it between the stones when they were glued in place. I am very pleased with how this turned out.
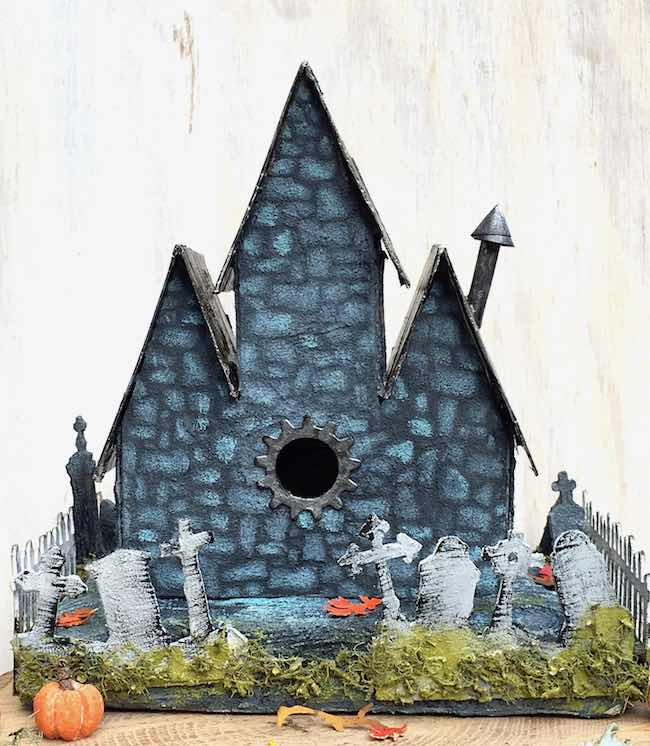
I even used the moss on the back graveyard. Later moss was added all around the house, but I took these photos before I did that.
Stone Texture on this Halloween Paper House
The walls are stenciled with the Stampers Anonymous Tim Holtz Mini Layering Stencil Set #28. I love this stencil. I painted the house with a dark grey (almost black) paint also mixed with a lot of craft sand. The texture is wonderful, I think. And it makes the house very substantial. The first color layer of the stenciled stones is Iced Spruce Distress Oxide Ink - a color I never thought I would use, but it's so perfect for stones that I use it all the time. Then I used Tumbled Glass Distress Paint and did the highlights with Picket Fence Distress Paint.
Village Manor Windows on Jeremiah's Halloween House
I wanted to do the Village Manor window frames a little different from the Stone Stenciled Clock House so I needed a different color - how about Brushed Pewter Paint? Another color that surprised me. I love the subtle shine.
Distressed Metal Roof for the Miniature Halloween House
The roof is made the way I do all my metallic roofs - metallic aluminum duct tape (also called metal dryer tape in the home improvement stores) on cardboard, grit texture paste, alcohol ink. I made this one darker and not so rusty-colored because the color of the house is in the blue-grey family. I also added some Brushed Pewter stain as well.
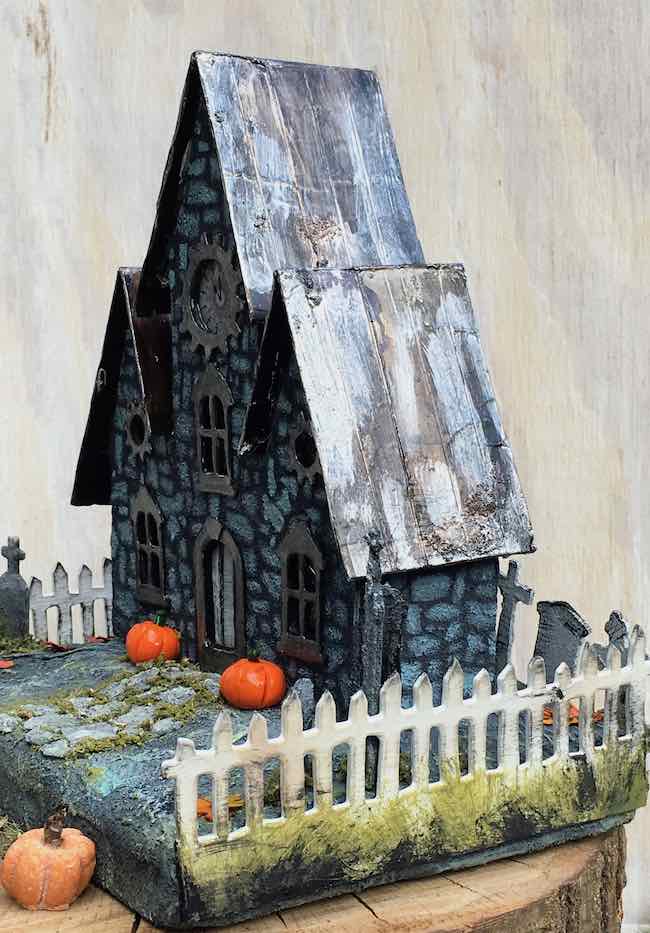
The fence is the Sizzix On the Fence edge die - a staple I cannot do without. The fence base is now covered with the Peeled Paint moss.
I added some embellishments from the new Tim Holtz Village Graveyard set. They were also painted with sanded grey paint and glued in place with moss at the base.
Add light to cardboard base
I think that covers most of the details of this Halloween house. There is space underneath the house for 2 LED lights so it lights up nicely. Here you can read about how to make a cardboard base with LED lights to light up your spooky little houses.
My friend is very happy about it. He loves Halloween so this adds to his collection from last year. Um. I just noticed that pumpkin looks like it has grown a tail. I don't think it is that conspicuous in real life. At least I hope not.
This pattern is modified from the Stone Stenciled Clock House pattern which is a variation of this little paper house on the Cardboard Christmas forum. Jeremiah's Halloween house is structurally different enough that I will eventually put a pattern here.
I am sharing this project to a couple of challenges - Simon Says Stamp Monday challenge this week is "A Walk on the Dark Side" featuring Tim Holtz products. Yes!! I love that theme. And then I will also add it to the Sizzix challenge for Tim Holtz Halloween 2017.
I hope everyone is well. Please take care of yourselves.
Lucy
Thank you Sara. This was a particularly successful house. I always appreciate your kind, enthusiastic comments.
Sara Barker
OOOH, Lucy! I missed this one! How fabulous! Congratulaitons on your Spotlight at SSS! So very deserving! Chuckling, because I am working on a post using similar elements. Boy,how I wish I could shrink down and walk through your scary house! Check with me on Wed. Hugs!
Kerstin F.
Gorgeous Lucy, love all the different ways that you have used this die, very creative!
Catherine
Wow, this is so cool! I love how spooky it is and the details are impeccable! Amazing job! Thanks for joining us on the Simon Says Stamp Monday Challenge.
Cathie ♥
Redanne
Another mini masterpiece Lucy!