Traditionally little glitter houses were lit by a bulb that was inserted in the back of the house. Sometimes people would take their Japanese Putz houses and cut a hole in the bottom to insert a light bulb, but the houses were not made that way.
I still usually cut a hole for a light bulb in the back, but I don't make it as big as I used to because we have LED lights now which are smaller and more powerful.
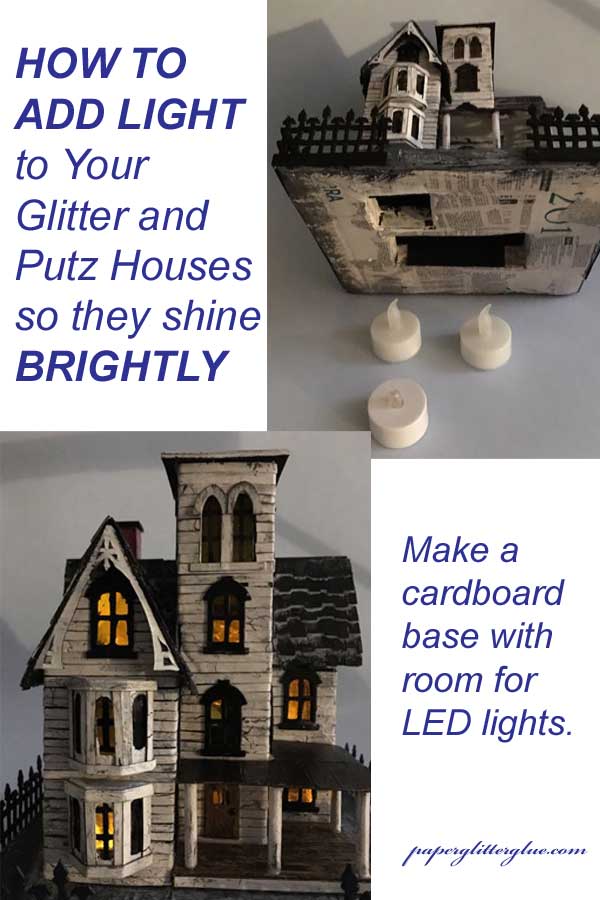
What I've started doing on some of my houses is cutting a rectangle in the base to fit 2-3 LED tea lights to illuminate the houses. I think the first one I did it on was the Abandoned Italianate House.
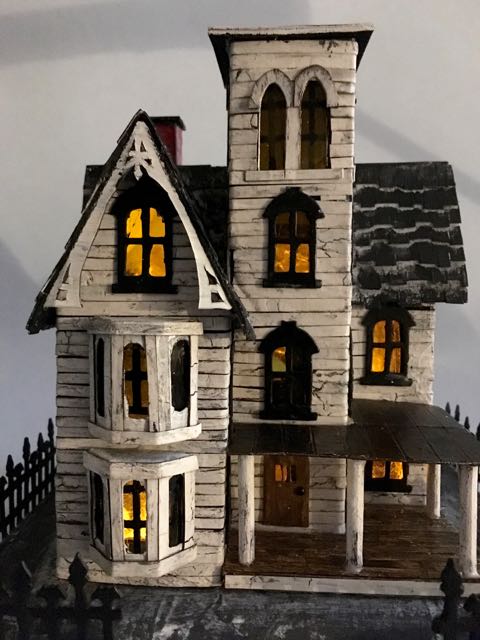
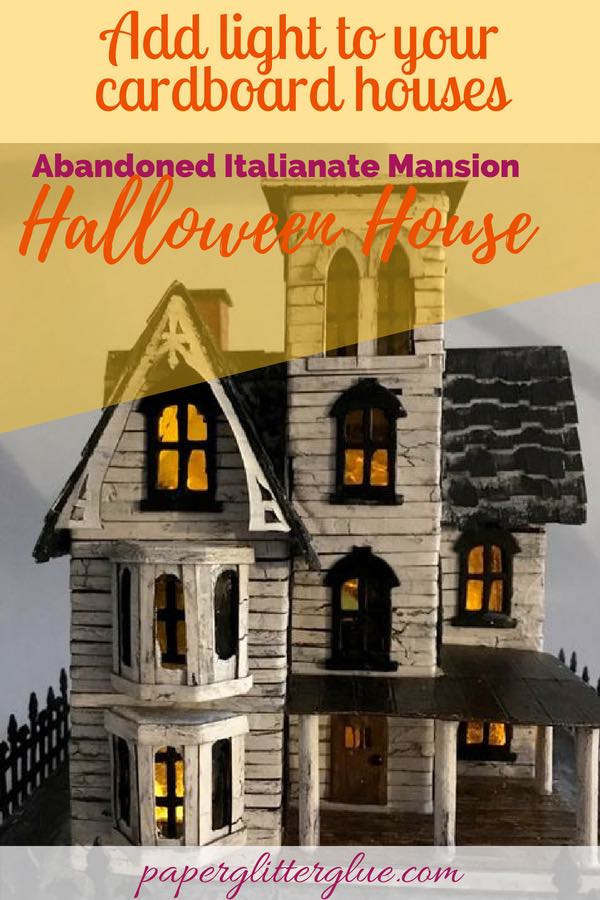
Abandoned Italianate Mansion Glitter House shining with LED lights
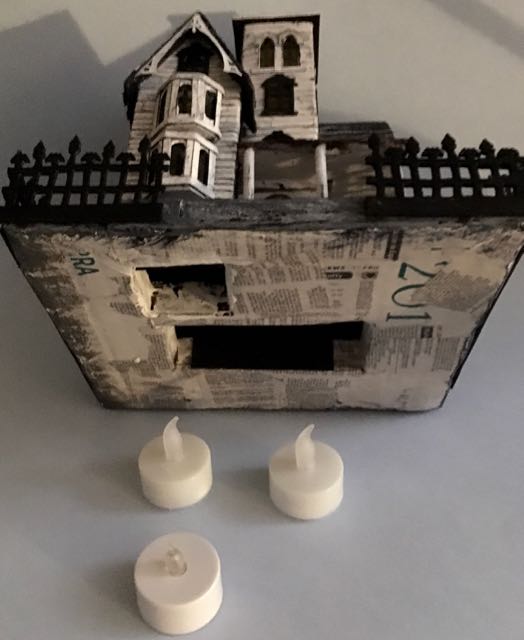
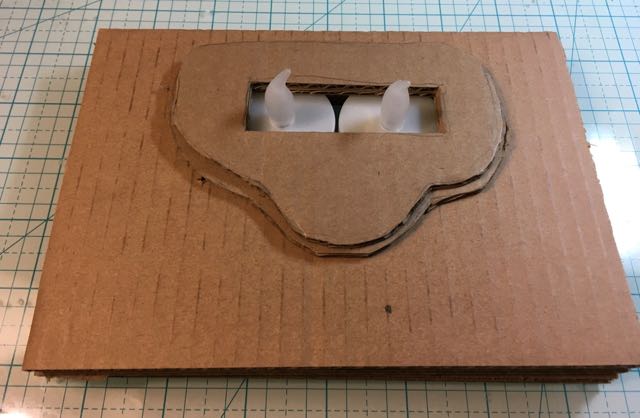
Cardboard base for the Abandoned Italianate Mansion with cut outs for LED lights to make the house shine in the dark.
You can see well this works for lighting the house. Also, the body of the tea light doesn't show up if you look in the house.
I've done it on my last 2 textured houses as well.
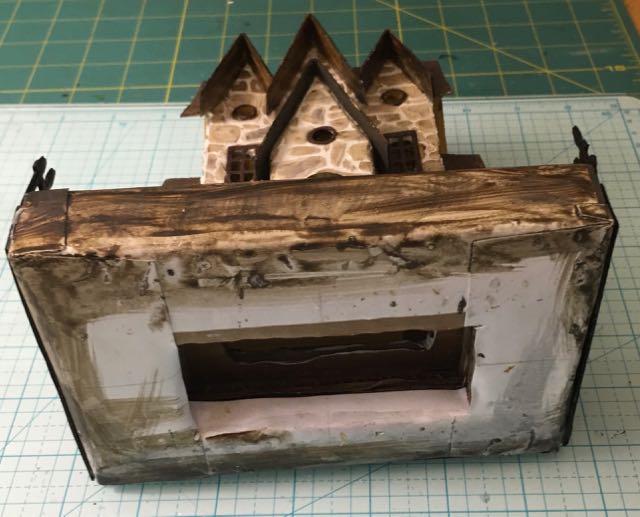
The Stone House with 3 Gables also has a base that allows good lighting for the house
Messy bottom on the Stone House, but you get the idea.
I'm going to go into a little more detail on how I made the base for my last house.
First, I've found it takes about 6 layers of cardboard for the depth of the base to cover the white bottom portion of the light. This is important in the this case because the diameter of the light is 1.5 inches and the width of the last 3 stone-textured houses I've made is 1.25 inches. I made them narrow to both save space and to be able to cut the entire house out of a 8.5 x 11 inch piece of cardboard. So I add a smaller piece on top to make a "hill" and to reduce the size of the hole and allow me to glue the house down effectively.
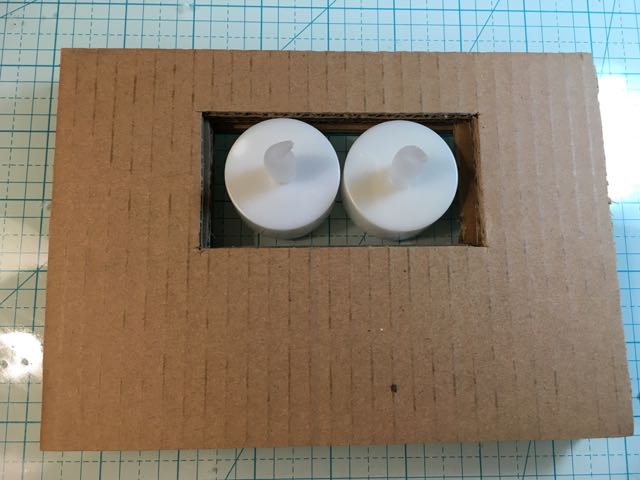
This photo shows how the "hill is made" to make the opening just a little smaller.
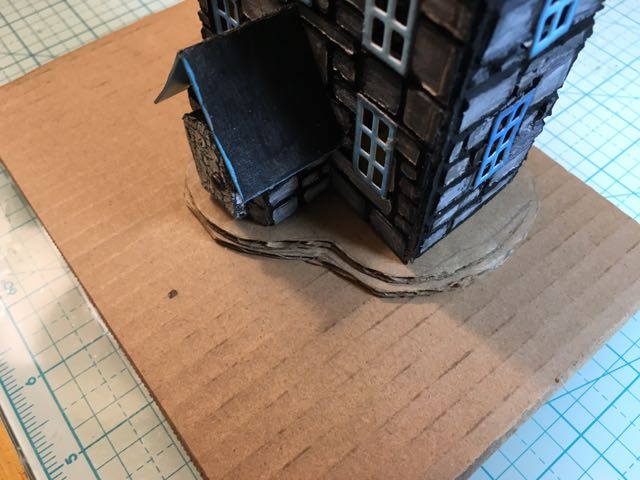

Here you can see into the house and see a little bit of the hole for the light in the back. When you want to insert the lights you just pick up the house and center the house over the LED lights and they fit very nicely.
Making bases for my little houses is not one of my favorite things in the creative process, but when I get them right, they really help make the house.
Pin to your favorite Pinterest board!
Feel free to pin this to your favorite Pinterest board
Pin this to remember where to find the directions for making a cardboard base to light up your little houses.
bon
Lucy, I always enjoy your posts. You explain not only how, but why. The crackled siding projects are awesome!
Bon
Lucy
Bonnie, thank you for telling me that. I always look forward to seeing your projects.
Lucy
Mary W
Lucy
Do most people light them with the tea lights or a string of lights? I'm unsure of how to make mine. They will be the smaller houses. Or should I just stick with the hole in the back? I've even toyed with the idea to make the back have a door to put a tea light or string light. Help!
Thanks, Mary
Lucy
Laney,
I first glue all the pieces together and while they are still wet with glue, wrap them in newspaper or scrap paper or even cardstock. I use cardstock when I am making a nice clean edge. I hope that helps. Thank you for asking these questions. It makes me feels like someone is reading my posts.
Caressa Goldschagg
Hi Lucy,
It's 2020 and I am so glad I found your site! So many helpful tips and tricks you are sharing with us. Thank you : )
Warm regards from New Zealand.
Caressa
Lucy
Caressa, thank you for taking the time to write. That is very nice. I am so glad you like my projects.
Lucy
Laney
I am having the best time reading all your posts Lucy! Thanks for sharing your base making process and showing the way you make the holes for the tea lights. Do you wrap each piece of cardboard in paper before you glue them all together? Or do you wrap the base in paper as a whole after all the layers are glued together?
Redanne
Great tips Lucy and always good to see the process! Anne x