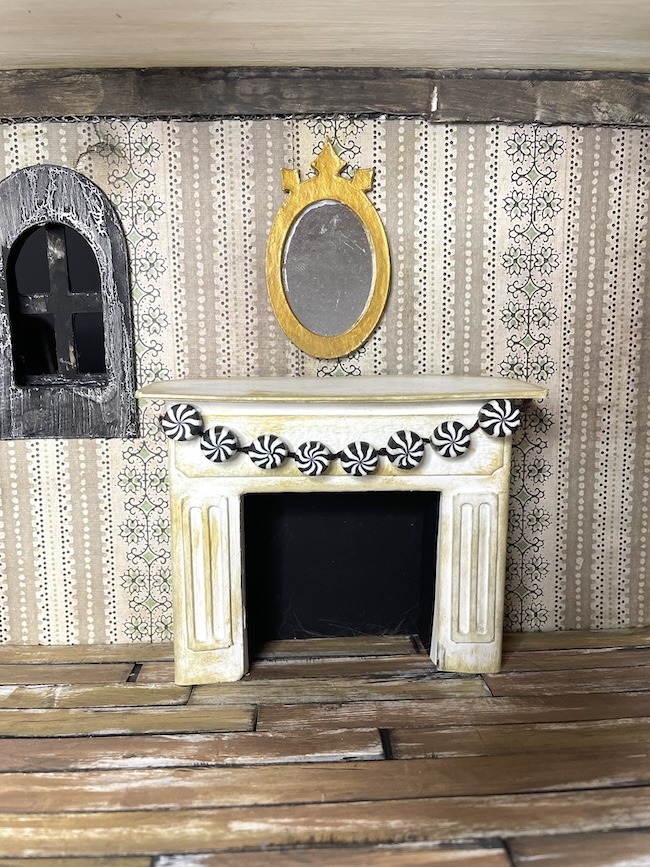
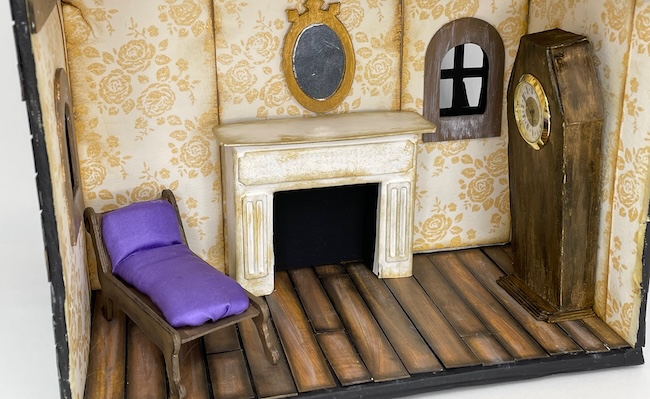
Today we're making an easy miniature fireplace that works with the Halloween dollhouse that I've made. You can use it for display with potion bottles on top or put it in a book nook. Another option is decorating it for other seasons. It's a very versatile craft piece.
Let get started with the Miniature Fireplace. To make the fireplace, use the password and simply download the pattern #194 in the Paper Glitter Glue library.
If you don't have the password, subscribe to my newsletter to get the password right away.

Materials to Make the Miniature Fireplace
You don't need much to make this cute little fireplace.
- Cardboard - lightweight cardboard like 22 pt cardboard or pasteboard cardboard works well
- Cardstock is another option - I prefer 110# cardstock for structural pieces.
- Gesso and paint if using cardboard
- Optional - Ink to distress the fireplace
- Glue - Bearly Art Glue or Aleene's Quick Dry Tacky Glue
- Binder clips or painter's tape help you hold pieces while the glue sets
- A cutting machine makes it much easier to make the fireplace. I use my Cricut Maker.
- LED lights are an option to put behind the fireplace.
Outline of Steps to Make the Miniature Fireplace
- Download Pattern no. 194 from the Paper Glitter Glue Library
- Upload the pattern to cutting machine or cut out the pieces by hand.
- Cut out all the pieces
- Fold along the score lines.
- Assemble the fireplace.
- For cardboard, paint the fireplace once assembled.
- Glue the base to the fireplace.
- Place your fireplace in a cute dollhouse or on display.
Now let's go into more detail about making the little fireplace.

Download the Pattern for the Miniature Fireplace - Design No. 194
First, go to my free Paper Glitter Glue library to download the cut file, click the big orange button on that page to take you to the password page.
Then enter the password that protects my files. If you don't have the password, just subscribe to my newsletter with the form below and you will get the password right away.
The Fireplace files are available as SVG cut files and also in a printable PDF format.
You can see all the pieces in the PDF files.

Note: There are two hearth pieces - one is slightly larger to allow you put lights behind the fireplace.
Upload the file to your Cutting Machine
Since I use my Cricut Maker, I upload to Cricut's design software. Here is how it looks when it is first uploaded to Cricut Design Space. Note that the one by one inch square is at the correct size.

This is the size the entire file comes in at - 10.69 inches x 10.16 inches.

There is only one set of score lines in the file - on the main fireplace structure. Be sure select the score lines, change them from cut to score, then attach to the main piece.

Now cut out all the pieces
Next cut out the pieces for the fireplace. For cardboard, I use the light chipboard setting (0.37mm).
If using a heavier weight cardstock, I use the Heavy Cardstock 110# (270 gsm) setting.

I included two pieces for the hearth, one is larger so you can more the fireplace forward a bit and add some holes in the back of the fireplace for tiny LED lights.
Fold along all the Score Lines
Before I start assembling my projects, I always fold along all the score lines. This is especially important if you are going to paint your pieces.

Assemble the Fireplace Structure
Since this fireplace is only one color, I assembled the fireplace before painting.
First, assemble the fireplace legs together and adhere. Then fold the piece underneath the mantle and glue to the top of the fireplace.
The photo below shows the legs assembled.


Add the decorative pieces to the front of the fireplace.

As usual, I like to make some of the pieces stronger. For example, I like to glue two layers of the mantle and base pieces together to make a stronger structure.
To make the background piece, paint it a dark color or use a darker colored cardstock. If you want lights in the back of the fireplace, poke a few small holes large enough to allow tiny LED lights to show through.
Glue the mantle to the top of the fireplace structure.
For cardboard, paint the pieces
If using cardboard, paint the pieces now.

Glue the base to the fireplace
Again, if you are adding a small string of lights to the back of the fireplace, move the fireplace slightly forward so you have room to add the tiny LED lights behind the fireplace.
You can also make some flames for your little fireplace.
Display your cute little fireplace where everyone can see it.
Do you have any questions? If so, please email me [email protected].
Thank you for reading.
Lucy
Leave a Reply