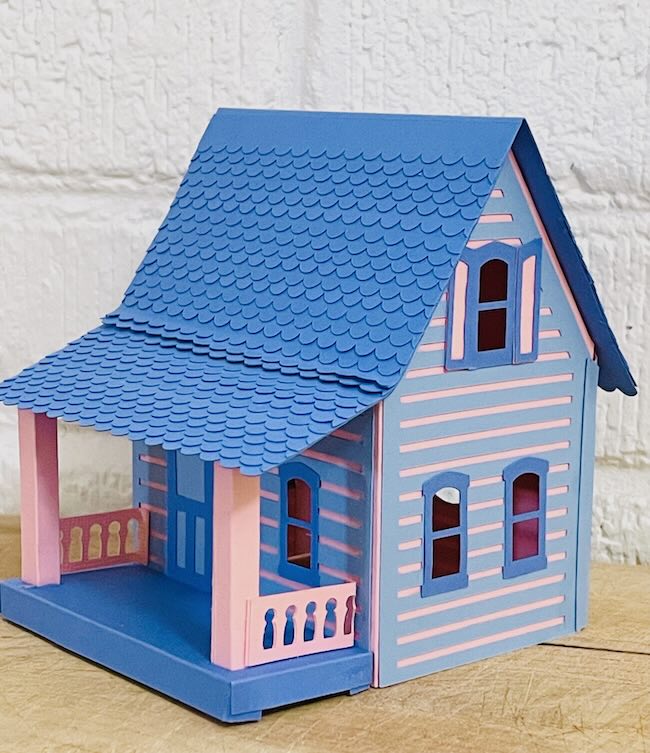
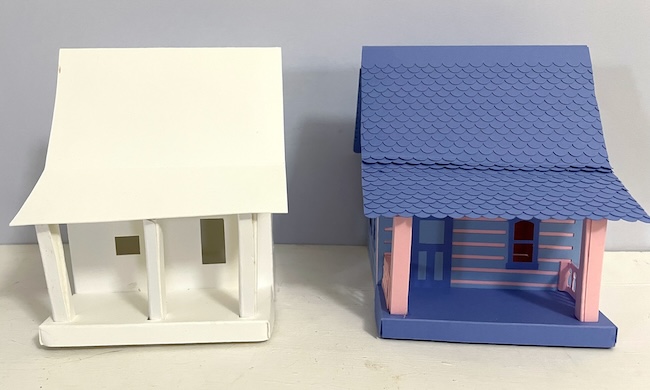
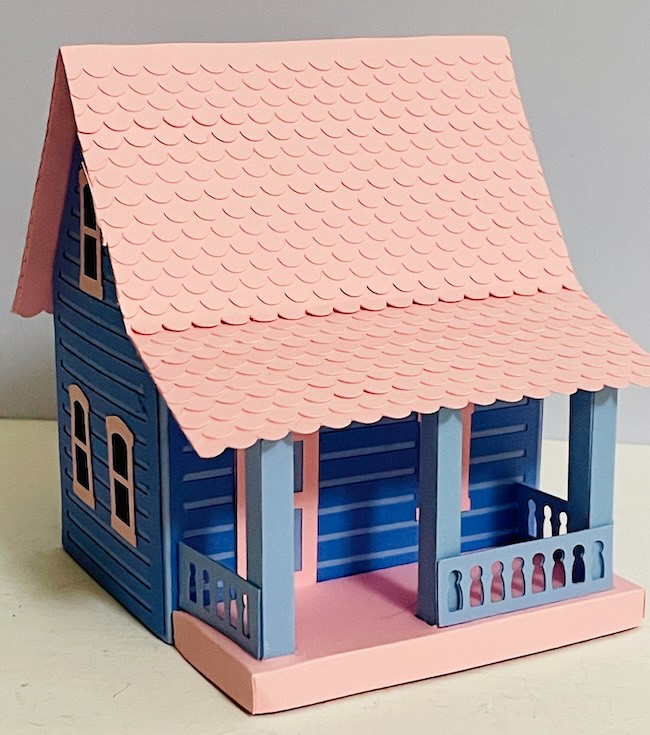
One of my friends ask me to make some Spring little houses to decorate for a bunny village so I came up with this idea for a Miniature Spring Cabin. I love pastel colors for Spring. This cabin has the option of a siding overlay, but you can omit that if you like. In addition, you have a choices for shutters or no shutters and 2 or 3 columns in the front of the cabin. This is a versatile little house pattern that works perfectly for Spring.
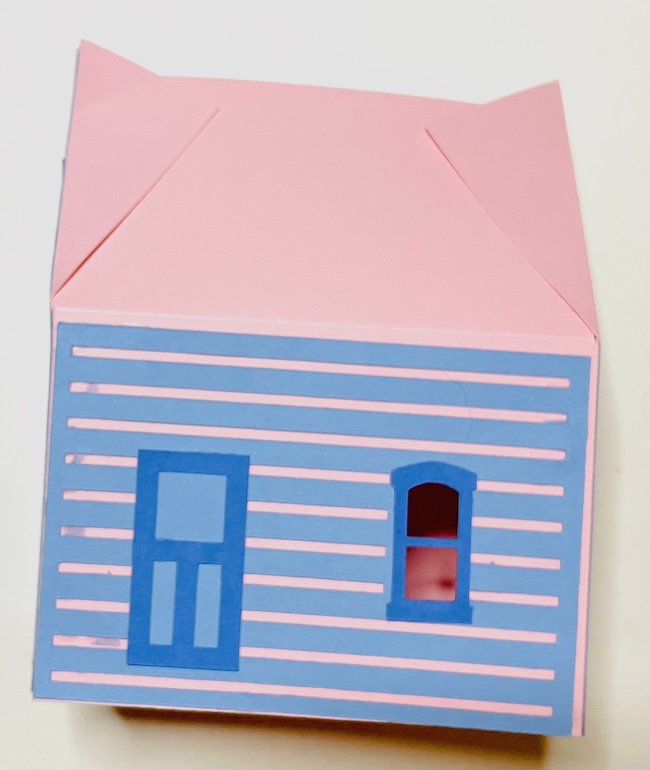
The house measures approximately 3.5 inches wide across the front, 4 inches deep and 4.5 inches tall. You can reduce or enlarge those dimensions if you like.
Be sure to subscribe to my crafty newsletter if you haven't already. That way I can let you know when I have new projects for you to make. Plus you get the password to my free Paper Glitter Glue library right way.
This post contains some affiliate links for your convenience. Click here to read my full disclosure policy.
What do you need to make the Spring Cabin?
- A way to cut out your pattern - I used a Cricut Maker, but it works well with the Cricut Explore Air, Cricut Joy Xtra
- Cardstock, cardboard, or watercolor
- If using Watercolor paper or cardboard, I use acrylic paints to decorate the Miniature Spring Cabin
- Cricut scoring stylus or scoring wheel for making score lines in the pattern
- Glue - I love this glue because it is easy to get out of the bottle, dries quickly and washes off my hands easily as well
- Springtime elements - tiny bunnies, birds, flowers or butterflies
Outline of Steps to make the Miniature Spring Cabin
- Download Miniature Spring Cabin pattern (Design No. 211 from the free Paper Glitter Glue library)
- Cut out all the pieces for the Spring Cabin - choose the porch base with 2 or 3 columns.
- Fold along score lines on all the pieces
- Paint if using cardboard or watercolor paper
- Adhere decorative pieces to main body of house
- Glue shingles in place on roof piece
- Make the house structure by inserting the back piece into the main house piece
- Glue down roof tabs to roof flaps
- Make the porch base and glue together porch columns
- Adhere the roof to the house
- Apply glue to the flap of the columns and adhere the front overhang of the roof to the columns. Make sure the columns are straight.
- Glue balusters around columns.
- Insert the bottom reinforcement to the base of the house.
- Decorate with spring elements - flowers, bunnies, butterflies, tiny birds for example
You can see my YouTube live video where I show you how to make the Miniature Spring Cabin.
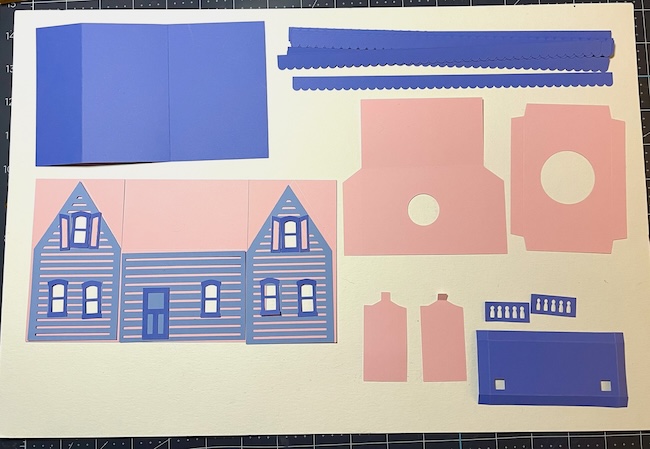
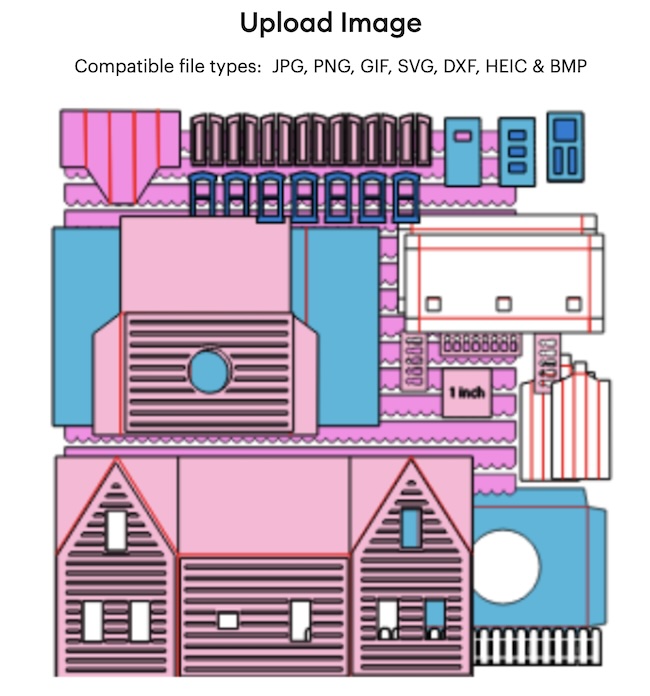
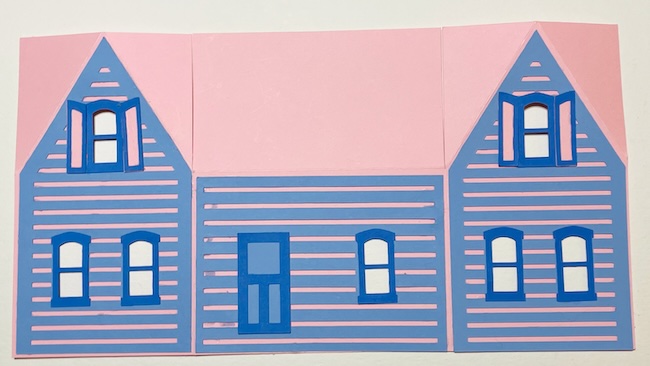
Below shows all the cut pieces for the Miniature Spring Cabin.
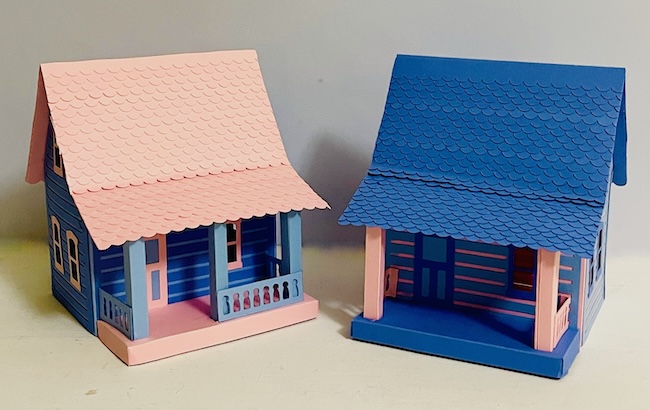
Choose either the 2 or 3 column porch base. In retrospect, I think the 3 columns looks more interesting.
1. Download Miniature Spring Cabin pattern - Design No. 211
First, download the pattern for the Miniature Spring Cabin from the Paper Glitter Glue library. It's Design No. 211. Simply click to enter the password page.
If you don't have the password to the library, subscribe to get my crafty newsletter with the form below and you will get the password right away. And please know that I will never send you spam or share your name or email address. You can always unsubscribe at any time.
The Miniature Spring Cabin SVG cut files are included with PDF files in a zipped (compressed) folder. SVG files are to be used for cutting machines.
If you need help unzipping the folder so you can see the files, see these instructions:
- Here's how to unzip a folder using an iPad or iPhone.
- To learn how to unzip a folder using a Windows computer, click here.
- To learn how to unzip a folder with an Android device, click here.
- To learn how to unzip a folder using a Mac, click here.
2. Cut out the pieces for the Miniature Spring Cabin
I use my Cricut Maker to cut out my pieces for the Spring Cabin. For this tutorial, I used card stock, but you can use a heavier weight watercolor paper, or cardboard for your cabin. If you use cardstock, use a heavier cardstock at least 80# cardstock.
When you use a cutting machine, you have to be sure to designate the score lines. I always draw my score lines in red so they are more prominent. On the first upload screen they do show up as red, but those lines do not show up as red unless you select the lines and see that the color box is red.
This is the upload screen where you can see the red score lines.
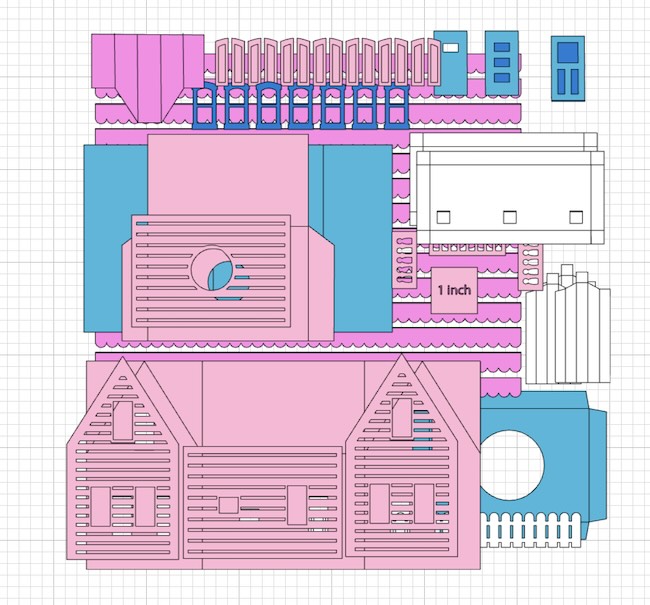
But when the file is uploaded these lines no longer show up as red unless you specifically select them.
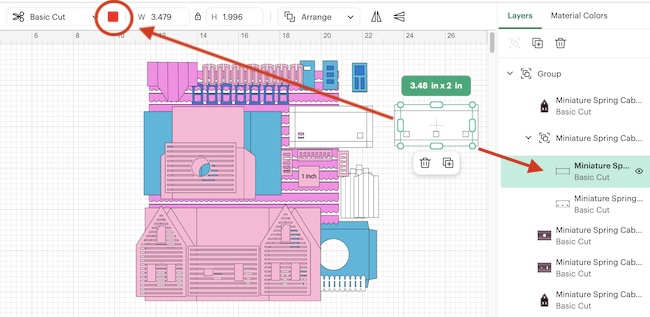
You can see in the photo below that the score lines on the porch base are selected in the Layers panel of Cricut Design Space. The color box on the upper left corner shows red.
The pieces with score lines are:
- Main body of the Spring Cabin
- Back piece for the cabin
- Roof of cabin
- Porch pieces (choose the piece with either two or three columns)
- Columns
- Base piece
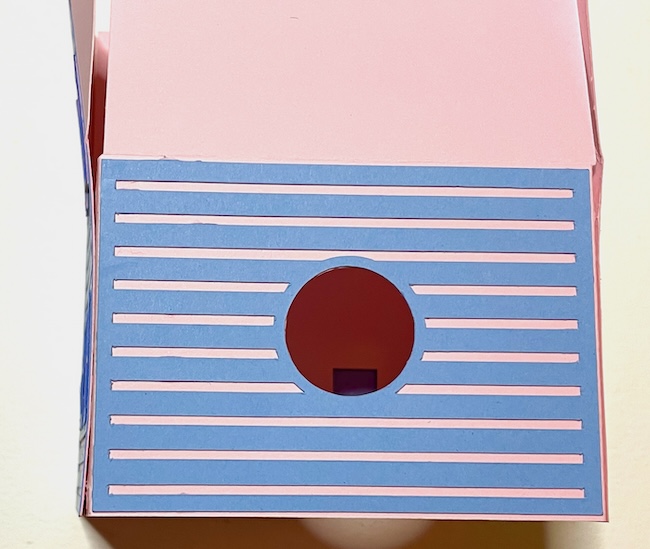
- Chimney
Be sure to select the score lines in the layers panel, go to the operations menu, choose score and then back to the very bottom of the layers panel and click on attach. That way your machine knows to score on the piece to which it is attached.
3. Fold along score lines on all the pieces
Now is a good time fold along all the score lines. If you are using a material like watercolor paper or cardboard that requires painting, be sure to fold along the creases well because paint somewhat obscures the score lines.
4. Paint if using cardboard or watercolor paper
I really like to paint my little houses because I think it adds so much personality to the projects, though I did not do that for this tutorial. I just want you to know that it is an option.
5. Adhere decorative pieces to main body of house
I included a siding overlay for all the pieces. Use that if you like. Then apply the windows and shutters if you want. It's much easier to glue these decorative pieces on while the body of the house is still flat before assembly.
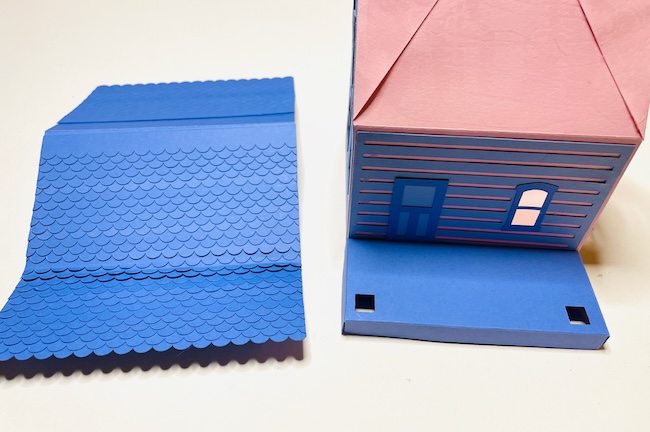
6. Glue shingles in place on roof piece
Just like the main house pieces, it's easiest to glue the shingles on the roof piece before you adhere it to the house. See the hints below.
The pattern includes 9 inch shingles, just cut them in half before you glue them to the 4 inch wide roof piece.
Start on the roof edge that covers the porch. When you get to the fold line for the porch, trim the last strip of shingles so that it does not extend past the score line as shown below.

The next strip will overlap the score line just a bit, but the scalloped edge bends easily as shown below.
Don't worry about lining up the edges until they have all been glued in place. Just trim the edges with scissors after you have finished gluing the shingles on the roof piece and before you glue the roof piece to the house.

If you forget and glue the roof on before you've added the shingles, they actually go on fairly easily even after adhering the roof in place.
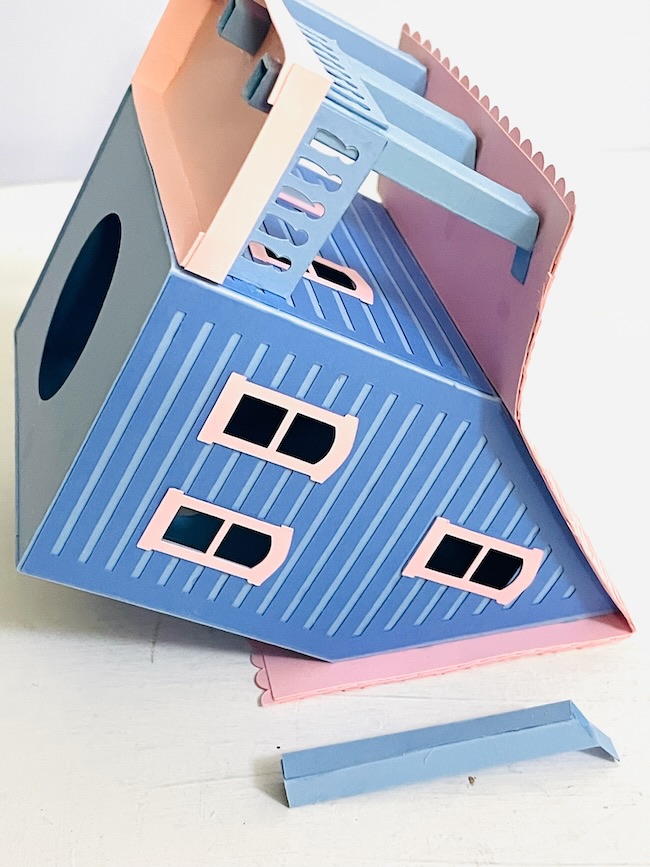
7. Make the house structure by inserting the back piece into the main house piece
Apply glue the back piece tabs and insert into the front piece.
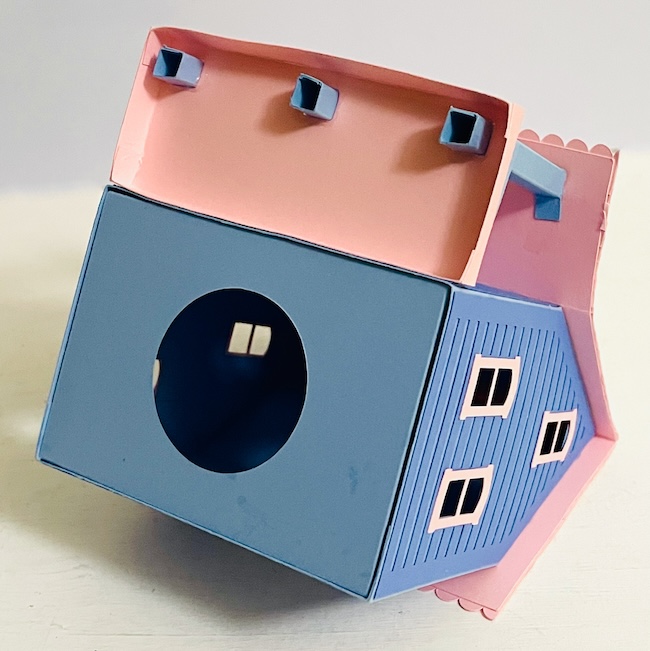
8. Glue down roof tabs to roof flaps
The photos below shows the angled roof tabs glued to the roof flaps.

9. Make the porch base and glue together porch columns
Here are porch pieces. Remember you can choose the 2 or 3 column pattern piece for the little Spring Cabin. After I made the first one with just 2 columns, I decided I liked the 3 column pattern better.

Here is the porch glued to the house.

Glue the columns together. Apply glue to the base and insert the columns in the square spaces.

10. Adhere the roof to the house
When you already have the shingles on the roof, it has weight and is much easier to adhere to the body of the house. Just apply glue to the top of the house so the roof adheres at the edges of the gables and along the front and back edges.
11. Apply glue to the flap of the columns and adhere the front overhang of the roof to the columns.
The little flap on the top of the columns helps provide more surface area for the glue, but you can also apply pressure to the tab and get the column to adhere better.
12. Apply balusters to the porch columns
To adhere the balusters, apply glue to along the bottom and the side edges. Glue in place.
13. Glue the bottom support in place
14. Decorate your Miniature Spring Cabin with Spring Elements
Little bunnies, birds, flowers would all look great. Also you can use the fence to surround your adorable Miniature Spring Cabin.
If you have any questions, please let me know. You can always email me - [email protected] so I can help you.
Valerie
Cute cabin! Thanks for sharing.
Lucy
Thank you, Valerie.
I was very happy about the way the design worked out.
Lucy