There is something so timeless about Norman architecture—the sturdy tower, the long rectangular nave, and those beautiful buttresses that make the whole structure feel ancient and grounded. When one of my email subscribers requested a Norman-style church and gave me an outline of his design, I knew it would make a great craft I could share with you.
I found a Norman Church that is structurally very similar to my design. It's the St. Germans Priory Church in Cornwall, England.

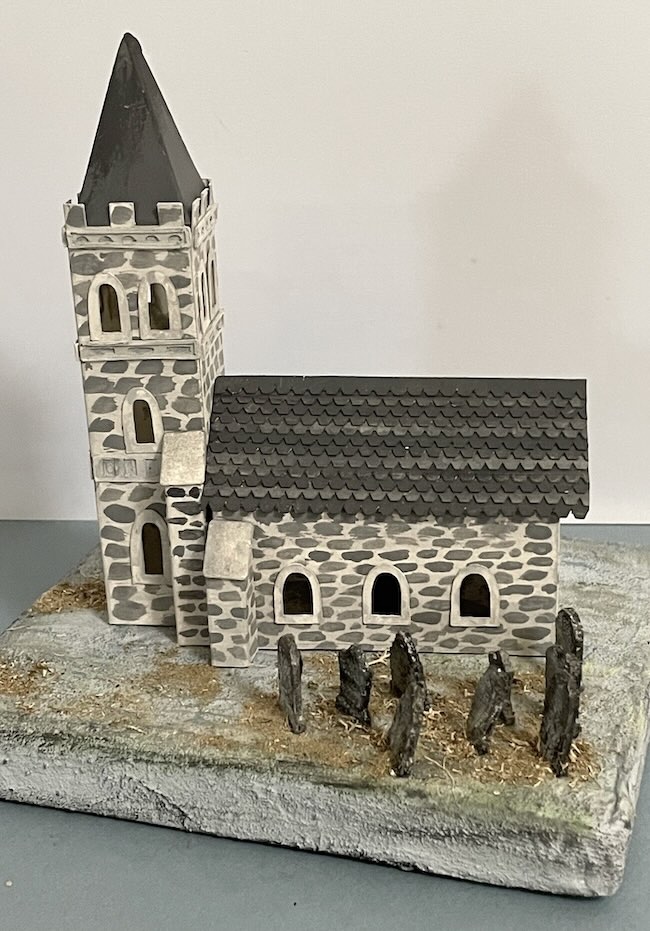
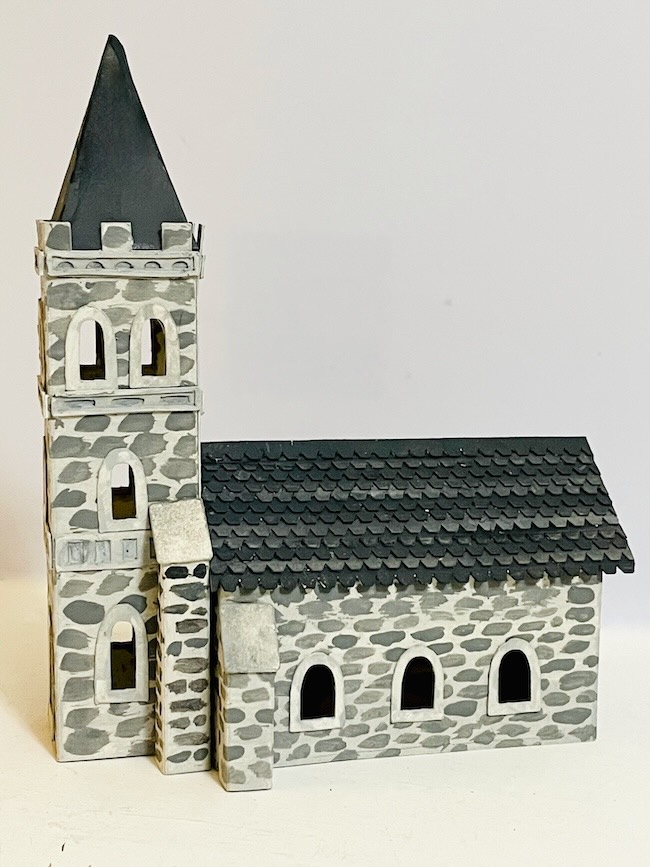
This design definitely looks Medieval with layered stone trim, a blocky front tower, and an optional steeple for added height. My design is 4.75 inches long and about 4 inches tall. It's 2.5 inches wide if you add the buttresses.
Get the Norman Church - Design No. 210 - from my free Paper Glitter Glue library. If you haven’t already subscribed to my crafty newsletter, be sure to do that first so you can get the password right away and download the pattern.
This post contains some affiliate links for your convenience. Click here to read my full disclosure policy.
What do you need to make the Norman Church?
- A way to cut out your pattern - I used a Cricut Maker, but it works well with the Cricut Explore Air, Cricut Joy Xtra
- 140# Watercolor paper or Cardstock
- If using Watercolor paper, I use acrylic paints to decorate the church
- Optional - Stone Stencil or Embossing folder for texture
- Cricut scoring stylus or scoring wheel
- Glue - I love this glue because it is easy to get out of the bottle, dries quickly and washes off my hands easily as well
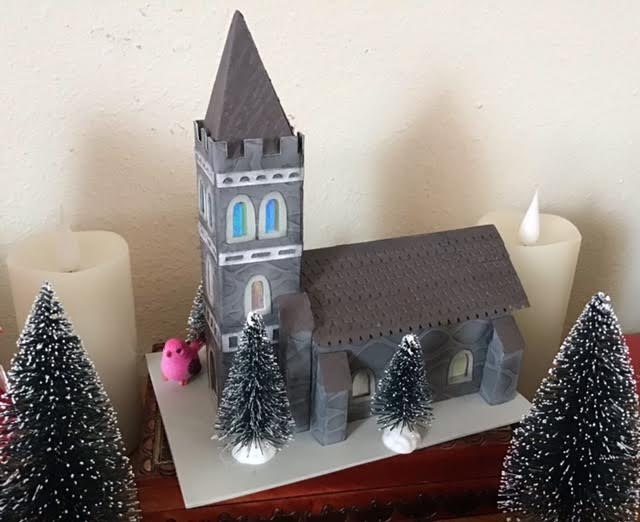
Here's a Norman Church made by Kay, one of my crafty friends.
Steps to make the Norman Church
Step 1. Download Pattern No. 210 from the Paper Glitter Glue Library
Download Design No. 210 from the Paper Glitter Glue library.
If you are not yet subscribed to my newsletter, simply sign up and you’ll receive the password immediately. The newsletter gives you access to my entire free pattern library plus updates on new designs, tutorials, and live videos.
The pattern is available in 2 formats - as an SVG file and a PDF file that you can print out.
Step 2. Cut Out the Pieces for the Norman Church
Here are all the pieces for the Norman Church in the SVG file:
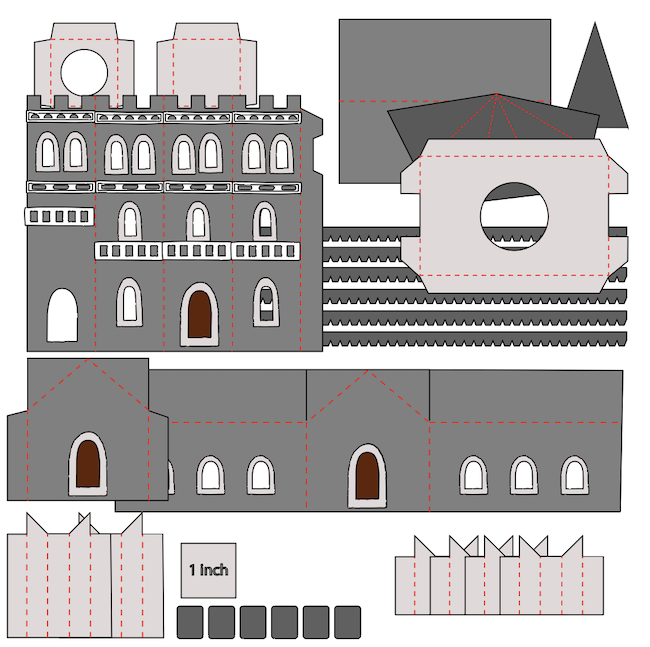
Cut out all the pattern pieces carefully. I use my Cricut for almost all my papercrafts because it makes it so easy to get nice cuts.
The important thing to remember when using a cutting machine is to designate the score lines as score.
I am using 140# watercolor paper for this project because it is very sturdy and paints beautifully. The heavier paper also helps support the tall tower structure.
Of course, you can absolutely use cardstock if you prefer. Choose a sturdy cardstock (#110 is great for this) so the tower and main body hold their shape well.
Score along all fold lines before assembling to ensure crisp, clean edges.
Step 3. Paint (If Using Watercolor Paper)
If you’re using watercolor paper, paint all the pieces before assembly. BUT be sure to fold along score lines before you paint. Painting does tend to obscure score lines.
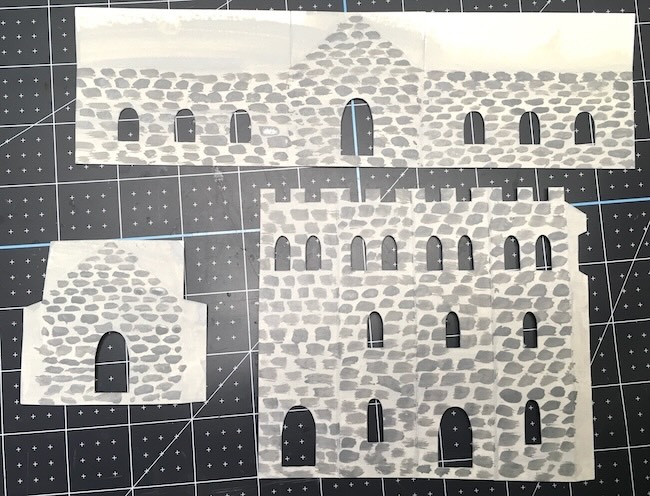
I like to use different tones of grey maybe with a little brown mixed in to mimic aged masonry. For the trim, I like to use a lighter color to give the church more depth and variation.
To get more texture, you can use an embossing folder to create a stone or brick texture before painting. But you know my favorite technique is to use a stone stencil and texture paste to really get the feel for stone. See my stone texture tutorial for more information on that.
Allow all pieces to dry completely before moving on to the next step.
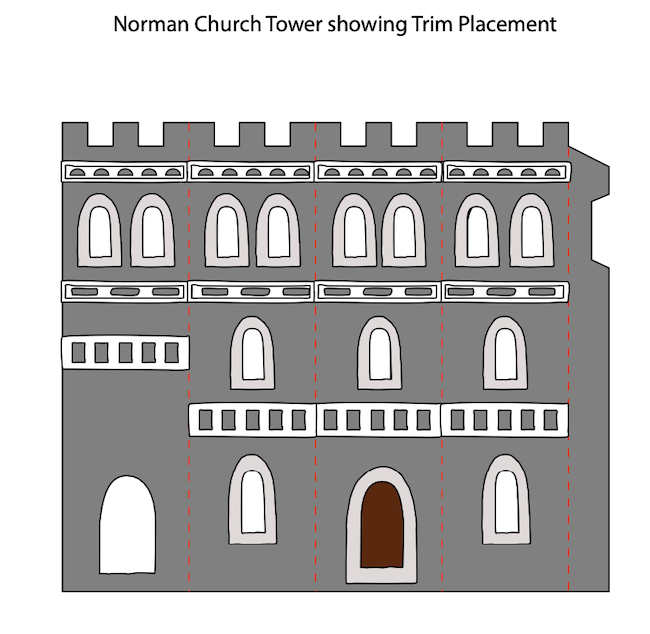
Step 4. Adhere Trim and Windows While Pieces Are Flat
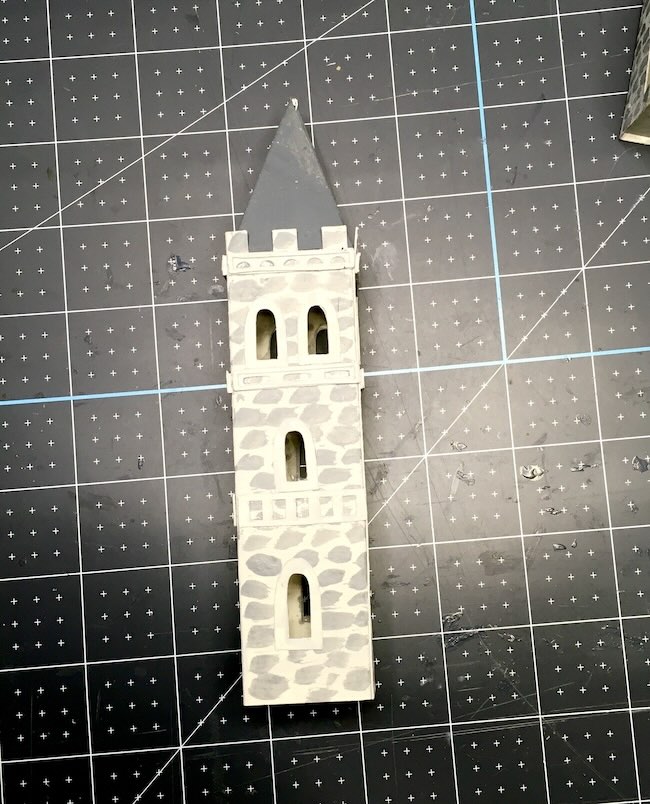
Before assembling the structure, glue all trim pieces and window details onto the tower and main building sections. See the tower trim in the photo below.
The trim on the main body of the church is show below. It is actually quite simple. The tower is the showpiece for this church.
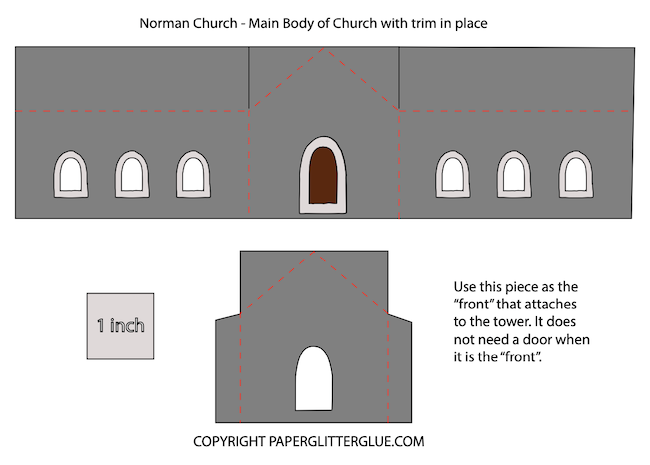
It is much easier to align windows and the stone trim while the piece is still flat.
Let the glue set before you continue.
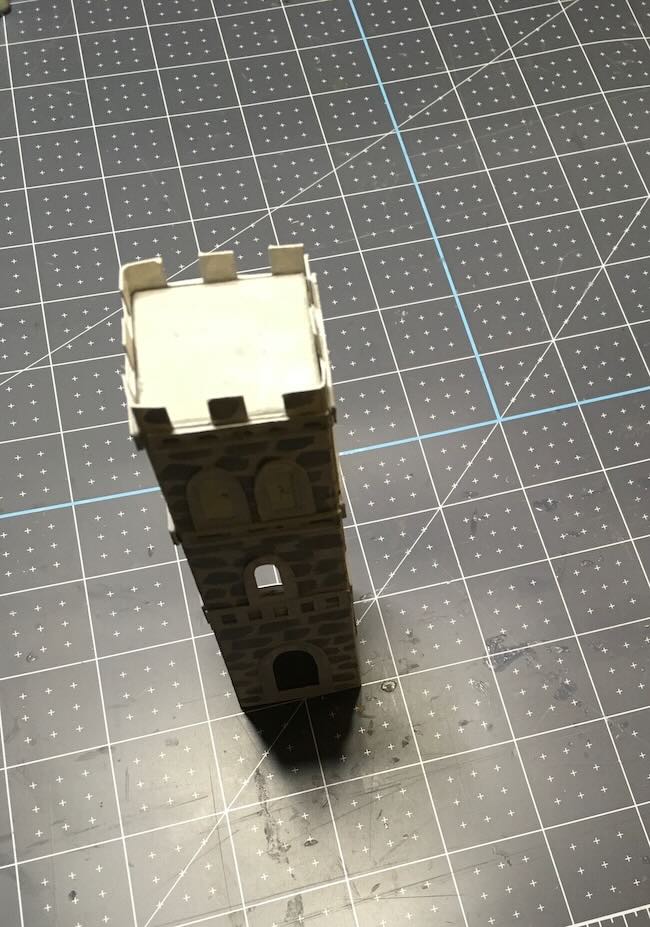
Step 5. Assemble the Tower and Main Body of the Church

Assemble the Tower
Glue the tower together by adhering the side tabs to form the rectangular tower. Hold in place until fully set.
Assemble the Main Body
Insert the gable piece to the 3 sides of the main structure to form the long main structure of the church.
Next, glue the roof tabs to the roof flaps to secure the roof in place. Make sure the roof is aligned evenly before the glue sets.
Set both pieces aside to dry completely.
Step 6. Make the Steeple and Roof
Glue the steeple together along the side glue tab.
Dark grey shingles look wonderful on the main roof and add great texture and definitely fit the time period because they look like slate.
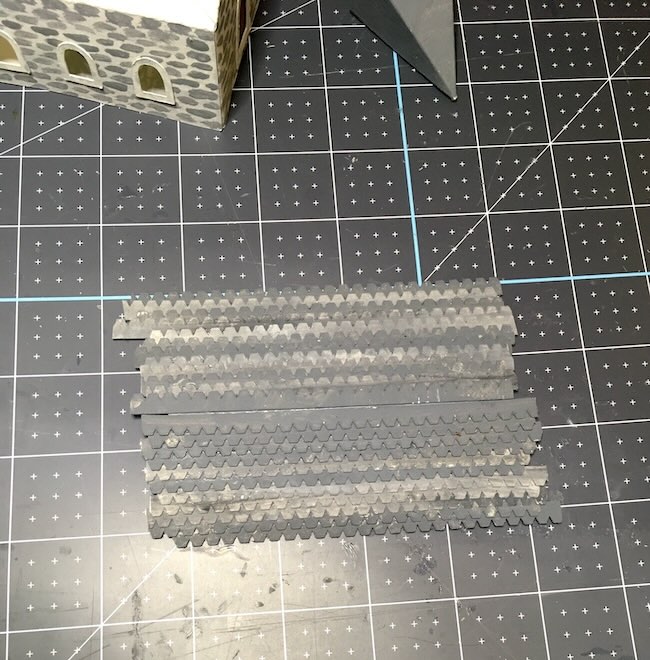
Set these pieces aside until the structure is ready.
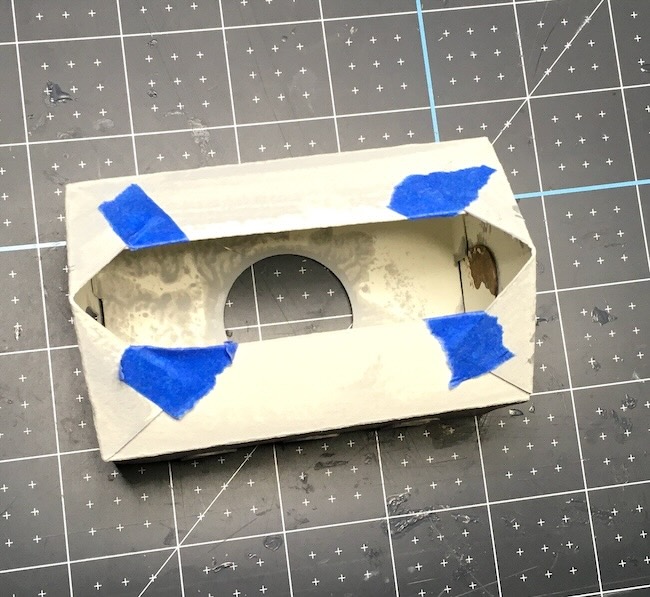
Step 7. Glue the Bottom Insert into the Main Structure
Glue the bottom insert into the base of the main church structure.
This insert helps the building keep the corners square and gives the base extra stability.
Step 8. Add the Tower Inserts
Use the solid insert for the top of the tower first.
This insert is important because:
- It supports the steeple if you choose to add one
- It strengthens the tall tower structure
You can use the bottom insert (which has a circular cut out), but I didn't think it was necessary so I left that piece off.
Step 9. Make the Buttresses (Do Not Attach Yet)
Assemble the buttresses by gluing along the side glue tabs.
Do not glue them onto the church yet. These should be the last pieces attached to the structure.
The buttresses are optional, but they add wonderful Norman character and visual weight to the design.
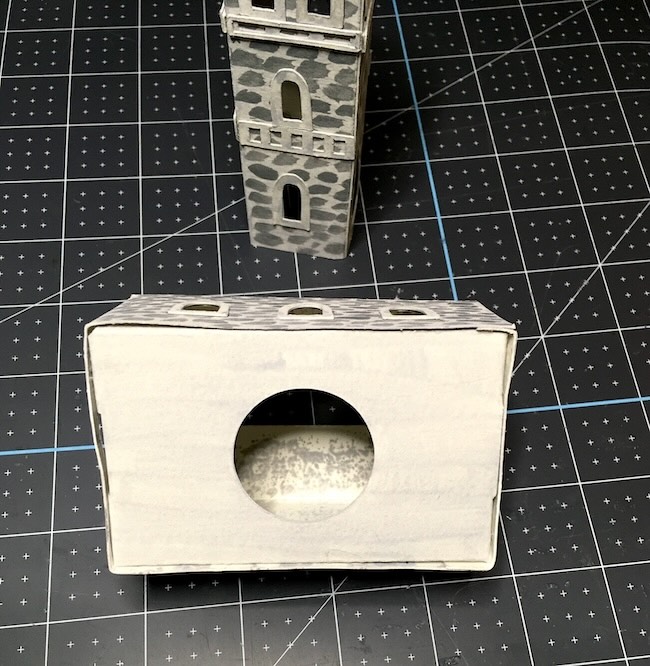
Step 10. Center the Tower on the Main Structure
Center the tower over the front of the main structure.
Line up the door cutouts on the tower and main building—this makes it much easier to center the tower accurately.
Step 11. Adhere the Tower to the Main Structure
Once centered, glue the tower securely to the main body of the church.
Hold in place until fully set and stable.
Step 12. Glue the Buttresses in Place
If you’re using the buttresses, glue them in place now.
Attach them carefully along the sides, making sure they are evenly spaced and straight.
Step 13. Attach the Church to the Base (Optional)
Finally, glue the completed church to the base if desired.
This step is optional but recommended if:
- You plan to display the church in a village
- You want added stability
- You plan to decorate the base with landscaping
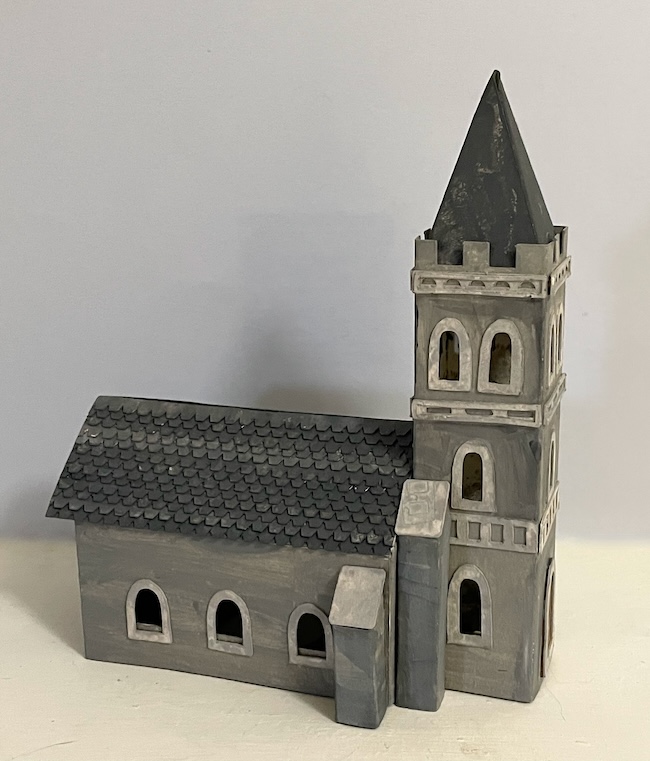
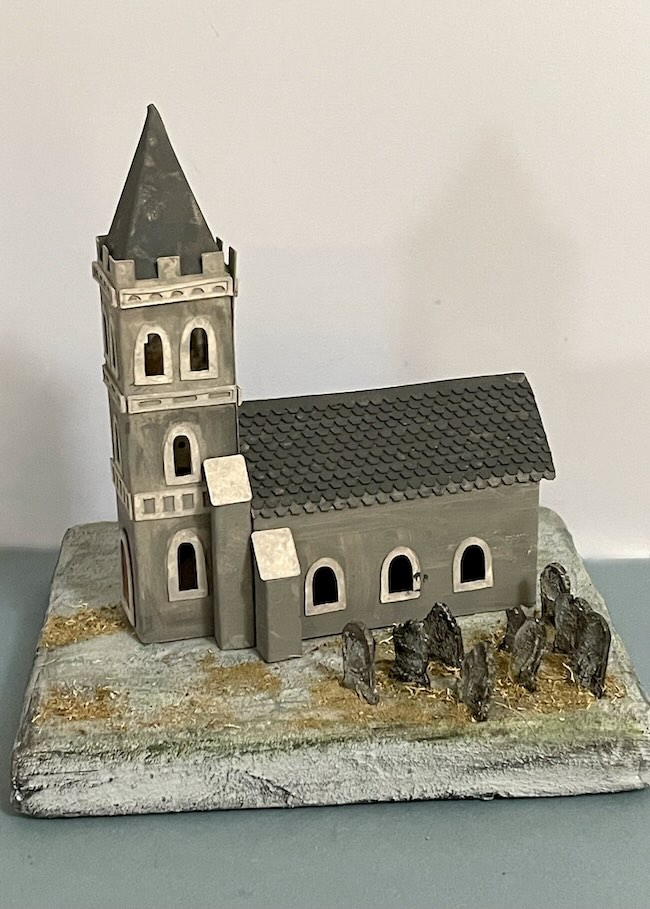
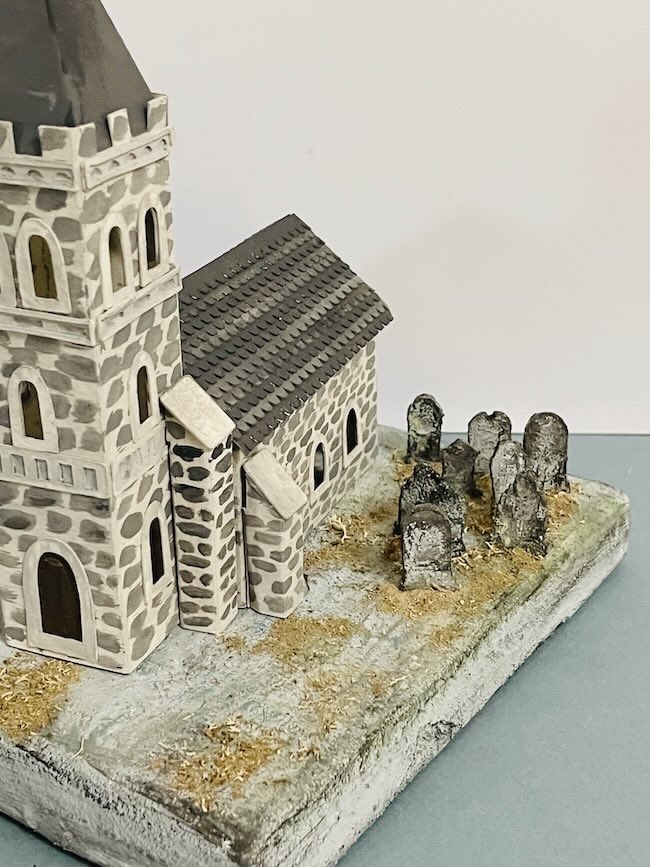
Here's are two landscaped versions with an old graveyard on the side. (I didn't glue them to the base yet so I just switched them out to see which one I like better.)
Well, those are the steps for making the Norman Church. I would love to see your version. It is always inspiring to see your work. If you have any questions, I will be happy to help you. Just email me - [email protected]
Thank you for reading.
Lucy
Nancy Marsh
That church is beautiful! I love how you made the tombstones look aged!
Lucy
Thank you, Nancy.
Jean C.
The ancient cemetery is the perfect touch. I think it looks very realistic, not at all Halloweeny. I prefer the church in solid gray.
Lucy
Thank you, Jean. I do value your opinion.
Lucy
John Herd
That’s fantastic Lucy, well done. I can’t wait to see others making it.
Lucy
John, thank you for the inspiration and the pattern. I have my version almost completed. I post a photo soon.
Lucy
Judith
I quite like this church with the brick. Wouldn't it be cute in a village setting with a castle and old houses?! Thankyou for all your hard work and good patterns. Looking forward to the Easter creations.😊