
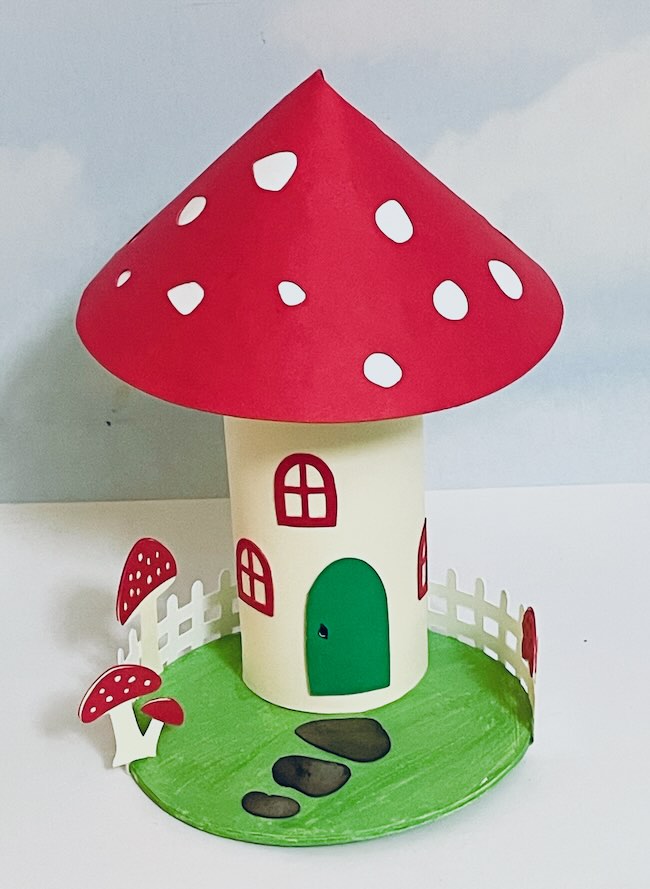
LEARN HOW TO MAKE A MUSHROOM FAIRY HOUSE - it's so easy
This Mushroom Fairy House is a perfect little house to make with kids because it's a simple structure made around a toilet paper roll.
This is no. 12 in the 12 days of the Fairy House challenge - the simplest and easiest house in the challenge.
Watch this video to learn how to make the Mushroom Fairy House on my Paper Glitter Glue YouTube channel! Be sure to subscribe to my channel so you know when I post another new paper craft project.
This post contains some affiliate links for your convenience. That means if you make a purchase after clicking an affiliate link, I will earn a small commission but it won’t cost you a penny more. Click here to read my full disclosure policy.
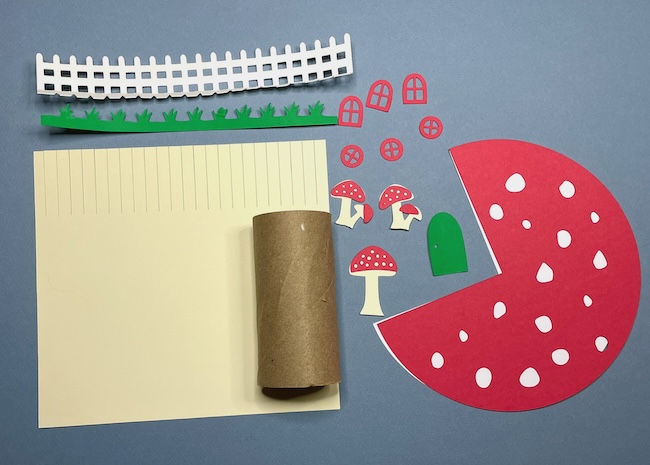
Materials to Make the Easy Mushroom Fairy House
- Card stock - Because I wanted to make a very simple house, I used 65# card stock.
- Cardboard roll - a toilet paper roll will do, but you can purchase them from Amazon.
- Cardboard - you know that cardboard is my favorite material for making houses - 22 point cardboard works well. I am going to make a painted, cardboard version of the Easy Mushroom house.
- Gesso primer if you chose to use cardboard for this house
- Acrylic paint if painting cardboard
- Glue options - Quick Dry Tacky Glue for the structure of the cardboard house or Bearly Art Glue for gluing card stock together.
- A way to cut out the pieces, I use my Cricut Maker but you can use other cutting machines to make this Fairy House
Steps to Make the Easy Mushroom Fairy House
- Download the free pattern from the Paper Glitter Glue library - Design No. 165
- Cut out the pattern for the house, the roof, and mushroom decor
- You can use cardboard for this house if you choose. If so, prime and paint your house pieces
- Glue the house structure together around a toilet paper roll
- Make the cone-shaped mushroom cap
- Make a circular base for the mushroom fairy house
- For this house, it's easier to decorate the house with windows and doors before gluing the mushroom cap on
- Glue the fence to the circular base
- Apply glue to the fringe on the mushroom stem, then glue the red mushroom cap on
- Adhere the the house to the base
- Decorate around the base with the small mushroom cutouts
- Share your adorable mushroom creation!
1. Download the Pattern for the Mushroom Fairy House - Design No. 165
This pattern for the Mushroom House is free in the Paper Glitter Glue library as Design No. 165. My files are available in 2 formats - SVG cut files for cutting machines like the Cricut Maker or Cricut Explore and PDF files you can print out.
If you already subscribe to my newsletter, then you already have the password located at the bottom of every email I send.
If you don't have the password, simply subscribe with the form below and I will send you the password right away. Don't worry. I will never send you any spam and you can unsubscribe at any time.
Please note that the pattern files are in a zipped format. That is, they are compressed so they can be downloaded relatively easily. If you need help unzipping the files, these instructions below will help.
If you are having difficulty unzipping the folders, here are the instructions:
- Here's how to unzip a folder using an iPad or iPhone.
- To learn how to unzip a folder using a Windows computer, click here.
- To learn how to unzip a folder with an Android device, click here.
- To learn how to unzip a folder using a Mac, click here.
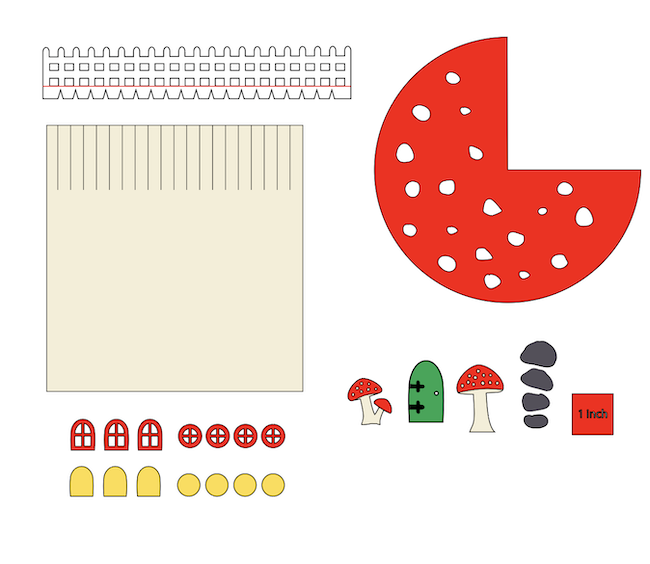
2. Cut out the pattern for the house, the roof, and mushroom decor
For these pieces, I used my Cricut Maker though you can make this house with any of the Cricut machines except the Cricut Joy. The piece that curves around the cardboard roll is too large to be cut out with the Joy, but it does work with the Cricut Joy Xtra.
I used 65# card stock for everything except the white backing to the red mushroom cap. I used regular copy paper for that.
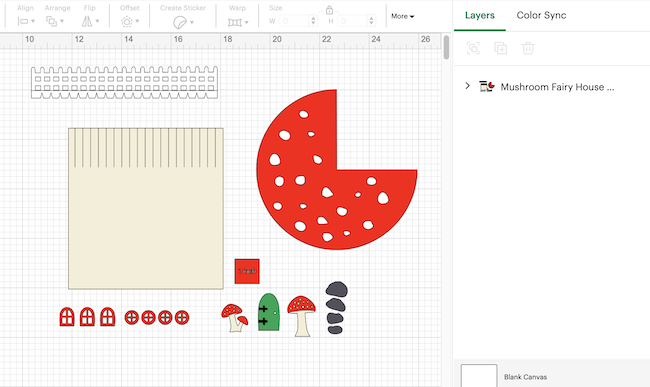
Here's how the design looks when first uploaded to Cricut Design Space.
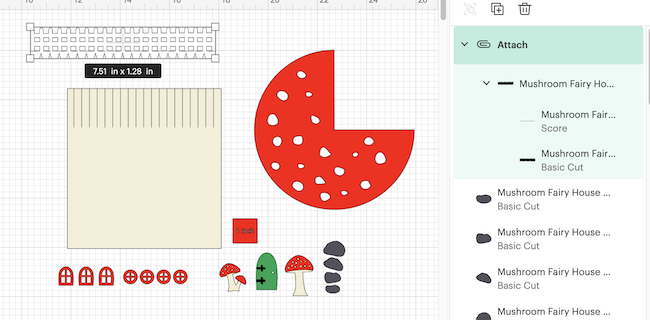
There is one set of score lines on the fence piece in the pattern. Select that line and be sure to change it to SCORE and attach it to the fence.
3. You can use cardboard for this house if you choose. If so, prime and paint your house pieces
4. Glue the house structure together around a cardboard roll
I used 65# card stock so it was easy to curve it around the cardboard roll. If you are using cardboard, you can lightly spritz it with water to make it curve. I think it's easier to use the cardboard roll as the structure even when you are covering it with card stock or cardboard.
5. Make the cone-shaped mushroom cap
Glue the white copy paper to the red mushroom cap. Then gently curve the mushroom cap into a cone shape. It's easiest to see how to do this in the video.
Also it helps to glue the mushroom cap into a cone BEFORE the glue dries from adhering the copy paper to the red card stock piece.
6. Make a circular base for the mushroom fairy house
I think this little house needs a cardboard base for stability. I glued 3 layers of cardboard together to make the base. Then I painted it green with acrylic paint.
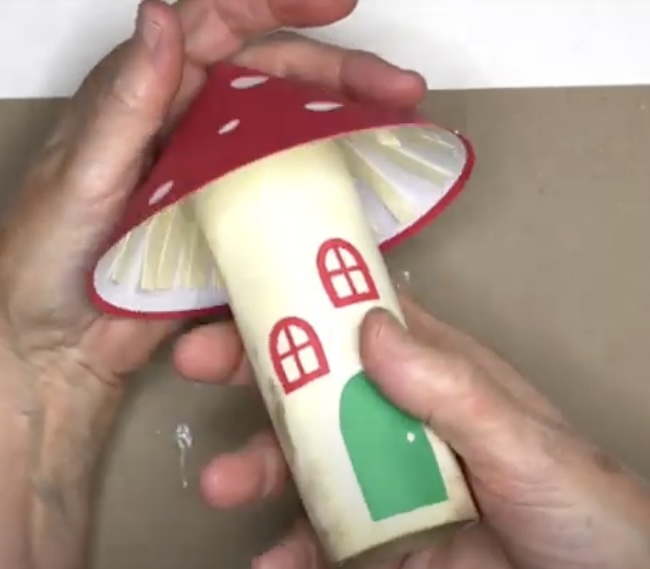
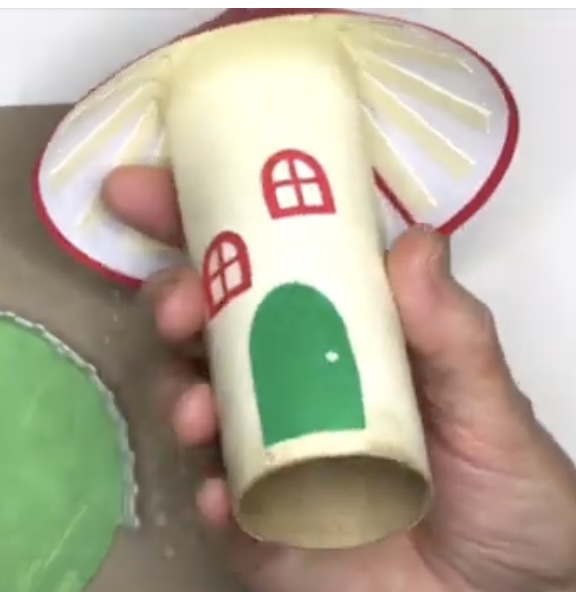
7. For this house, it's easier to decorate the house with windows and doors before gluing the mushroom cap on
Glue the windows and doors to the mushroom "stem" before you glue the mushroom cap on.
Please note: I added some yellow backing for the windows in the updated pattern. I think it helps the windows stand out more.
8. Glue the fence to the circular base
To adhere the fence to the base, apply glue to the tabs at the bottom of the fence. Then slide the tabs underneath the base while applying some pressure. You may have to use a little piece of painter's tape to hold each end while the glue dries.
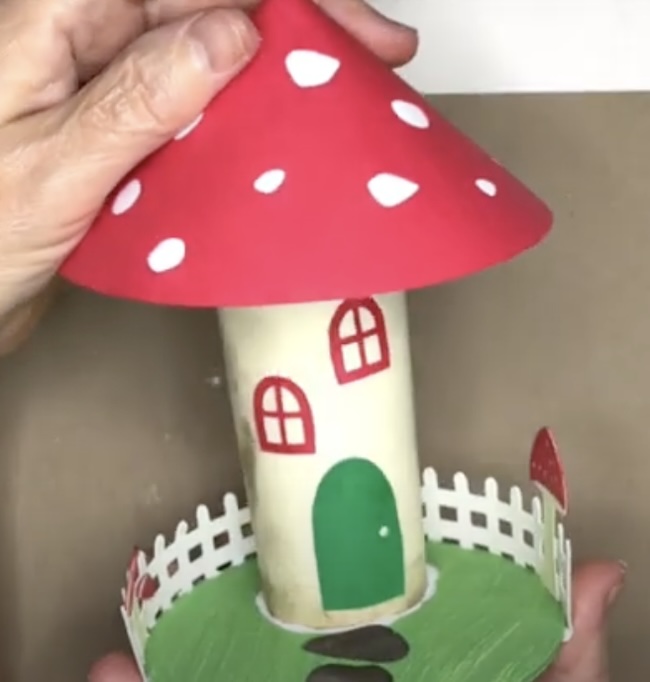
9. Apply glue to the fringe on the mushroom stem, then glue the red mushroom cap on
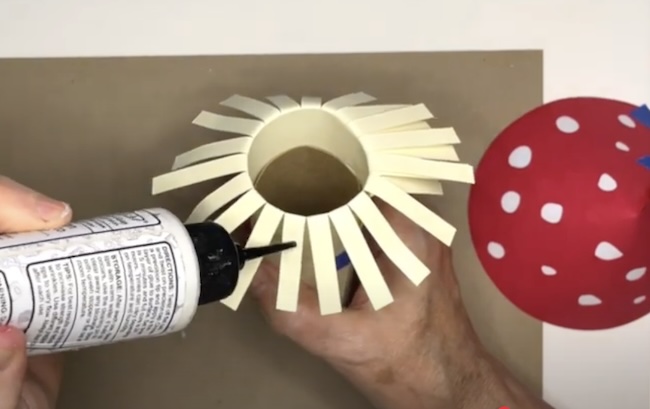
After you apply the glue, just apply the mushroom cap to the stem with a little downward pressure. The fringe pieces will spread out and hold the cap in place.
See how the fringe holds the cap in place?
10. Adhere the the house to the base
Apply glue to the bottom of the toilet paper roll and then glue the house to the circular base.
11. Decorate around the base with the small mushroom cutouts
Also add the stone cutouts as a pathway to the door.

12. Share your adorable mushroom creation!
I would love to see what you make. You can post in my Facebook group, share on instagram, or even email me a photo. It makes me so happy to see your lovely work.
Here's a photo of some of the fairy houses that Donna made. They are so cute.

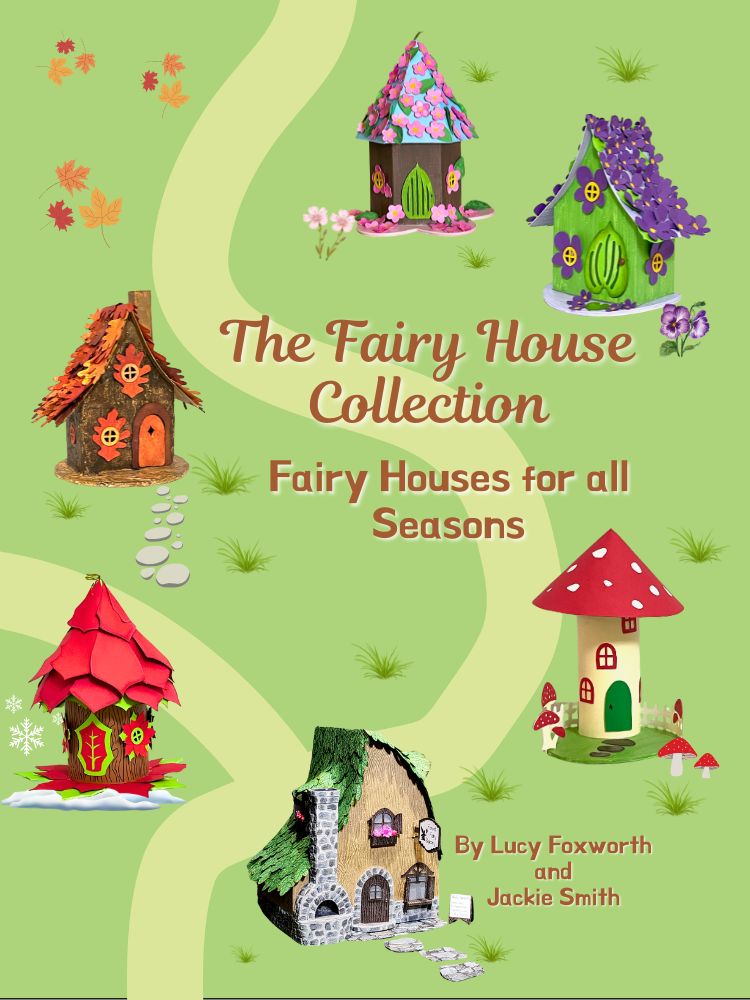
Now you can get the entire Fairy House Collection from my shop!
Discover the magic with our enchanting digital collection of fairy house cut file designs! Perfect for crafters and dreamers, these whimsical designs will transport you to a imaginative world. Each file is meticulously crafted, offering you the flexibility to create stunning fairy houses for decor or as unique gifts. These files make it easy to bring your fairy tale visions to life. Expand your creativity and captivate hearts with these delightful fairy house designs. Start your magical crafting journey today!
Questions?
If you have any questions, please email me - [email protected]. I'm always happy to help.
Thank you for reading.
Lucy
Leave a Reply