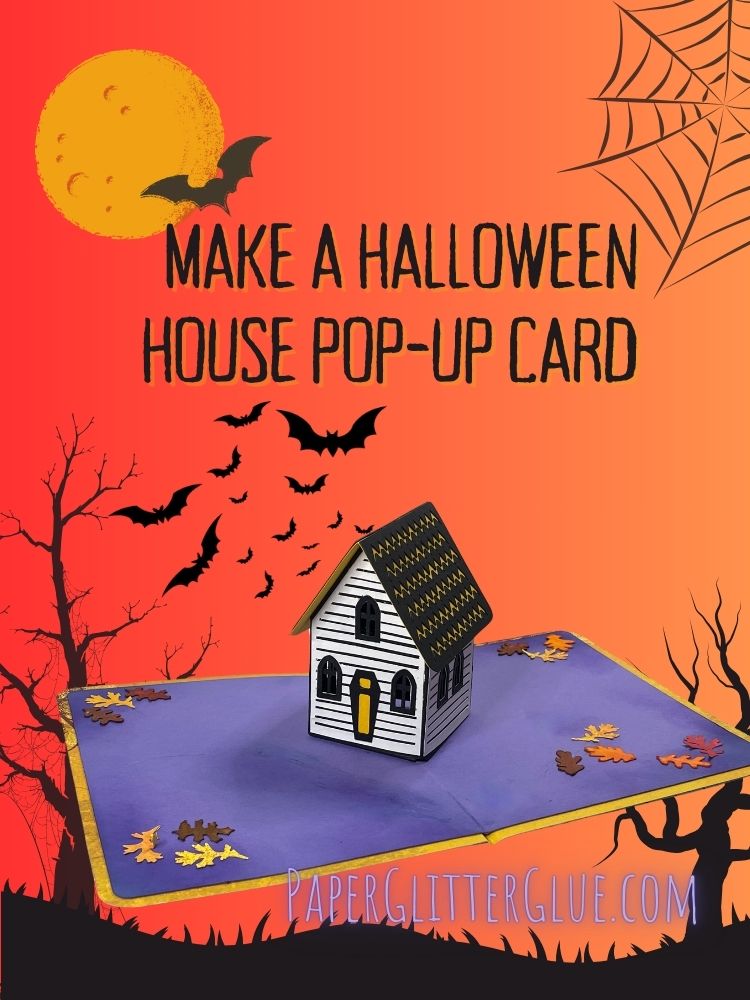
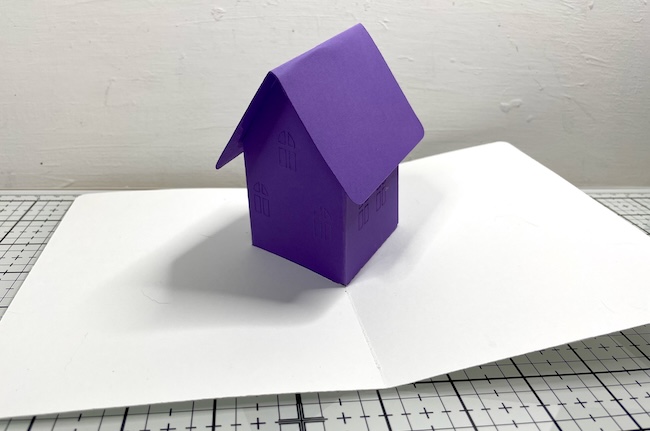
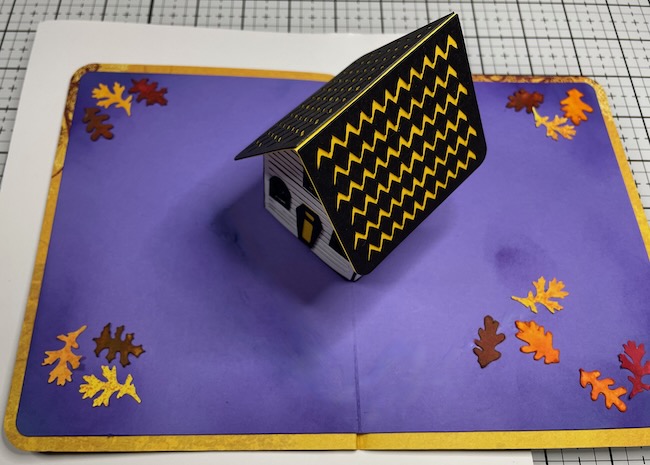
Get ready to impress with this unique Halloween craft! In this tutorial, I will show you how to create a 3D pop-up card featuring a haunted house that springs to life when opened. Perfect for adding an eerie touch to your Halloween greetings, this card features crooked house siding, a decorative roof with colorful leaves strewn about.
I'll show you step-by-step the process for making this adorable card, from selecting the right cardstock to assembling the (relatively simple) pop-up design. I've simplified the pop-up mechanism as much as possible. It's free as design no. 168 in the Paper Glitter Glue library.
Whether you’re a crafting pro or a beginner, this tutorial will teach you how to make a haunted house scene that literally jumps off the page.
By the end, you’ll have a bewitching handmade card that’s sure to thrill any recipient this Halloween season!
This post contains some affiliate links for your convenience at no additional cost to you. Click here to read my full disclosure policy.
Supplies to Make the Halloween House Pop-Up Card
- Card stock - generally I use 65# card stock for my cards. 8.5 x 11 inches works for every piece except the outer card base.
- Glue - Bearly Art Glue is my current favorite
- Pattern - Halloween House Pop-Up Card Pattern
- A way to cut out your pattern - I used my Cricut Maker, but you can also use Cricut Explore Air, and the Cricut Joy Extra or other cutting machines to cut out the patterns
- Light grip or Standard grip mat
- Fine point blade
- Scoring Tool
- Scoring Wheel (I think the scoring tool is much easier to use, though it does not score as deeply)
- Halloween decorative elements or stamps like these
Outline of Steps to Make the Halloween House Pop-Up Card
- Download the pattern for the Halloween House Pop-Up Card - Design No. 168
- Upload the House pattern to Cricut Design Space, then ungroup the design.
- Under the operations menu, designate the score lines on the pieces with score lines - the main house structure, the roof beam, the roof, and the card bases.
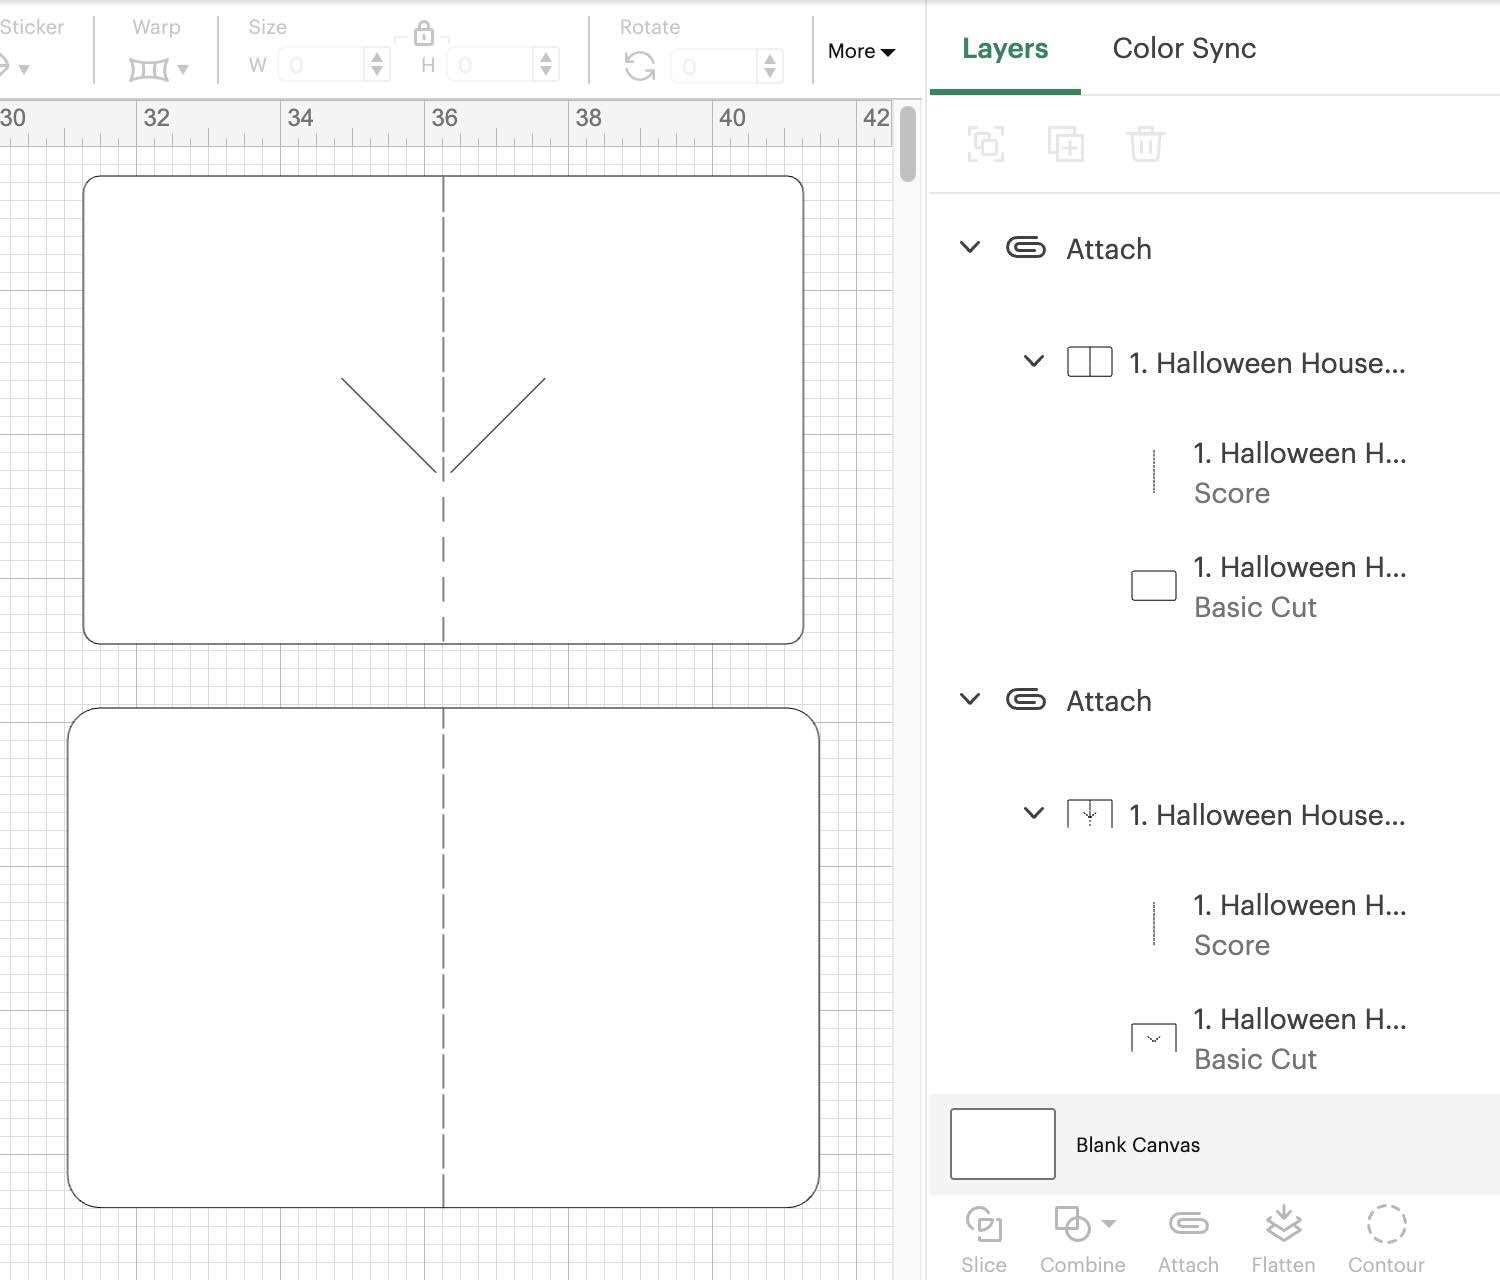
- Attach each set of score lines (and the drawing lines) to each piece in Cricut Design Space. The attach button is located at the bottom of the layers panel on Cricut Design Space.
- Cut out all the pieces for card. Fold along the score lines.
- Here's an important tip: Make a simple prototype so you understand how the pop-up house works.
- When you are ready to make your real card (not the prototype) glue the siding, the windows, and the door on the house while it is flat because it is much easier at this time.
- Glue the house together.
- Next, glue the roof beam in place.
- Glue the roof to the roof tabs on the roof beam.
- Fit the house glue tabs in the slots at the center fold of the card.
- When you are sure the house pop-up mechanism works, apply glue to the underside of the tabs on the house. Insert in the slots on the card base. Apply pressure to make sure the house fully adheres.
- Decorate the base with additional elements.
- To finish the card, insert the inner card into the outer card base.
- Finally, send the card to someone who loves Halloween. That's very important because they will be delighted to receive it.
For more detailed instructions, see below.
Check out this YouTube video to see how to construct this Pop-Up Card
Download the Free Pattern for the Halloween House Pop-Up Card - Design No. 168
To download the free pattern for the Halloween House Pop-Up Card, be sure you have the password to the library. If you don't have it, simply subscribe to my newsletter with the form below and you will get the password in every newsletter. And don't worry, I will never send you any spam, or share you email address with anyone and you can always unsubscribe at any time.
The files are compressed in a zip folder. To unzip a folder, here are the instructions:
- Here's how to unzip a folder using an iPad or iPhone.
- To learn how to unzip a folder using a Windows computer, click here.
- To learn how to unzip a folder with an Android device, click here.
- To learn how to unzip a folder using a Mac, click here.
I make my files in two formats - SVG cut files for cutting machines and as printable PDF files. Let me know if you have any questions - [email protected].
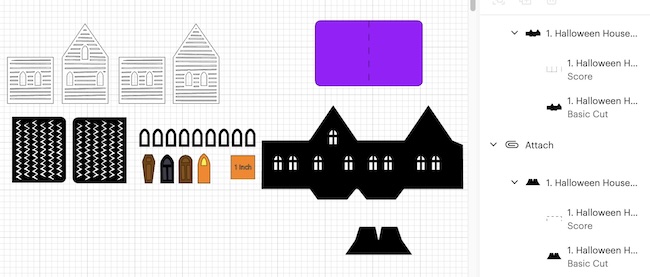
Upload the House pattern to Cricut Design Space, then ungroup the design
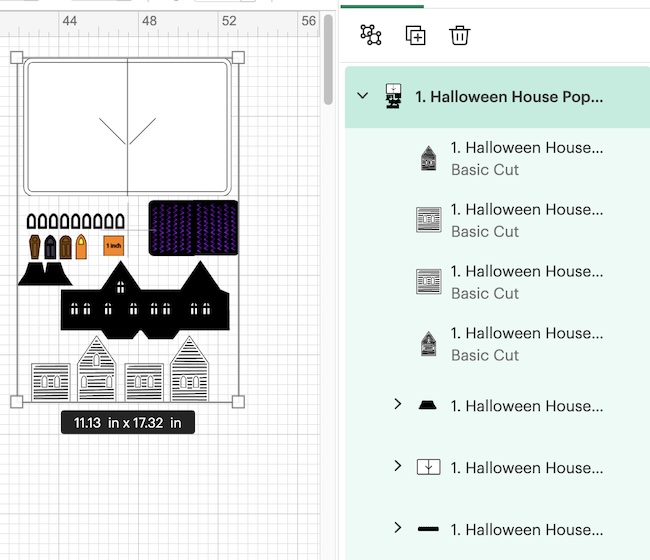
Next, ungroup the design so you can set-up the file with score lines.
Under the operations menu, designate the score lines
There are a number of pieces with score lines in this pattern that need to be designated as such when you use a cutting machine to cut out the pattern.
First, select the card base pieces. Each of them has a score line in the middle of the card. Select the score line on each piece, then go to the operations menu on the upper left corner of Cricut design space. Scroll down and select score. Do that for both card base pieces, the roof beam, the roof, and the house structure.
Attach each set of score lines (and the drawing lines) to each piece in Cricut Design Space
The attach button is located at the bottom of the layers panel on Cricut Design Space.
These are the two card bases with score lines designated and attached.
These are the other pieces with score lines. You can't see the score lines designated on the black pieces, but they are there.
Cut out all the pieces for card and fold along all the score lines
Now, cut out all the pieces for the card. Make sure the score lines are well-folded so that they move easily. This is very important for a pop-up card.
Here's an important tip: Make a simple prototype so you understand how the pop-up house works
You just need 4 pieces to make a prototype - basic house shape, the roof to the house, the roof beam, and the base card. You don't have to decorate the prototype.
Just follow the construction tips below omitting the decorative elements for your prototype test.
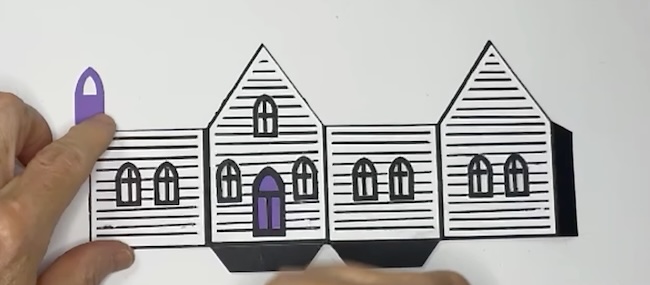
Decorate Your House with Siding, Windows, and the Door
When you are ready to make your real card (not the prototype) glue the siding, the windows, and the door on the house while it is flat because it is much easier at this time.
Glue the house together
Once the siding, doors and windows are glued on, glue the house together along the side glue tab. The fold it flat like it will be on the closed card. It's important the your house folds flat since it is going on a card.

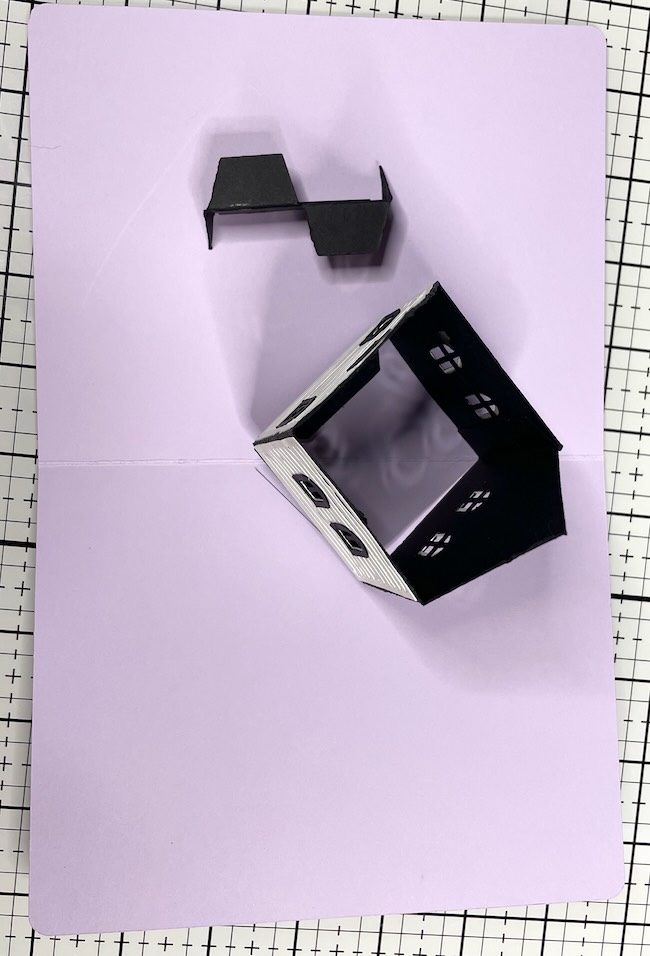
Glue the roof beam in place
Next, glue the roof beam to the house. The roof beam is z-shaped and supports the roof allowing it to fold flat.
To help hold the angled flaps in place, I use binder clips to hold it while the glue dries.
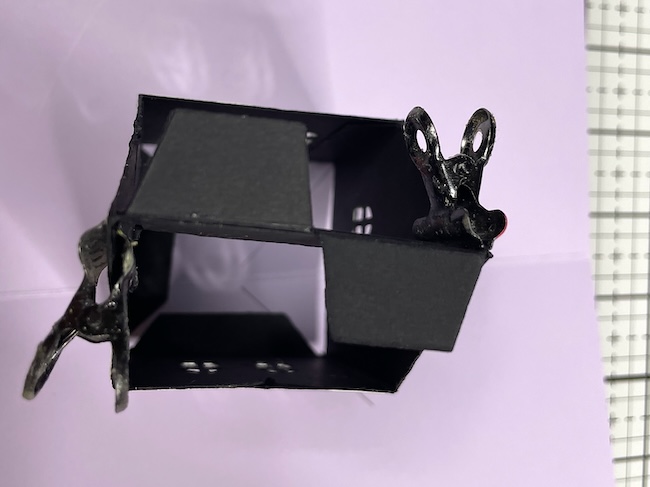
Once the roof beam is in place, fold the house piece so you can see how the roof beam fits and how the house folds flat.
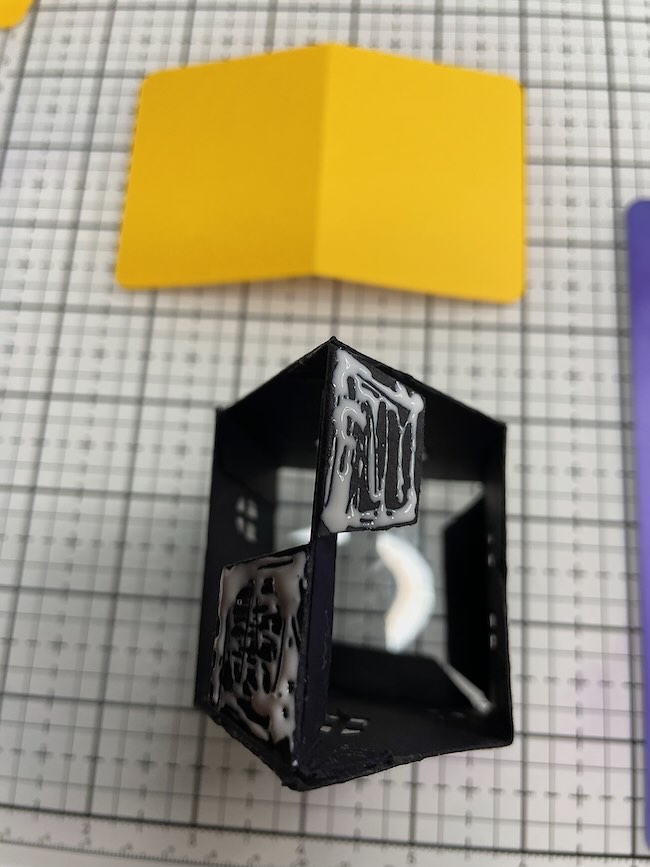
Glue the roof to the roof tabs on the roof beam
One tab supports one half of the roof and the other tab supports the other half of the roof. First, apply glue to both roof tabs. Then center the house on the roof piece. Close the roof piece to make it adhere to the roof tabs.
Fit the house glue tabs in the slots at the center fold of the card
Make sure the house folds flat in the way it will fit in the card. Next, do a test fit of the pop-up first before applying glue. To do that, insert the tabs on the bottom the house into the cut out slots on the card base. Then test to make sure that the card folds flat before you apply glue.
Glue the bottom house tabs to the card base
When you are sure the house pop-up mechanism works, apply glue to the underside of the tabs on the house. Then insert the glue tabs through the slots on the inner card base.
To insure these tabs adhere to the card base, fold it flat and apply pressure.
Decorate the base with additional elements
If you want to decorate the base with additional elements, this is a good time. If you want to use stamps to decorate your card, do that before you adhere the house to the card.
Make sure any decorative elements do not interfere with the pop-up mechanism. Sometimes the roof will catch on things so leave those elements out to the side.
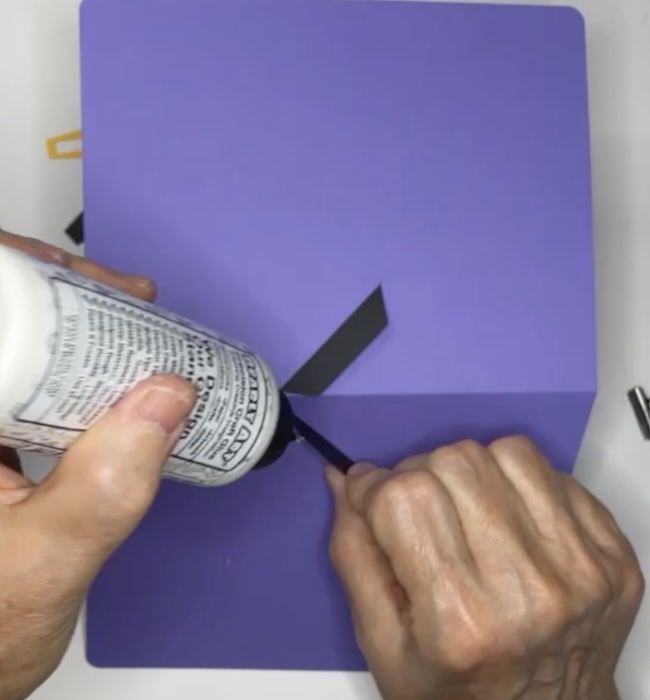
Glue the outer card base to the inner card
For this step, apply glue to one side of the inner card (with the house on it). Be sure to apply glue right up to the fold line. Center the inner card to the fold line of the outer card. Apply pressure to make it adhere.
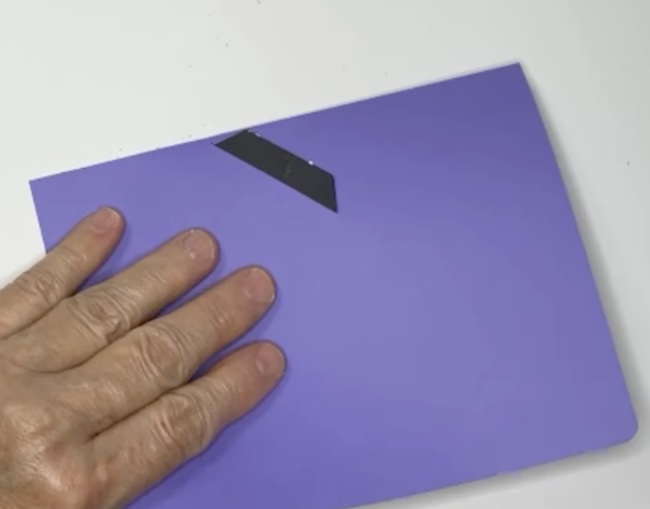
Next, apply glue to the other half of the inner card. Close the card to adhere both sides of the inner card to the outer card.
Send your card to someone who will love it!
If you have any questions, please email me - [email protected]. I'm always glad to help.
Lucy
PJ
This is extra special! Thank you!!
Yvonne A.
Big fan of pop-up cards and Halloween! AWESOME card, Lucy! :0) tfs