
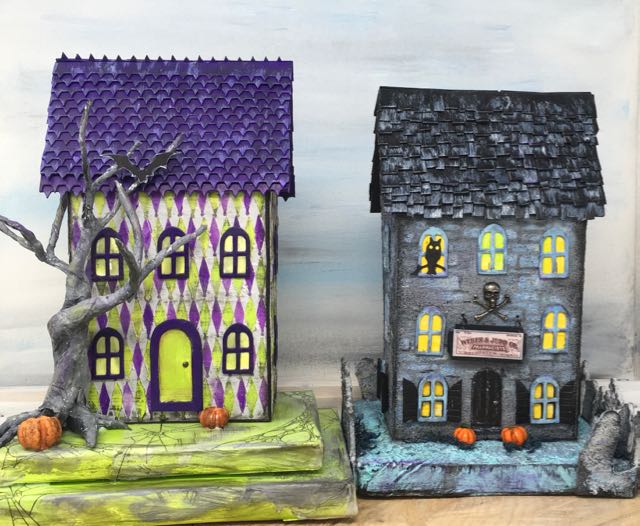
Back view of the two-sided Halloween houses - the Harlequin House Used Bookstore and the Apothecary Halloween House
Here is how you make the Two-Sided Apothecary Halloween House or really any two-sided miniature house based on the pattern in my resource library. These are the detailed instructions for making the house that I didn't include in the last post. To illustrate many of the construction details, I used the Harlequin House Used Bookstore as the model for most of these photos because I remembered to take photos during construction. This house is made exactly the same way as the Apothecary Halloween house. I'll post the miniature bookstore Halloween house right after this tutorial.
Links to Information related to this tutorial:
- Apothecary Halloween House
- Harlequin House Used Bookstore - Miniature Halloween House
- Stone Texture for your little house
Materials:
- Cardboard - Design No 7 - free Apothecary Halloween House pattern here
- Aleene’s Fast Grab Glue or similar glue
- Gesso
- Paint colors of your choice
- Siding for the house
- Decorative Halloween decorative elements such as miniature Apothecary Jars, specimen jars, miniature spell books, miniature bones and skulls, tiny pumpkins, printable labels for your Apothecary potion bottles
Steps for Making Your Little House
Briefly, these are the steps in making this cardboard house:
- Copy and cut out the pattern - Design No. 7
- Decorate the outside of the house
- Make reinforcement cardboard pieces to provide good support for the house
- Decorate the inside of the house
- Make shelves for the apothecary cabinet
- Glue the house together
- Glue the roof on and install the shelves
- Add the shingles or roofing of choice
- Make and decorate the base
In the Apothecary Halloween House post I talked about the many decorative elements for that particular house. I'll talk about the elements for the Halloween bookstore in the next post.
Overall this is a fairly easy house to build.
Download the pattern to make your Apothecary Halloween house or the Halloween bookstore from my resource library.
You can get the password for my resource library that has the pattern for the Apothecary Halloween House and other future freebies by filling out the newsletter subscription form located at the bottom of this post. You will also receive my newsletter every two weeks or so.
Detailed Information to Construct Your Own Two-Sided Apothecary Halloween House
-
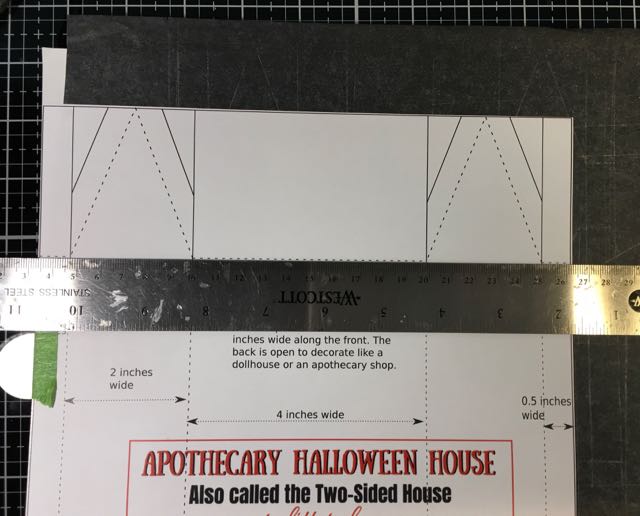
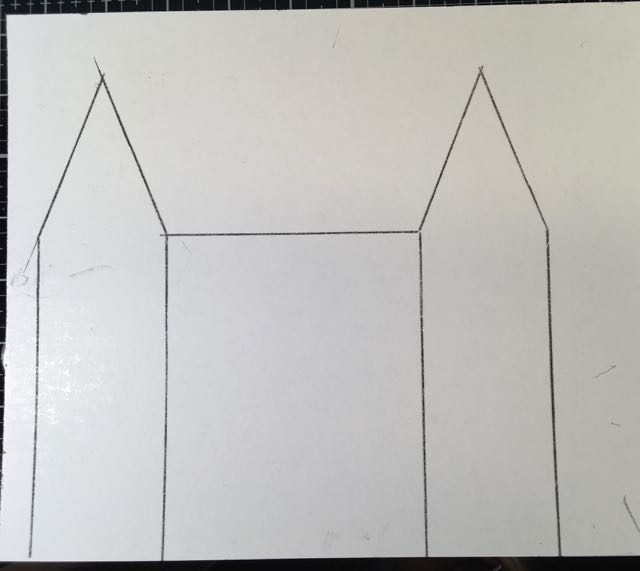
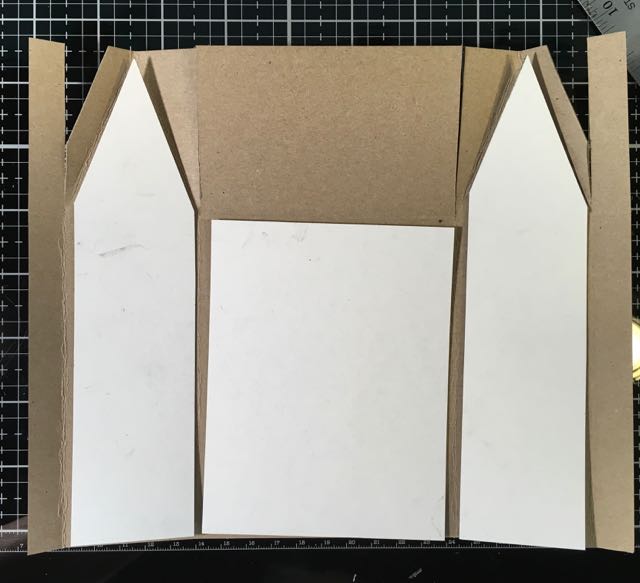
Copy the pattern onto your cardboard, score and cut the pattern
The pattern itself is very simple – it is a basic gable house with the back open. I generally make my patterns so they fit on an 8.5 x 11 piece of paper and cardboard. This house is taller than usual to make room for the decorative elements in the back. You may shrink or enlarge your pattern to whatever size you want depending on your sources of paper and size of cardboard.
Once you have the pattern copied, the score along the fold lines BEFORE you cut it out. It is so much easier to score before you cut because you have a bigger area to hold on to.
-
Main body of the Halloween house
Trace your pattern onto your cardboard using a metal edged ruler
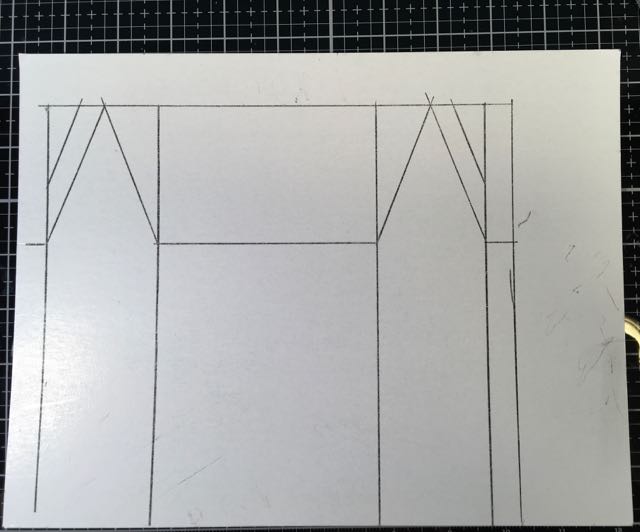
Apothecary Halloween Pattern traced onto cardboard
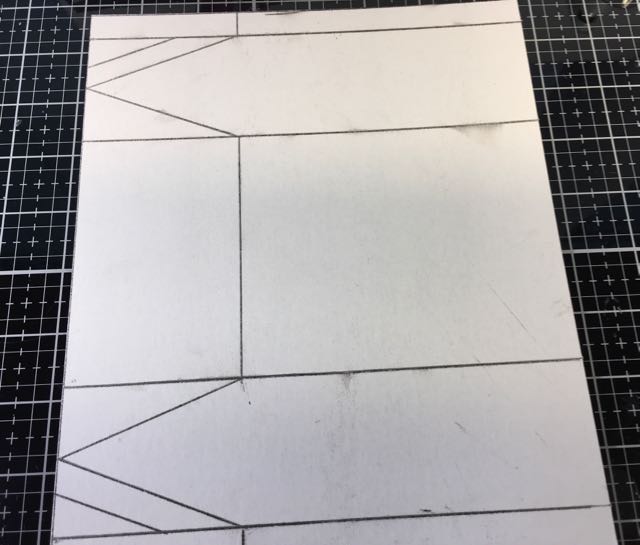
Trim the excess cardboard off of each side of the miniature Halloween house
-
Roof piece for the Miniature House
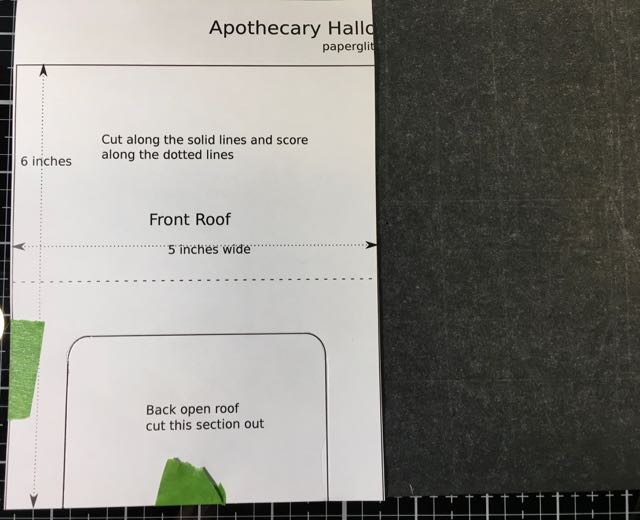
Trace the Apothecary Halloween house roof pattern the same way as the body of the house
Cut out the roof piece for your miniature house
-
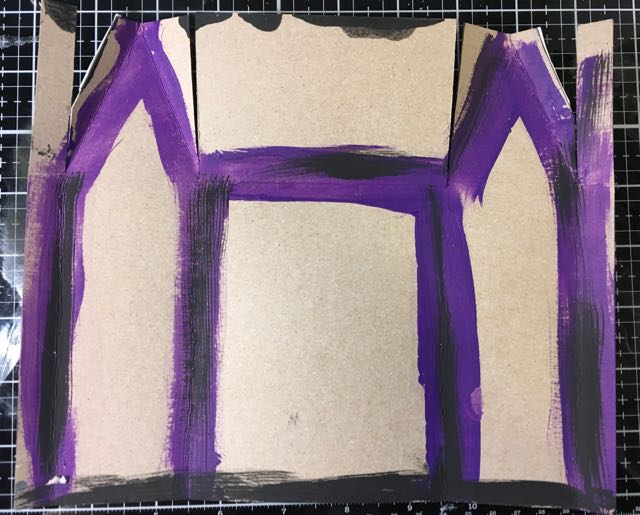
Decorate the Outside of Your Miniature House
Here are two versions of the same pattern decorated. The first is the Apothecary Halloween House and the second is the Harlequin House Used Bookstore.

Outside decorated stenciled stone for the Apothecary Halloween House
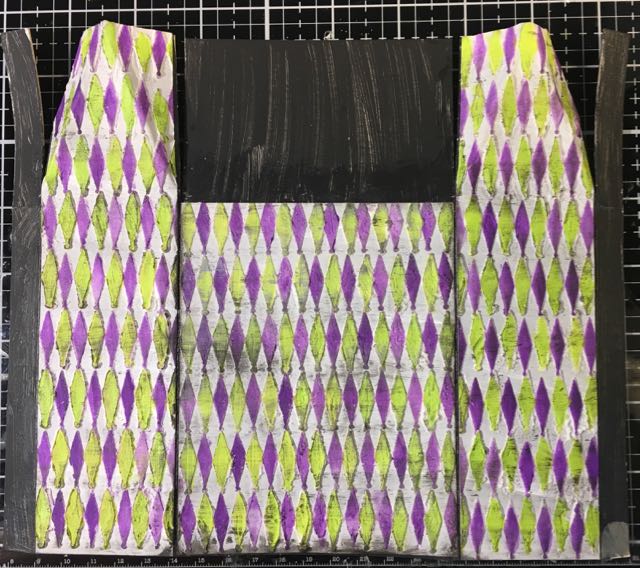
Harlequin stenciled and painted exterior to the Harlequin House Used Bookstore
Please note it is easier to glue on windows and doors at this stage than when the house is glued together.
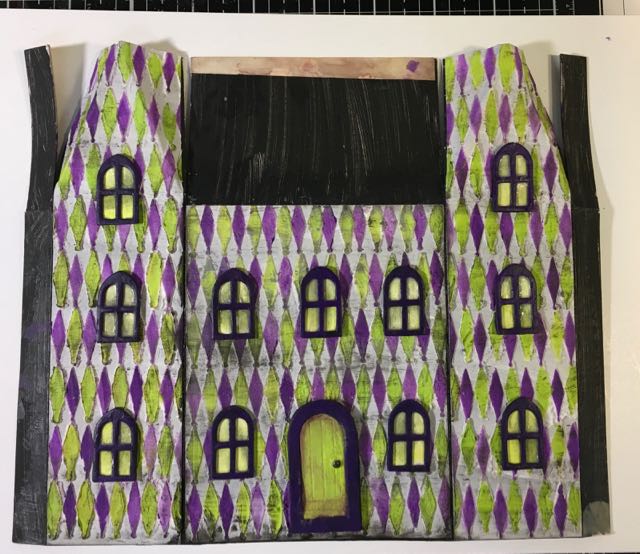
You'll find it easier to glue on windows and the door before you glue the house together
-
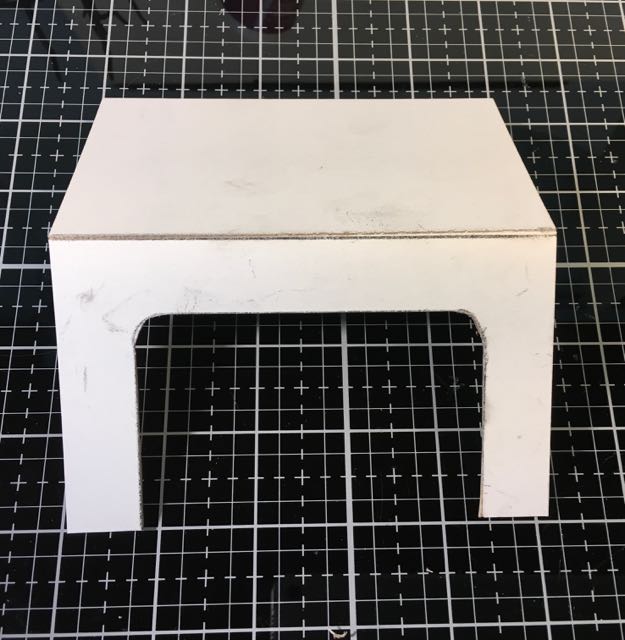
Reinforce the sides of the house with extra cardboard
Additional pieces cut out for cardboard reinforcements of the house to make it really sturdy
Trim the supporting cardboard to fit inside the house. Make sure you trim enough so you can fold the house together
I know that these edges aren't really going to show, but just in case, I paint them because I don't want raw cardboard to show. As much as I love cardboard - I don't like raw, unpainted cardboard.
Paint the slightly exposed area of cardboard so raw cardboard won't show
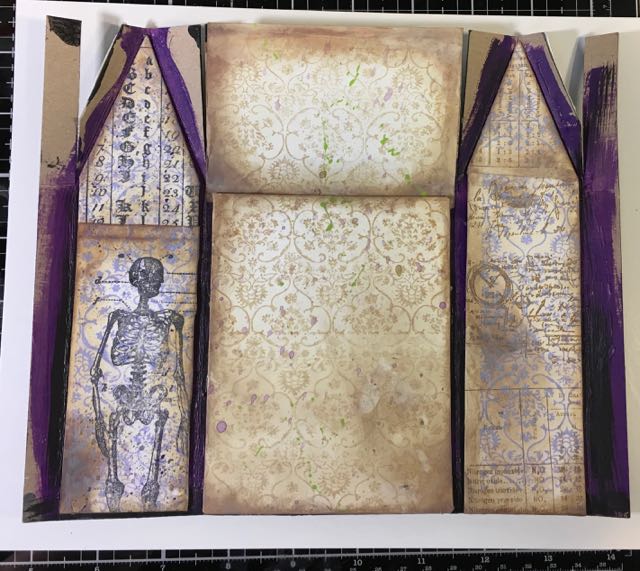
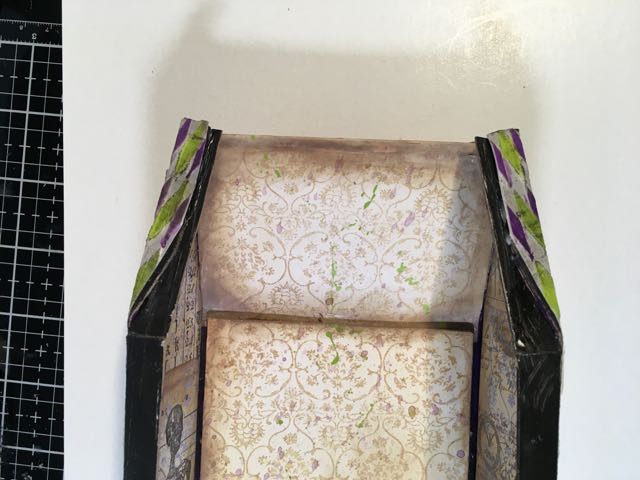
Decorate the reinforcement cardboard before gluing to the inside of the house because at least some of it will be visible.
-
Make Shelves for Your Miniature Two-Sided House
The shelves are made the same way for both houses. Each shelf is a little narrower than the shelf below it. I designed them that way to allow a little more light to reach the bottom shelf. Decorate each shelf as you choose. Paint is the simplest choice. Stamping or stenciling on paper then glue to the individual shelf. If the underside is going to be seen as well, then cover it the same way. Bend the glue tabs down for the top 2 shelves. The bottom shelf glue tabs bend upward to fit within the house.
The bottom shelf is about 2 inches wide, the next one is 1.5 inches wide, then the top one is 1.25 inches wide for better visibility and lighting
-
Glue the house together
Now you glue the house together. It's a bit different from previous little houses which are completely enclosed. Primarily, you glue the roof flaps down to form the structure of the house. When you install the shelves, they provide more support for the house and pull the sides together better.
Next glue the roof flaps down to glue the house together. I had to trim the flaps a little bit because they protruded a little bit when the roof was glued on.
-
Glue the roof on and install the shelves
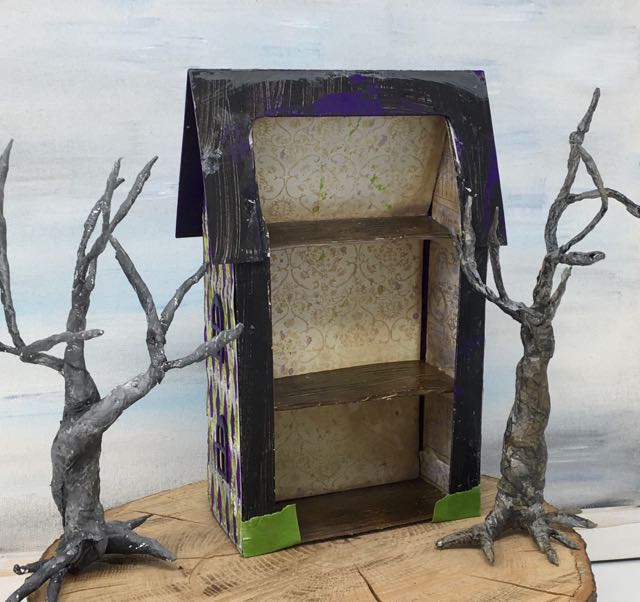
Glue the shelves in place to hold the house together better than just the roof flaps.
-
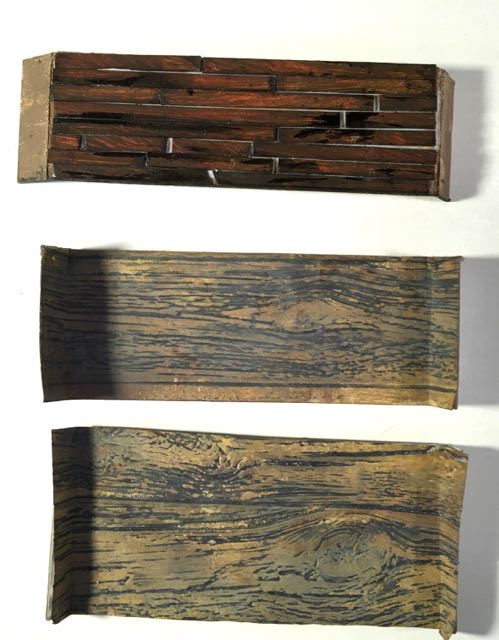
Add the shingles or roofing of choice
For both of these houses I used offcuts from the Tim Holtz Village Rooftops dies. I cut out so many of these dies that I hate to waste the leftovers because they make pretty cool rooftop shingles as well.
After you have the house completely constructed, you get to decorate your little Halloween house which really is the fun part. I'll go over the decorations on the Harlequin House Used Bookstore in the next post.
Front view of the two miniature Halloween houses with the open back
-
Make and decorate the base for the house
These bases are very simple to make because you don't have to cut a hole in the bottom to install an LED light. Basically, each base consists of 4-5 layers of cardboard glued together with hot glue, covered with paper, then painted. For the Halloween Used Bookstore I stacked two bases together just because I liked how it looked.
In the next post, I'll go over more details about decorating the Harlequin House Used Bookstore.
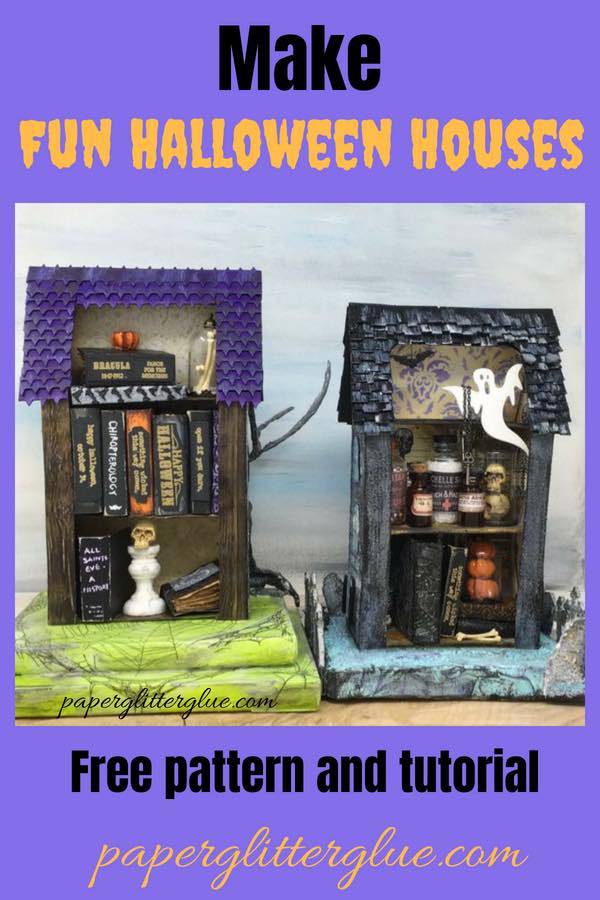
Make a fun two-sided Halloween House out of cardboard - free pattern
Thank you for reading.
Lucy
P.S. Sign up for the newsletter below.
Leave a Reply