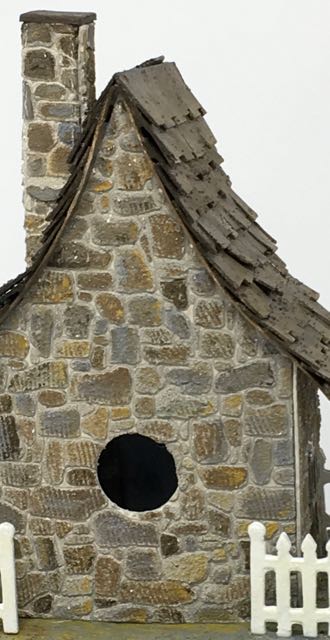
I love to add texture to my projects, specifically, to my little houses. My most recent house with a stone texture is the Irish Stone Cottage. Full instructions on how to make this stone texture on your paper crafts is outlined below. You can also download a free copy of the Stone Texture tutorial from my library here.
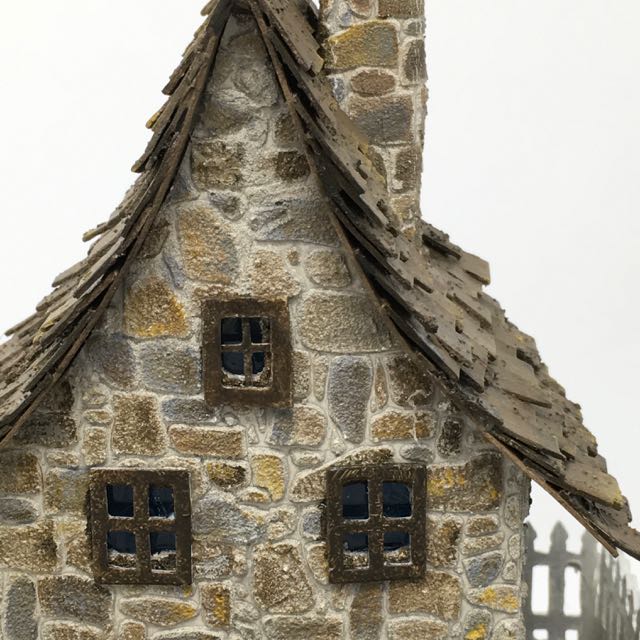
Stone texture on the Irish Stone Cottage
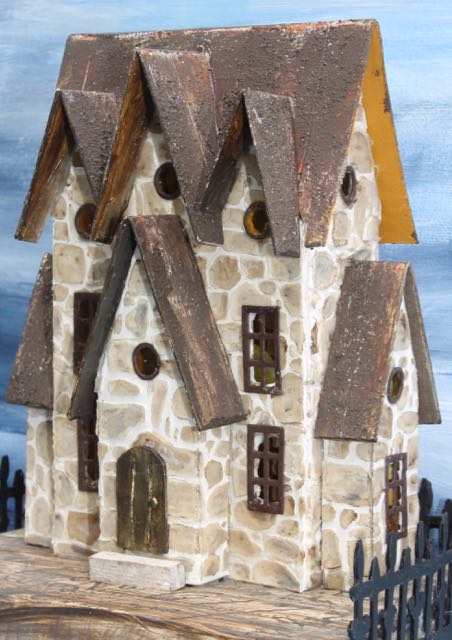
Examples of Stone Texture Surfaces on the Little Cardboard Houses
Here are a few examples of different miniature houses I've made with a stone surface on them. This tutorial talks about one specific method that uses a stencil and texture paste to make the raised dimensional stones.
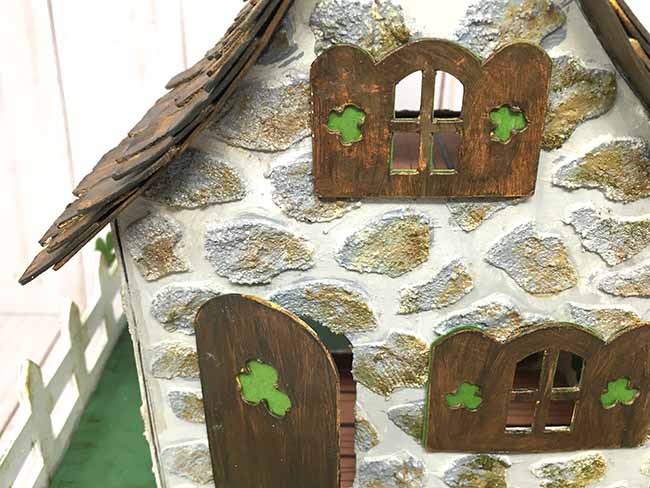
Here is the Leprechaun house with stone texture on it.

Jeremiah's Stone House - with a paint stenciled on a rough undercoat
The Irish Stone Cottage is probably my best example of a little house with a stone-like siding. With this little house I was able to make the stone covering much easier after learning a few helpful hints which I will share with you here. The free pattern for the Irish Stone Cottage - Design No. 1 - is available in my library as well.
I have written a PDF with all this information that you can also download from the library for future reference.
I've just added an SVG pattern that you can use for stenciling stone on any of your paper crafts - Design No. 137 - in the July 2022 section of the Paper Glitter Glue library.
Just sign up at the end of the post to get free access to the paperglitterglue library.
This post contains some affiliate links for your convenience. That means if you make a purchase after clicking an affiliate link, I will earn a small commission but it won’t cost you a penny more. Click here to read my full disclosure policy.
Materials for Making a Stone Texture on Your Projects
- Cardboard house - flat piece before it is glued together - Design No. 1
- Gesso - to prime the house before the stenciling
- Stone stencil - I used Stampers Anonymous Tim Holtz Mini Layering Stencil Set #28
- Free Stone stencil pattern - Design No. 137 - in the Paper Glitter Glue library
- Texture paste - Ranger's Tim Holtz Distress Grit-Paste
- Spatula or Palette Knife - I actually used a regular plastic knife with a serrated edge
- Painter's Tape - so the tape can be removed easily and won't tear your project
- Various paints in stone-like shades such as grey colors, a variety of brown shades and a highlight yellow shade. For this house I used Tim Holtz Distress Paints in Pumice Stone, Hickory Smoke, Ground Espresso (my favorite brown), Walnut Stain, Gathered Twigs, and Fossilized Amber.
Here's a video that shows you how to use a stone stencil:
Prime the House Pattern with Gesso
I almost always prime my houses with gesso because it provides "tooth" or a surface that other things will adhere to.
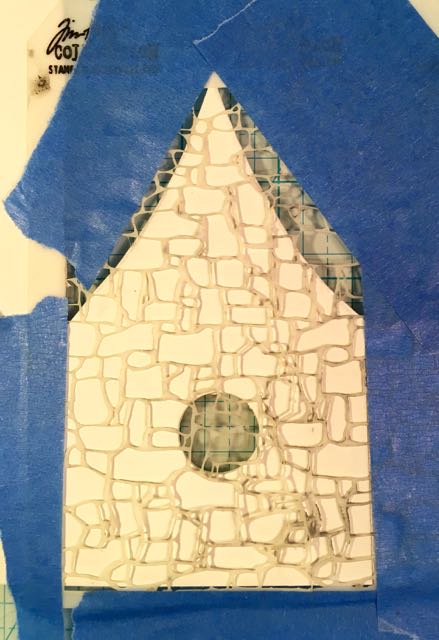
Tape Stencil to Cardboard Pattern
For my house, I did modify my stencil. I purchased 2 of these stencils and glued them together with E6000 glue so I would have one stencil that would cover an entire side of a little house. This prevents having a seam in the front of the house. There are other stencils available where you wouldn't have to do this, but I love the scale pattern on this particular Tim Holtz stencil so that is how I altered it for my little houses.
It is really important to tape the stencil down firmly to your pattern if you want the stone to be consistent. If the stencil slides around it is difficult to get the recessed spaces between the stones. Maybe someone like Tim Holtz is coordinated enough to hold the stencil in place without taping for this process, but I am not. So my advice is to tape the stencil down. And I only do one side at a time.
Apply Texture Paste to Stencil, Smooth with Spatula or Knife
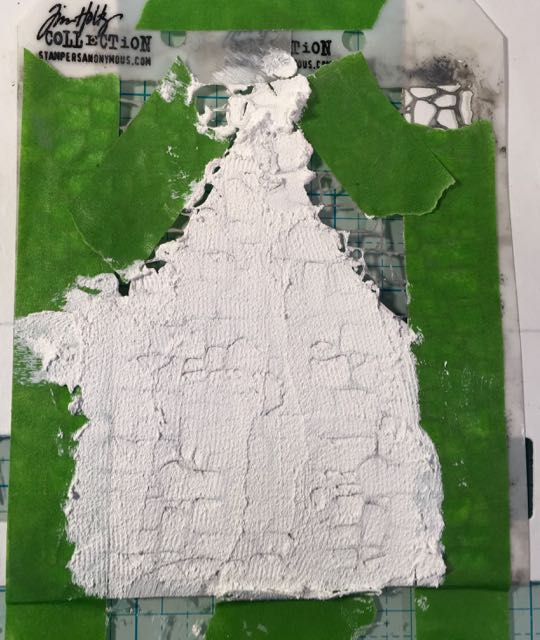
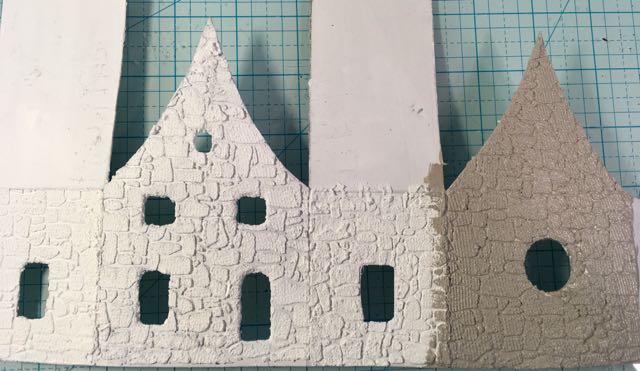
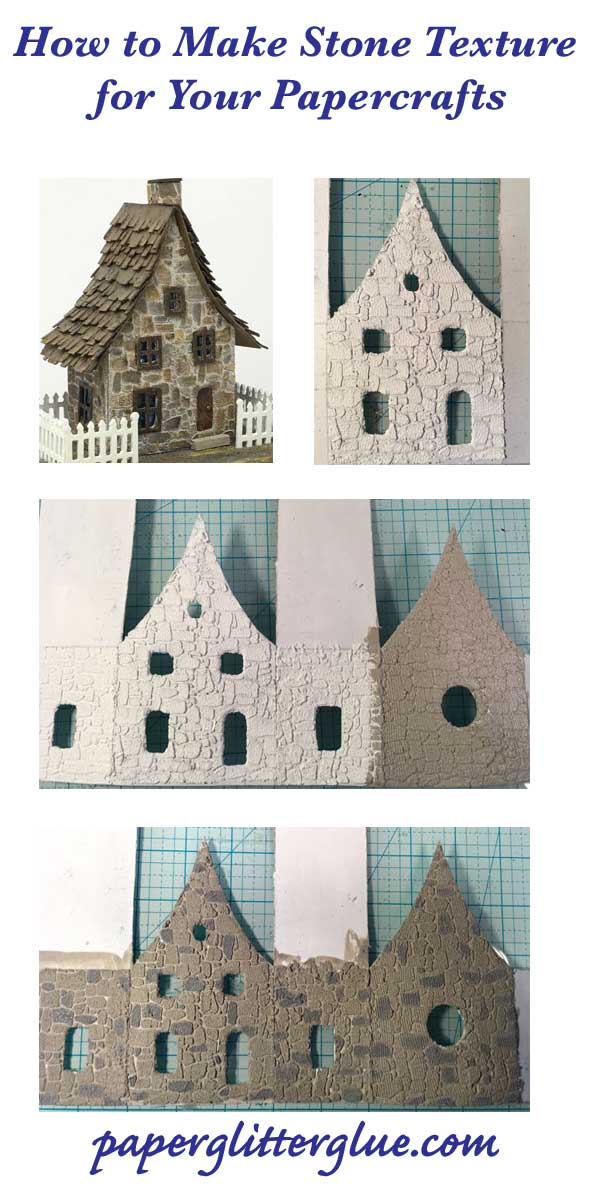
Texture Grit-Paste applied to stencil and front piece of the Irish Stone Cottage pattern, then smoothed down with the plastic knife.
I used the serrated edge of the knife, by accident, but I think it adds to the texture of the stones. I probably should have taken off a little more of the paste in the center because you want the stencil to be barely visible to ensure the appropriate amount of the paste. If it is too thick, the stencil won't lift up properly and everything gets mushed together.
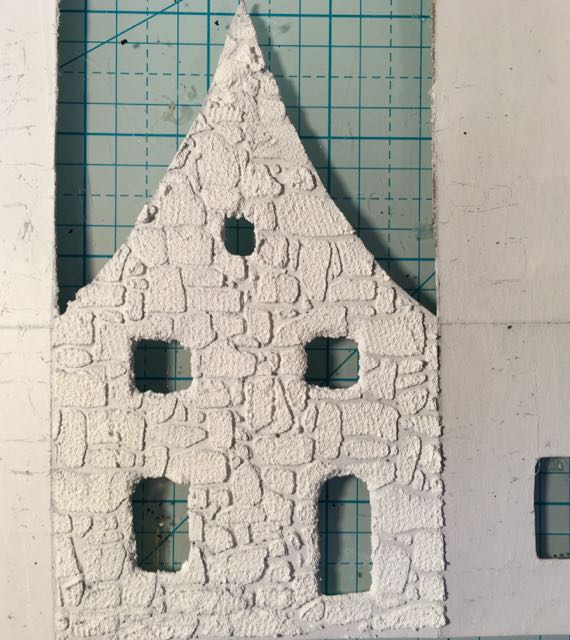
Remove the Stone Stencil from the Cardboard Pattern
Here is a bit of the tricky part. As you see above, your stencil is firmly taped down around your pattern. Now you need to get it off without disturbing the soft texture paste. Peel off the the tape on one side of your pattern. I usually peel the bottom part off first. Gradually lift the pattern starting at that edge. Be sure that your house pattern does not move during the removal or you will smear the texture paste. You can help prevent that by taping an area outside of the stencil area to your surface. Since I only stencil one side of the house at a time, I can tape two other sides down before I tape the stencil.
And you know the nice thing about this process? If you mess it up, you can just scrape off the smeared texture paste and do it again. You can even re-use the same texture paste so you don't have to waste it. Or if you only messed up a small section, you can use a tool, such as the tip of the knife or your craft blade, to clear the spaces between the stones.
Oh, please remember to wash your stencil before the paste sticks to your stencil.
Allow the Stenciled Area to Dry Completely
This hint deserves its own section because it is important. You need the texture paste to be fully dry before you go on to stenciling another side. Remember you are going to tape over it and you don't want the tape to pull up your already completed stone siding.
And here's the next important hint about the texture paste - the brand I used, Tim Holtz Distress Grit-Paste, cannot be heat dried because it will puff up and you will lose your detail. The regular Ranger Texture paste is the same way. I don't know about other brands, but I do know that you cannot heat dry these particular pastes. You can put your project in front of a fan to help it dry, but do not use heat.
That means that it takes a little while for each side to dry.
Stencil each side of the Cardboard House
Remember to stencil each side of the cardboard house individually. Because each side has to dry before you can proceed with the next, it does take a bit of time. Here is the order in which I usually stencil the house - the front because that is the most important side, then the back, then each side.
Paint the Background Color to the Cardboard Pattern
You want the mortar to have some color rather than glaring white between the stones. Choose a color that will contrast with the stones. For this house I wanted the mortar between the stones to be lighter so I chose Pumice Stone. It dries to light grey color with just a smidge of brown in it.
Paint each Individual Stone with Different Colors for Dimension
Next it's painting time. Yes, I paint each individual stone with different colors trying to mimic an old stone house. I like this step. For me, it is kind of meditative, just sitting there with a small brush picking out which color will go where. I realize some people would go crazy doing this step, but it is part of the creative process that I like.
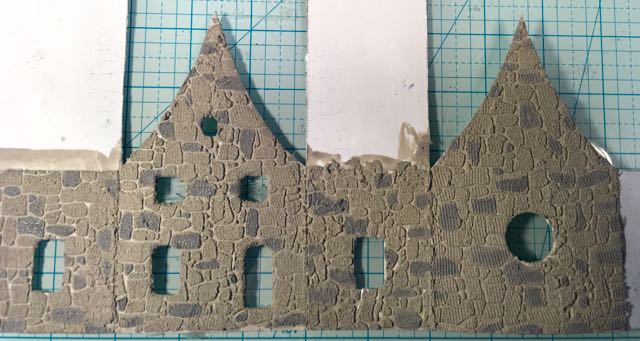
Painting the stenciled stones with Hickory Smoke, a darker grey color. See how much difference just adding one color makes.
I add different colors sequentially and then sometimes I smear 2 or more colors together because real stones have so much variation in color. Just play around with this step to recreate the stones.
The Distress Paint colors I used:
- 2 shades of grey - Pumice Stone and Hickory Smoke
- 3 shades of brown - Gathered Twigs, Walnut Stain and Ground Espresso
- 1 yellow for highlighting - Fossilized Amber.
I think it is easier to see all the colors on the stones better on the backside. Uh oh, I see a few little stones around the light hole that I didn't paint. I may have to go back and touch them up a little bit.
If you would like a printable PDF of the Stone Texture Tutorial, sign up below:
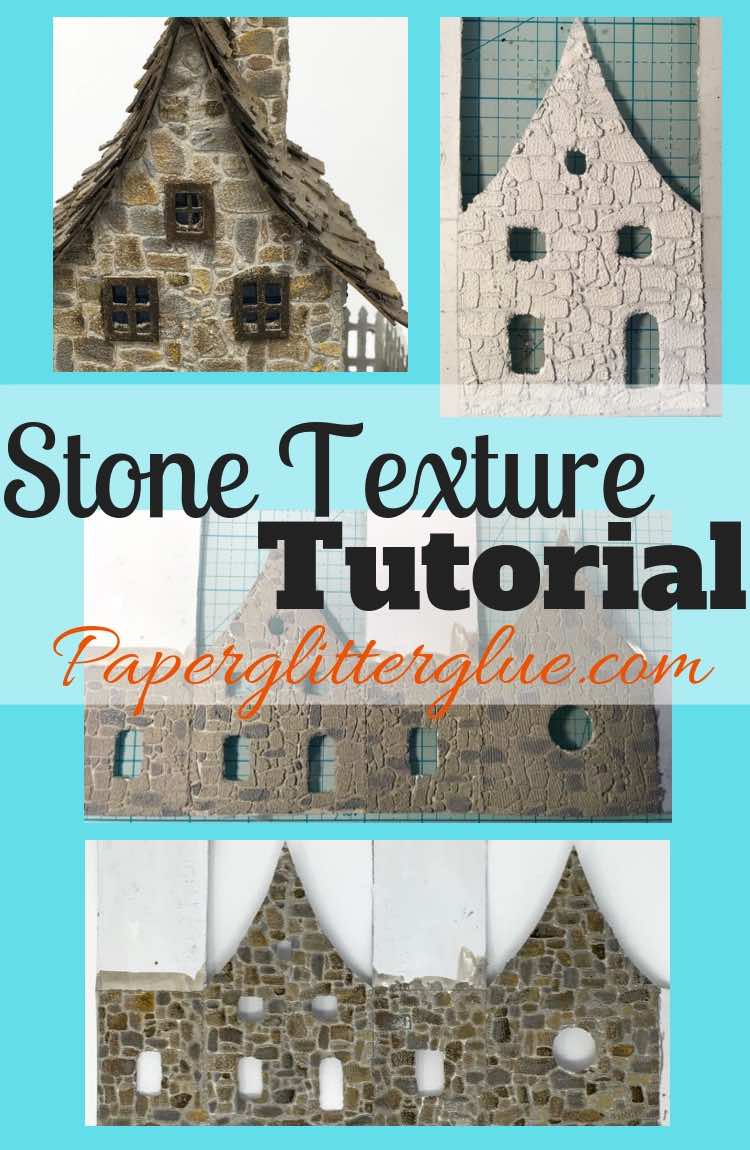
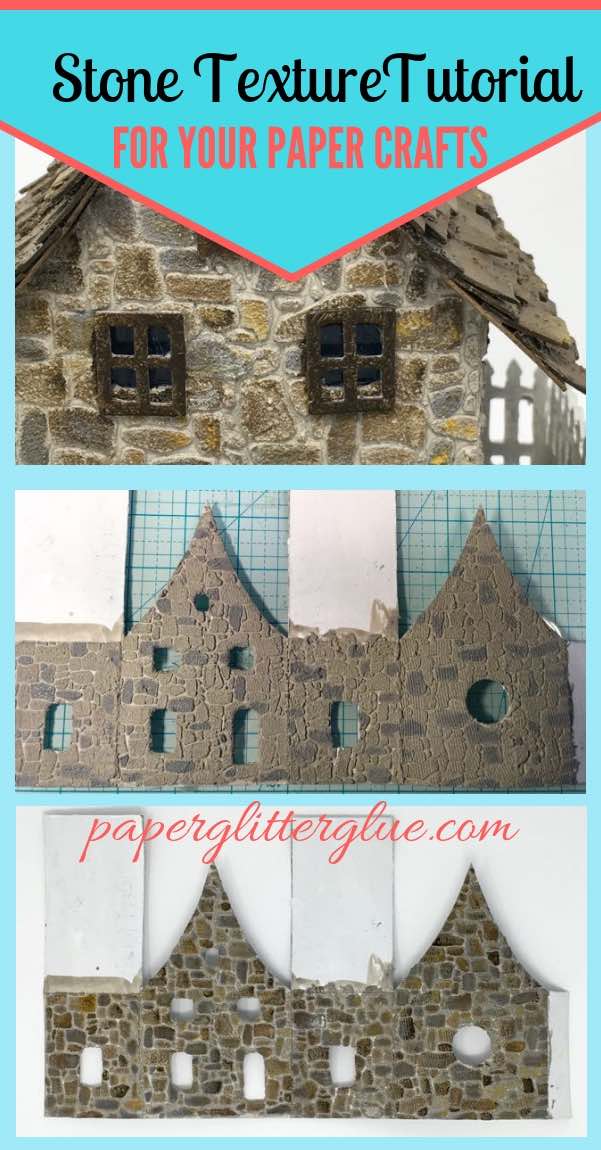
Stone Texture Tutorial - now you know how to make a realistic stone texture on your paper crafts!
Well, that's really all that is required to make mimic real stone on your paper projects. Let me know if you have questions about the stone texture tutorial. Feel free to pin photos to your favorite pinterest board if you like. Thank you for reading.
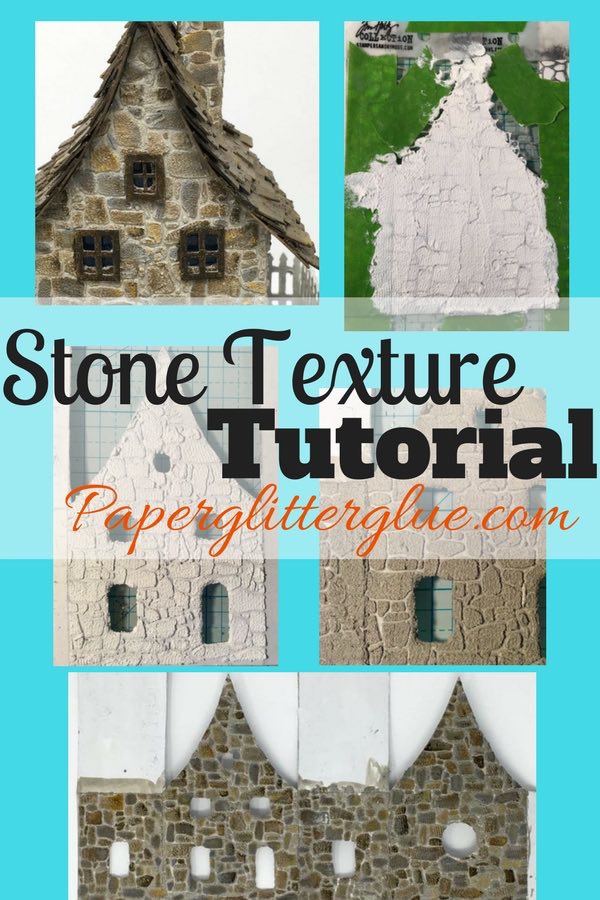
With texture paste and a stone stencil make stone siding for your little house



Charlette
This is a great technique. I have used texture paste on several of my little Tim Holtz houses and find that they tend to warp a bit, maybe the Gesso will help keep that from being a problem.
Do you dry or wet brush your stones?
Lucy
I do paint my houses with gesso before using the texture paste and often I paint both sides of the cardboard. You could actually tape the cardboard down as it dries to keep it from warping as it dries.
And for your question about wet or dry brush, I'm not really sure. But I think it is much more of a dry brush technique. I almost always wipe off some of the paint before I apply it to the stones.
Lucy
Binny
I would like to make a fairy house for outside use. I have a wooden house, can I use the distress grit- paste? I am planning on giving it several layers of clear coat.
Lucy
You have asked a very good question, but I'm not sure of the answer.
Grit paste might work. I'm not sure though. What about applying some to a piece of wood and then keep it wet for a day or so?
Most of the outside Fairy Houses I've seen are made of polymer clay or silicone caulk with real stones. I live in South Carolina where we have serious humidity that would make it unlikely that a wooden fairy house would last very long outside. Even bird houses hanging from the trees don't last long.
Mary W
Thanks for the lesson, I've been to intimidated before to stencil and have embossed/scored anything I wanted stonework on (small card sections, nothing big) and feel I could give this a try.
Mary
butterfly
Amazing stone textures - and a great tutorial, thanks.
Alison x
Lucy
Thank you, Alison. I do appreciate you visiting my blog especially since you came from the old blog. That is very nice.
Lucy
DebraC
Just discovered your blog and I LOVE it! So fun to see what can be made with the little houses. I have the Tim Holtz dies and can't wait to try this stone tutorial on them. It looks like real stone, fantastic job! Totally understand the painting stones one-by-one, its like therapy. Can't wait to see more.
Lucy
Thank you, Debra. I am sorry it took me so long to respond to your comment. I am tickled that someone else finds a task like painting little stones individually therapeutic. It is for me. I hope you will continue to find some more good ideas on my blog. That is what I love to do - provide inspiration and help people create. Thank you again. Lucy
deborah345
LOVE, LOVE, LOVE so adorable are these little houses. Thank you!
Lucy
Deborah, thank you so much. The little houses are some of my very favorite things to make. I hope you can find some inspiration here. Do you make little houses?
Vanessa
Your houses look awesome! I love that stencil too - I may have to go look for one of those the next time I'm in a craft store. Great tutorial!
Yvonne Boucher
Fantastic! thank you so much for showing the technique.....you really need to consider making video tutorials...you are so talented
Laney
Great tutorial Lucy! Lots of excellent tips in this post. I agree that the painting would be meditative and satisfying. 🙂
Andrea Wood Schmitz
Are you kidding me?
This is fantastic!
Years ago I made a whole village by papier mâché a bunch of empty cereal boxes. It was a whole medieval town.
This technique would have made it even more authentic! Wonder if the kids would want to re-build???
Loretta
Hi, Lucy. Thanks for all these tips for faux stone. Did you go lightly with the texture along the fold lines?
Lucy
Loretta, I don’t stencil over the fold lines since I do one side at a time. I tape each side off separately and let that side dry throughly before doing another side. But you actually can stencil over the lines though because the paste is somewhat flexible. It will crack along those lines though.
Donna
This is really amazing! I love your little house and your tutorial is so detailed and helpful!
Felicita Moncada
What an amazing technique! I love it. It looks exactly like stone. I need to start working with these different mediums - gives projects so much texture!
Linda Pekrul
I love your little houses! This really is the most wonderfully helpful tutorial... thank you so much for sharing how you create such fabulous detail!
Kriz Eliz (Eliz)
Beautiful house Lucy! I have a future project where I need to do a cobbled stone look as base for my sculpture. This tip is very handy!! So glad you shared it.
Lucy
Very cool. I'm glad it will be helpful to you.