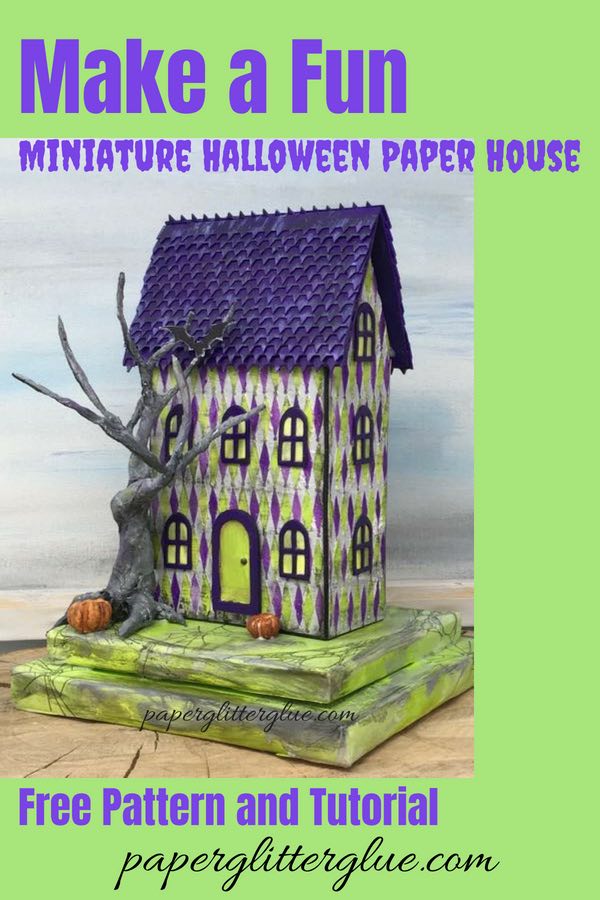
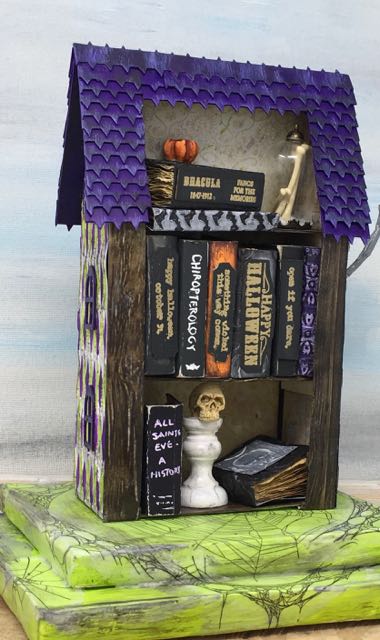
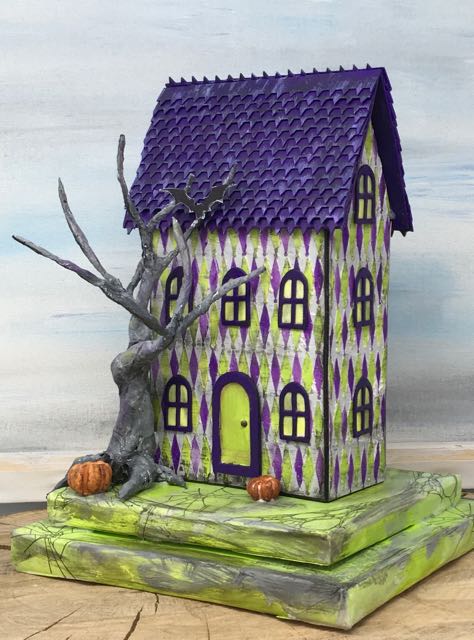
Make a miniature Halloween Bookstore to decorate a shelf or mantle for Halloween. This little cardboard house is named the Harlequin House Used Bookstore. It's made from exactly the same pattern as the Apothecary Halloween House just with different Halloween decorative elements - mainly spooky little books.
You can find the Apothecary Halloween House free pattern in my resource library. To get access to the library, just sign up for my newsletter (which I send out about every two weeks) and I'll immediately send you the password so you can get all the free patterns and tutorials.
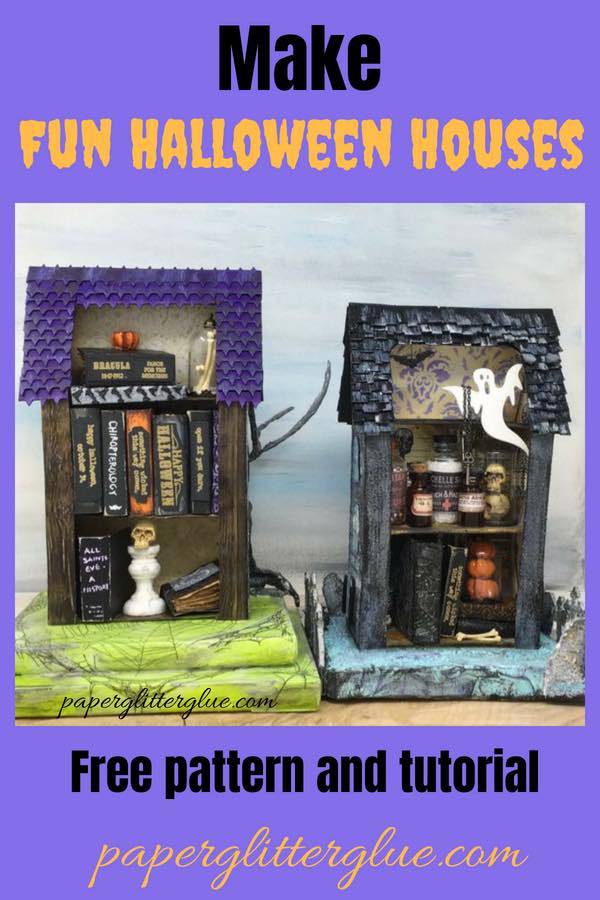
You'll find the tutorial for the construction of both of these mini Halloween houses here. This post shows you more of how I decorated the little Halloween Used Bookstore.

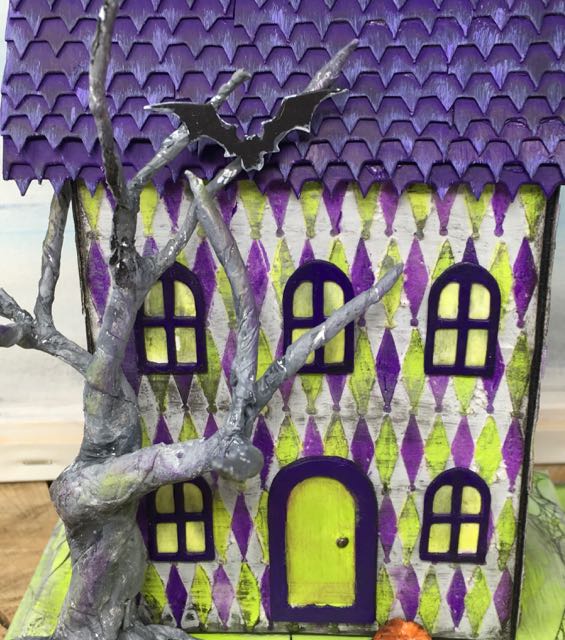
Decorate the outside of the Harlequin House Used Bookstore
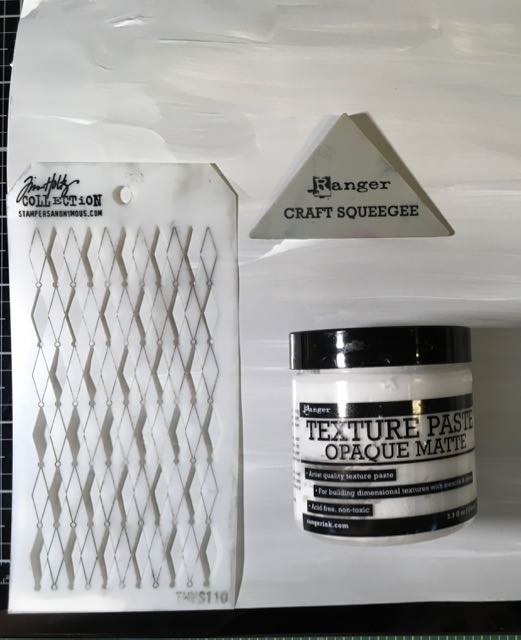
You may have noticed that I am a big fan of Tim Holtz products. I just love the paint colors and his Sizzix dies and embossing folders and the Stampers Anonymous stamps and stencils. And while I don't need to add to my collection, I found one new product that I could not resist and ordered the first minute that I heard about it. It's a set of stencils called "Shifters" which allows you to make a really cool pattern by just shifting the stencil over and stenciling a different color. That's where the inspiration for the Harlequin house came from - the new shifter stencil from Stampers Anonymous.
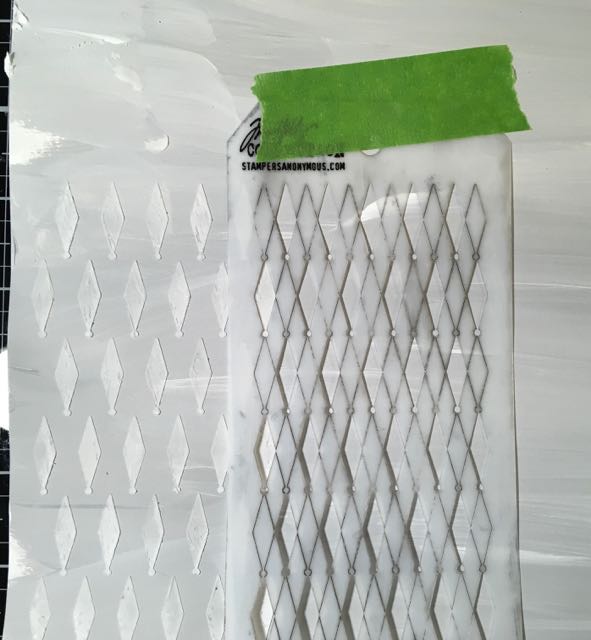
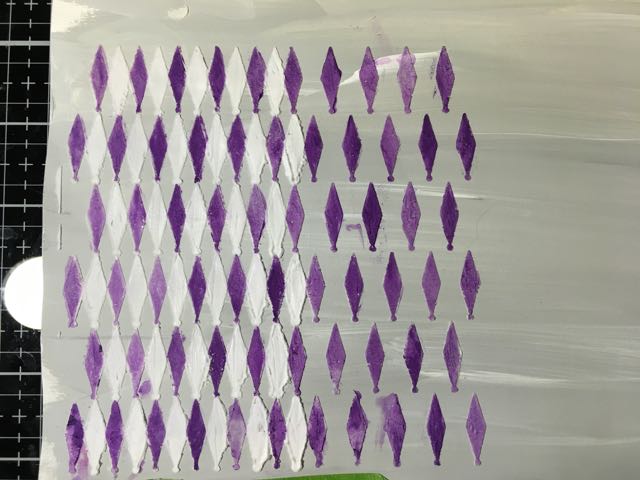
First Pass of Stenciling
I used painted watercolor paper to stencil on because I could control the stenciling a little better on paper rather than on the precut cardboard. A light grey provides the background between the harlequin colors.
Second Pass of Stenciling
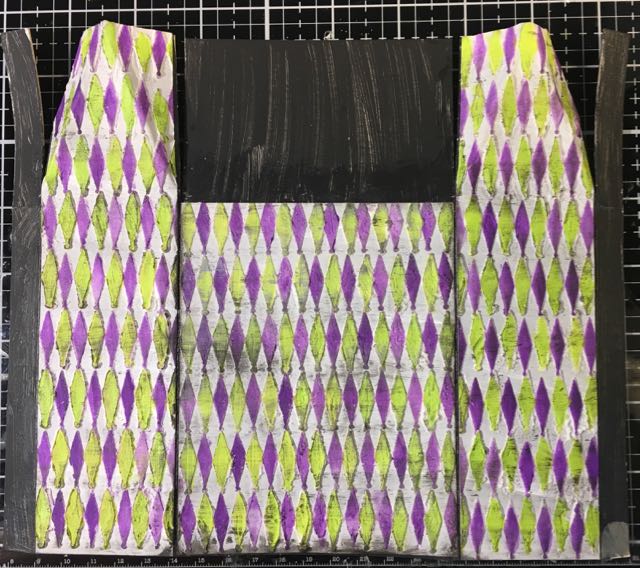
Third Pass of the Stencil
Some of the stenciling smeared a little bit, but it's ok. It's a Halloween house. That's what I always tell myself.
Since the house pattern is so simple, I just cut out rectangles large enough to cover the surface of the cardboard house and glued them down. Now you see why I had to buy the shifters stencils?
Actually, it would have much easier to stencil without the texture paste using Distress inks, but they are not permanent and I want my little houses to last so I used texture paste and Distress paints - Twisted Citron and Wilted Violet.
After completing the painting or stencils on the outside, glue on the doors and windows.
Decorate the inside of the Miniature Halloween Bookstore
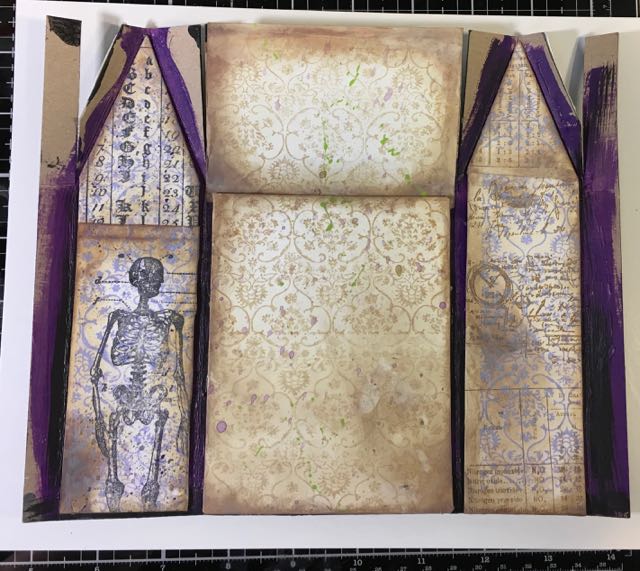
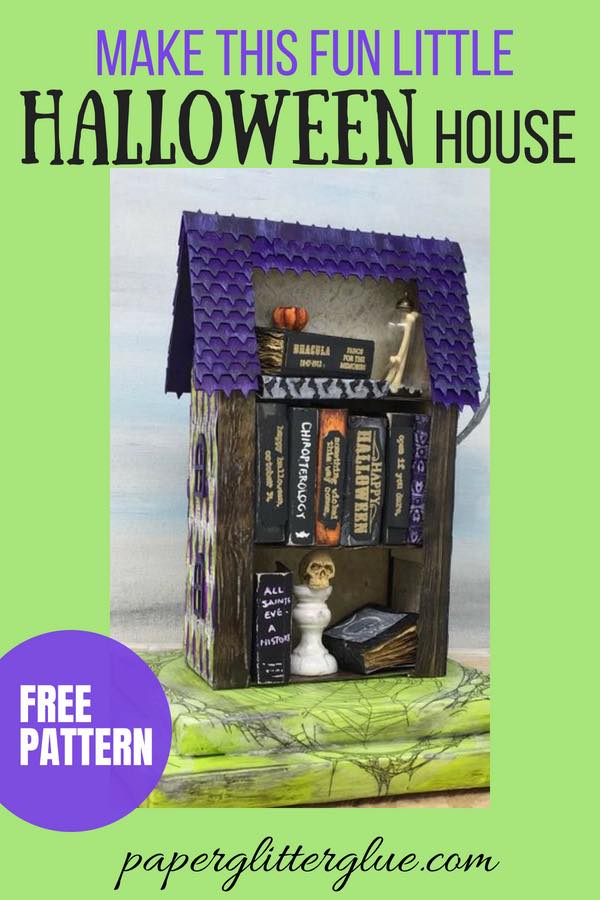
With the outside done, we can turn our attention to the decorating the inside of the little house. Most of the time, my little cardboard houses don't have an inside to worry about, but the two-sided houses do. Not much of the inside shows, but some does. On the Apothecary Halloween house, mostly the attic haunted by the ghost is visible. The same is true for the Harlequin House Used Bookstore, but not nearly as much shows. Still you cannot have raw cardboard visible.
I cut out a sections of cardboard to reinforce the house structure and covered them with stamped paper. I used another new stamp (yes, another one - it's kind of a recurring theme) called Ornate and Lace. It's a relatively subtle wallpaper pattern. To keep it subtle, I distressed the paper with Antique Linen distress ink and stamped with Vintage Photo Distress Ink. The contrast is perfect for wallpaper on the back of the little house.
To vary things a little bit, I did stamp a skeleton and a few other spooky elements on the side, but you really can't see them at all on the finished house. I also spattered some paint because I might enter an online challenge that includes spattering.
Add the roof shingles to the Miniature Halloween Bookstore
Ah, the shingles. I agonized about the shingles. First I painted them black, then overpainted with Wilted Violet distress paint, then edged them with Twisted Citron paint which looked horrible. Then I repainted them black, then purple. Then I decided to try a different shape, then I went back to these offcuts shingles. And finally, I glued them down on the house. They were kind of pain because I was trying to stagger them, but the die cuts vary a little so it was difficult to stagger them.
After all the glue, I decided that the front of the house looked overwhelming with that big expanse of purple. What to do? Distress them, smear them with some Black Soot paint and then highlight a little bit with Picket Fence. Am I totally happy with it? No, but it looks so much better.
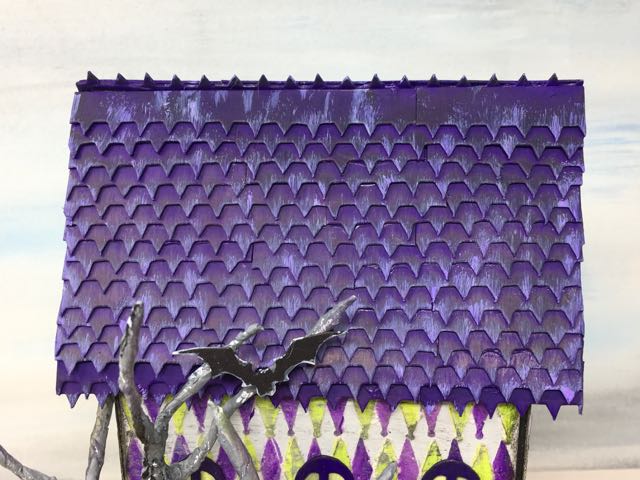
The problem with this roof is that it forms such a large visual presence because I need the space in the back to display things (storage - it's all about storage). It's kind of like many modern houses with large garages in the front occupying much of the visual space of the house. It's a design challenge. Anyway, I like the roof better with the distressing.
Make bookshelves and glue in place
Next I made the bookshelves with the Sizzix 3-D Embossing Folder Lumber. I inked the folder first with black Archival ink to get in the crevices and then inked it with Walnut Stain distress oxide and Ground Espresso. To make sure the color is permanent I coated it with a layer of Mod Podge. By accident I used gloss Mod Podge, but it's ok. Mod Podge does smear the Distress Oxides, but that worked anyway because of the permanent black Archival ink providing the contrast.
I covered the underside of each shelf with leftover paper from the background which worked nicely.
For the sides of the bookshelves on the back of the house, I used leftover wood grain paper to make them look like wood as well.
Make a Miniature Book for Your Halloween House
You'll find my tutorial for making miniature books on this post - Make a Miniature Book for Apothecary Halloween House. So for a bookstore I needed more books than for the previous house. Last time I made 5 books, this time 10 books.
It took me a whole day. That's because I get all caught up in the details. First I tore all the paper rather than cutting it, so the edges would be old looking. Then I soaked them in tea water so the pages would be old looking. After that they went into a warmed oven (turned off) to get wrinkly to guarantee that they would be old looking. See what I mean. The pages barely even show on most of the books. I could have folded the covers around scrap cardboard and that would have been fine, but no, I wanted authentic little books that actually open even though I knew I was going to glue them closed.
A little excessive, don't you think? Sometimes we get that way in our creative process. Despite the time, I still had fun making them.
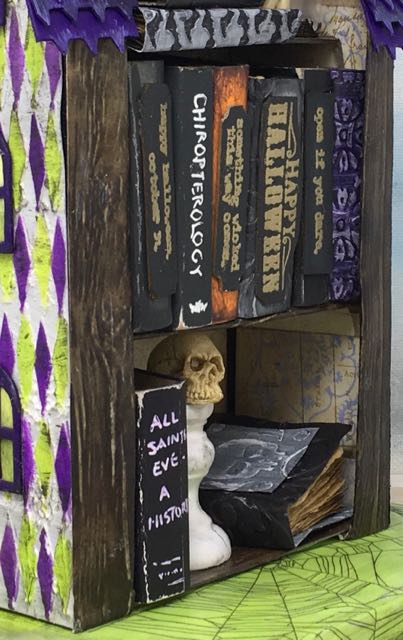
I found a number of small stamps that could function as titles of the Halloween books. I hand lettered two titles - Chiropterology, the study of bats and the All Saint's Eve book.
Book titles available at the Harlequin House Used Book Store
Make a Marble Plinth for poor Yorick
I meant to enter a Frilly and Funky challenge called "August" which is a month named for Augustus Caesar and was supposed to include some type of marble effect, arches or columns. Well, I missed the deadline - probably because I was obsessing about the little books.
In any case, I did learn to paint faux marble on a tiny scale. The first directions I clicked on when I goggled faux marble was from Family Handyman where they demonstrated the technique on an old wooden table. I was able to get enough of an idea of how to do just from skimming that article. Basically it's a white base, streaks of grey, smear the streaks of grey, thinner grey or black streaks smeared again, then overpaint with white. I'm pretty happy how the plinth (the marble stand for a bust or sculpture) turned out.
The skull is named Yorick for the jester's skull in Hamlet - "Alas! Poor Yorick." Yorick needs a label so everyone will know his name.
Glue decorative elements to the bookshelves
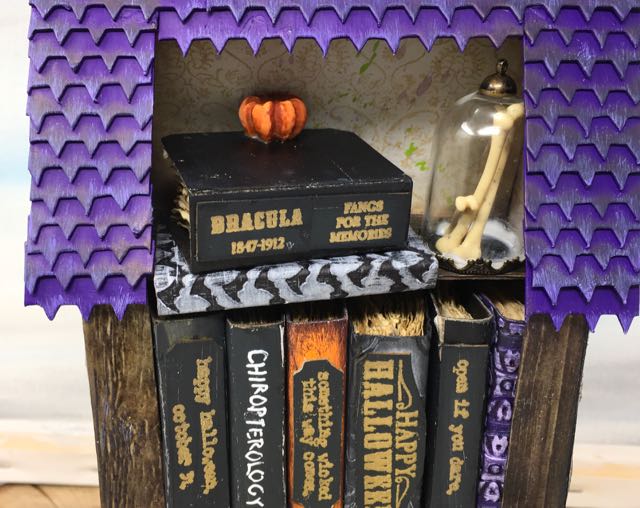
Now glue the books and other Halloween decor to the shelves. I made most of the books a little bit too big so they won't fit on the bottom or top shelves, but they fill up the middle shelf very nicely. Yorick and the two textbooks work on the bottom shelf. And Dracula's autobiography "Fangs for the Memories" fits on the top with the bat embossed book and some bone specimens.
Make and decorate a cardboard base to support the little house
I often agonize about the base as well. If I make a traditional putz house I know what to do - simple base just a little bigger than the house with fencing surrounding it, but a two-sided Halloween House that's a used bookstore? Didn't really know what to do with that. And colors are a challenge to me so the Wilted Violet and Twisted Citron kind of freaked me out. I figured with the roof so purple, I had to go with Twisted Citron for the base. Because I was so unsure about what to do, I made 2 different sizes. Somehow I stacked them and figured this will work nicely.
And then some Tim Holtz spider webs from Stampers Anonymous stamped on collage paper glued on edges seemed to bring out a little creepiness, but not too creepy.
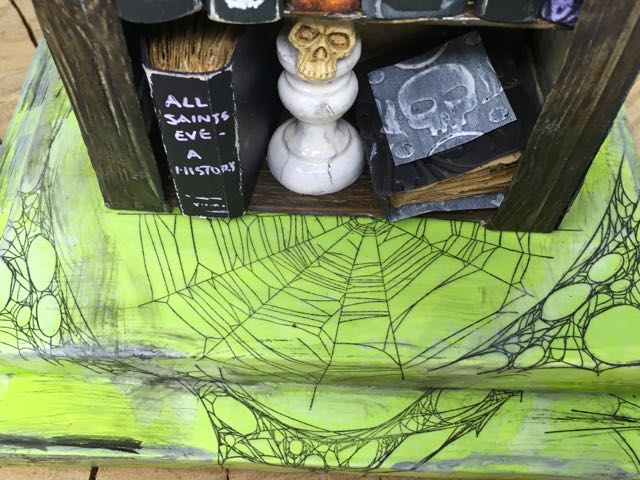
Aren't these the greatest spiderweb stamps? I distressed around them a little bit to disguise the collage paper edges.
Glue on the twisted tree and pumpkins
The front of the little house needed something more so I glued on one of my twisted trees and a few pumpkins so it wouldn't be so blah.
Make sign to advertise the Harlequin House Used Bookstore
And now what do? I may paint the tree some more. I see what blotches of primer showing through. Maybe more bats? I need to make a sign for the front of the house. I haven't figured out the right font or how I want to do it yet. It's one of the those details I usually get to right before I sell the little house at the Habitat for Humanity fundraiser. I call these details - the punch list - like when you build a house and all these little details have to be finished before you can move in.
Which side do you like best? Even though I love the harlequin effect, I do love the little books. For me, I'd have to say the back of the house.
Did I leave out any details about making the house that you are curious about? If so, just comment below or email me at [email protected]. I am always happy to help.
Sign up for the newsletter below. Also if you like this miniature Halloween house, then pin it to your favorite Pinterest board.
Lynn
I really like the paint job on this house! The roof is really cool as well! I love the titles of the books!
Lucy
Thank you, Lynn. I know you love books, I love them too, so this was a fun little house to make. I'm glad you like the painting on this house. I wasn't sure about it at first, but I do like it now.
Sara Emily Barker
SQUEAL!!!!! Drool! Squeal again! OK, now that I have all my sounds out of the way, I can blabber on an on about this whimsical Halloween bookstore. Your details are so incredibly thought out and lighthearted, and it's so much fun to read about your process, as well. Choose a favorite side???? You've got to be kidding! I love it all! The stenciling on the front/side is so cool, and I think the roof really sets it off. But those books, bones and oh!!!! that marble plinth and Yorick are so dang creative! LOVE, LOVE, LOVE your amazing creativity! Well, I could go on and on, but life is calling! Thank you so much for your incredible inspiration! (Sorry you missed the August challenge, but I'll thank you anyway for all loyalty to the challenge blog.) Hugs!
Lucy
Sara Emily, I am so glad you like this one, too. It is so fun to read your comments. Thank you.