
Handmade book cover for my friend who recently retired.
One of my lovely co-workers whom I've worked with for 30 years recently retired. Naturally, I wanted to make something for her, but I didn't think a little house would be the best thing. I had some pictures from work that I took when another co-worker left so I decided to make a handmade book. Never having made a real true bound book before, it was a challenge, but a FUN challenge.
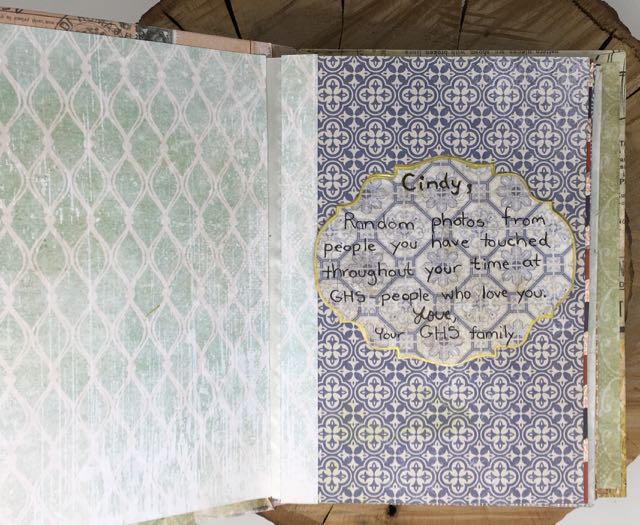
The inscription for my friend's retirement book. The photos didn't have a cohesive structure so I decided the theme would be random photos of her time at work.
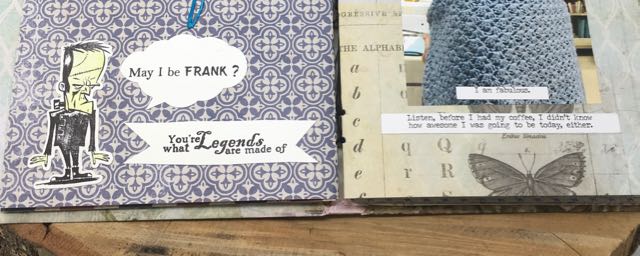
I found this stamp among my Halloween stamps. It's perfect for one of the first pages in Cindy's book.
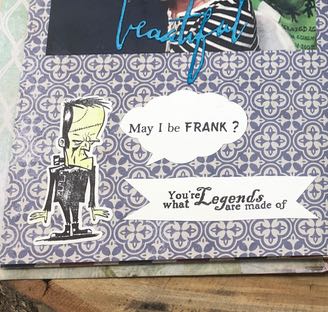
A perfect sentiment for an extremely grumpy co-worker. Another stamp I found in my Halloween stamp collection - Franken Bad Hair Day

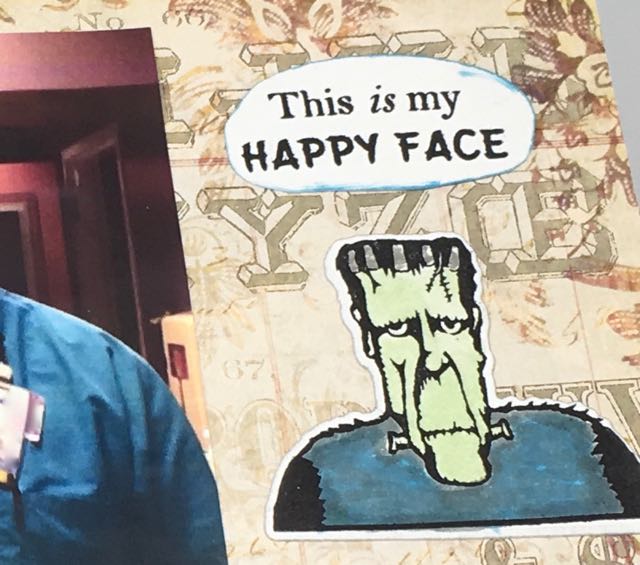
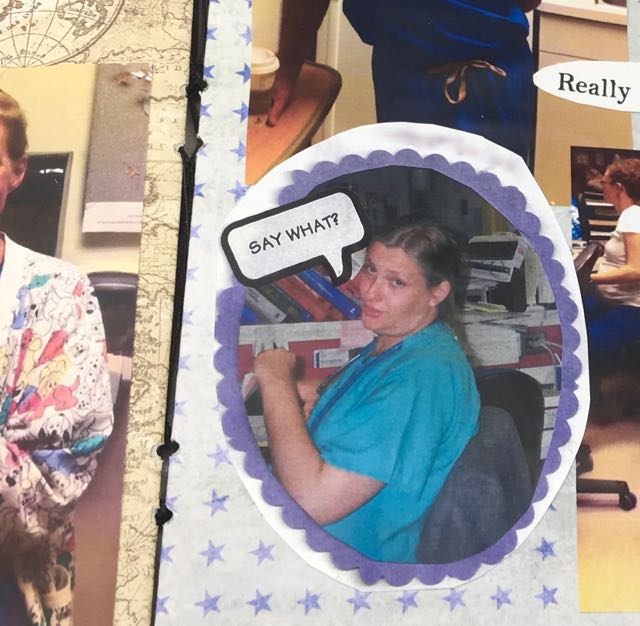
This caption expresses my feelings perfectly when I ask for directions. If I can't tell left from right, how I am to know which way is EAST? Cindy will know it's me from the caption without even looking at the photo.
General Instructions for Your Handmade Book
So here are the general instructions on making Cindy's book. I'm not really going into detail partly because I didn't take photos as I went along (and that was because I didn't know if it was going to work or not). My intention is to give you enough detail so you will think to yourself - I can make a book, too. The best instructions I found are here on Instructables - How to Create a Hand-bound Sketchbook.
I modified a lot of the details for several reasons: I was in a time crunch, to make it a little easier, and I didn't know what I was doing. Still this is the basic structure that I used. Next time I will follow the instructions much more closely.
Another very good site that shows how to bind the signatures (the sets of folded book pages) together is this retired blog.
First, the Papers for Your Book
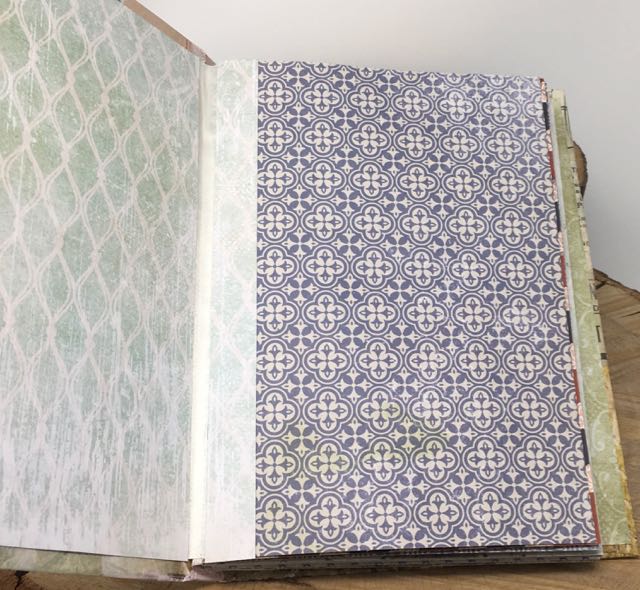
I must confess that I am a paper hoarder. You've probably figured that out if you've read anything on my blog. Yes, I have a problem with paper. I have always loved paper which means that I always have a HUGE stash of papers stored away for almost any kind of project my brain compels me to try. For this project I had several great 12 x 12 scrapbook pads of Tim Holtz papers just begging to be used. The ones I used for this project are: Tim Holtz Idea-ology Memoranda, Paper Stash Wallflower, and Correspondence.
Cut Your Papers to Size
The size of the book was determined by the size of the papers, to make the book easy to look at and large enough to fit 2 photos per page. I decided on a cover of 9 inches tall by 6.5 inches wide. Each individual page is 8.5 x 6 inches. To make the pages, I cut the 12 x 12 scrapbook papers down to 8.5 inches tall x 12 inches wide. I cut 12 pages to that size.
I matched up 2 pages that I thought looked good together and folded them in half. That gave me 6 sets of folded pages (called signatures) for a total of 48 front and back pages.
Sew Signatures together
This is where I followed the instructions from the Instructables website. Punch 6 small holes on the edge of your papers. You can use an awl or even a needle, but I used a small hole punch just to catch the edges of the papers so I could sew through the holes with thick thread.
You're supposed to use heavy duty linen thread to make real books, but all I had was heavy duty button and carpet thread. For strength I doubled up the thread. Below you can see how the holes are spaced and get an idea of the thickness of the thread.
The 6 holes where the signatures were sewn together are visible here.
Here you can see the gaps between the signatures.
Bottom half of the first two pages again showing how the signatures go together. Also with a small gap between the signatures.
The only complete photos of people I am including are mine and they are ancient. One photo above is 20+ years old. I'm sure I was telling them that I am allergic to cameras because that is what I say every time someone points a camera my way. But my point in including this page is showing how the signatures fit together and that there are some gaps because I didn't glue a strip of cloth or flexible paper to the edge of the signatures to make them a cohesive unit in the book.
Sew and Glue the Signatures Together
Each signature consists of 2 folded papers making 8 pages total. They are sewn together in the middle with long running stitches. After you sew one set of pages together, you stack the next set on top and continue sewing with the same thread. That anchors them together. I didn't take photos of this step, but you can see it on the Instructable page I linked to above.
Then the next step to truly make the signatures stick together (and avoid the gaps) is to cut a small strip of cloth the length of the book spine and apply glue to the sewn edges of the signatures and glue the whole set together. These pages wouldn't have opened up the way they did if I had done that.
Glue Covers and Spine to the Book
Here's where I really cheated. It was getting very late so I had to improvise for the covers. I don't even remember what steps I took to do these steps because I was so tired and I needed to sleep. It would have been easier to keep following the Instructable instructions than to improvise like I did. But fortunately the book holds together nicely despite my slapdash glue and tape method.
Cloth tape and glue holds the book to the front and back covers. Reinforcement strips of paper were glued on as well.
I added the photos and sentiments AFTER the book was bound together because I found that I could work on placement better that way.
For my next handmade book I will take photos as I progress so you can see how it all goes together. Overall, despite the time crunch I was under, it worked out better than I expected. And Cindy loves it.
I entered the Mini-Album Makers Challenge here.
Autumn
Lucy, just reading the words "GHS" made me realize how very close we are and have never met! We have to amend that right away! 🙂 You are such a kindhearted friend to make something so difficult and so personal for your coworker and I'm touched by this gesture. I've never learned how to stitch signatures together and make a "real book" so you've already surpassed my lofty goals. he he. I truly love how you used Tim's papers and your personalized touches. <3 We're thrilled that you shared with Mini Album Makers this month! Big hugs, Autumn
Sara Emily Barker
I BET Cindy loves it! Let's be Frank...you did an awesome job on the construction of this album! I don't think I would even attempt it even without time constraints. I just want to say, though, that if you work in the ED you had better know your right from your left! Our Anatomy professor would mark an answer wrong if you didn't note if it was a right or a left whatever. That has proven to be a very good teaching tool. But I totally don't get the east/west/north/south thing. Oh well....
Mary W
She will bring this out over the years and laugh and cry over again.
So many helpful tips and directions, Thank you, Mary
Lynn
This book is awesome! What a book to be treasured!
Lucy
Lynn, thank you. I have to finish a few details then I need to give it to her.
Anne R
Lucy, I think you did a remarkable job considering your time constraints and the fact that this is your first! You used some great papers from your hoarded stash and I love both of those 'Frank' stamps that you used. I am not at all surprised that your friend Cindy loved her album, it is so much more special because you made it for her.
Thanks so much for joining in our June Challenge at Mini Album Makers. Anne x
Lucy
Thank you so much, Anne. I didn't expect to like making books so much. The mini-Album challenge is very inspiring and part of the reason I was tempted to try this.