• Skip to primary navigation
  • Skip to main content
  • Skip to primary sidebar
  • Skip to footer
Paper Glitter Glue
  • Shop
  • Favorite Supplies
  • Tutorials
  • About
  • Contact Me
  • Free Library
menu icon
go to homepage
search icon
Homepage link
  • Shop
  • Favorite Supplies
  • Tutorials
  • About
  • Contact Me
  • Free Library
×
Home » Challenge » Origami Wallet - "You've Got to Know When to Fold 'Em"

Origami Wallet - "You've Got to Know When to Fold 'Em"

March 20, 2017 by Lucy Leave a Comment

Be sure to Pin to your Favorite Pinterest Board!

3 shares
  • Share

This month's Frilly and Funkie challenge is "You've Got to Know When to Fold 'Em" which made me think it is time to share a simple craft that I have been doing for years that I think people might be interested in. First, a little background. I work in a Pediatric ER and sometimes we (the staff) want to let a child know that they have been very brave so we give them a special prize. For years I wrote "Best Patient of the Day" on a label, stuck it on a urine cup and put a dollar inside and gave it to the best patient. One of our patients grew up to be an EMT and told me that he still has his "Best Patient of the Day" urine cup with the dollar still in it because it meant so much to him.

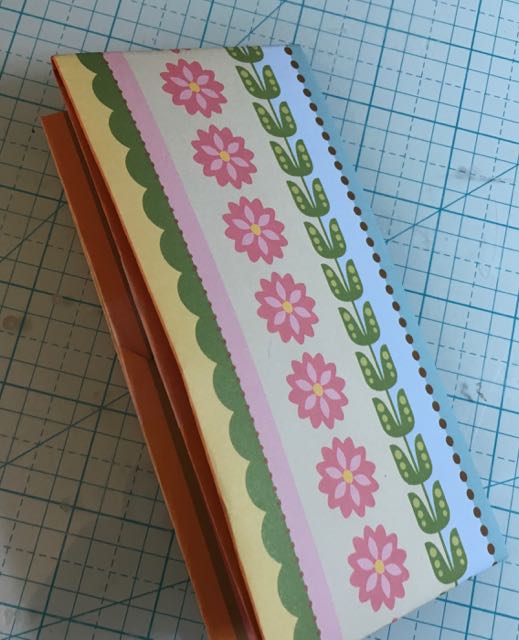
The Origami Wallet - sticker holder. Nothing fancy, just an easy, easy craft to share with a child
Start with a 12 x 12 sheet of scrapbook paper

I tried to think of something a little more fun for kids so I googled "origami wallet" and saw an example made with 6" origami paper. Clearly, that was too small so I figured I could make one with 12" scrapbook paper. That's really how I got into scrapbooking stuff - from going to the craft store frequently and buying pads and pads of scrapbook paper. The other nice thing about this size wallet is that stickers fit perfectly inside.

Here are instructions. I think you can probably make one just from looking at the photos.

Step 1. Fold the paper in half

Step 2. Fold each half to the middle just to the crease line. Try not to fold past the crease line.

Below are the 2 halves folded to the middle.
Step 3. Fold each corner down to so that the fold makes a right triangle that just touches the crease line.

Step 4. Do that for all 4 corners.

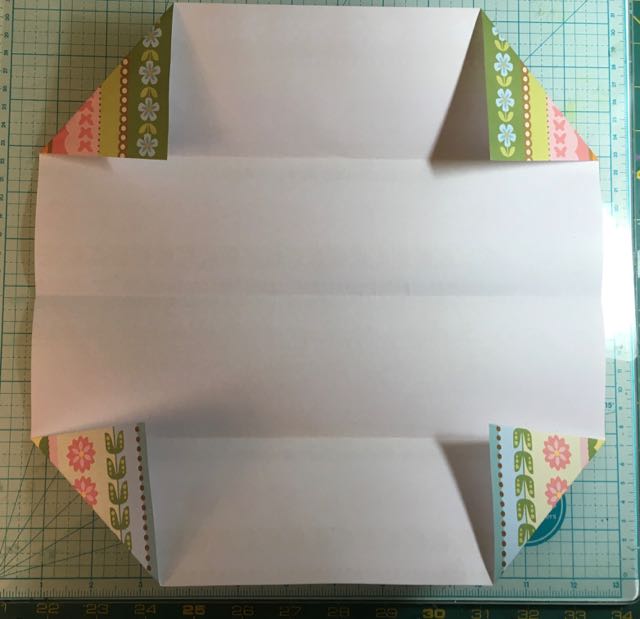
Step 4. Fold the flaps back down.

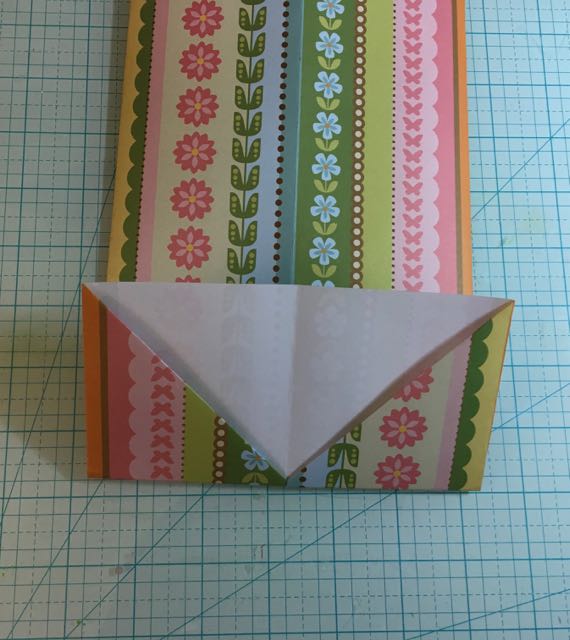
Step 5. Flip the paper over so the folded corners are underneath.

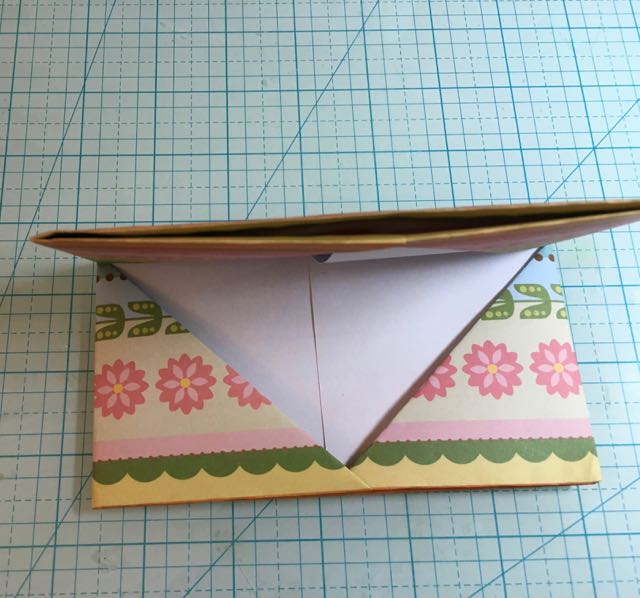
Step 6. This is one of the harder steps. Fold the end up to reveal the folded in corners. The only thing hard is that you fold it just to the tip of the triangle made by the folded corners is visible.

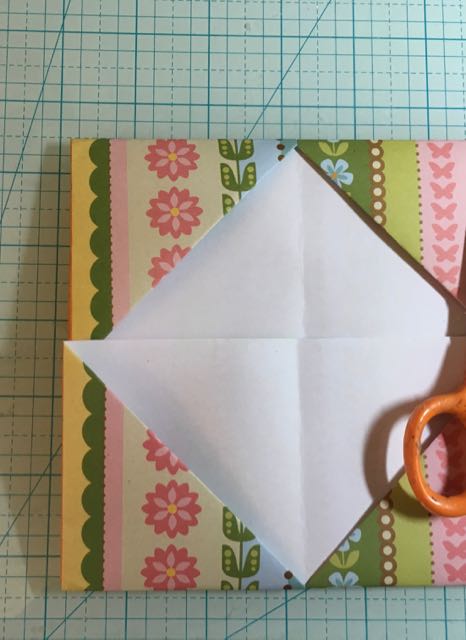
Step 7. Do the same thing with the other side. You need to have it overlap the first side you folded up so you can tuck in the corners to anchor your wallet. See the overlap below.

Step 8. Completed wallet. Ta Dah!! When you close the wallet fold it where it already has the center line crease, no need to make new creases.

Step 9. I found that when I gave it to kids without taping it, the first thing they did was unfold it. They can't help it. So now I tape it in 3 places - a tiny piece where the ends are tucked in and in the middle to hold the paper down inside the wallet.

You can see where the tape holds the tucked in pieces.

Small piece of tape to hold down the paper in the middle. That way stuff doesn't slide in that area which would be hard to reach without unfolding the wallet.

See how nicely stickers fit in the wallet. A dollar for "Best Patient of the Day" fits when folded in half. Usually I hide the dollar behind the stickers so it's more of a surprise for the child.

This is so easy to make and the kids love them. I just thought someone might find the idea useful so I am sharing it on the Frilly and Funkie challenge this month.
« New and Improved Steampunk House
Butterfly Spinner Card - Layer it Up Challenge »

Be sure to Pin to your Favorite Pinterest Board!

3 shares
  • Share

Reader Interactions

Comments

    Leave a Reply Cancel reply

    Your email address will not be published. Required fields are marked *

  1. Zoe Hillman

    April 03, 2017 at 2:46 pm

    So thoughtful and a great way to fold. Thanks for joining the Frilly & Funkie "You've got to know when to fold 'em" challenge.

    Reply
  2. Cec

    April 01, 2017 at 11:35 pm

    What a fun fold and such a thoughtful idea. Thanks for joining us at Frilly and Funkie.
    Hugs!
    Cec

    Reply
  3. Kathy/NorthCarolina

    March 29, 2017 at 6:06 pm

    This is such a great tutorial! I'm going to make these with the grandgirls the next time they come to visit. They will love them!Clearly, you know when to fold 'em! Thanks for sharing with us at Frilly and Funkie!

    Reply
  4. Suzanne C

    March 29, 2017 at 11:48 am

    What a beautiful thought and wallet! How special of you to share these treats to the people you care for. Love your sweet origami wallet and the thought and sentiment put into it! Thanks for playing along with us at the Frilly and Funkie Challenge!

    Reply

Primary Sidebar

Lucy holding a small putz house

I'm Lucy - the paper architect behind the captivating tiny house designs at PaperGlitterGlue.com.

While I am often found covered in glue and cat hair and obsessing about the details of my projects, I love sharing my designs so anyone can craft seriously awesome paper crafts.

So look around and find something to MAKE.

You can read more about me here.

Want to make a beautiful Village Wreath?

You can do it step-by-step with my Alpine Village Wreath Workshop. Just let your creativity flow as create your own little village proudly displayed on a wreath. You'll create a heirloom that your family will treasure for years.

Wreath with alpine village houses and bottlebrush trees

And if you are a Halloween fan - you'll love my Halloween book! 13 Handcrafted Halloween Houses

This book contains 13 different Halloween designs with embellishments like crooked windows, fences, and shingles.

13 Handcrafted Halloween Houses book cover

What is a Putz House and How Do You Make One?

Halloween house putz house

Learn to make the best House Pop-Up Cards! with the Playful Pop-Up Houses book.

Cover for Playful Pop-Up Houses book

Footer

You are welcome to link to PaperGlitterGlue.com or use a single image with a brief description and a link back to any post. Do not republish any post. That's not allowed. But I do like it when you share my photos to Pinterest.

Amazon Associates Disclosure

Lucy Foxworth of PaperGlitterGlue.com is a participant in the Amazon Services LLC Associates Program, an affiliate advertising programs designed to provide a means for sites to earn advertising fees by advertising and linking to Amazon.com. So as an Amazon Associate I earn from qualifying purchases. Thank you.

Footer

↑ back to top

About

  • Privacy Policy
  • Disclaimer

Newsletter

  • Sign up with the form below for emails and updates.

Contact

  • Contact

As an Amazon Associate I earn from qualifying purchases.

Copyright © 2023 Paper Glitter Glue