• Skip to primary navigation
  • Skip to main content
  • Skip to primary sidebar
  • Skip to footer
Paper Glitter Glue
  • Shop
  • Favorite Supplies
  • Tutorials
  • About
  • Contact Me
  • Free Library
menu icon
go to homepage
search icon
Homepage link
  • Shop
  • Favorite Supplies
  • Tutorials
  • About
  • Contact Me
  • Free Library
×
Home » Cardboard house » Cardboard base » Progress on the Gothic Halloween House - Part 4

Progress on the Gothic Halloween House - Part 4

May 7, 2017 by Lucy Leave a Comment

Be sure to Pin to your Favorite Pinterest Board!

  • Share

We last left off with the house glued together but the roof was not on.

Under roof glued down to the roof support flaps, gables cut out.

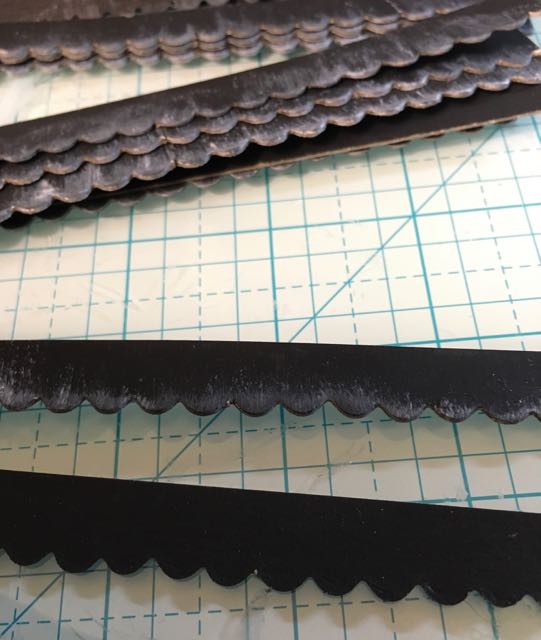
Mini-scallops cut out, painted black, distressed with white paint.

Fish scale shingles glued on gable roofs. Remember to paint the edges of the cardboard. Underside of the gable roofs were painted black but that was a mistake because it didn't provide enough contrast to the fronts of the gables. I dabbed on some Ranger Tumbled Glass - a light blue to solve that problem. I'll show you in a later photo.

3M Painter's Tape holding the roof on so I don't have to walk around the house holding it down.

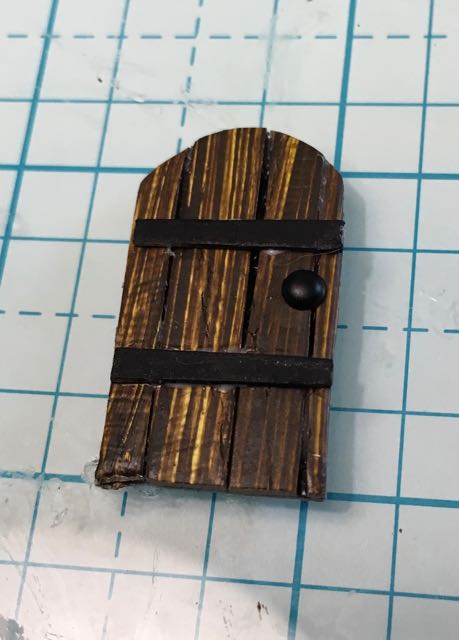
The door is made by gluing woodlike-painted cardboard from a previous project, In the Dog House, to black cardboard. I punch a tiny hole for a tiny brad as the doorknob.

Finished door.

Door glued in the alcove.

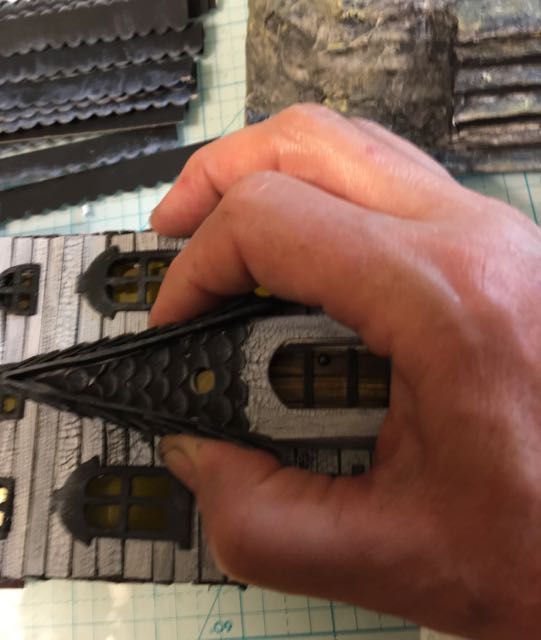
Sometimes I use tape and sometimes I am the tape.

Sometimes I use clamps.

Sometimes I am the clamp.

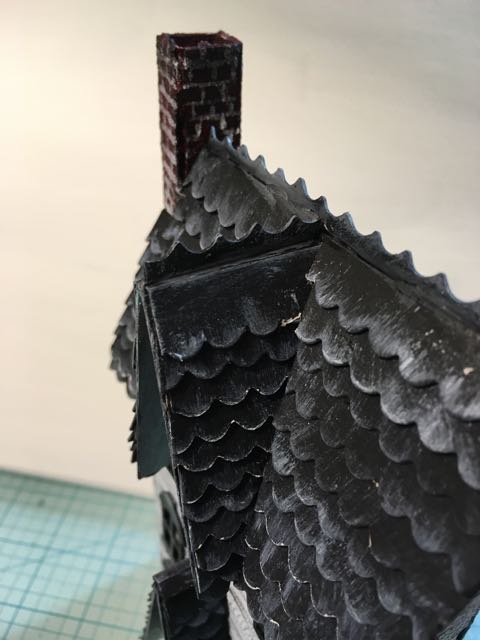
Roof details - I added the scallop offcuts along the ridge line for a little more spooky factor. You can also see a little of the blue painting under the gable. In the photo above you see how the black masks the detail of the shingles on the front of the gable.

I cut out 2 little squares in the base for fence posts.

It will look something like this. The fence pieces are in the oven drying. When I paint and glue stuff I often dry them in a (turned off) barely warm oven. I don't cook much.

So it wasn't big stuff today, but lots of tiny details. The house is built and except for some clean up - searching out the elusive glue balls and tiny cat hairs - the house itself is done. Glue the house to the base, landscaping and halloween decor to follow.

If you are following the progress of this little Halloween house, thank you for reading.

« Gothic Halloween House - Part 3 in the continuing series on making a little cardboard house
Glue is drying - almost done on the Gothic Halloween House »

Be sure to Pin to your Favorite Pinterest Board!

  • Share

Reader Interactions

Comments

    Leave a Reply Cancel reply

    Your email address will not be published. Required fields are marked *

  1. Lucy

    May 10, 2017 at 1:09 am

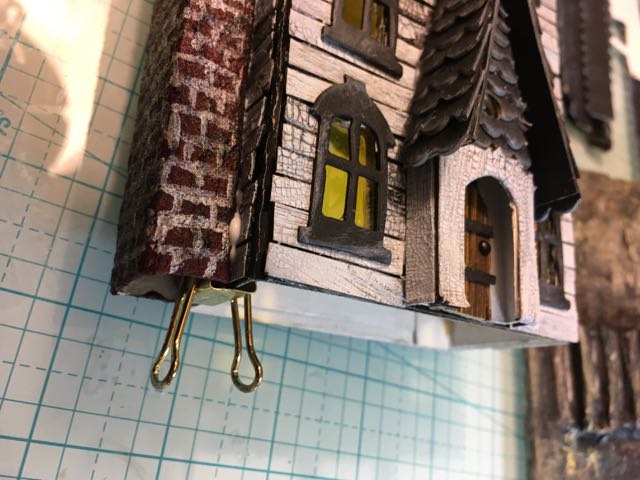
    I use the tape where it can be taped down without damaging the piece or curving the pieces you are gluing together. The depth of the alcove roof wasn't enough to adhere the tape well and didn't want it to damage the crackle finish. I had to hold the chimney on because it required more force to adhere to the side of the house.

    Reply
  2. Laney

    May 10, 2017 at 1:01 am

    Nice tip about the tape - hand not thought of that. I often use clothes pins as clamps - or I just walk around and hold it together! 😉

    Reply
  3. Lucy

    May 09, 2017 at 1:03 am

    Anne, thank you for your comments. I always appreciate hearing from you.

    Reply
  4. Redanne

    May 07, 2017 at 10:55 pm

    You are making great progress on this fabulous little house, I really like the way the roof is looking. You really made me smile with your 'don't cook much' comment, I can't think of a better use for your oven! Anne x

    Reply

Primary Sidebar

Lucy holding a small putz house

I'm Lucy - the paper architect behind the captivating tiny house designs at PaperGlitterGlue.com.

While I am often found covered in glue and cat hair and obsessing about the details of my projects, I love sharing my designs so anyone can craft seriously awesome paper crafts.

So look around and find something to MAKE.

You can read more about me here.

Want to make a beautiful Village Wreath?

You can do it step-by-step with my Alpine Village Wreath Workshop. Just let your creativity flow as create your own little village proudly displayed on a wreath. You'll create a heirloom that your family will treasure for years.

Wreath with alpine village houses and bottlebrush trees

And if you are a Halloween fan - you'll love my Halloween book! 13 Handcrafted Halloween Houses

This book contains 13 different Halloween designs with embellishments like crooked windows, fences, and shingles.

13 Handcrafted Halloween Houses book cover

What is a Putz House and How Do You Make One?

Halloween house putz house

Learn to make the best House Pop-Up Cards! with the Playful Pop-Up Houses book.

Cover for Playful Pop-Up Houses book

Footer

You are welcome to link to PaperGlitterGlue.com or use a single image with a brief description and a link back to any post. Do not republish any post. That's not allowed. But I do like it when you share my photos to Pinterest.

Amazon Associates Disclosure

Lucy Foxworth of PaperGlitterGlue.com is a participant in the Amazon Services LLC Associates Program, an affiliate advertising programs designed to provide a means for sites to earn advertising fees by advertising and linking to Amazon.com. So as an Amazon Associate I earn from qualifying purchases. Thank you.

Footer

↑ back to top

About

  • Privacy Policy
  • Disclaimer

Newsletter

  • Sign up with the form below for emails and updates.

Contact

  • Contact

As an Amazon Associate I earn from qualifying purchases.

Copyright © 2023 Paper Glitter Glue