The First Bat Wing Halloween Cardboard House
This whole house design is inspired by the base and bat wings. I conceived of the base when I heard someone use the term "slippery slope" and it hit me that this was the perfect concept for a Halloween house particularly a bat-winged Halloween house.
Here is the basic sketch of the house - the concept drawings.

Concept drawing for the bat wing houses
The left-sided drawing was the first one after I drew the anatomy of a bat wing. A bat wing is really kind of amazing. The majority of the wing is the bat's hand. Remember that a bat is a mammal so it's structure is closer to our anatomy more than to a bird. If you spread out your hand with the thumb sticking up that is analogous to what makes up the bat wing. In fact, a bat has a little tiny thumb sticking up at the top of the wing. I haven't figured out what to make that out of yet, but I am going to put a little spire at the apex of the wings to represent the thumb. If it's made out of cardboard it will probably be too fragile so I will probably make it out of wire of some kind.
The drawing on the right is easier to execute and looks better to me. You probably can't see much difference, but the straight lines forming the side gables are easier to make than curved ones would be. Also I like the moon cutout rather than a circular window in the middle gable.
Cardboard Base for the Bat Wing House
Now back to the base. You saw the concept drawing above. Here it is in it's raw form being executed. I have used Mod Podge to glue the layers together. There are 14 layers. There were 13 layers, but I am a little superstitious so I added an extra layer. Not rational, I know.
When I first made bases for the cardboard houses I squirted the glue out of my glue bottle to adhere the layers together, but there were 2 problems with that - one, squeezing the glue bottle that much killed my hands. It really hurt. Two, it was hard to get enough glue on the edges to prevent them from flipping up and not adhering at the edge. So I now get a paintbrush, dip it in the Mod Podge making sure to cover the edges well, then paint both the top and bottom of the adjoining pieces. When I have all the layers added, I use strips of scrap paper, brown packing paper in this case, to hold the edges together. If the base gets a little wonky and is sloped on the top I try to squash it down to make it level. Pretty easy to do at this stage.
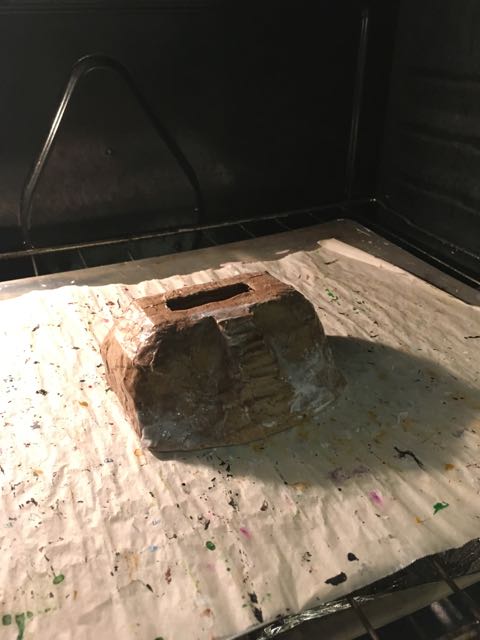
Cardboard Base before the Stairs covered with paper

This is what my oven is for - drying craft pieces. I turn on the timer for 3-5 minutes, heat up the oven during that time, turn it off and put my pieces in. Have I ever left the oven on with some craft pieces in there? Yes, and the smell will alert you pretty quickly. Have I ever burned up something I am working on? No, not yet. I have melted the acetate a little bit though.
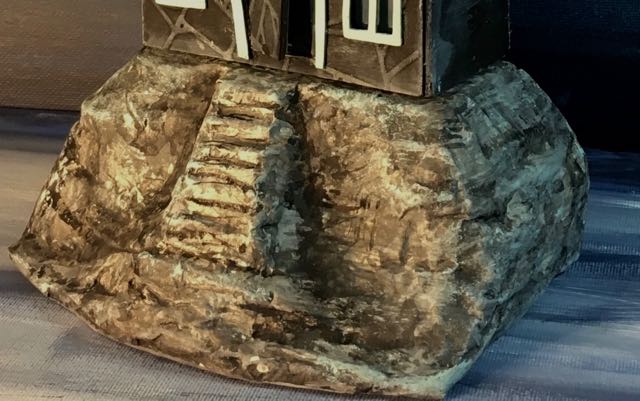
Slippery slope base in progress. Still playing around with the paint. Since the house will be black, I need the base to be lighter for contrast.
Here is the house in progress balancing on the slippery slope base.
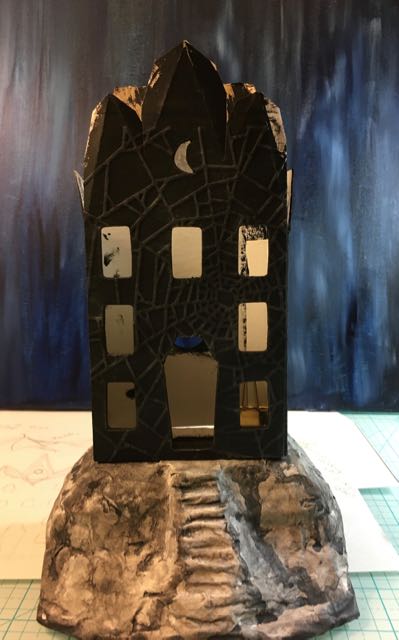
The Count Awaits Bat Wing House on the Slippery Slope cardboard base
More tomorrow on making the house. I don't know why this one is going so fast. Maybe because I have several days off in a row AND I am inspired.
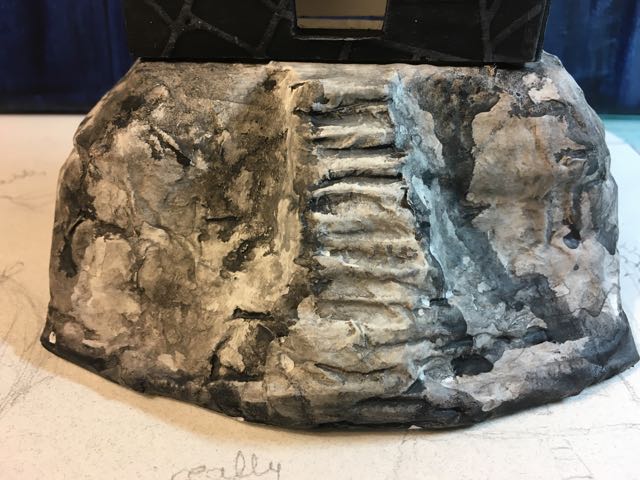
Close-up of the finished base for the Count Awaits Bat Wing Halloween House.
Once again thank you for stopping by and reading about my crafty journey. I have really appreciated everyone's comments on my previous houses. Thank you.
Maggie
I really love how your Count's Lair came about, I'm trying to do some air dry clay houses for my daughters and would certainly use some of our ideas.
Lucy
I am so glad you like this house. I haven't ever made houses from air dry clay houses, but I'm sure you could make them in a similar manner.
I would love to see your versions that you are making for your daughters.
Lucy
Myrna
I love your idea, it’s going to look fabulous.
One question the base looks like you actually put rocks on the design, can you tell me how to achieve that look.
Keep up the good work
Lucy
Myrna, what looks like rocks is just paint. I just play around with the layers of paint until it looks like rocks. I think I painted over it several times. To get that effect, I will smear and streak the layers because rocks are so variable and irregular. I will re-read the post and see if I can give you more specific instructions later today or tomorrow (work, you know.) Lucy
Laney
Nice to see the base in progress. Interesting to see how you are forming it!
Lucy
Thank you, Anne. I am so excited about being recognized on A Vintage Journey. What an honor.
Redanne
Your slippery slope looks amazing and so does the beginnings of the house! Congratulations on being a pinworthy at A Vintage Journey with one of your previous creations too! Anne x