• Skip to primary navigation
  • Skip to main content
  • Skip to primary sidebar
  • Skip to footer
Paper Glitter Glue
  • Shop
  • Favorite Supplies
  • Tutorials
  • About
  • Contact Me
  • Free Library
menu icon
go to homepage
search icon
Homepage link
  • Shop
  • Favorite Supplies
  • Tutorials
  • About
  • Contact Me
  • Free Library
×
Home » Cardboard house » Cardboard base » Slippery Slope - The Count Awaits

Slippery Slope - The Count Awaits

May 13, 2017 by Lucy 2 Comments

Be sure to Pin to your Favorite Pinterest Board!

11 shares
  • Share

This house is going to be named "Slippery Slope - the Count Awaits" so the question a visitor would ask,  "Do I really want to go up those stairs?"

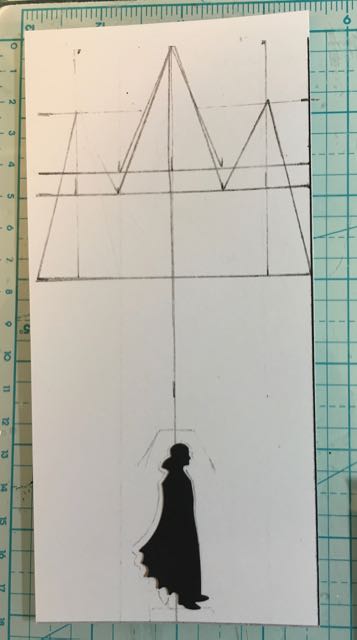
I have been planning on using the cutout of the Count Dracula from a retired Martha Stewart punch ever since I stumbled onto it. There was one on sale on Ebay for several years that was listed at $300, now reduced to about $150, but I found one much cheaper on an Etsy site. I felt like I'd won the lottery when I got it.

The photo below shows the figure in the coffin-shaped doorway on a sketch of the facade.

The silhouette of the Count in the doorway to see how he will fit. It also shows the embossed facade with the Sizzix Tim Holtz Spiderweb embossing folder. The house is painted black and I used Ranger Picket Fence ink to highlight the embossing. I used leftover acetate packaging for the windows. They were colored with blue Ranger alcohol ink.

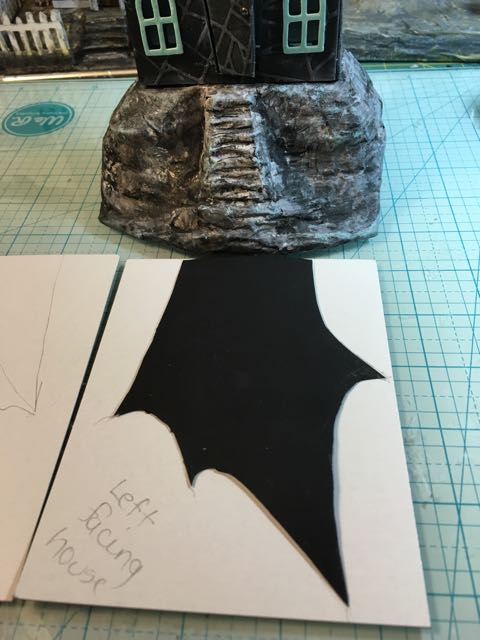
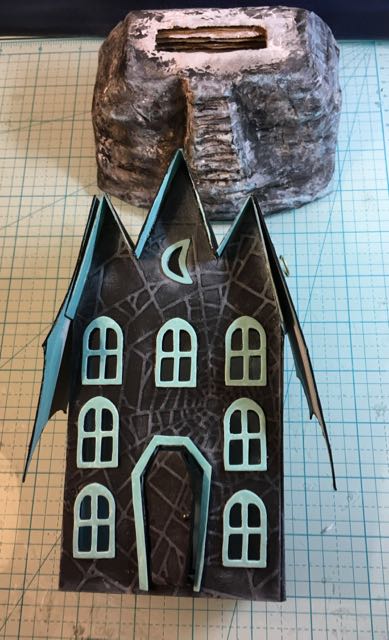
Here are a few more step-by-step photos of the house. The house structure is based on a house pattern that I sent to Accucut for a custom die. This glued-on facade (glued front and back to the base structure of the house) has 3 gables which will serve as the body of the bat and the 2 side supports for the wings. The photos show it best.

I was going to have red windows and red bat underwings, but the color was too jarring for me. It would make a good Halloween design, but too stark in my opinion. The white piece in the door is the hinge part for the coffin door so it can actually open a little. The Count is in the doorway. The cutout portion of the door was glued onto the hinge piece. I had to cut the main door down a little bit to allow it to fit and move. 
Initial design for the bat wing template.
Testing the wings - too big. I wanted them to be exaggerated, but that was extreme.

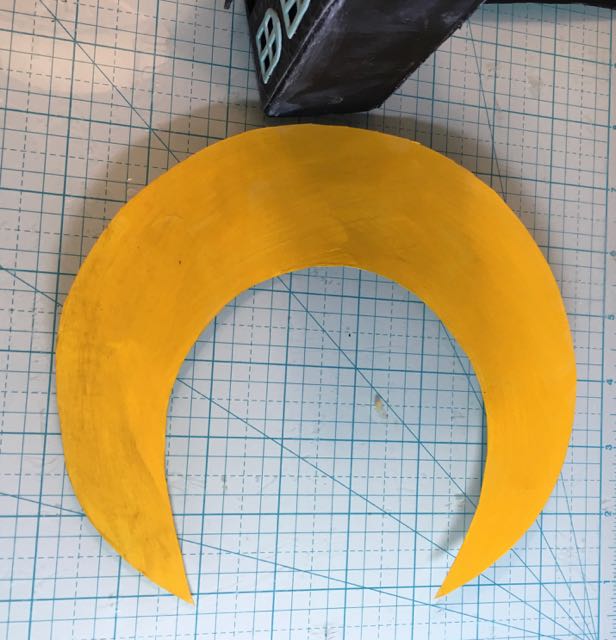
Moon prototype for the "Batground". Not sure about this.

Modified wings - much better. 

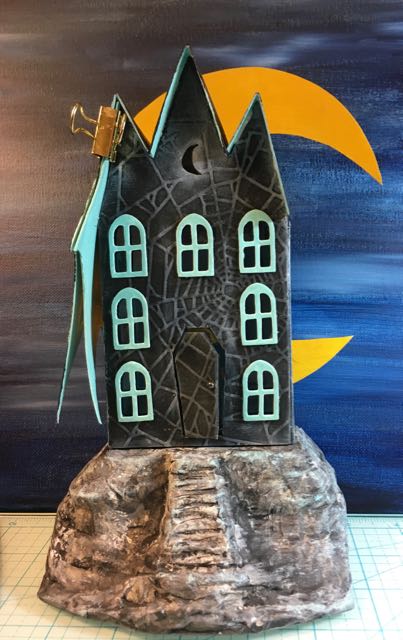
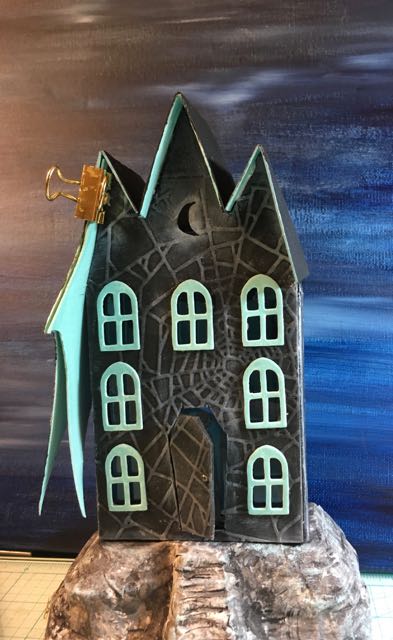
I think I need to add framing around the Moon window and the coffin-shaped doorway. What do you think? It's not glued down yet, but I think it makes the doorway and the moon show up so much better.

This is where I am now. I am pleased with how it is turning out. I do have to figure out some more details about the wings and the moon. My plan for the wings is to glue some string to function as the bones of the wings and then cover it with a layer of tissue paper and paint it black.
The plan for the moon is to make several paper mache prototypes of different sizes and try them out. If they don't work on this house, I'm sure they will work on some other project. 

That's the current progress on the Slippery Slope house.

I hope you will make a little cardboard house sometime and have fun in the creative process like I do. Thank you for reading my blog and for all your wonderful comments.

« The Slippery Slope - Fun with a New Halloween House
Sea Life Framed »

Be sure to Pin to your Favorite Pinterest Board!

11 shares
  • Share

Reader Interactions

Comments

    Leave a Reply Cancel reply

    Your email address will not be published. Required fields are marked *

  1. Mary W

    June 10, 2018 at 10:27 am

    Love those wings, such a unique idea. I'm going to make one, thanks for the inspiration.

    Mary

    Reply
  2. Laney

    May 15, 2017 at 12:13 am

    So fun to follow your progress. I do like the framing around the door and the moon window. I think it looks better - they stand out more. I like the blue and the blue windows too.

    Reply

Primary Sidebar

Lucy holding a small putz house

I'm Lucy - the paper architect behind the captivating tiny house designs at PaperGlitterGlue.com.

While I am often found covered in glue and cat hair and obsessing about the details of my projects, I love sharing my designs so anyone can craft seriously awesome paper crafts.

So look around and find something to MAKE.

You can read more about me here.

Want to make a beautiful Village Wreath?

You can do it step-by-step with my Alpine Village Wreath Workshop. Just let your creativity flow as create your own little village proudly displayed on a wreath. You'll create a heirloom that your family will treasure for years.

Wreath with alpine village houses and bottlebrush trees

And if you are a Halloween fan - you'll love my Halloween book! 13 Handcrafted Halloween Houses

This book contains 13 different Halloween designs with embellishments like crooked windows, fences, and shingles.

13 Handcrafted Halloween Houses book cover

What is a Putz House and How Do You Make One?

Halloween house putz house

Learn to make the best House Pop-Up Cards! with the Playful Pop-Up Houses book.

Cover for Playful Pop-Up Houses book

Footer

You are welcome to link to PaperGlitterGlue.com or use a single image with a brief description and a link back to any post. Do not republish any post. That's not allowed. But I do like it when you share my photos to Pinterest.

Amazon Associates Disclosure

Lucy Foxworth of PaperGlitterGlue.com is a participant in the Amazon Services LLC Associates Program, an affiliate advertising programs designed to provide a means for sites to earn advertising fees by advertising and linking to Amazon.com. So as an Amazon Associate I earn from qualifying purchases. Thank you.

Footer

↑ back to top

About

  • Privacy Policy
  • Disclaimer

Newsletter

  • Sign up with the form below for emails and updates.

Contact

  • Contact

As an Amazon Associate I earn from qualifying purchases.

Copyright © 2023 Paper Glitter Glue