 Tutorial for an Upcycled Cardboard Book with a Drawer
 Tutorial for an Upcycled Cardboard Book with a Drawer
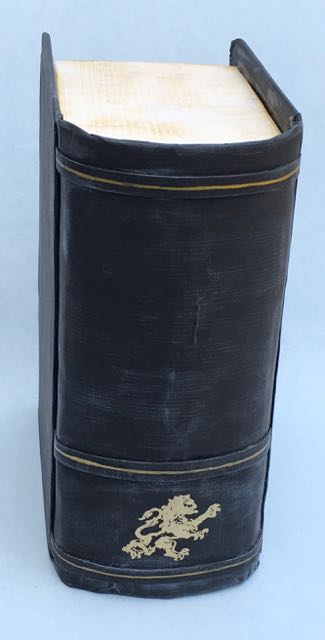
Upcycled Cardboard Book Box with Drawer
As you know, I LOVE paper and cardboard. I am always on the lookout for ideas on how to use leftover paper or cardboard on my projects. This project allows me to solve 2 problems – recycling cardboard and provide a cool base for my little houses. Making bases used to be my least favorite part of making the little houses because it is boring – cut cardboard, cover with paper or paint – blah! When I think something is boring, I try to think of a different thing to do or a different way to do it. This upcycled cardboard book box with a drawer evolved from there.
First, the Anatomy of a Book

Basic book anatomy showing the spine and front and back covers
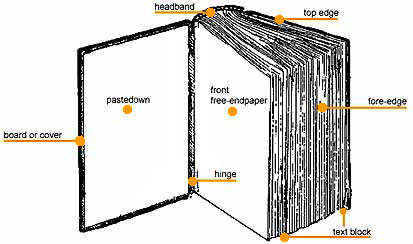
Book anatomy showing fore-edge of a book with front cover open
I have some serious geeky tendencies which leads me to look up lots of stuff. For this project I wanted to use the correct terms for the anatomy of a book requiring me to look up the anatomy of a book. There were two surprises in this research. The first one is that what is called the pastedown on a hardback book is the same size as the pages of the book. I don’t know why I thought it was larger, but I did. And second, there is cool, cool detail on old hardbound books called headbands – threads at the top of a book to support the book when you pull it from a bookshelf by the top of the spine. I always thought it looked cool, but had no idea that it had a purpose.
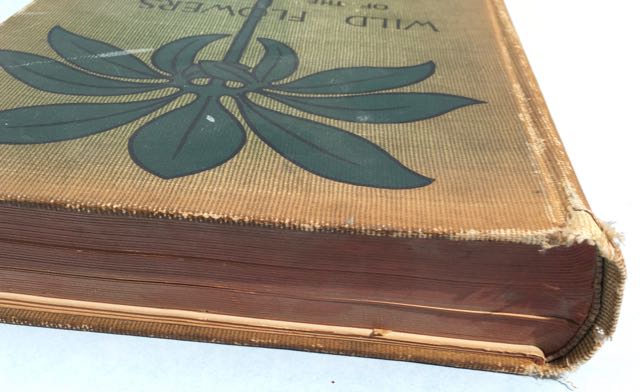
1904 Wildflower book showing the headband at the top of the book spine
I’ll use the terminology from the drawing in this tutorial.
Summary of Steps to Make an Upcycled Cardboard Book Box with Drawer:
- Base for the book box
- End templates
- Score page edges
- Spine
- Cover boards
- Drawer box
- Drawer face
- Decorate book
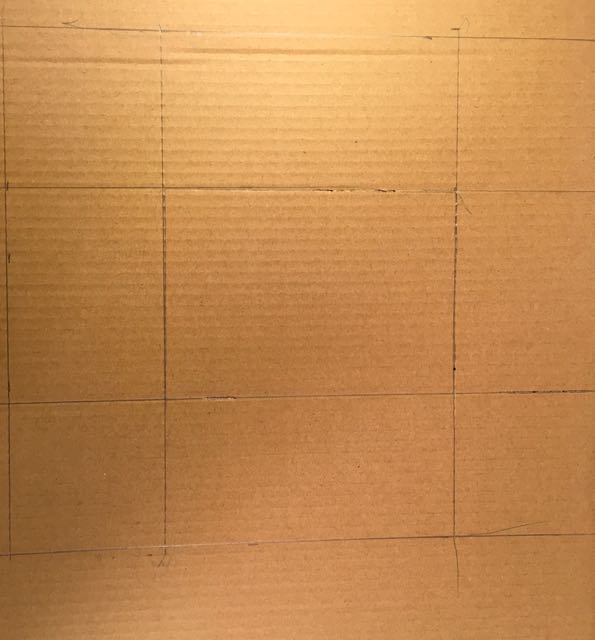
1. You need a cardboard box
Find a cardboard box that is about the size of a book. The cardboard box I chose makes a very fat book, but that’s ok. I am pretending it is an old apothecary book chock full of forgotten knowledge. Cut off the front of the box where the drawer will slide in. Reinforce the sides if they need it after you have removed the front of the box.
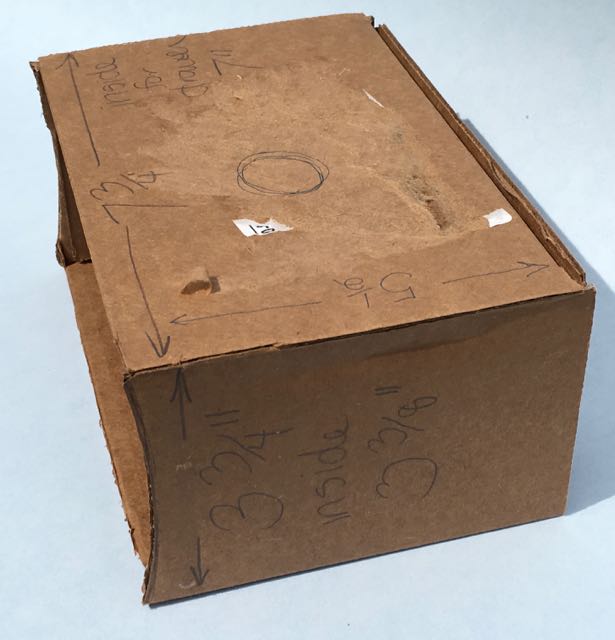
Basic box for the upcycled cardboard book box
For this book, I made the front curved like you see on the Wildflower book. It makes for a challenging detail when you construct the drawer. My advice to you and to my future self is to skip this detail. Just leave the fore-edge flat because it makes a much simpler drawer.
2. Cut cardboard template for the top and bottom page edges of the book
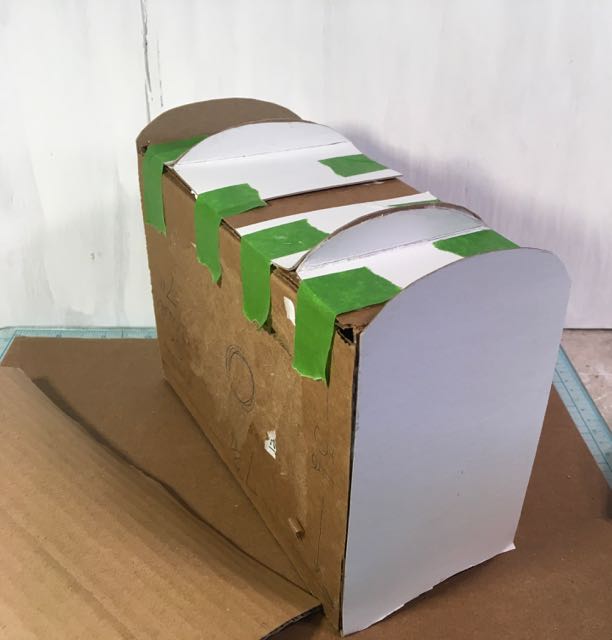
Top and bottom edge templates for pages of the book
These pieces of cardboard will be covered with paper scored to look like pages. With the fore-edge and the spine curved a template is needed to provide that shape. Glue to the ends of your box. This also provides support for the rounded spine. I added 2 more supports for the spine using the same curved shape. Removable painter’s tape holds them in place until the glue sets.
3. Make the pages for your book
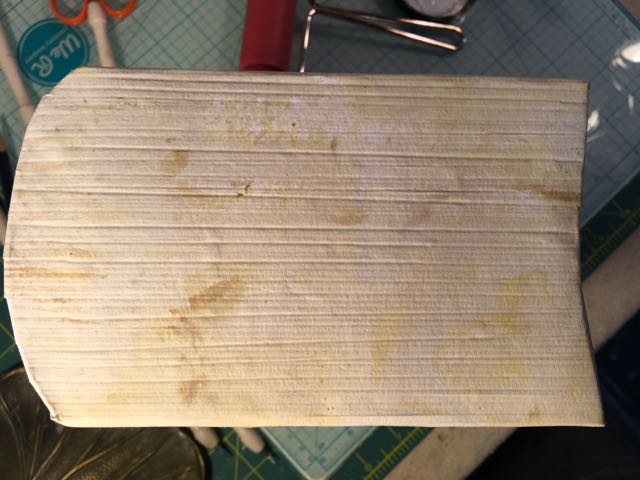
Score your paper to look like pages. I usually score the paper and then move it slightly so the score lines won’t be so uniform. The books I make are kind of wonky and uneven because I make them for Halloween projects. You may want your book to be nice and even for a pretty Christmas house or for a baby gift. In that case parallel even lines would be the perfect choice.
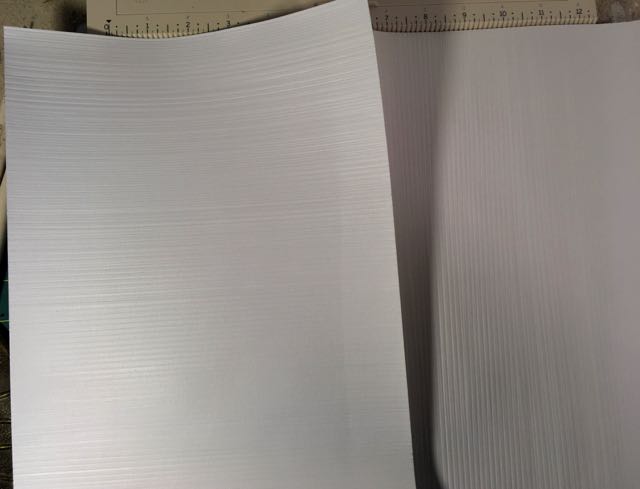
Scored paper for edges of the book. Be sure to score the paper before you distress it. If you distress it first the paper often tears when you try to score it.
Distress the pages if the book you want your book to look like a vintage book. I use various colors of Tim Holtz Distress Oxides to age the book, mainly Antique Linen distress oxide ink. But you have other options - you can use tea or coffee or watercolor paints to achieve the same aged patina. I happen to love Tim Holtz products so that is what I use most often.
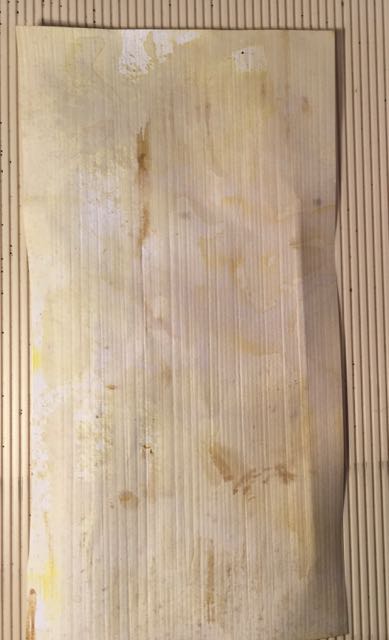
Distressed scored paper to form page edges
Cut and adhere the pages to your book edge templates that are glued on the book base
Bottom edge scored pages
Cut the scored pages to fit your top and bottom end templates and adhere them with collage medium, mod podge or diluted glue. If you use your regular glue without diluting it and, it makes thick glue lumps that are hard to smooth out. To make the pages adhere well without bubbles I pulled out my brayer and rolled it over the paper. Glue these papers on before you adhere the spine so you can hide the paper edge under the spine. The fore-edge paper is folded inside the box to hide those edges.
4. Curve cardboard for the spine of the book
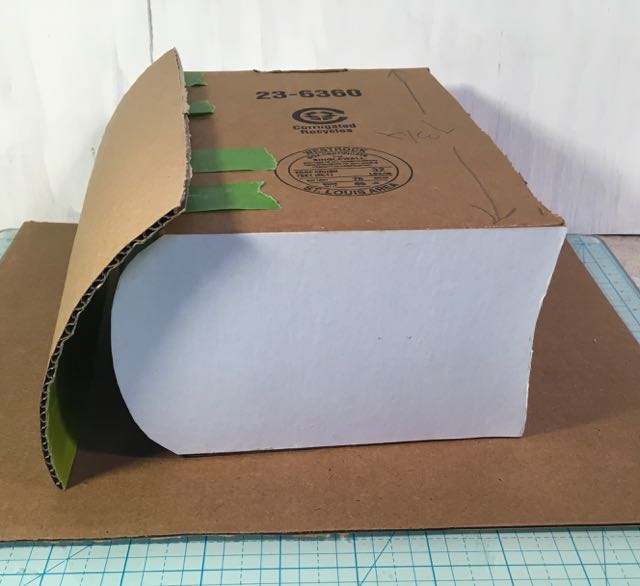
Side view of book box with curved corrugated cardboard spine - testing the fit.
Gently curve the corrugated cardboard to conform to the shape of the spine. When you cut the cardboard for the spine cut it so the corrugations are parallel to the spine of the book. This will help you ease the cardboard into a curve. You can use regular cardboard, but it can be a little more challenging to hold a curve. Your cardboard should be about ½ inch larger than pages of the book. Allow a ¼ inch overhang on each side to form the head and tail of the spine.
Cover the spine with the paper you have chosen. I picked a canvas textured watercolor paper that I painted black. It is easier to curve the cardboard spine first and then adhere the paper because your glued on paper may not be as flexible as the uncovered cardboard.
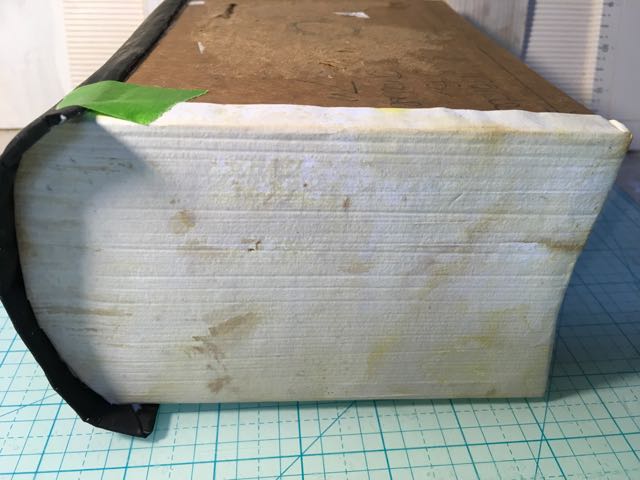
Bottom edge showing the tape holding the spine in place while the glue sets.
Glue the spine on with a strong glue. Use easily removed painter’s tape to hold it in place while the glue dries.
5. Make your book covers and adhere to the basic book box
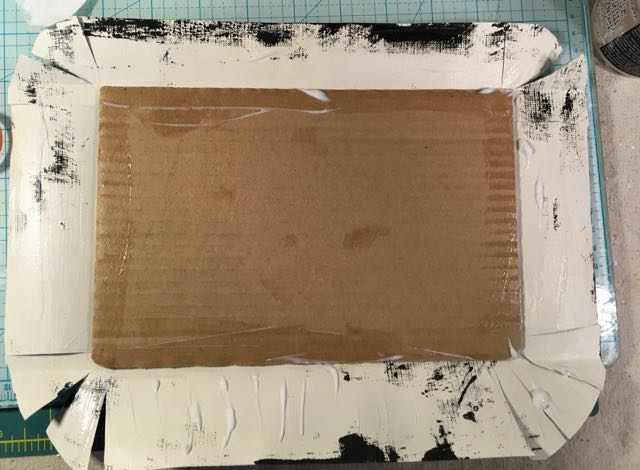
Cover board for book box
Cut cardboard for your book covers. Make each end ¼ inch longer than the book box size. You want the covers to be the same length as the spine. Choose how far you want the covers to hang over the fore-edge pages (which is the drawer front). I almost invariably make the cover boards too wide. They really should be about ¼ inch wider as well, but generally I make them about 1 inch wider. I need to make them closer to the size of the book with less of an overhang. Round the fore-edge corners of the cover because every books fore-edge corners get damaged a little are look rounded. Don’t round the spine side edge of the cover board, though I did that inadvertently.
Choose the paper or even cloth for the covers of your book. I chose a canvas-like watercolor paper to look like cloth. I painted it with black gesso for this particular book. Place your cover board on the paper and trim away some of the excess paper. Leave enough so the underlying cardboard does not show. Put a thick layer of collage medium or Mod Podge on the paper, center your cardboard cover on the paper and fold over the edges. Round over and trim the edges at the corners to fit the cardboard. Try to make it look like fabric has been folded over the corners.
When dry, adhere your covers to the book box.
6. Make the drawer box
There are a number of ways to make the drawer. You could get lucky and find a box that already has a slide out drawer. That’s the easiest option. Most often you have to make the drawer. My cabinet maker brother hates to make drawers and I must confess I’m not real enthused about making them either.
Method No. 1: The easiest way to make a drawer is to make it from a large piece of cardboard, scored and folded into a drawer shape. Measure your opening and make the box small enough that you know it will slide into the space. Make it a little bit smaller than you think it should be. You can always make a larger drawer front to cover up any gaps. That’s an easy fix.
Drawer box drawn on sheet of upcycled cardboard
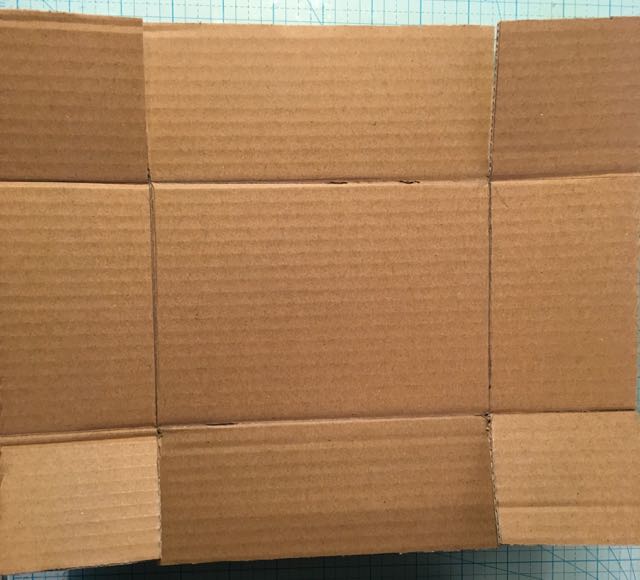
Drawer box scored and lines folded
Easy box for drawer book made from folded cardboard
Method No. 2: Here are the instructions for the way I made this drawer box. First cut out a piece of cardboard that easily fits in the drawer opening. Always test fit. We don’t have to be as precise as cabinet makers because our medium is cardboard which generally is present in abundance. It’s not the same as messing up an expensive piece of wood.
Side pieces glued to bottom of drawer box reinforced with tissue paper at the intersecting edges
Cut side pieces the height of the drawer. Place them on top of your cardboard again to make sure that they will slide in and out of your drawer space easily. Make paper pieces to hold the cardboard in place. I used tissue paper for these drawers because it is surprisingly strong and goes on so easily. Lay down a bead of glue and put the back side piece in place. Smear glue around the drawer bottom and the back piece edge and add the paper supports on each side to hold it firmly. Do the same with the next 2 side pieces but be sure to add glue where all the edges touch. I added tissue paper to each of these intersections to make my box stronger.
Method number one is substantially easier and the way I will use that technique in the future. The box is just a little clunkier, but it doesn’t really matter because I always line the drawer anyway.
7. Make the curved drawer face
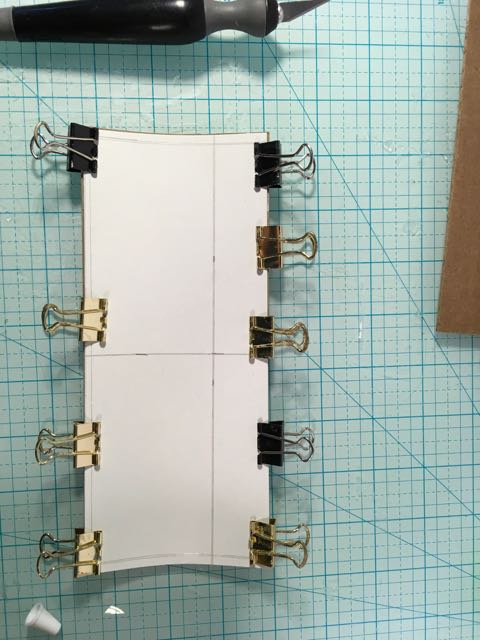
Curved cardboard for the curved drawer front on the book box. The clips are holding the 2 pieces together while the front dries in a curved shape.
Remember the initial detail where I curved the fore-edge of the book and said that I would not do that again? Well, that’s because this curved drawer front which can be a little challenging. To make the curved drawer front, glue two pieces of thin cardboard together and gently curve them. Sometimes you need clips to hold the edges together while you are curving the cardboard. You can use the painter’s tape here to hold the curve or you can walk around your house holding the curved cardboard until it sets in that shape. I chose to use the painter’s tape.
Test fit your drawer face to make sure it looks the way you want it to. Truthfully, mine never do fit perfectly, but I don’t expect that really. It’s an upcycled handmade item and the imperfections are part of the appeal.
Glue the drawer front to your drawer box. Use painter’s tape to help you.
When the drawer front is firmly adhered to the drawer, cover the drawer front with scored, distressed paper for your fore-edge pages. Fold the excess paper around the edge to the drawer box itself. It gives more support. I didn't take pictures of this series of steps.
Test fit your drawer box again when dry to make sure it fits in the drawer opening.
Test fit drawer box in book. Sometimes you have to trim the cardboard a little to get the box to fit.
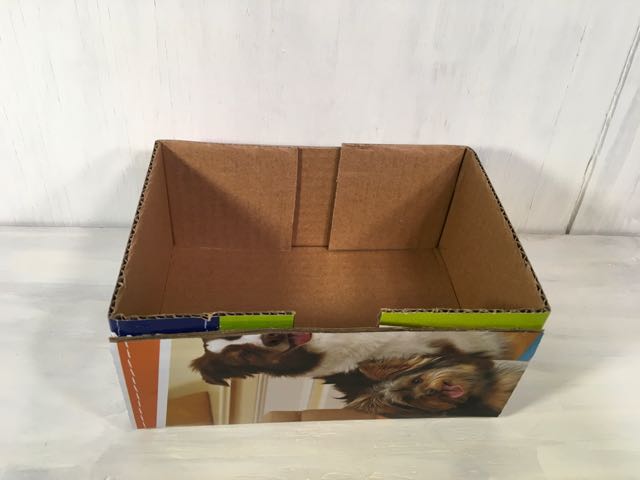
Line your drawer box
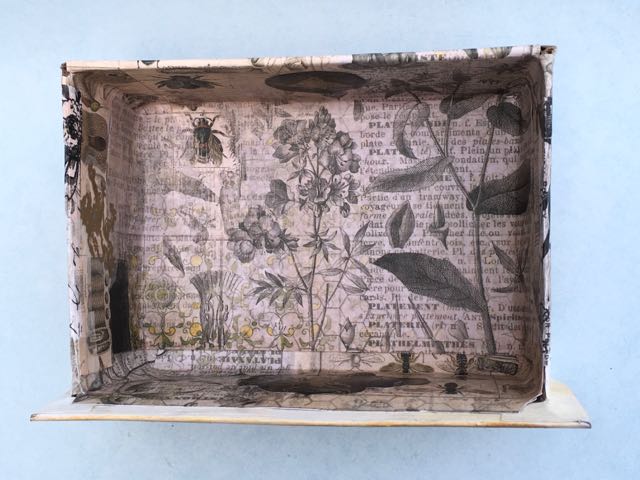
Drawer box for Book lined with Tim Holtz paper
Pick a paper to fit the theme of your book and line the drawer box. I found a great piece of Tim Holtz scrapbook paper that looks wonderful in my drawer. Adhere the paper with collage medium or Mod Podge.
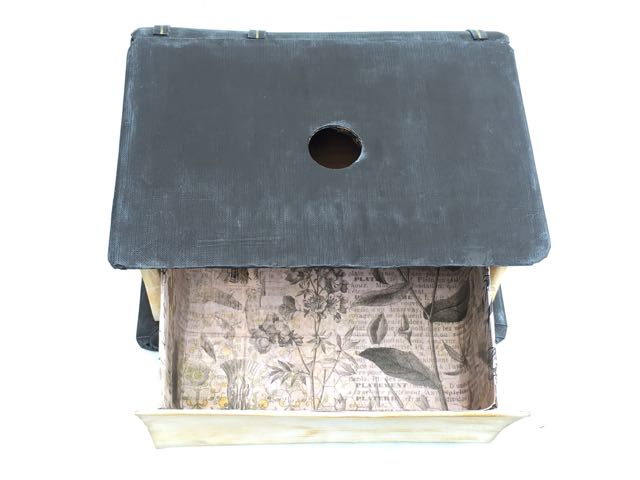
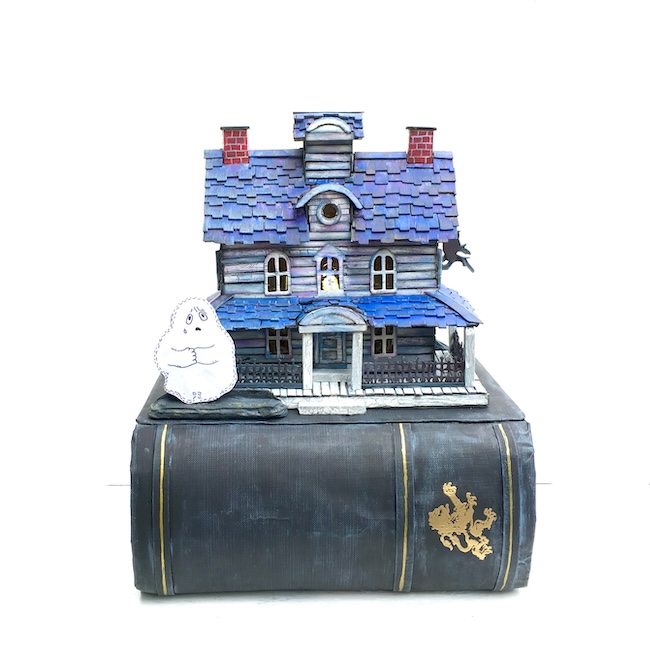
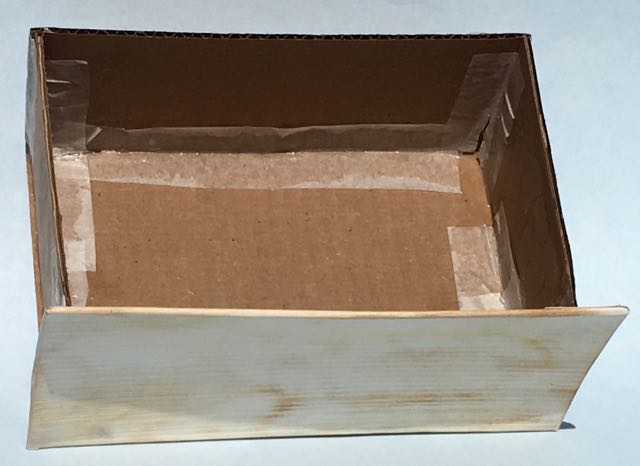
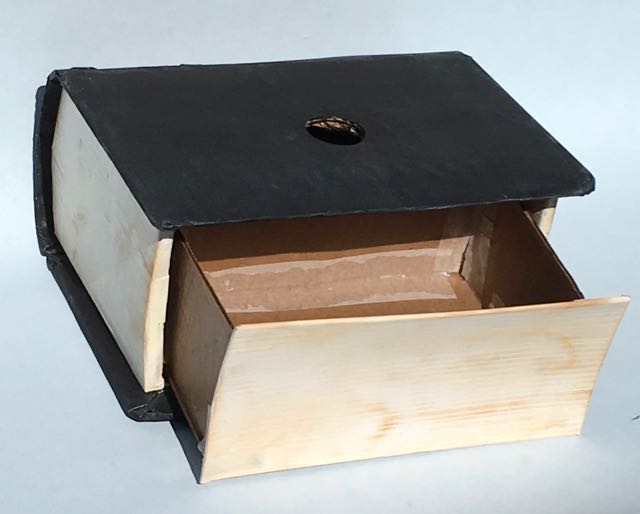
Finished view of the book with the drawer open. The hole is for an LED light to shine through when I build a Halloween house to fit on top
8. Decorate the book cover
Here’s where you can go crazy in making the book your own. You can add funky, imaginative titles or you can distress your book like crazy. Or make it beautiful for a new baby gift with the child’s name on it.
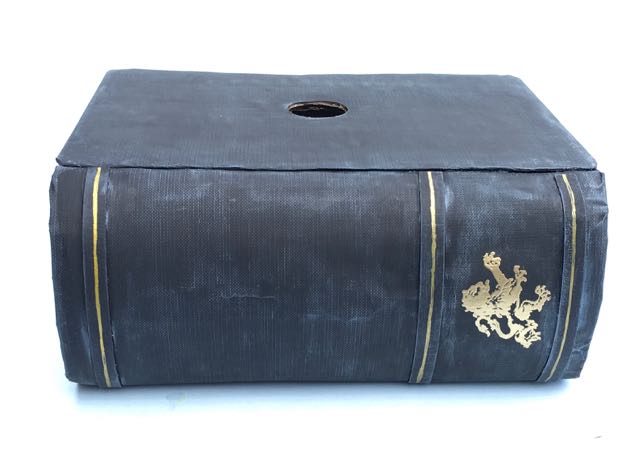
Finished Upcycled Book Box with Drawer. Decorative details include distressed edges of the book, gold highlighting on the bands and the gold embossing symbolizing the publisher. No title for this book yet
For me, this book is the base of a Halloween house - that’s why there is a hole in the front so someone can put an LED light in the drawer and light up their little house. Since I don’t know exactly what house will go on top of this book, I’m not going to add a title yet. But I did decorate the spine. I added 3 bands with gold highlighting and one embossed dragon to look like the publisher’s logo. When you glue these embellishments on, bits of glue seep out and are kind of shiny. For my distressed book, that’s not what I wanted so I painted over the glue to make the surface look matte again.
To further distress the book, you can use white or grey paint and very lightly dry brush the edges so they look worn. I actually did this by using Hickory Smoke Distress Oxide ink and a small paint brush. I like how it accentuates the canvas paper and makes it look like cloth.
And that is one way to make a book with a drawer from upcycled cardboard.
I found 2 other incredible examples when I was planning to write about this topic. Cathe Holden of Inspired Barn published some delightful examples from recycled book spines in the Country Living July/August 2012 issue. You can find a reference on her website here.
Jim of The Gentleman Crafter has in his project archives a book box with drawers that is absolutely incredible. His work is so precise. He truly makes works of art. You have to scroll a bit to find this in the archives, but it is worth a visit. Go to his post starting on January 9, 2012 entitled
“Get a Pencil! New Project!” http://www.thegentlemancrafter.com/p/old-blog-posts-tutorials.html
What do you think of this Upcycled Cardboard Book with a Drawer? I have a couple of other ideas about making a book with upcycled cardboard for later posts.
Thank you for reading. I do appreciate comments.
bon
What a wonderfully creative project! Love it!
Brenda Brown
Wow, you took so much time and energy bringing your book box together and what a beauty and a treasure it is. Thanks for taking the time to share it for our fourth birthday celebrations at A Vintage Journey. Hugs Brenda xxx
Lucy
Thank you, Brenda. The book box did take a while, but it's not that hard to do using stuff everyone has at their house. And it's perfect for the base of a Halloween house which is the purpose for me.
Sara Emily Barker
Wow, Lucy! There is nothing you cannot construct and make look absolutely fabulous! I love the drawer. The watercolor paper you've chosen to cover the book makes this look like one of the old tomes I have in my grandmother's barrister's bookcase. Another very well done project! thank you so much for sharing your steps! That is the icing on the cake! I can't wait to see your Halloween house that will go on top of this! Hugs! Oh, and thank you so much for sharing this at A Vintage Journey!
Lucy
Sara, I need more of the canvas watercolor paper because it is incredible. I love the texture of this paper. I am almost finished with the house that will go on top of the book. I think it will be really cool.
Laney
Love seeing the making of this book. So many nice touches - the shape, the rounded spine, the gold accents. I noticed the tissue paper to reinforce the joints - I have never tried that - I have always used a heavier paper (scrapbooking paper). I am surprised it is strong enough! I need to try that.
Lucy
Thank you, Laney. The tissue paper is so nice because it is so flexible and adheres so well. I figure the glue provides the most strength, but the paper makes it stay in the right place.
Anne R
Lucy, I really enjoyed seeing how you brought this amazing project together, the result is fabulous and it will make a fantastic base for a Halloween house for sure, I really look forward to seeing that one. I will check out Jim's project, his work is exquisite. Thanks so much for joining in our challenge this month at A Vintage Journey. Anne x
kath stewart
what an amazing upcycling project, love that you created something so beautiful and useful and thank you for sharing the steps with us at Simon Says Stamp Monday Challenge, hugs kath xxx
Lucy
Thank you, kath. I love the Simon Says Stamp challenges. They are fun.