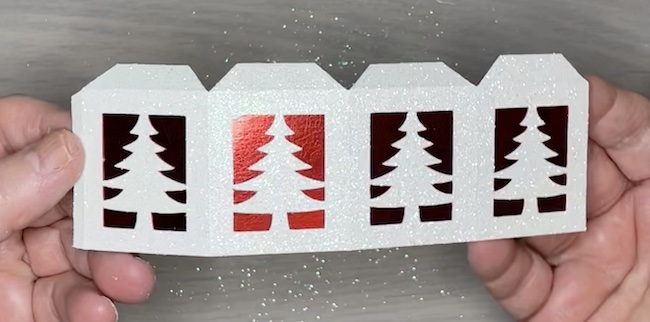
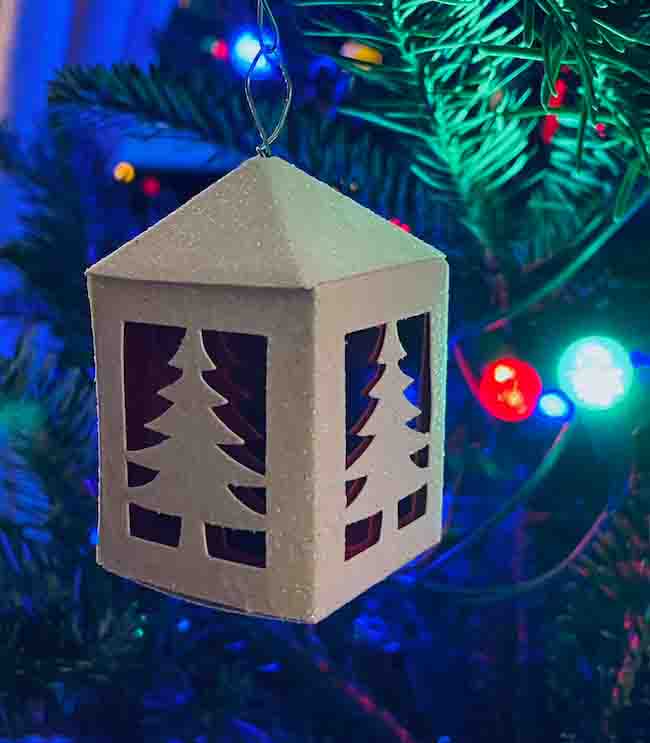
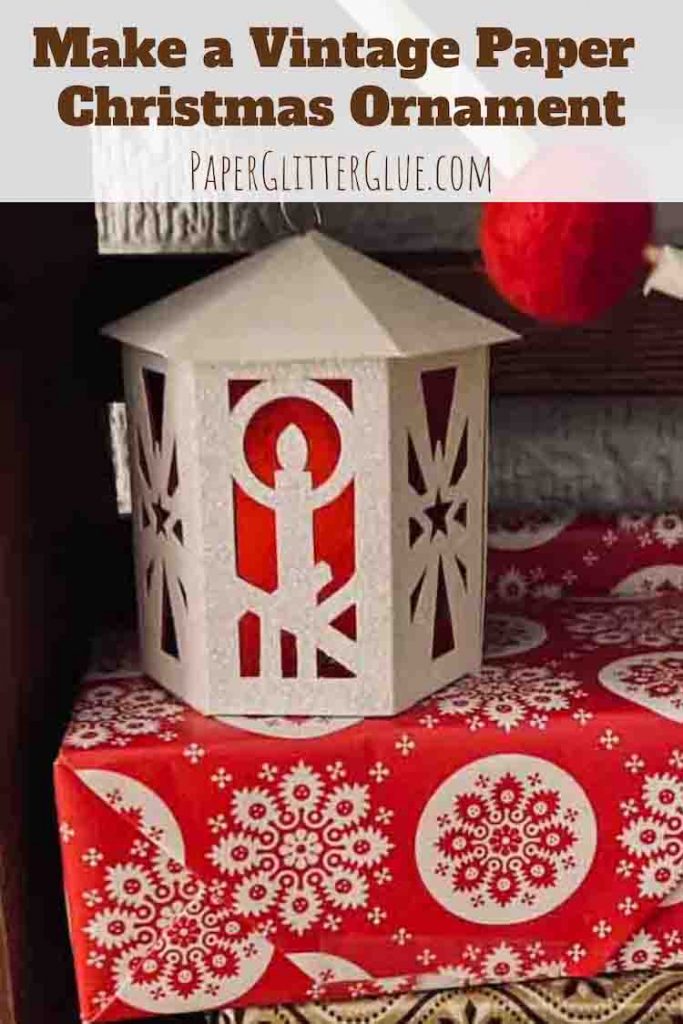
Learn how to make these vintage paper Christmas ornaments. When one of my friends sent me photos of these vintage ornaments, I decided I had to make them. And then I had to make patterns of these ornaments for you. I hope you have fun making these vintage Christmas ornaments from card stock papers.
To make these ornaments, I used 65# glitter card stock and red foil card stock. Those two papers match the vintage design well.
Table of Contents
Materials to make the Vintage Christmas Paper Ornaments
-
- Vintage Christmas Paper Ornament Patterns from the Paper Glitter Glue library - Design No. 131
-
- Liner paper - Foil Card Stock (this is a gold example of Recollections which works well) or translucent paper for light to shine through
-
- Glue - PVA glue like Art Glitter Glue or Bearly Art Glue
-
- Metal hanger or thread
-
- A way to cut out the pattern - I use my Cricut Maker, but Cricut Explore Air, a Silhouette or a Scan N Cut work, too.
Outline to make the Vintage Christmas Paper Ornaments
-
- Cut out the pattern - Design No. 131
-
- Fold along the score lines
-
- Glue the liner paper in place
-
- Assemble the body of the ornament
-
- Adhere the roof to the paper ornament
-
- Display your creation!
For more details on making these Vintage Christmas Paper Ornaments, read below.
1. First, cut out the pattern for the Vintage Christmas Paper Ornaments
Get the Pattern from the Paper Glitter Glue library - Design No. 131
To get the pattern, just go to the free Paper Glitter Glue library, type in the password and get the pattern (Design No. 131) from the December 2021 section of the library. The patterns are available in 2 formats - as printable PDFs and as SVG cut files. Choose which one works for you.
If you don't have the password, you can get it by subscribing to my Paper Glitter Glue newsletter with the form below. You will get the password right away when you subscribe.
Decide which version of the Vintage Christmas Paper Ornament - flap or no flap
Before you cut out the patterns for this ornament, decide if you want to make one with the bottom flap or not. If you like, both patterns have an option for a simple ornament without a bottom flap. If you want to use the ornament as a treat box or insert a light, then choose the pattern with the bottom flap.
As you know, I use my Cricut to cut out the pattern. So here is the way to cut out the Vintage Ornaments with Cricut's Design Space.
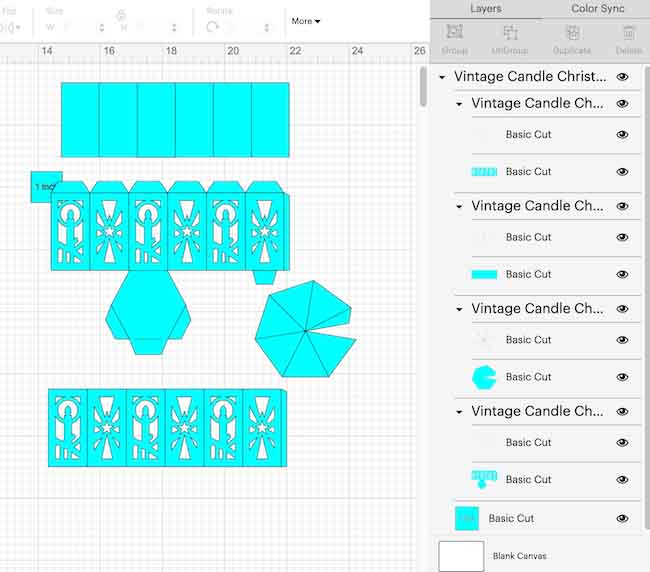
Upload the SVG design to Cricut Design Space
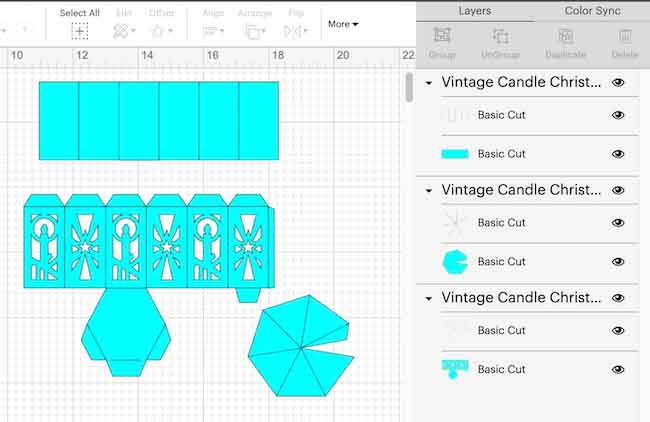
When you upload the Vintage candle pattern to Design Space, it looks like this.
Next, Ungroup the design so you can choose individual pieces
To make one of the ornaments, ungroup the pieces in Cricut's Design Space.
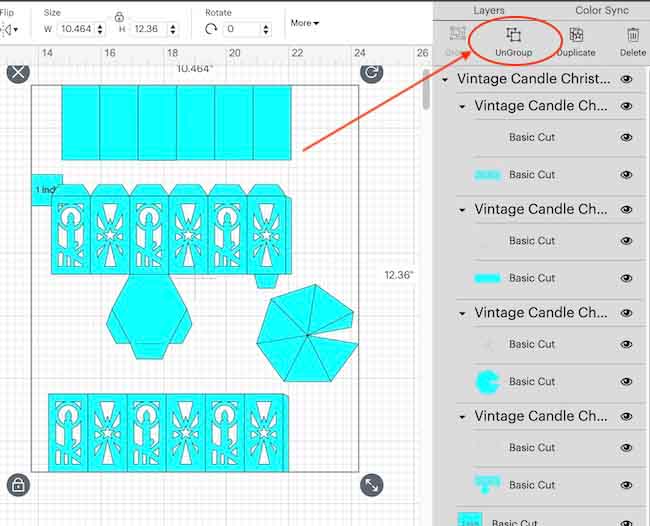
Here you can see how it looks once ungrouped. Now you can choose score lines and attach them to specific ornament pieces.
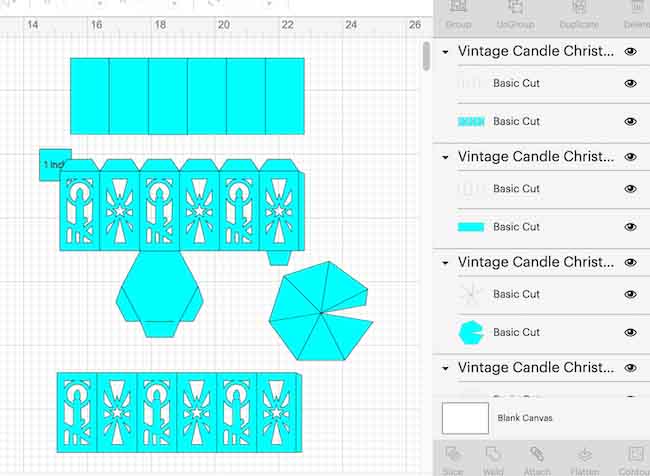
Delete any sections of the pattern you don't need
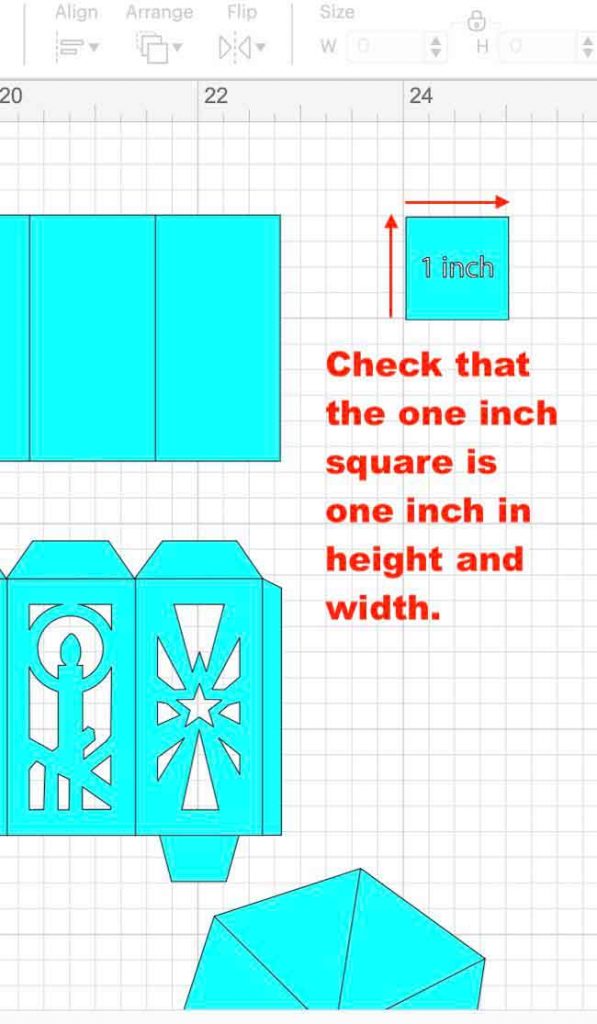
Check to make sure the design is imported correctly by checking the one inch square in the pattern is imported at 1 inch wide and tall.
For this design, I deleted the design without the flap and the one inch square because I don't need those pieces.
And below is the design almost ready for cutting.
Now designate score lines
For these patterns, the score lines are all combined together for each piece and then grouped with the piece of the ornament they belong to. Now you only have to click on the entire group to convert them to score lines.
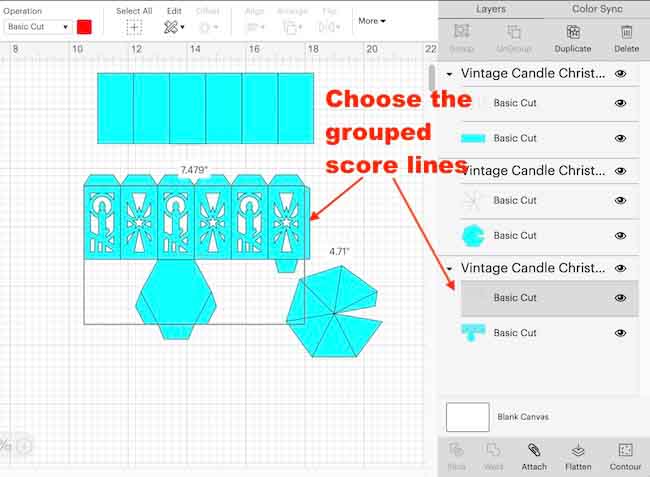
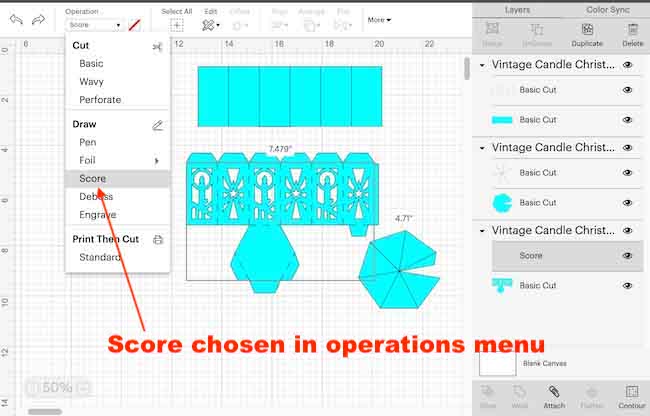
Under the operation menu on the upper left hand side of Cricut Design Space, choose Score.
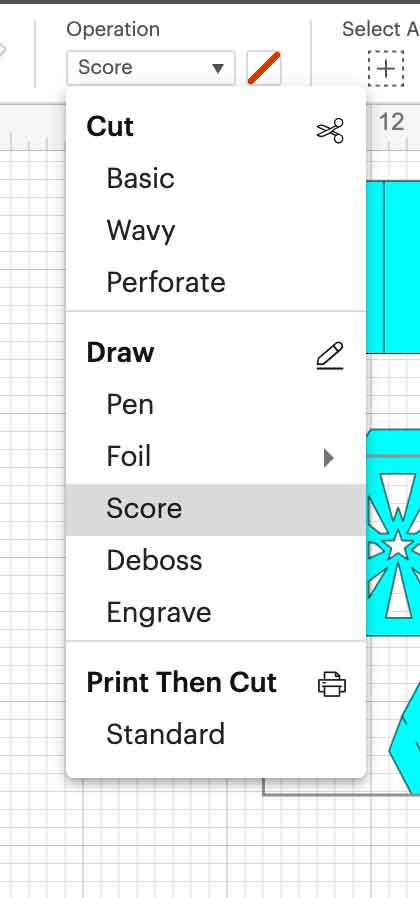
You know the score line has been chosen when you see dashed lines on the piece itself and you see score under the layers menu.
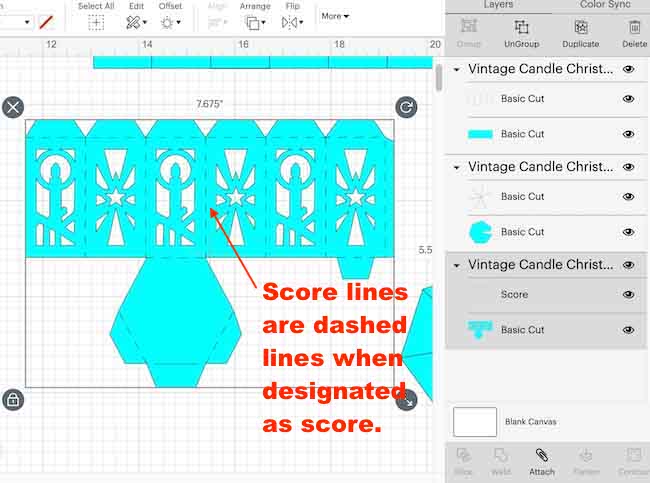
Do the same for all the score line parts of the ornament.
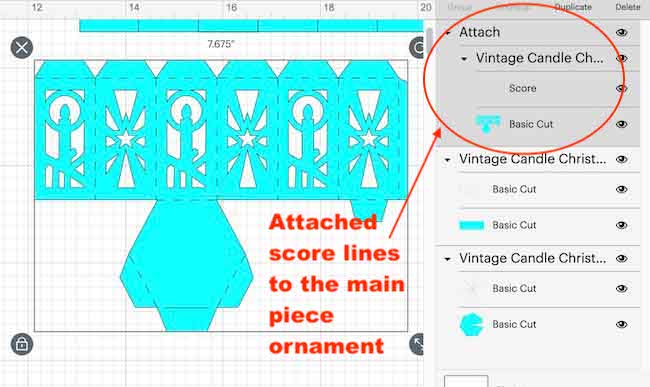
Next choose attach so the score lines are attached to the appropriate piece
First, you have to select both the piece and the score lines, then click attach.
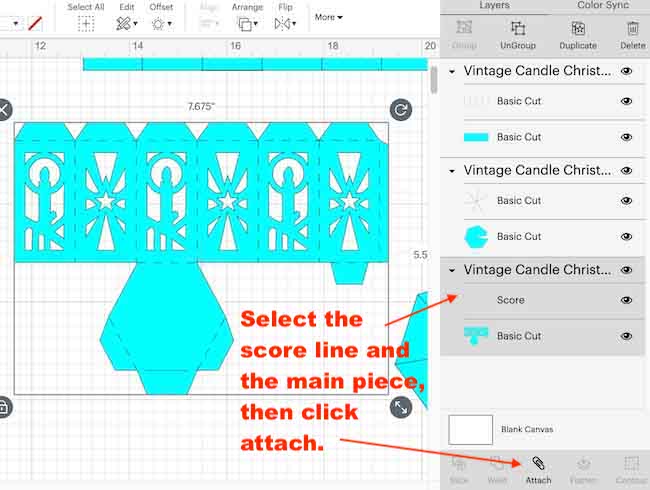
When the score lines have been attached appropriately, you see them attached under the layers panel on the right.
Designate and attach the score lines to the other pieces - the roof top and the liner piece.
Choose the setting on your machine
When I use glitter card stock for the ornament, I use the Glitter card stock option to cut it out. Every time I used that custom setting on my Maker, it worked perfectly. But I must admit that I run it through two times just to make sure.
For the foil liner, I used the Cardstock, intricate settings because that works so well with my 65# cardstock.
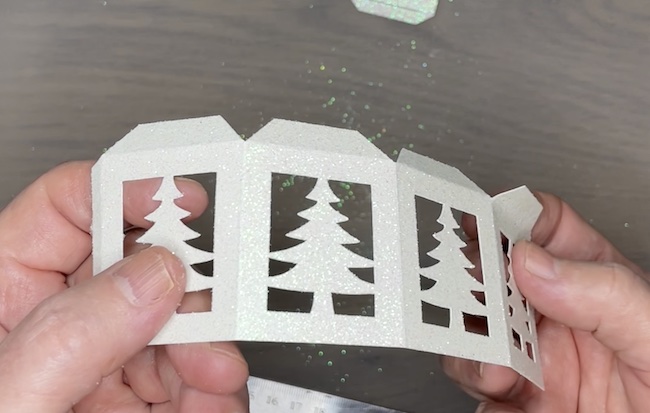
2. Fold along the score lines
To make sure I get straight lines, I fold along the score lines using a straight edge. First, fold towards yourself then away from yourself.
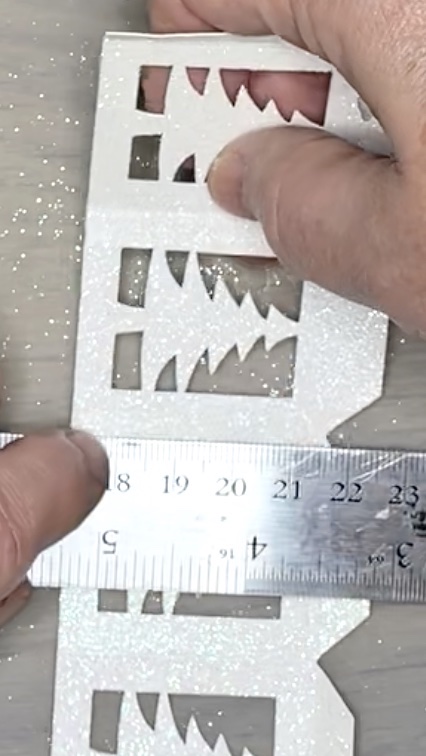
See the nice straight score lines on the tree ornament below.
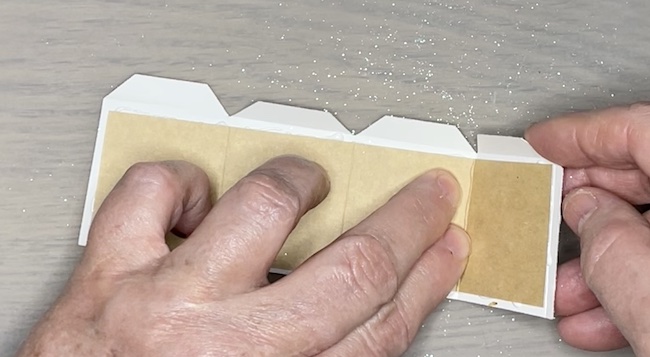
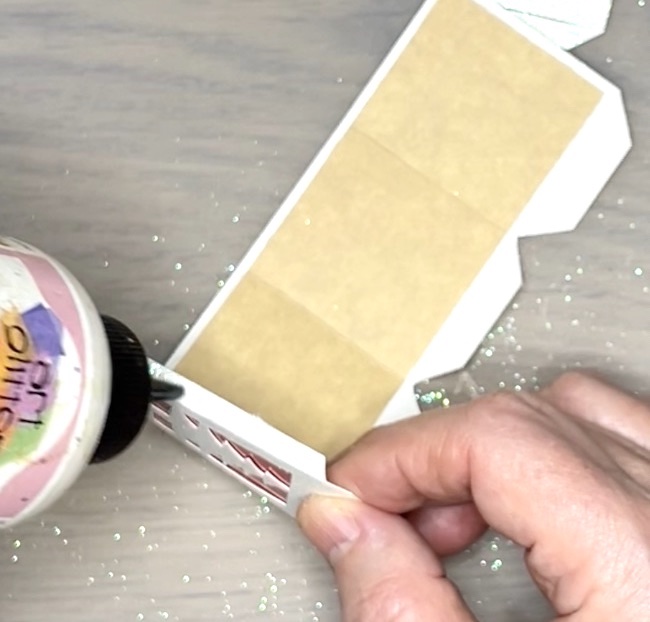
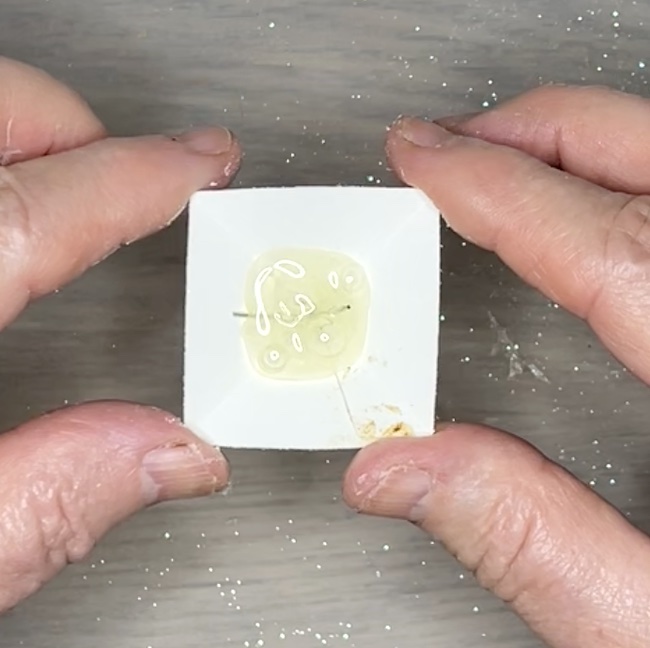
3. Next, Glue the liner piece in place
For this step, choose either a solid card stock or a translucent paper like vellum, plain copy paper, or even wax paper. I love the red foil card stock.
Apply glue to the inside of the ornament. It's a little hard to see below, but there is a light layer of glue around all the trees.
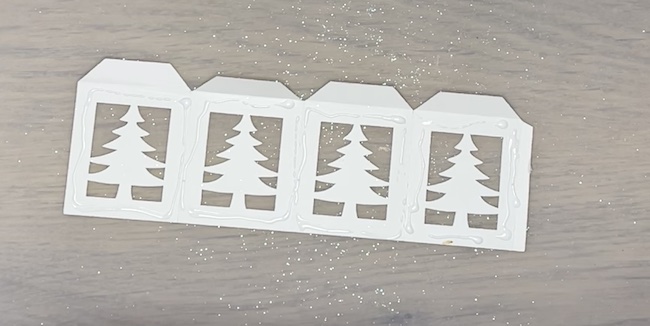
Remember to score along the score lines on the liner piece as well.
Then center the ornament liner over the center line of the ornament and apply to the ornament.
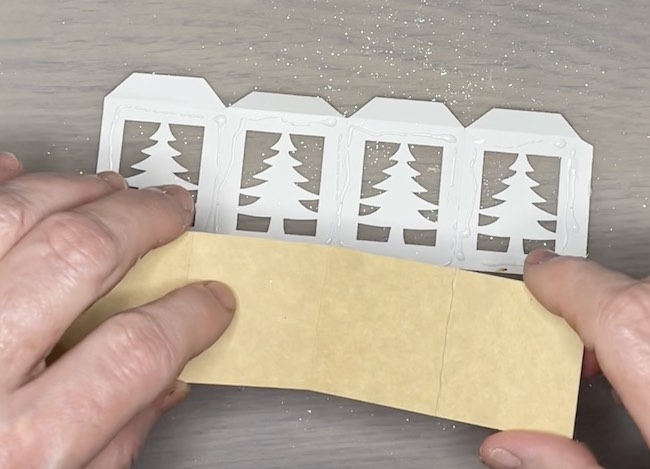
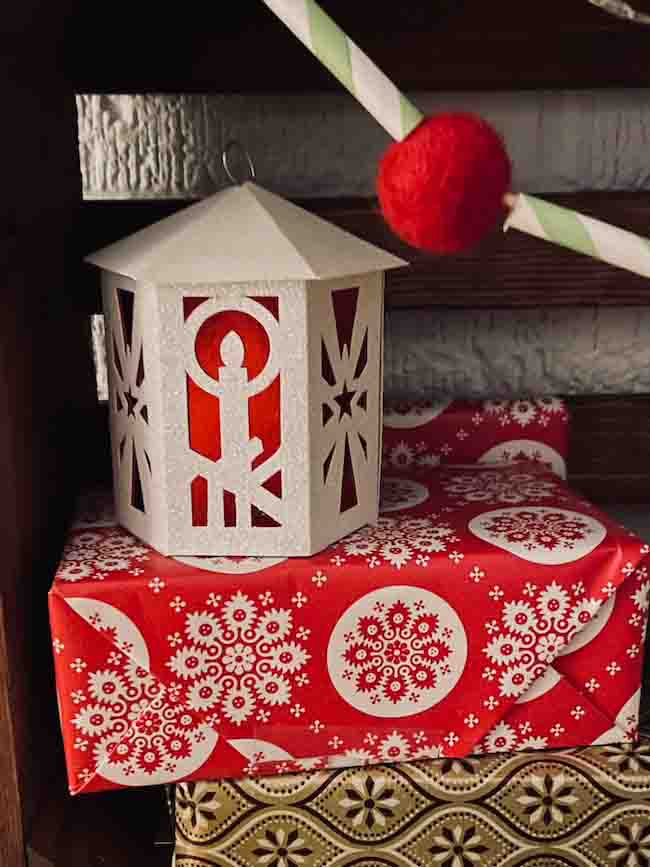
The vintage ornaments that these are based on have a red foil lining so that is what I chose. Fortunately, I think it works beautifully. But if you want light to shine through your ornament, remember to choose a translucent paper and omit the bottom flap off the design so light can shine through.
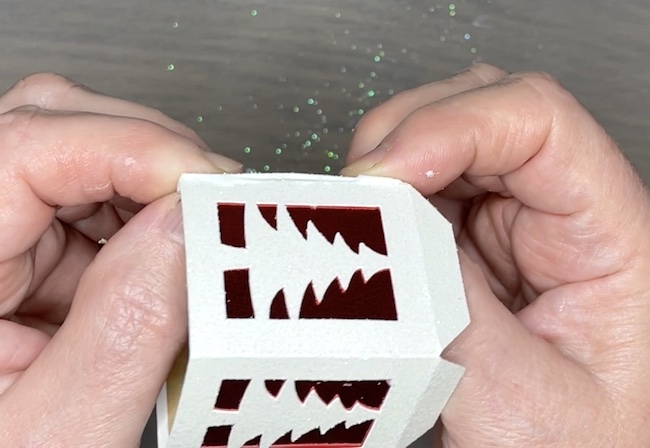
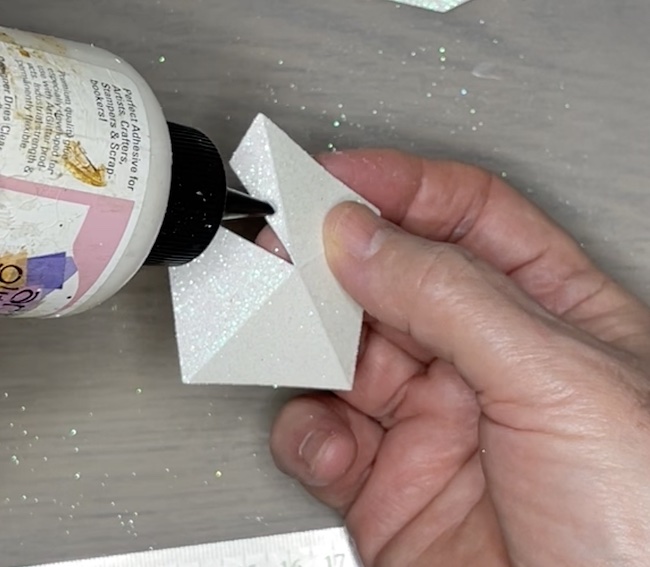
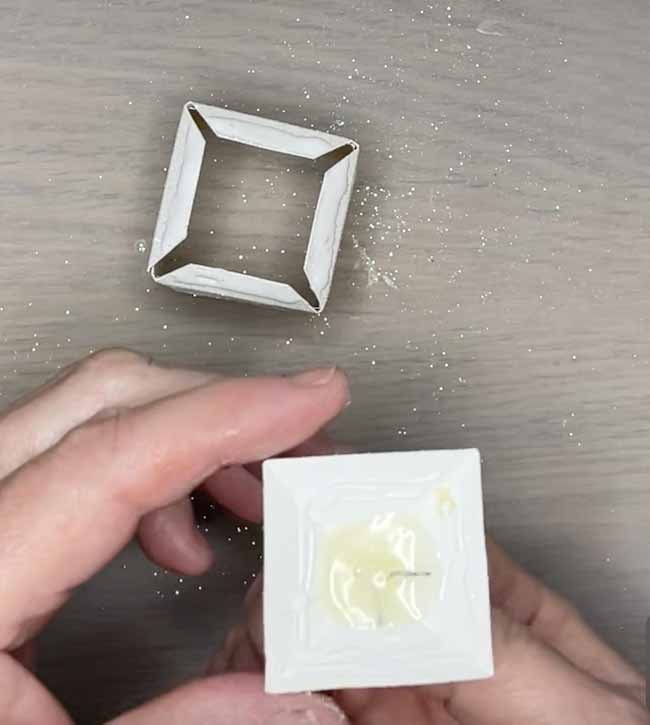
4. Glue the main body ornament together
To assemble the main body of the ornament, simply glue the side tab to the other side of the ornament. Let dry. It's very important to let the ornament dry before you try to glue the roof top to the ornament.
Just a note here, glue doesn't really like to stick to glitter paper. That means that you have to get decent glue coverage on the glitter paper. After that, hold the glue tab in place for a minute or so to make sure it adheres.
5. Adhere the roof to the Christmas ornament
Once your ornament is dry, then glue the roof together along the triangular flap. Again, let that piece dry completely. Before you adhere the roof piece to the ornament, poke a tiny hole for the ornament loop to go on the top.
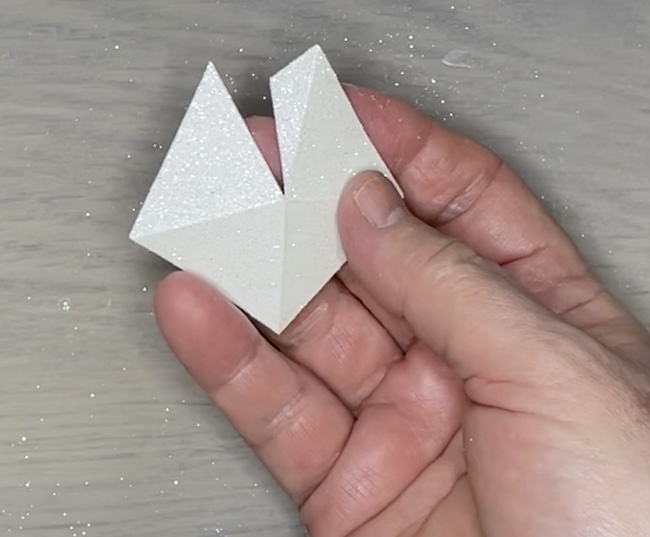
Again, glue doesn't stick as well to glitter card stock so be sure to hold the glue tab in place for a minute or two while the glue dries.
If you want to use a metal hanger in the top, just twist a wire ornament hanger so there is a loop.
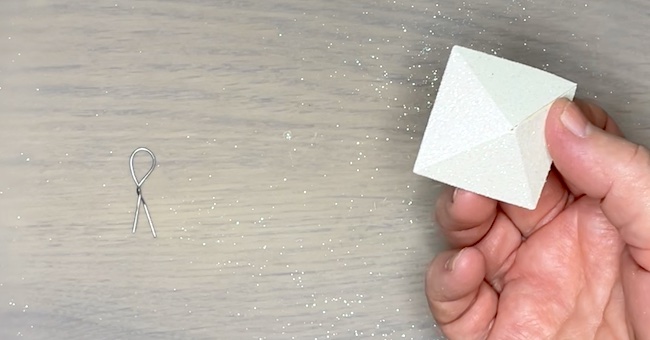
Poke a hole in the top of the ornament with the pin for the wire to fit through.
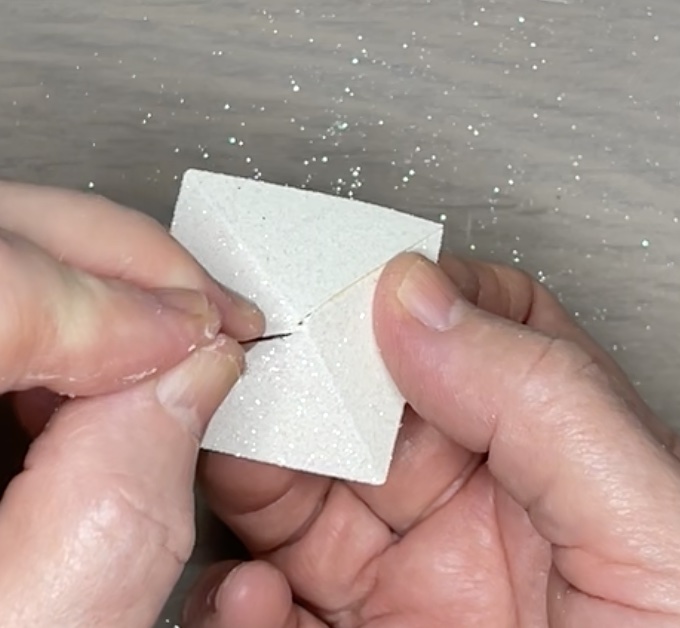
Insert the two wire ends through the very top of roof. Apply one side then the other wire end.
Then reinforce the wire loop with hot glue so it won't move. Make sure the roof top is square before the hot glue dries.
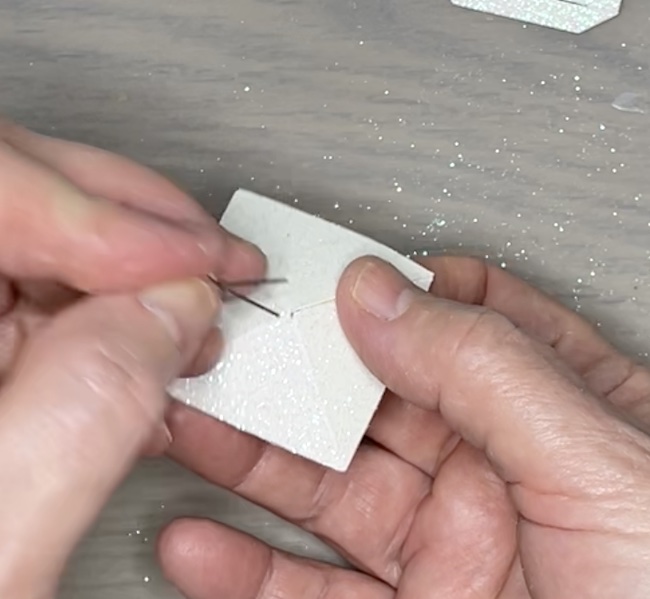
If you want to use a thread or twine to hang your ornament, just poke two holes at the top of the roof. It helps to do that before you glue the roof top together.
Then glue the roof to the top of the ornament. You'll see glue tabs at the top of the ornament to give you more surface area for the top to adhere better.
Apply the top carefully and push a bit from the underside of the tabs. Let dry thoroughly before you try to pick it up and add the hook for hanging.
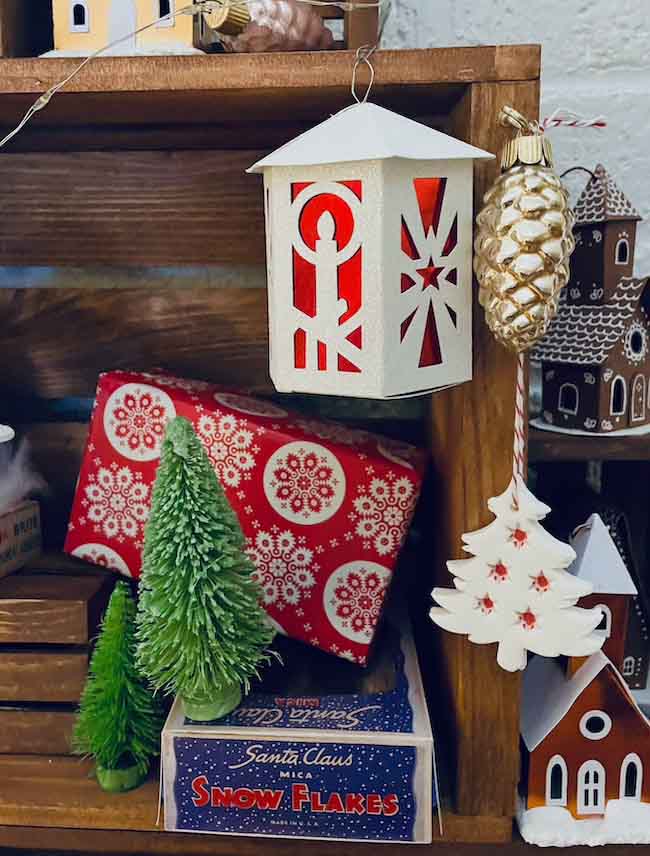
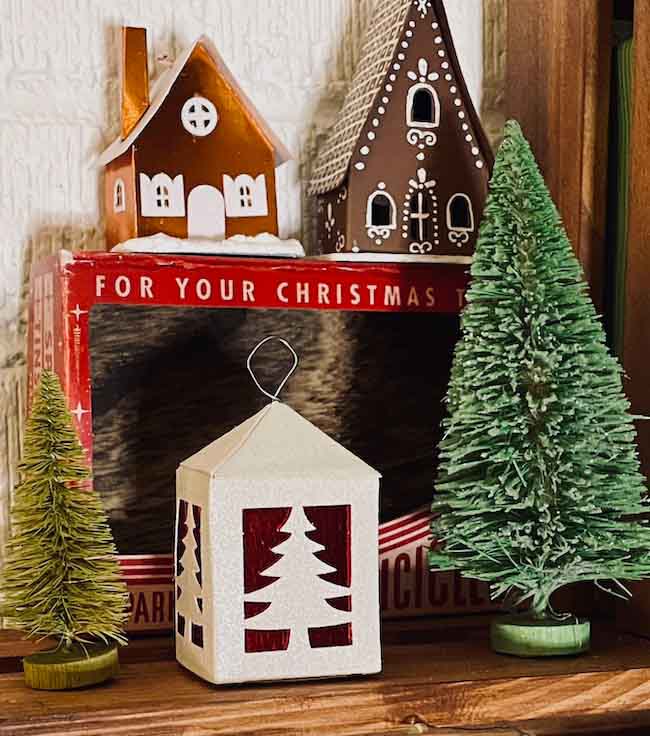
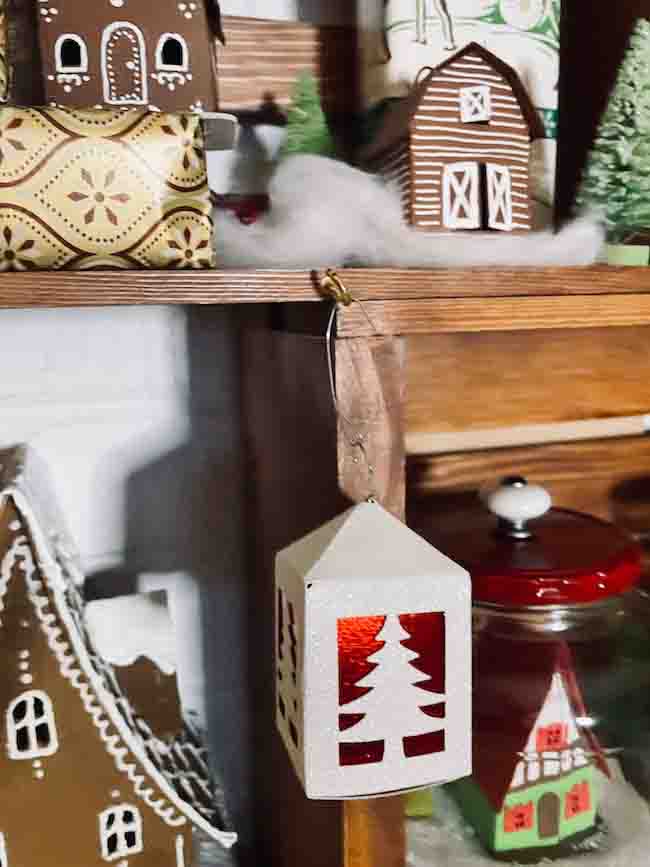
6. Now find the perfect place to display your delightful vintage ornament
I made a display out of wood crates in the shape of a Christmas tree and hung my ornaments there. When I get my tree up, I'll put a couple of these vintage ornaments on the tree as well.
If you have any questions about making this ornament, please email me at [email protected].
Thank you for reading and crafting with me.
Lucy
Mary Clark
Do you have a tutorial for the Amsterdam House Christmas Card? Thanks!
Lucy
Mary,
Here's the link to the Amsterdam House Christmas cards. It's design no. 132 in the Paper Glitter Glue library.
I do hope you will make some. I'd love to see them.
Lucy
Chelle
Super cute Lucy, I love them!
Lucy
Thank you, Chelle. I hope you will make one or both.
Lucy
Dana
Thank you so much Lucy. What a beautiful ornament! I wish you the merriest of Christmas'.
Lucy
Dana,
I am so glad you like the ornaments.
Thank you and Merry Christmas to you too.
Elena
That linked website with all the vintage ornaments is so wonderful! I really loved the tinsel pipe cleaner ornaments. Reminds me of some of the vintage decorations my grandmothers used to put out, and are so hard to find today.
Really love your blog, one of these days I will sit down and make some Putz houses for myself!!
Lucy
All the vintage ornaments are inspiring, aren't they?
Thank you so much for the kind words.
Lucy
Shirl Lundstrom
These are wonderful! I told myself no more crafting until after Christmas! I may have to break down and make these two. Thank you so much. By the way, am loving my huge wreath with all my little houses wired to it. Added lights this year. Merry Christmas from snowy Minnesota!
Lucy
I know I need to stop crafting too, but I keep coming up with more ideas. I decided I am going to do Christmas stuff as long as I am inspired. Except, of course, I have a January 10th deadline for a Spring project which may change things.
Thank you for letting me know you like these ornaments. Lucy
Julie
I love your creations. I just got a Cricut and will try this ornament. Thank you
Lucy
Julie,
The ornaments are so easy with the Cricut. And I love how they look on my tree. I do hope you will share your project on the Facebook group or with me by email. I love to see people's creations.
Lucy
Lea Cook
Those are so adorable ❣️❣️
Lucy
Thank you, Lea. I do hope you will try them.
Lucy