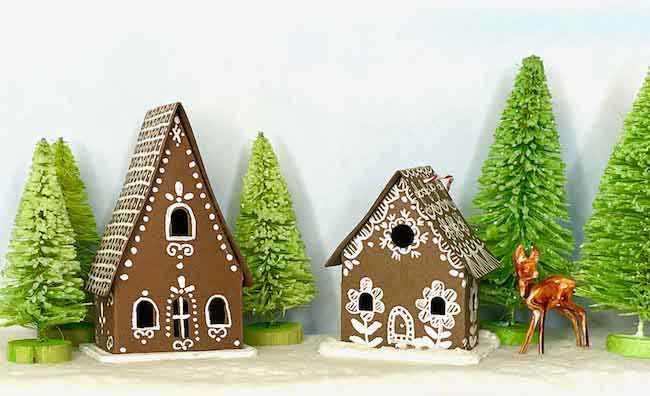
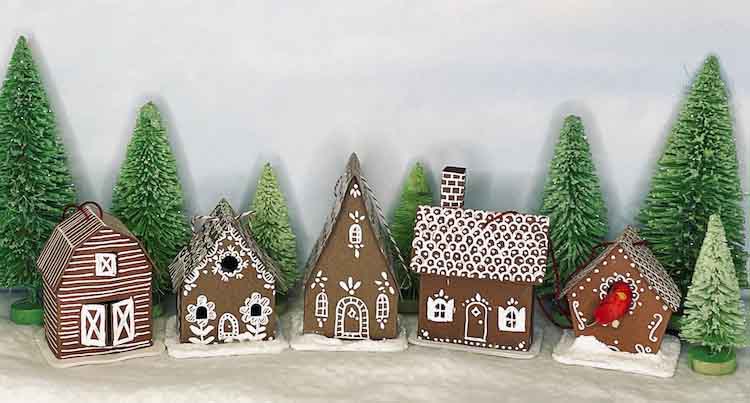
When Christmas comes around, time seems to fly by. I suspect it's the same for you. That's why I made these Tiny Paper House Christmas ornaments. Because making these adorable little houses is both fast and easy. The series consists of 6 different patterns to make the tiny house ornaments. All of the patterns are free for you in the December 2021 section of the Paper Glitter Glue library. And to make it easier for you, I grouped all the patterns in one file.
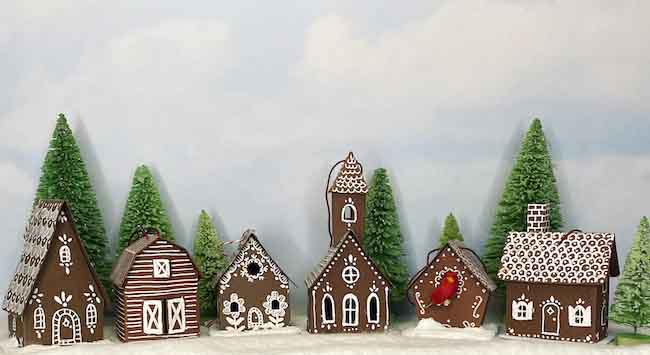
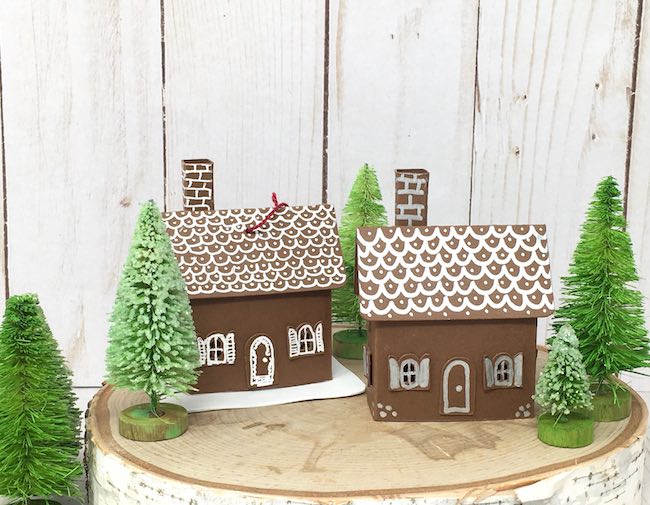
Check out the examples of the tiny paper house Christmas ornament series below. After the photos of the houses, you'll find the materials and the instructions to construct your own seriously cute, tiny paper house Christmas ornaments.
1. Tiny Paper House Christmas Ornaments
You can make this house with colored card stock and glue on the doors and windows or you can draw the elements on the little paper house whichever you prefer.
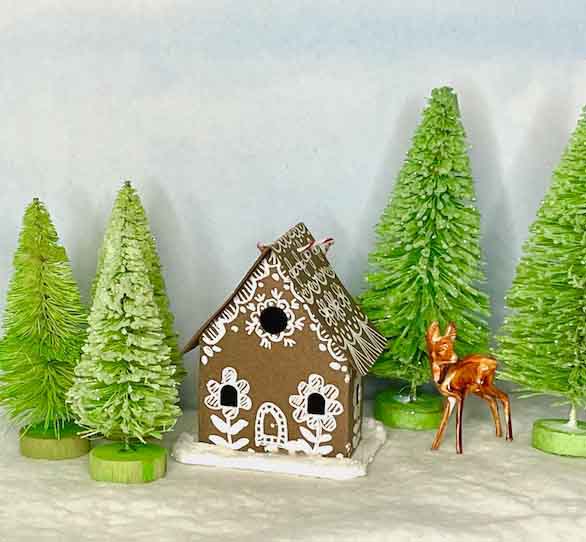
If you want to make one with Cricut's foil tool, check out this tiny house version from last year.
2. Tiny Paper Church Christmas Ornament
The tiny paper church is one of my favorites. For some reason, the tiny church just makes me happy.
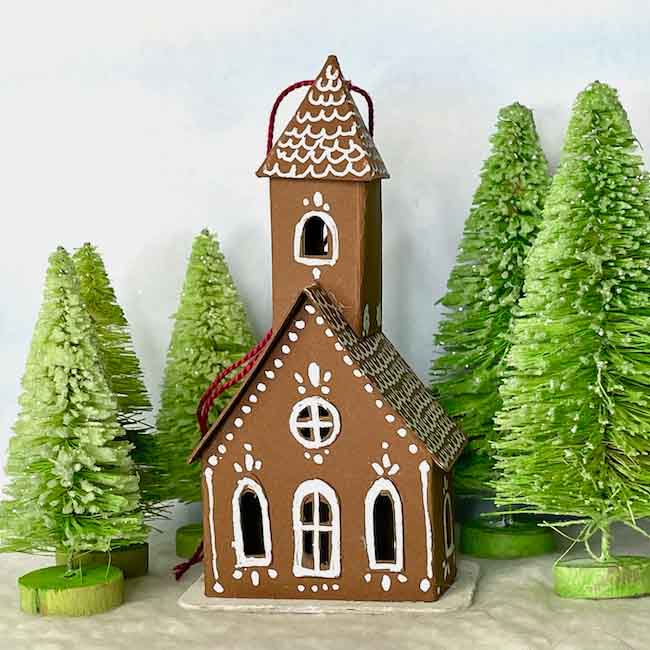
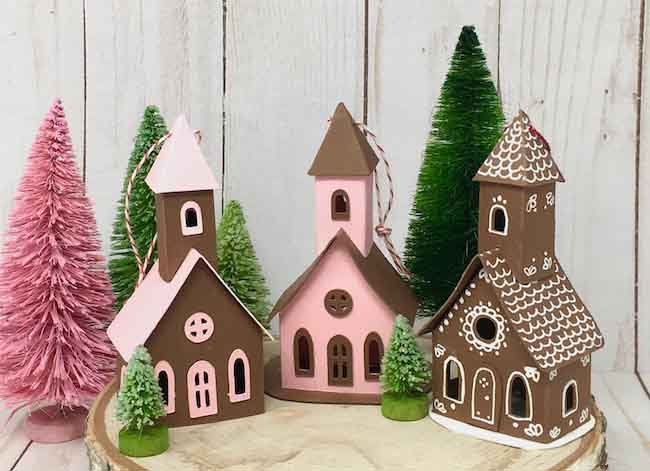
You construct all of them in the same way. The tiny church has a steeple which makes it just ever so slightly more involved, but certainly worth the effort.
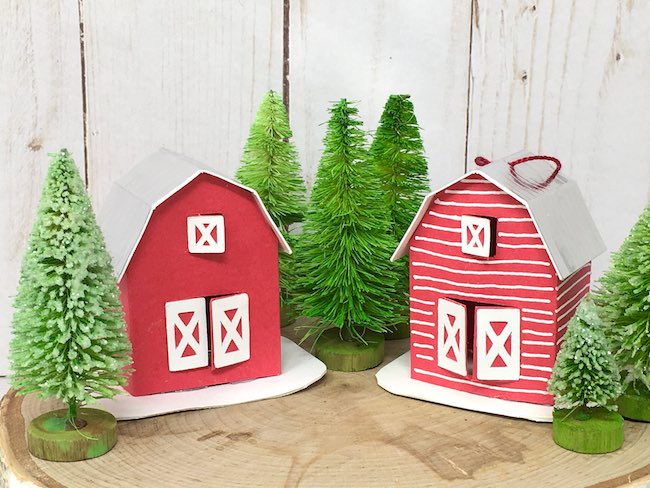
3. Tiny Paper Barn Christmas Ornament
Now, who can resist a tiny paper barn on the Christmas tree? They just need some tiny cows, but I keep forgetting to order them.
4. Tiny Paper Chalet Ornament
I imagined a Swiss Chalet when I designed this tiny house Christmas ornament. Though real chalets are usually wider than tall, I still think of a chalet as looking more like an A-frame house so that is why I made this house with steeply angled roof.
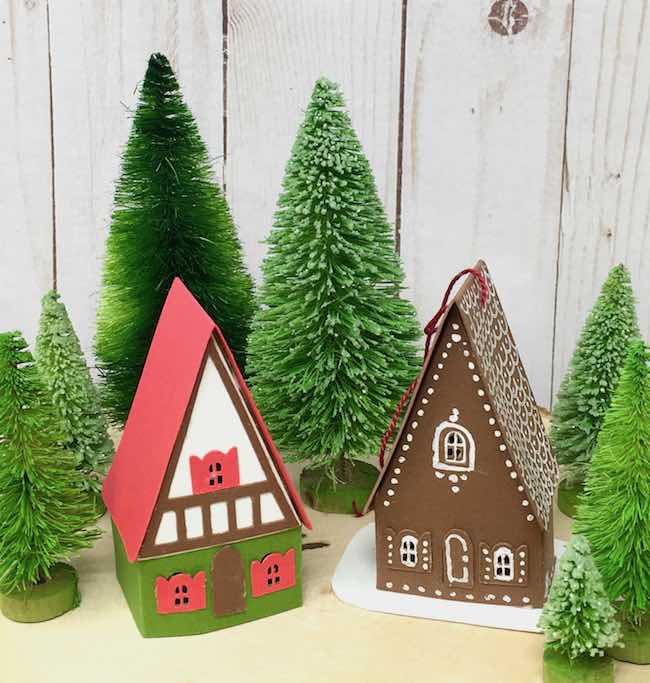
If you are interested in the more ornate chalet with the wood trim, that version is located in the November 2020 section of the Paper Glitter Glue library.
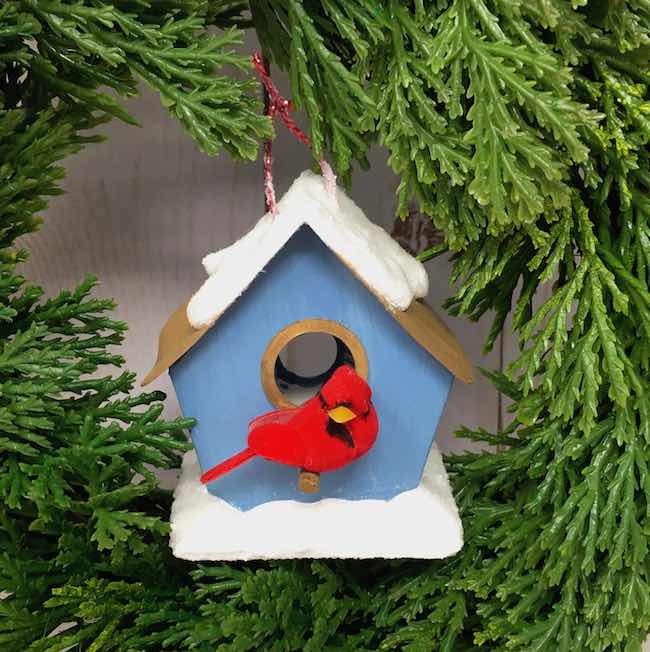
5. Tiny Paper Birdhouse Ornament
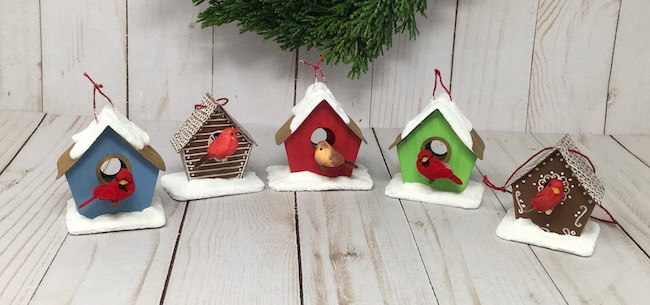
For the tiny house series, here's the tiny birdhouse with a tiny red bird. Doesn't your Christmas tree need a tiny birdhouse?
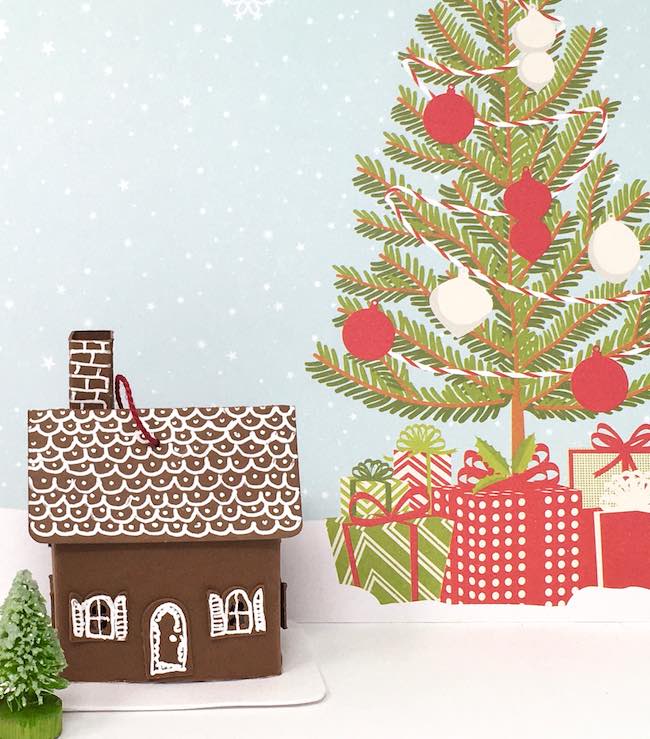
6. Tiny Paper Cottage Ornament
And as the final entry in the tiny Christmas house series, here is the tiny paper cottage ornament.
So let's start making these adorable tiny houses.
This post contains some affiliate links for your convenience. Click here to read my full disclosure policy.
Materials to Make the Tiny House Christmas Ornaments
- Card stock - choose whatever colors or type you like, I recommend at least 65# card stock, but 110# card stock is better. Glitter and foil card stock work well.
- Glue - good choices include Bearly Art Glue, Aleene's Quick Dry Tacky Glue or Art Glitter Glue (which doesn't have glitter in it)
- Gel pen (optional) - I love the Uniball Signo white gel pen
- Snow - Snow-Tex, Grit Paste, or Modeling Paste are good options
- Glitter - here's my favorite glitter
- ⅛ dowel for the birdhouse
- Tiny birds for the birdhouse
- Hot glue and glue gun for the birdhouse
- Cardboard for the house base - this is what I use
- Tiny bottle brush trees - you can find many options on Amazon like this
- A way to cut out your pattern, I use my Cricut Maker for this step, but the house patterns are pretty easy to cut by hand as well
Outline for how to make the Tiny Paper House Christmas Ornaments
- Download the free house patterns - Design No. 130 - from the Paper Glitter Glue library from the December 2021 section - Printable PDF format or SVG format for cutting machines
- Cut out the pattern pieces
- Decorate the house pieces - glue on windows, doors, or draw decorations on your house
- Assemble the main body of the house (or barn or birdhouse)
- Glue on the roof or roof and steeple
- Glue the body of the house to base
- Apply snow, glitter or other embellishments to the house and base
- Thread a string or ribbon through the hole in the roof for your ornament
- Proudly display your adorable creation!
1. Download the Free House Patterns from the Paper Glitter Glue Library
Ok, the first step is to download the free house patterns - Design No. 130 - from the Paper Glitter Glue. If you already have the password, just type in the password in the appropriate place. But if you don't have the password, just subscribe to my newsletter and you will get the password right away.
All Files Organized in Chronological Order in the ibrary
I keep all my files in chronological order so these files are in the December 2021 section of the Paper Glitter Glue library. All of them are included in the Design No. 130.
They are available in two formats:
- Printable PDF files
- SVG cut files for cutting machines like the Cricut
Also, the files are kept in compressed (zipped) file folders which you have unzip to use.
How to Unzip the Christmas Ornament File Folders
If you have a Windows-based machine, here's how to open or extract the files from zipped folder:
- First, open File Explorer and find zipped SVG or PDF folder.
- If you want to unzip or open the entire folder, right-click, then click to extract all and follow the instructions.
- But if you want to just unzip a single file within the folder, then drag or copy the file to a new location.
2. Cut out the Tiny Paper House Christmas Ornaments
If you cut your patterns by hand, you will notice that all the houses are very simple to cut out. The windows are a little more challenging. Feel free to alter the number and shape of the windows to make them easier to cut.
If you use a cutting machine like the Cricut, here's how to use the designs within Cricut Design Space.
Tiny Paper House as uploaded to Cricut Design Space
Once the first design is in Cricut Design Space, it looks like this.
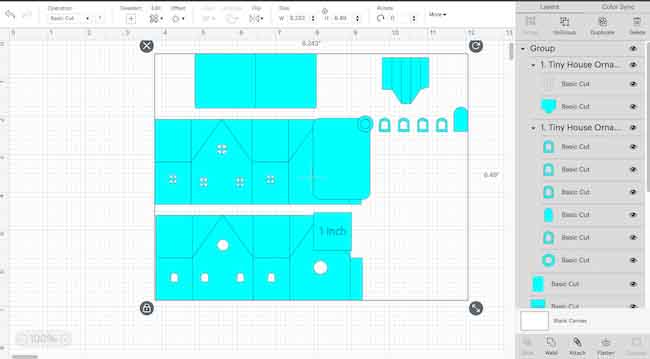
If you want to change the size of the house, then change it while the entire design remains grouped. That way the roof, windows, doors, etc. continue to fit properly.
Next, ungroup the file
After uploading the file, ungroup the file using the menu at the top right.
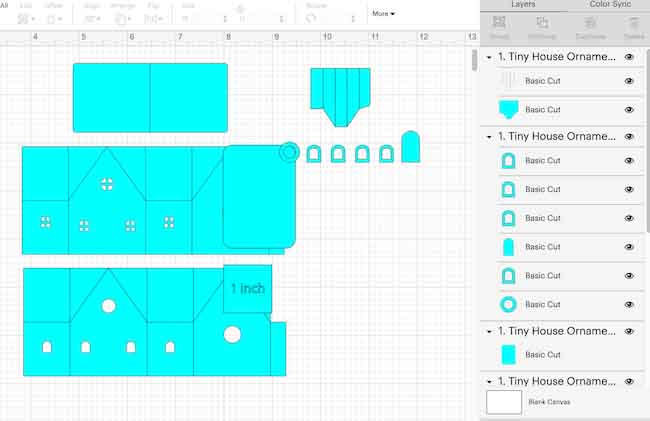
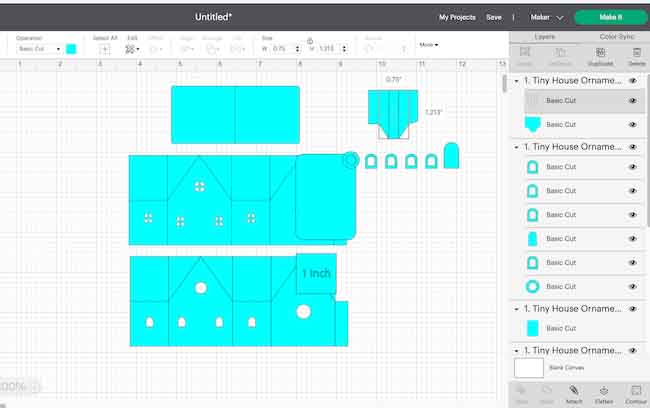
Select the score lines for the chimney
Next, select the score lines for the chimney by clicking on them or using the layers menu on the right side of Cricut Design Space.
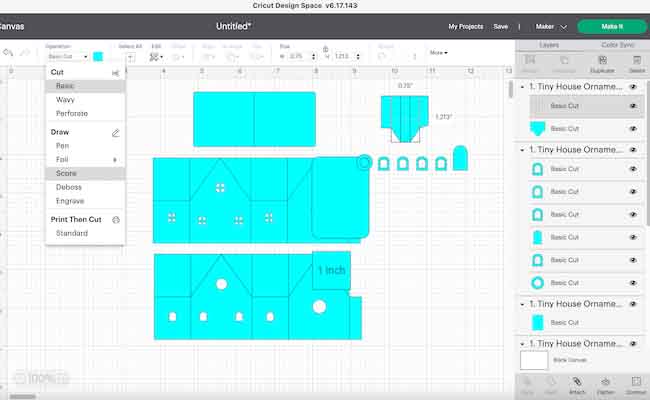
Select Score under the operations menu
To change the grouped lines from Basic Cut, click Score under the operations menu on the top left side of the Cricut Design Space.
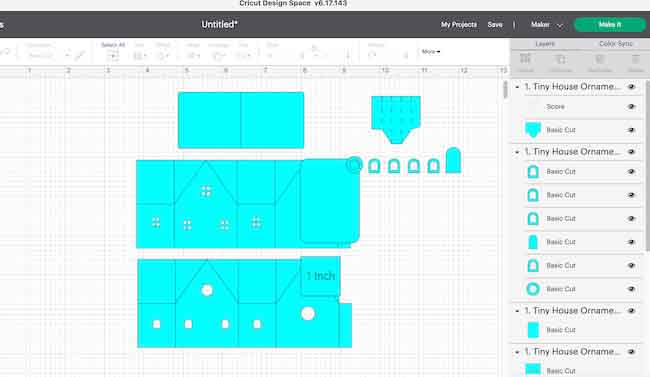
When you choose the score function, the lines change to dashed lines
See how the chimney score lines change from solid lines to dashed lines when you select score under the operations menu on the upper left hand side.
Select both the chimney and the score lines
Next, select both the chimney and the score lines by clicking on them both on either the canvas or where they are grouped in the layers menu on the right side.
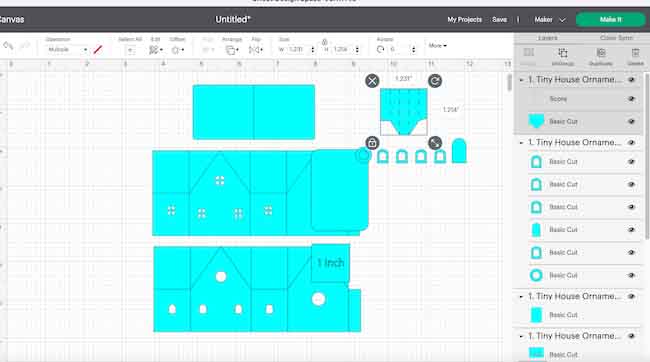
Now attach the score lines to the chimney piece
In order for your cutting machine to understand that the score lines belong to the chimney piece, you must "attach" them. Use the menu for attaching on the lower right hand side of Cricut Design Space.
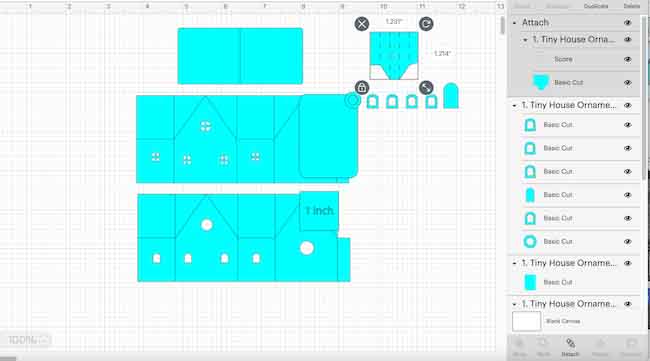
Delete or hide portions of the patterns that you don't want to use
For this pattern, you can choose the little house pattern with tiny window panes or the one with no window panes. Simply choose the one you like better OR which one cuts better on your machine.
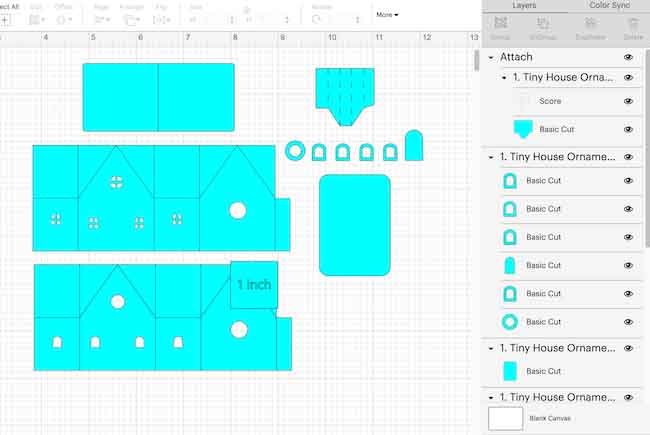
Also, omit the one inch square when you know the house has been imported at the correct size.
To delete a portion of the pattern, just select that portion and click delete on your keyboard or at the far right top of the layers menu. After I know the size has been imported correctly, I always delete the one inch square.
But to hide a portion of the pattern, select what you want to hide, click the little eye symbol beside that item under the layers menu. When you have hidden this section, you won't see it on the canvas, but it stays under the layers menu with a slash through the eye symbol.
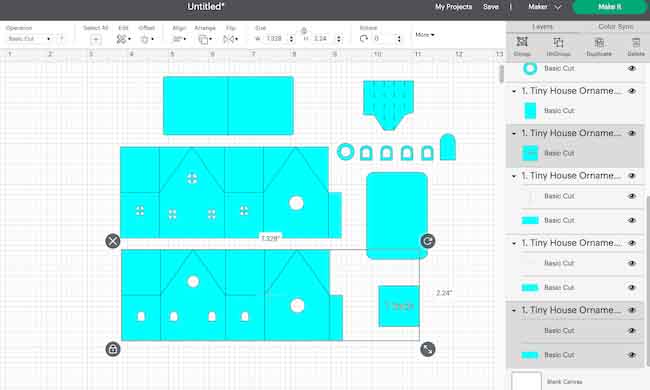
And here is how the canvas looks after the bottom house pattern has been hidden.
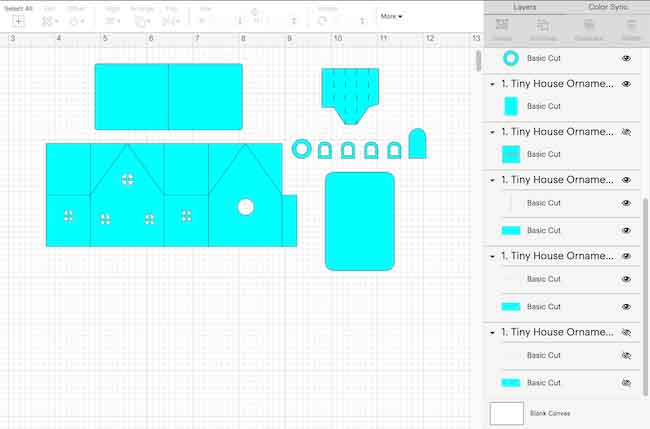
Finally, change all the score lines to score
Really, you can do this at any point - changing the grouped score lines to score under the operations panel, then attaching. See how the lines have changed to dashed lines.
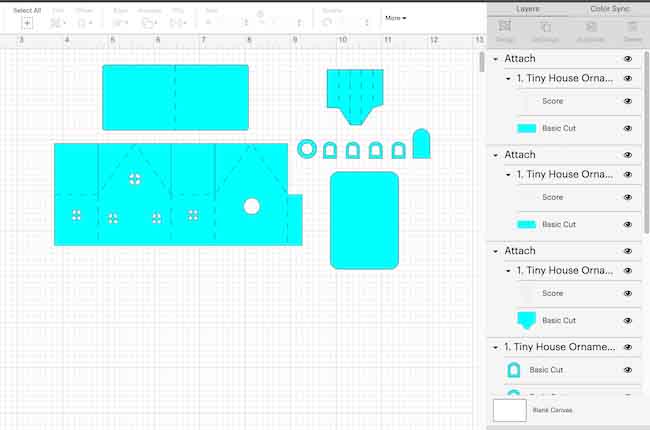
When score lines have been designated and attached, click MAKE IT
And here is the menu on my Cricut Maker showing my favorite materials.
For this design, I use Cardstock intricate cuts when using using foil cardstock. It works beautifully on my Maker.
When I use heavy 110# cardstock, I choose the Heavy Cardstock selection.

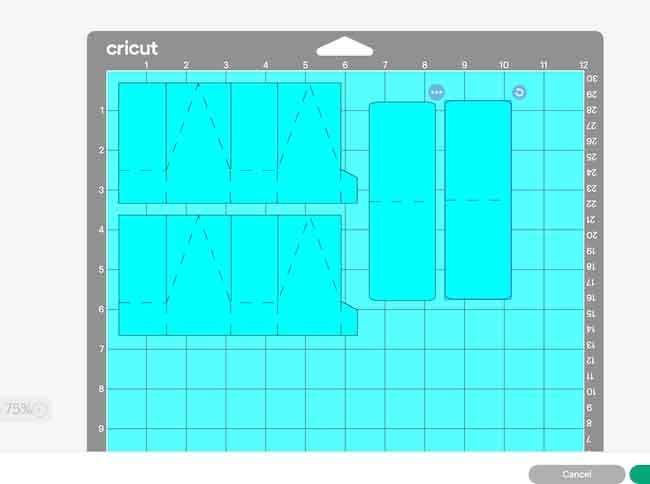
Also you can cut more than one tiny house Christmas ornament on an 8.5" x 11" piece of card stock
If you want to make more than one tiny house ornament, just duplicate the house and other pieces. Sometimes even 3 pieces will fit on one sheet.
As you can see the chateau is taller, so only 2 fit on the mat at a time.
Decorate the Tiny Paper House Christmas Ornaments
Now this is the fun part, decorating your little house. You can choose to glue on the tiny windows and doors.
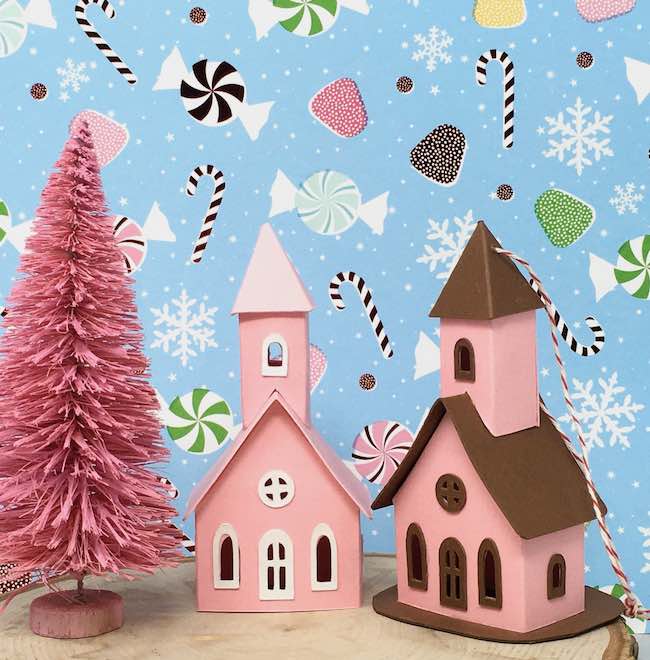
Or you can draw designs on the little houses which is really my favorite way to decorate the houses.
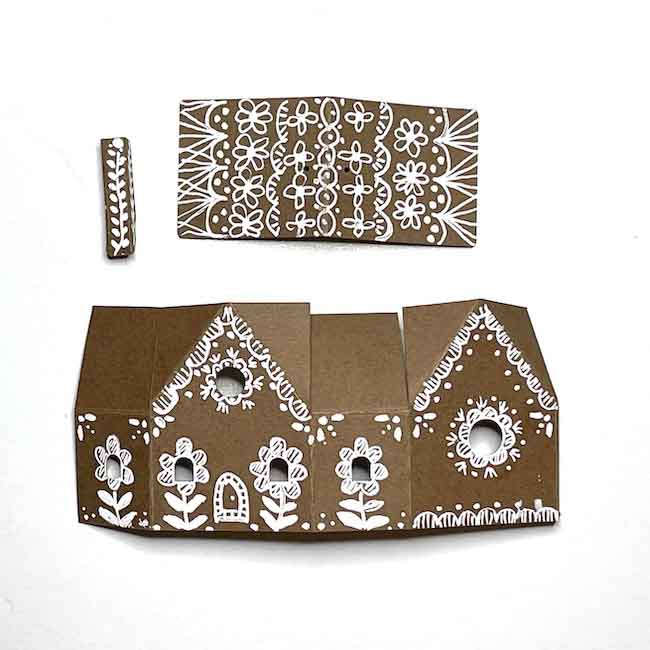
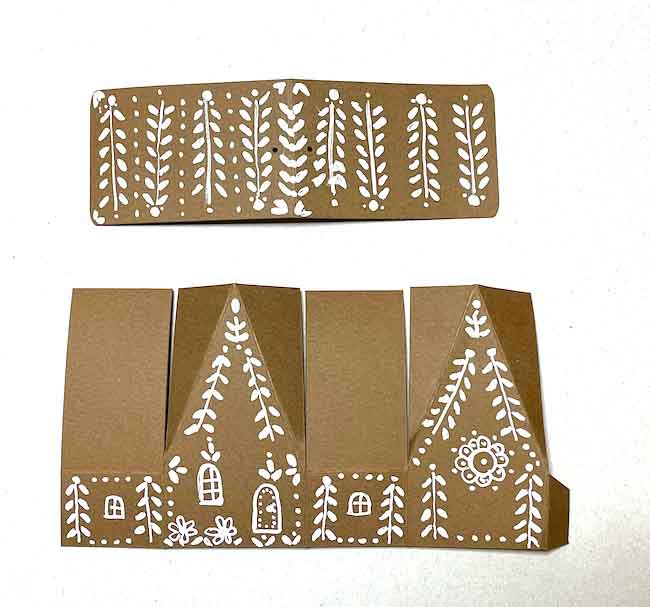
And here's another version of the chalet house decorated with my favorite white gel pen - the Uniball Signo Gel Pen.
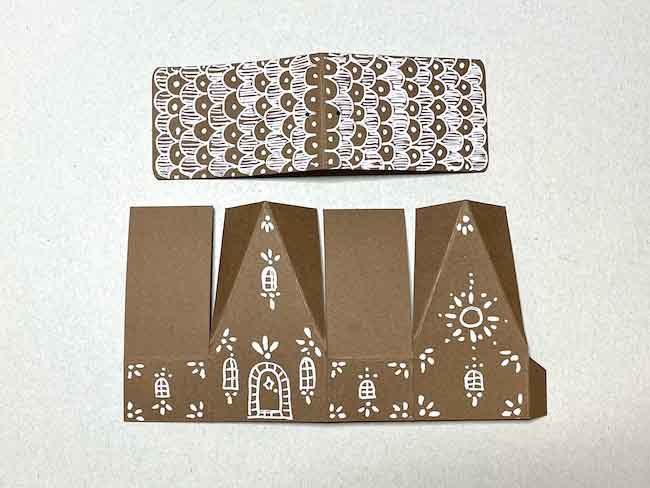
Choose whichever method appeals to you the most.
Assemble the Main Body of House
Fortunately, this series of houses is so easy to construct. That's whaat makes them perfect for Christmas when our time is so limited.. If you want, you can decorate an entire tree with little houses. How fun would that be?
To construct the house that you have already decorated, just apply glue to the glue tab on the right side of the house and glue to the other side.
That forms the main structure of the house.
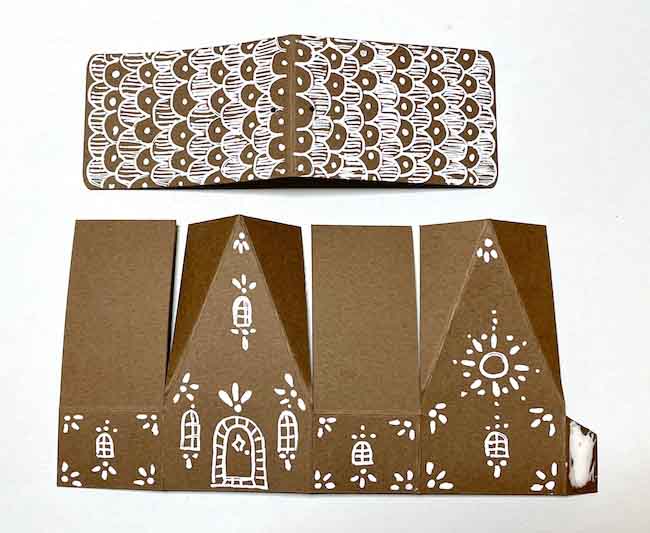
See the glue seam on the back of the paper house.
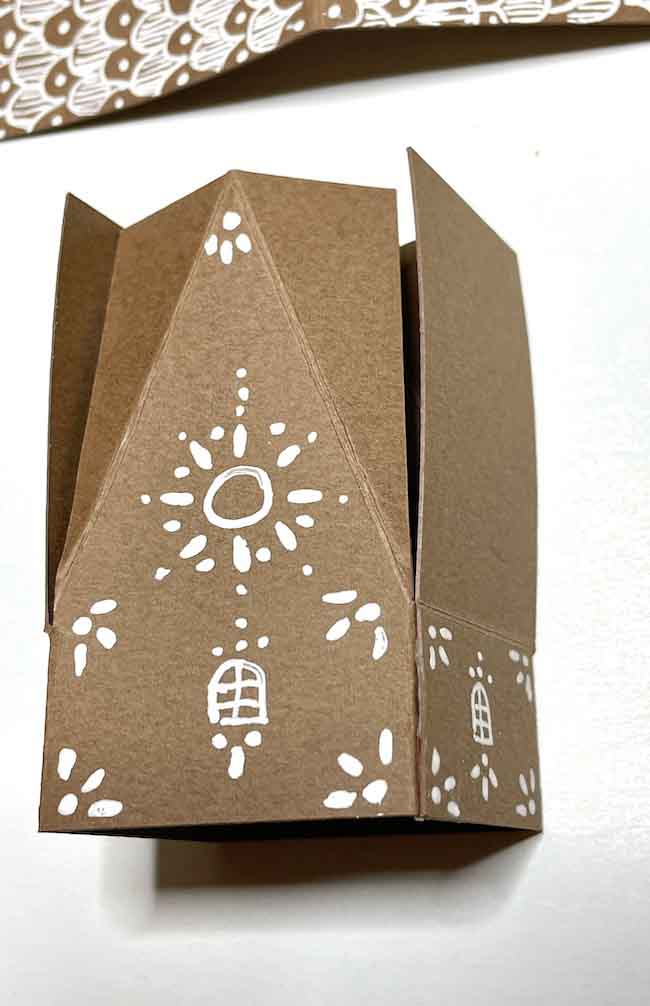
After the side seam is dry, apply glue to the roof flap to glue down the roof flaps. Doing this provides the structure for the top of the house and the roof piece.
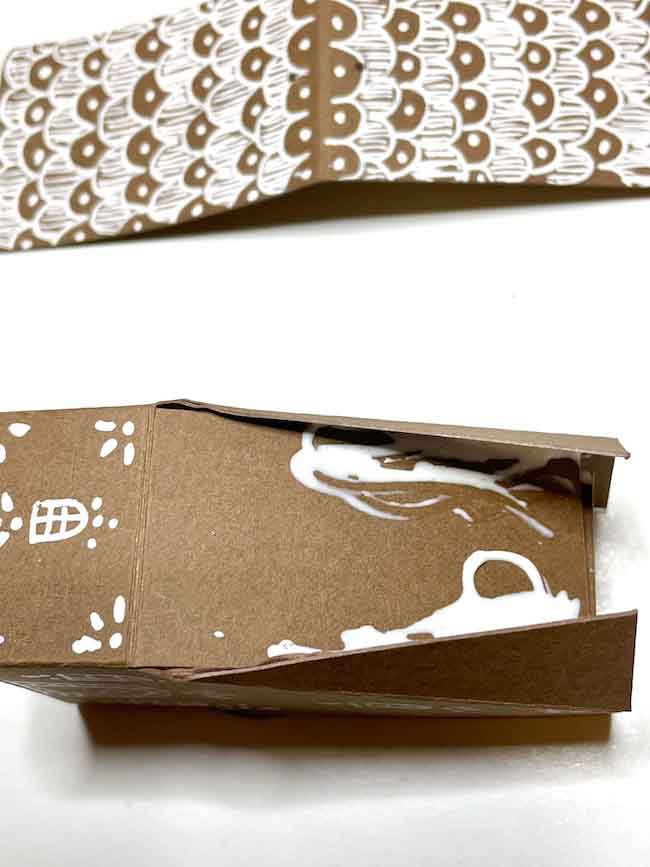
Next, fold the roof tabs to adhere to the roof flap.
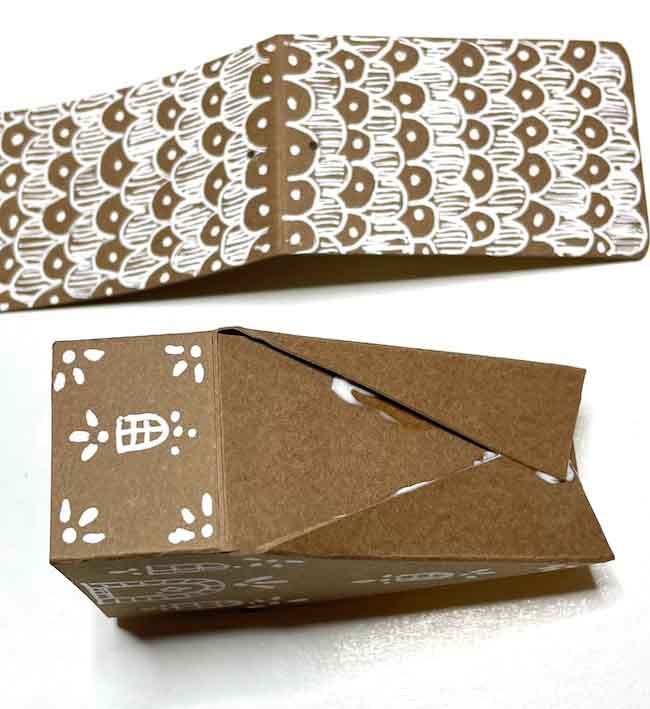
And this is how it looks when when the roof tabs are firmly adhered to the roof flap.
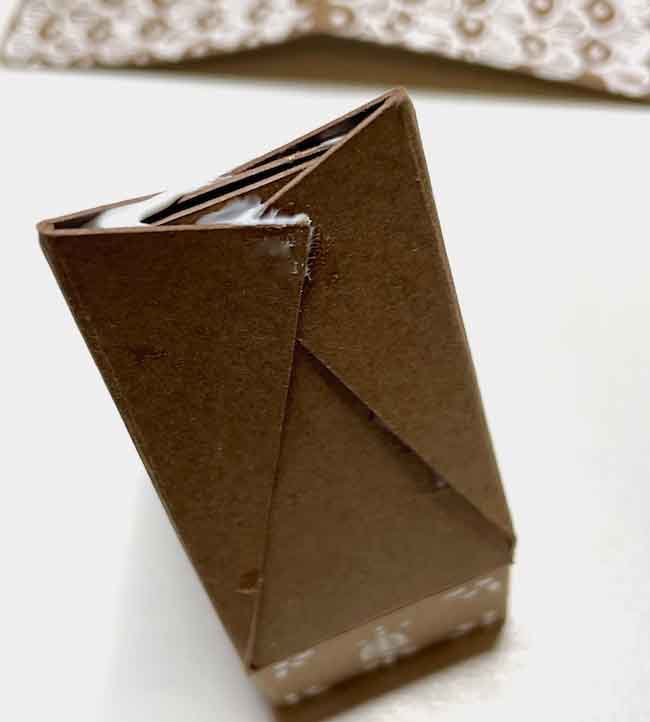
If you want to hang your tiny house ornament, punch a small hole for the string to hang the ornament.
Once both sides of the roof tabs are dry, then apply more glue for the roof piece itself.
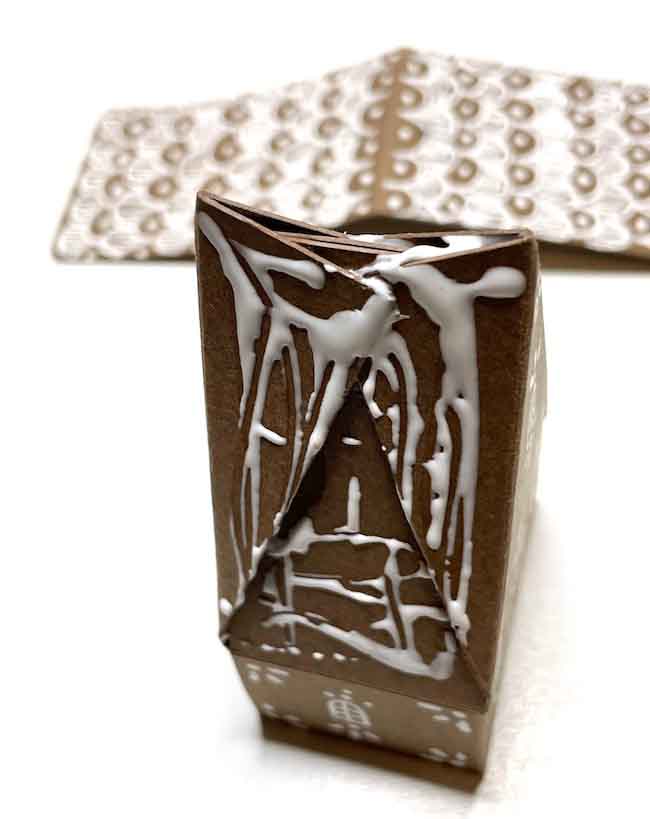
Finally, center the roof piece over the house and adhere it to the house structure.
Special Construction Tips for Specific Houses
Tiny Paper House and Tiny Paper Cottage Ornament Chimneys
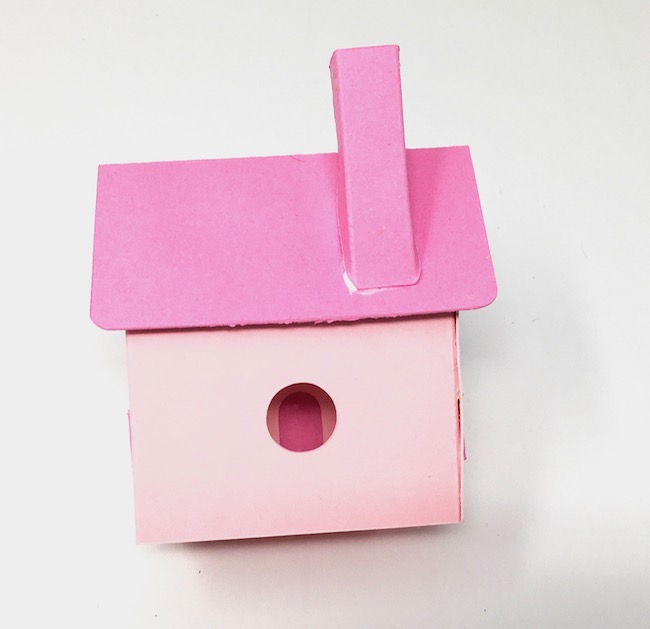
Both the tiny paper house (design no. 1) and the tiny paper cottage (design no. 6) have chimneys you can add to the roof.
The chimney is simple to make by gluing along the side tab and then glue to the roof. But please note that the chimney angles differ for the two houses. For example, the cottage chimney has a much steeper angle than the tiny house chimney.
Tiny Paper Church Tower and Steeple
Making the tower and the steeple for the tiny church (design no. 2) is straightforward.
First, assemble the church just like you make any other houses - glue the side glue tab, then the roof flaps and finally the roof piece. Once that is done, then work on the tower and steeple
Simply glue the tower piece together along the side glue tab. Note the tabs on the bottom and top of the tower piece to give more surface area to adhere the tower to roof and the steeple to the tower.
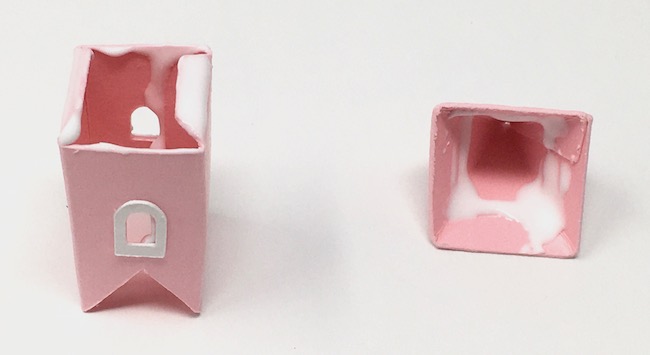
Before you glue the steeple together punch a hole in the opposite sides of the steeple so you can thread a string through if you want to make your church as an hanging ornament. I neglected to do that on the steeple below.
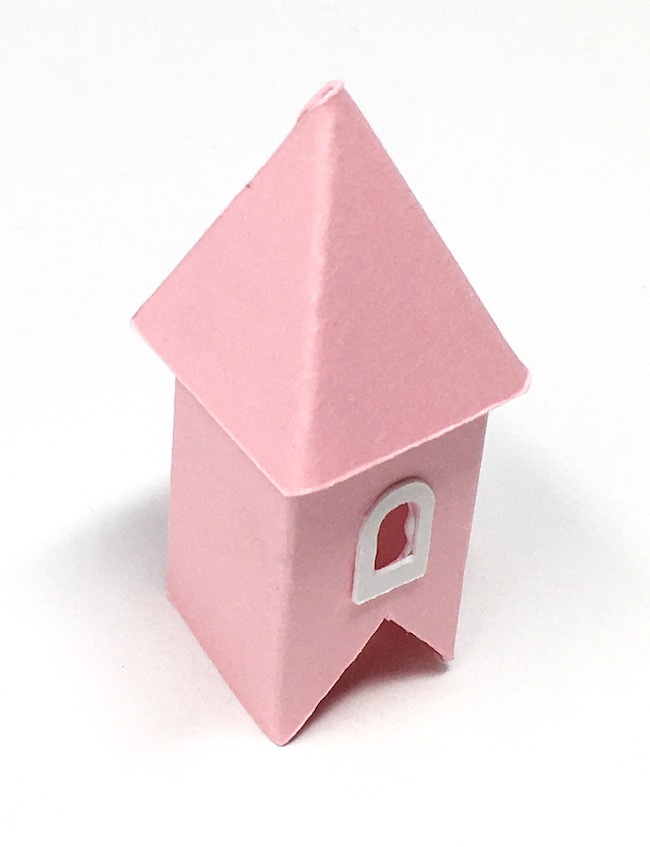
Once the steeple and the tower are dry, glue the steeple to the tower, then glue the completed steeple tower to the church base. Let dry.
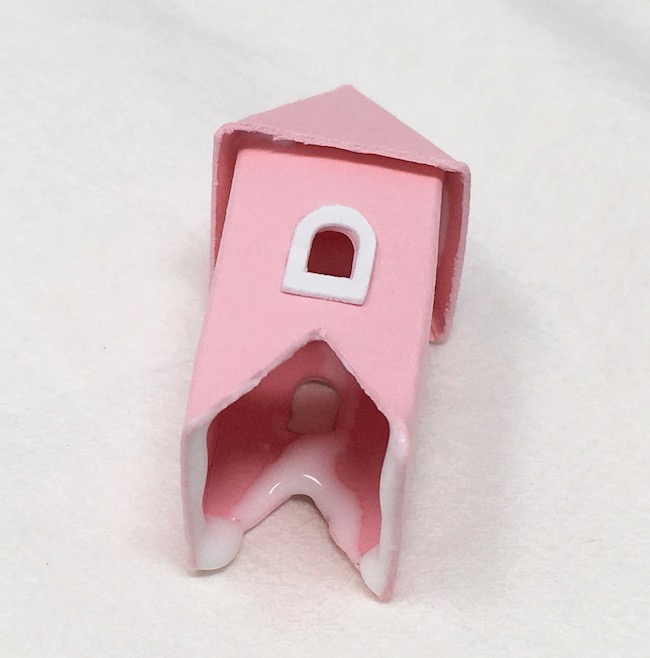
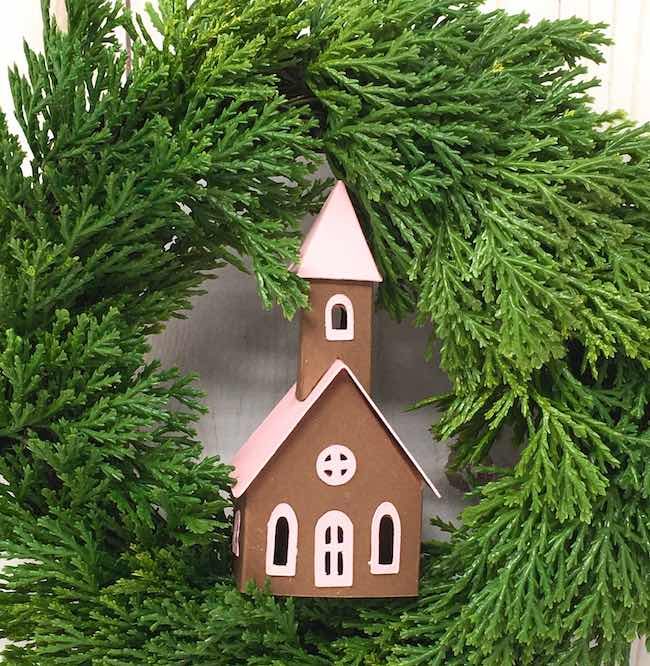
Isn't the little church adorable?
Tiny Paper Birdhouse Christmas Ornament
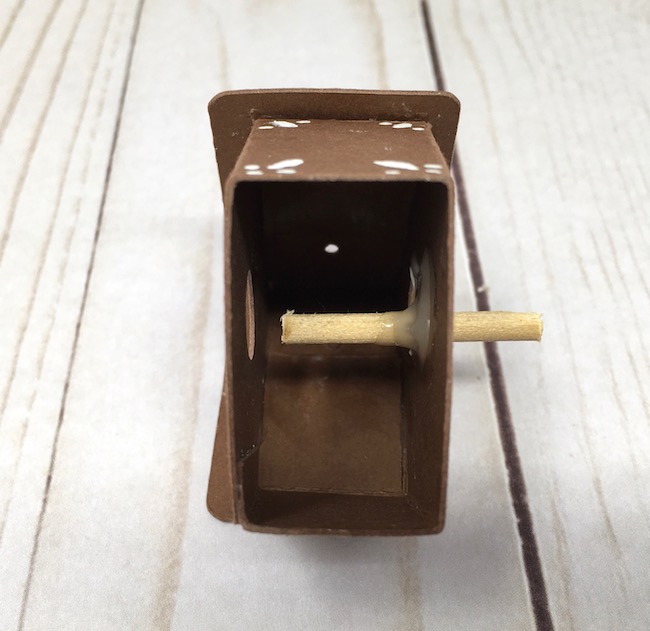
To make the perch for the bird, glue a ⅛ inch dowel in the front of the birdhouse. Cut it long enough to just touch the back of the birdhouse and extend out the front enough to glue a bird to the dowel. For this I recommend hot glue because it dries fast enough to hold the dowel quickly.
Glue the Tiny Paper House Christmas Ornament to the base
Included in each pattern is a pattern for the base. There are two different sizes - one is 2 inches wide and the other is 2.25 inches wide for the Tiny Paper Cottage (design no.6).
For the base, cardboard works much better than card stock. It supports the house so much better.
If you want to include more decorations on the base, like tiny bottlebrush trees, make a larger base by adding an inch or so to the width of the base.
Add more decorations, if desired
Because I want my ornaments to be small and easy to hang, I used a small base. But if you use a larger base, you can add little trees, deer, or other embellishments.
On many of my Tiny House Christmas Ornaments I painted some snow around the base and then sprinkled glitter on top.
Thread a String to hang the House Ornament
Now simply thread a large-eyed needle with your string or baker's twine, make a loop, and tie a knot.
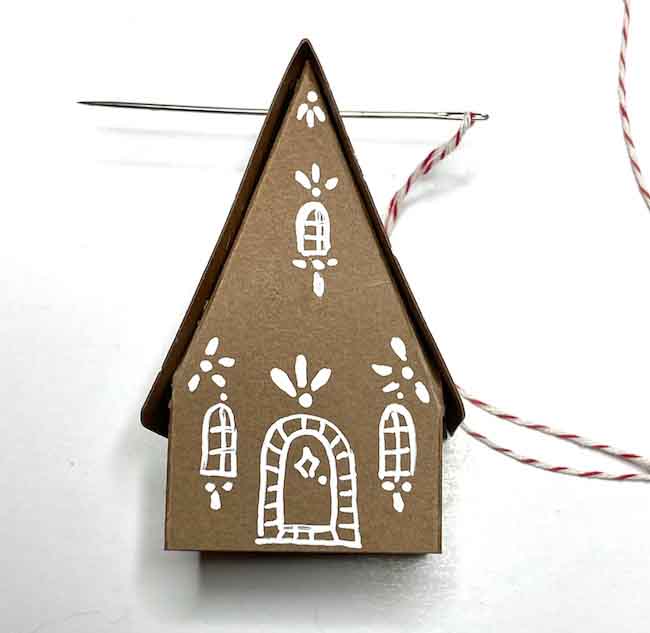
Your adorable little house is done and ready for display.
Proudly display your Tiny House Christmas Ornaments
Since everyone loves tiny things, they will be enchanted with your tiny houses. Display them wherever they can be seen easily. And because they are so easy to make, you don't have to worry if they get handled too much by children. You can always make more.
If you like this set of houses, you might like the Advent village as it is very easy to make as well.
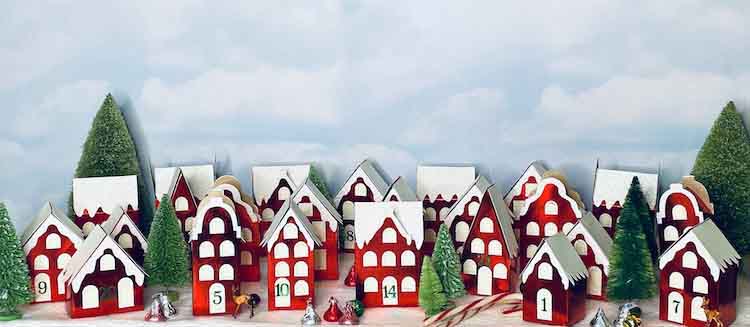
Remember to pin to your favorite Pinterest craft board so you can remember where you found this paper craft.
And have a lovely holiday season.
Lucy


Leave a Reply