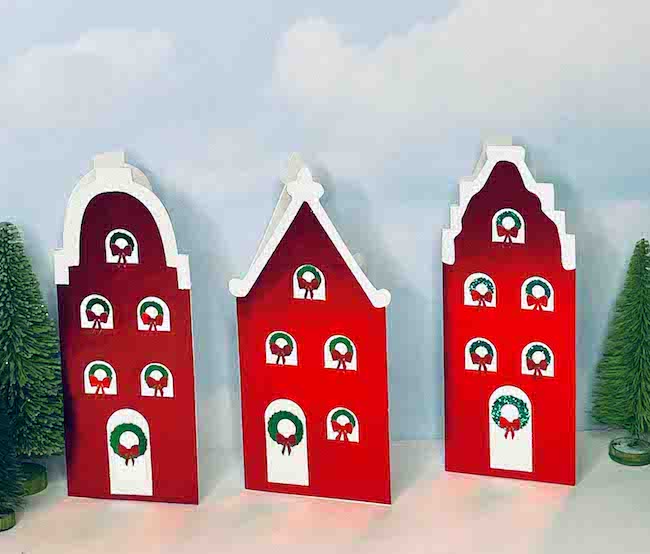
When I needed Christmas cards this year, I decided to make them based on my previous Amsterdam canal houses designs. So these are based on those incredibly interesting houses along the canals in Amsterdam. And I am so happy with how the Amsterdam House Christmas cards turned out.
If you want to read the fascinating history of the Amsterdam canal houses, you can read more here.
And if you would like to see the other paper houses made with these shapes, check out these versions:
This post contains some affiliate links for your convenience. Click here to read my full disclosure policy.
Table of Contents
Materials for the Amsterdam House Christmas Cards
- Amsterdam House Christmas Card Patterns - Design No. 132 - from the Paper Glitter Glue library December 2021 section
- Foil Card Stock (this is one example of red foil paper, but I like to use Michaels Recollections foil paper - 65# card stock or 176 gsm)
- Glitter Card Stock - 65# glitter card stock
- Glue - PVA glue like Art Glitter Glue or Bearly Art Glue
- A way to cut out the pattern - I use my Cricut Maker, but Cricut Explore Air, a Silhouette or a Scan N Cut work, too.

Directions for making the Amsterdam House Christmas Cards
- Download the pattern for the Amsterdam House Christmas Cards - Design No. 132
- Cut out the card stock pieces for the Christmas cards
- Assemble the Christmas card
- Make an envelope to fit your Christmas card (optional)
- Write your sentiments and mail them to your favorite people
For more detailed instructions, read below.
1. Download the Pattern for the Amsterdam Christmas Cards
To make these Christmas cards, first download the patterns for the cards from the December 2021 section of the PaperGlitterGlue library as design no. 132. Simply go to the library and type in the password.
If you don't have the password, just subscribe to the Paper Glitter Glue newsletter with the form below and you will get the password right away.
The zip folder for Amsterdam House Christmas Cards includes 3 different house patterns in two formats - a printable PDF format as well in SVG format for cutting machines. Use the file that works for you. When you cut your projects out by hand, use the PDF files But when you use a cutting machine, use the SVG files.
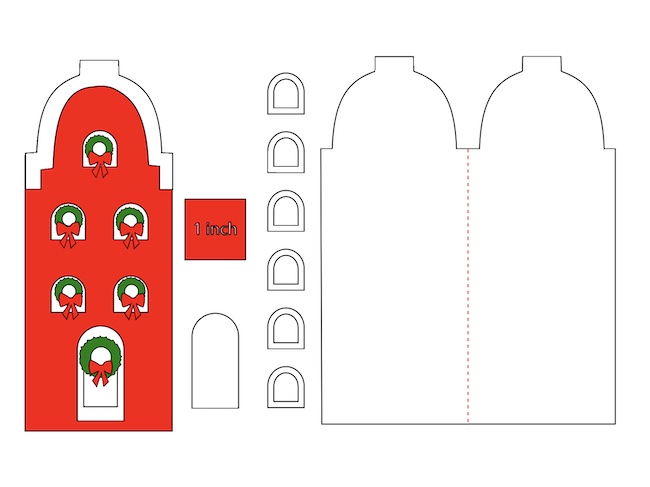
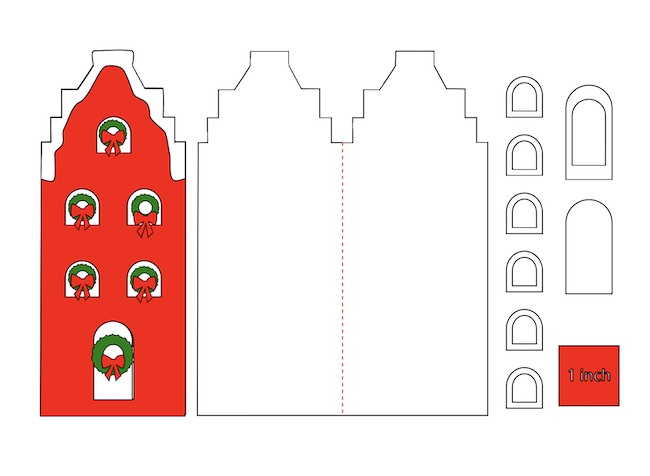
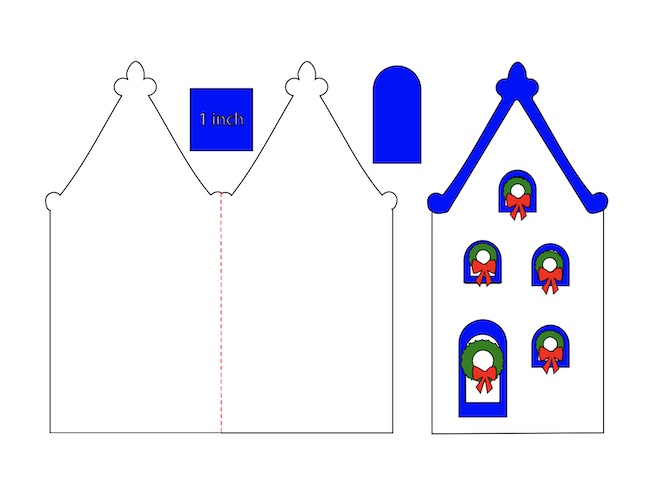
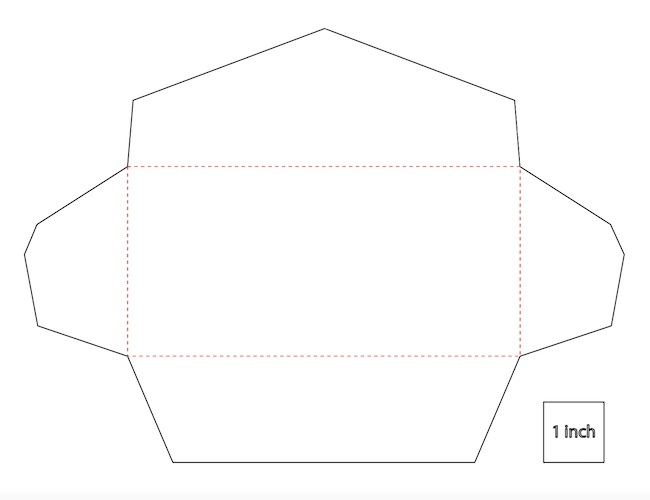
If you would like to make a special envelope to fit your Amsterdam House card perfectly, you can use this template included in the files.
2. Cut out the Card Stock pieces
These cards are so easy to cut out with a cutting machine like the Cricut. For the card itself, I used 65# cardstock (176 gsm). Since I use my Cricut Maker, I'll show you how the design looks and works in Cricut Design Space.
If you already know how to use your Cricut or have a different cutting machine or cut by hand, just skip this section.
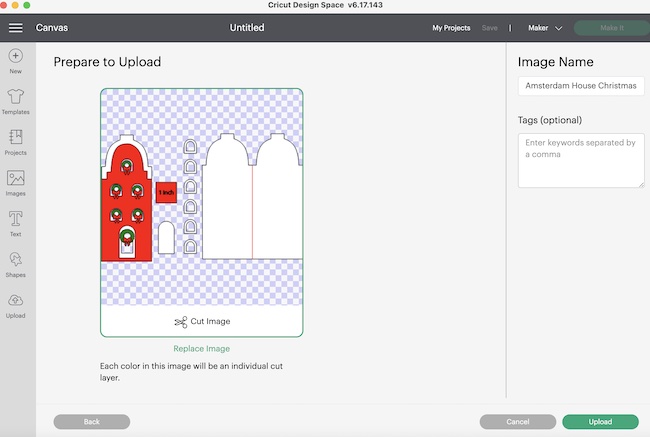
Upload the design to Cricut Design Space
First, upload the design from the folder to Cricut Design Space. This is how it looks on my screen.
Now click the green upload button in the lower right hand corner.
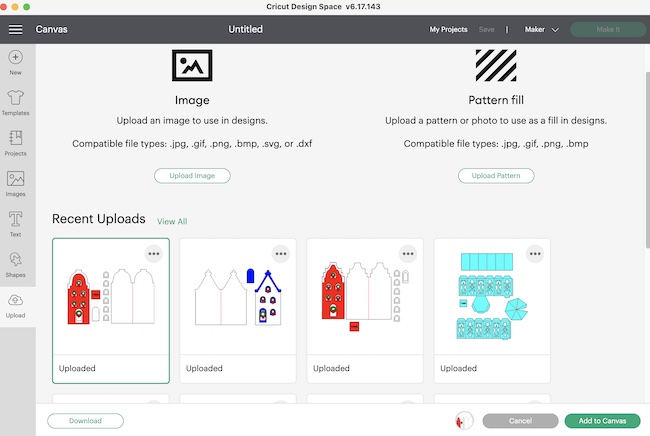
Choose the image you want to add to Cricut Design Space Canvas
After that, you see this on your screen. Click on the image that you want to add to the Cricut Design Space Canvas.
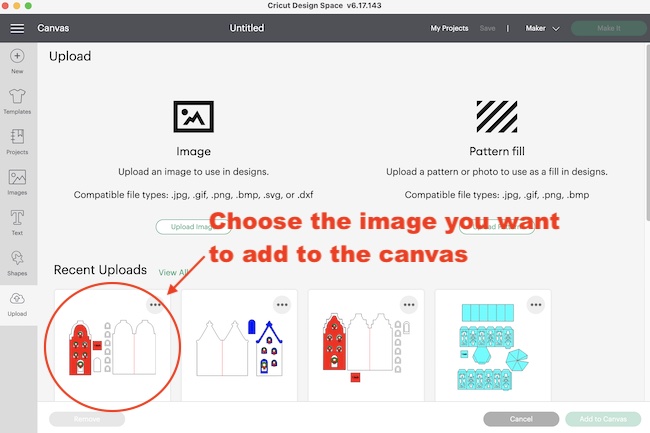
The green "Add to Canvas" button on the lower right hand corner becomes active when you choose a design to upload.
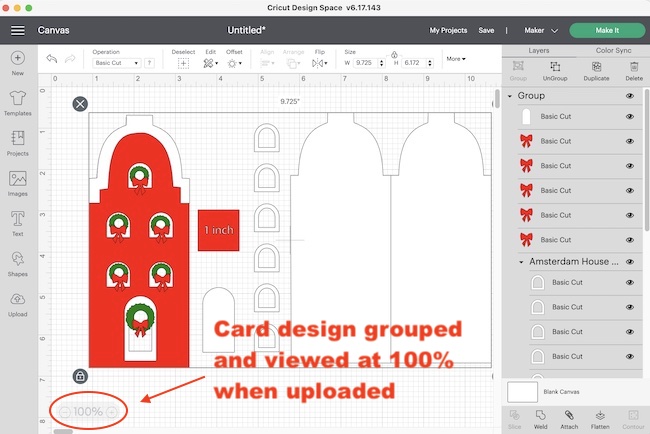
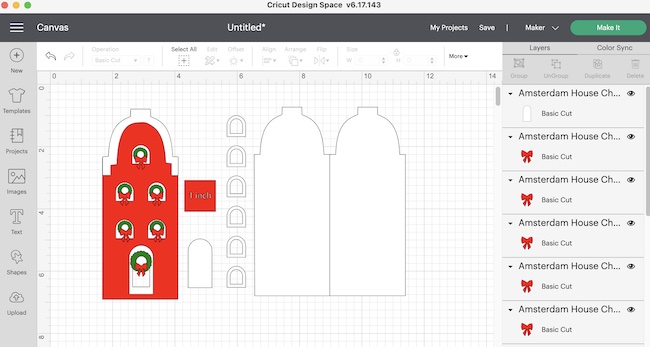
Once you add the design to canvas, your Cricut Design Space looks like this.
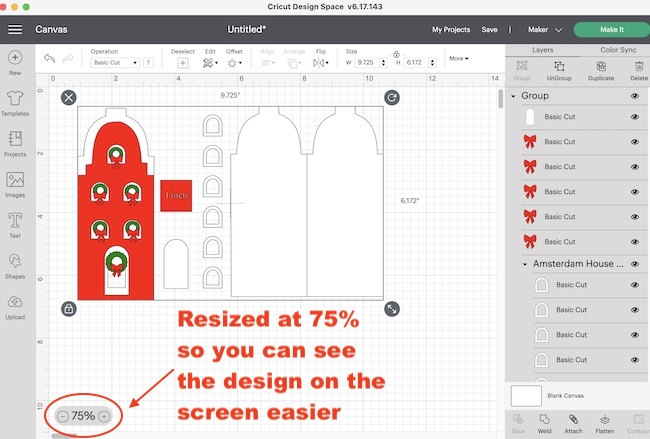
Re-size the design to see it better on your screen
To get a better view of the design, I often reduce the size of the design on the canvas by clicking on the size on the lower left hand corner of the screen. Also note that the entire design is grouped at this time. Whenever you re-size, leave the design grouped.
Now you see the design re-sized at 75%. Sometimes I make it smaller than that to get the entire design on the screen.
Ungroup the Design
Next, ungroup the design.
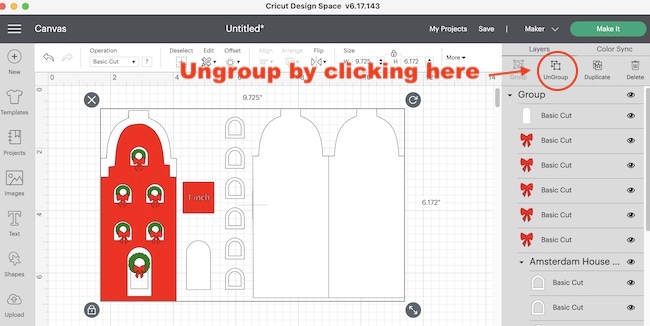
Now that the Amsterdam House Christmas Card is ungrouped, you can get on with making the design.
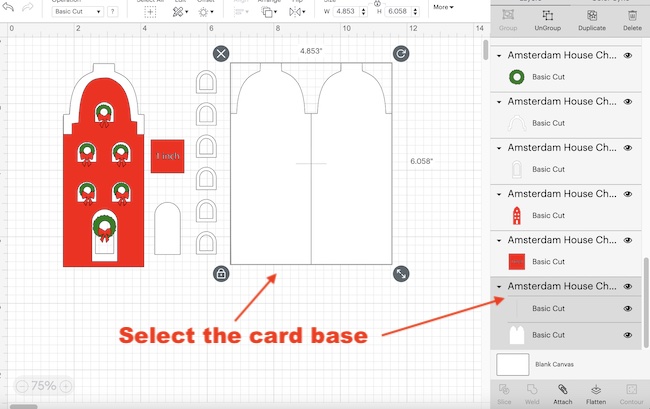
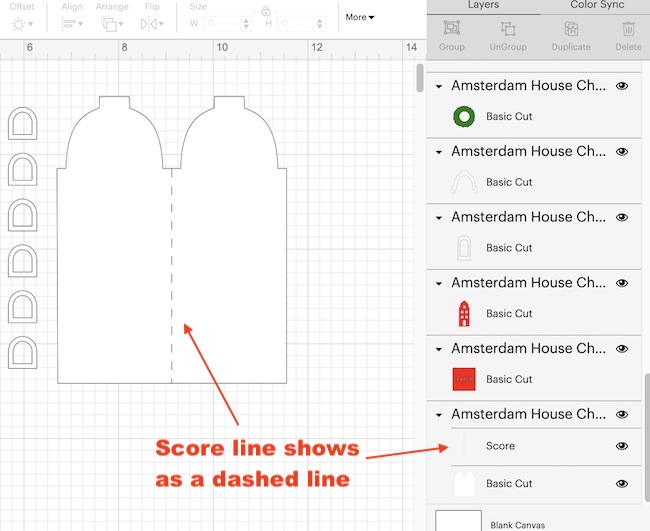
Select the card base to designate the only score line
Just click on the card base to select it.
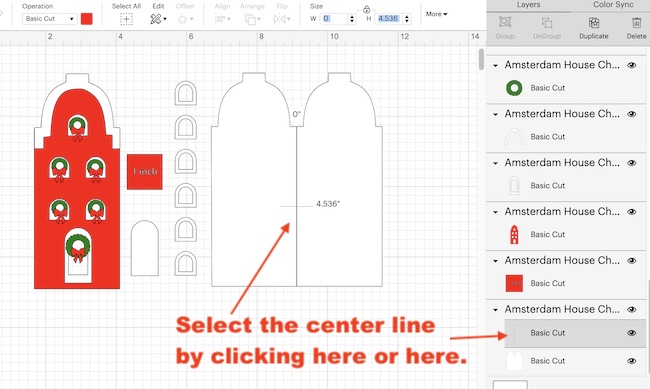
Now select the line in the middle because that is the only score line - the line where you fold the card base in half.
Next, go the the operations menu in the upper left hand corner and choose score.
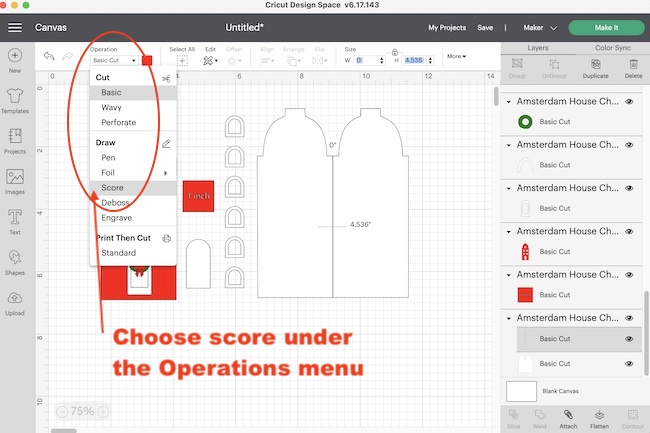
Now the score line shows up as a dashed line and you can see score in the layers panel as well.
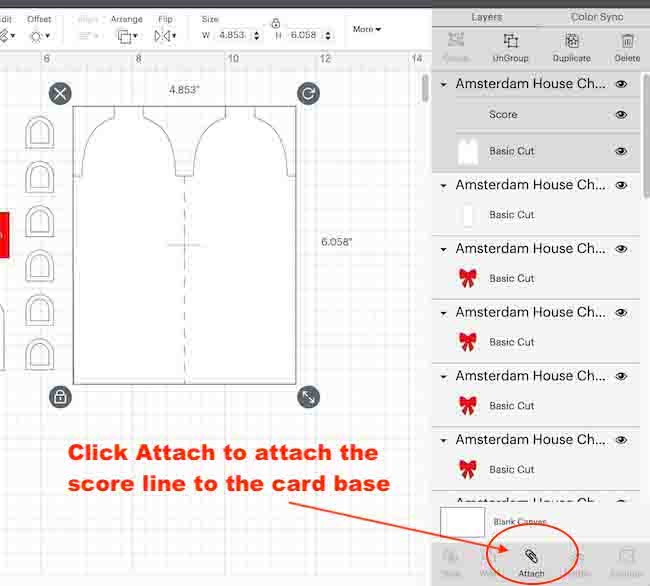
After choosing score, be sure to attach the score line to the card base. Otherwise your Cricut won't know where the score line is supposed to go.
Ok, so you have done all the changes needed to make the cards.
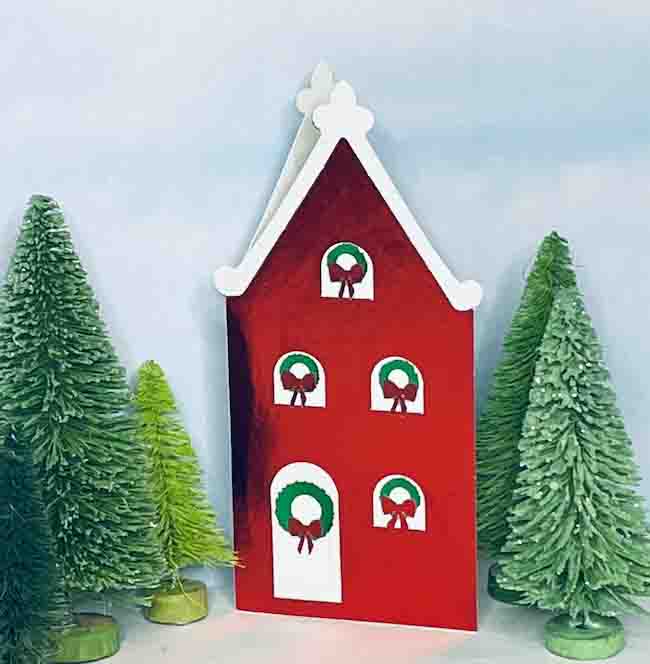
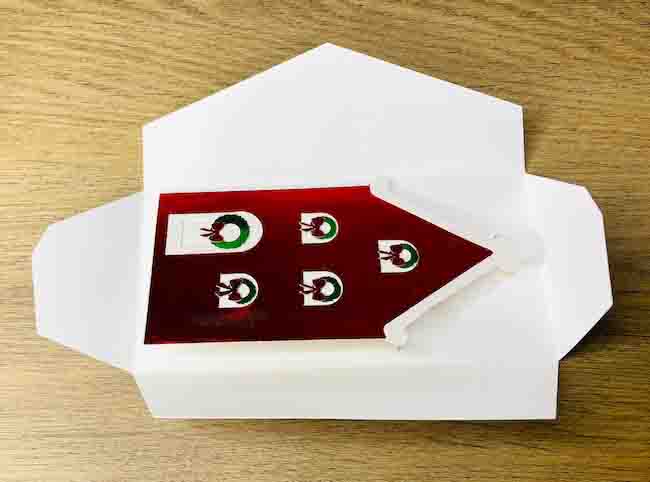
Finally, choose your colors and papers to make the card. I chose 65# red foil card stock for the house and the bow on the wreaths. For the white trim, I chose 65# glitter card stock. And for the base of the card, I just used 65# plain white card stock.
3. Assemble the card
In my view, it's easier to glue the red foil card front to the card stock base before you decorate the front of the house. But you can decorate it first, if you like.
Included in the pattern are window frames, but I didn't use them because I don't think they are necessary since the window backing (the card base) is white. They just seem kind of redundant. Depending on the colors you choose, omit the window frames or not.
Actually, I did use the window frames on my white and blue version of the house card because I do think these windows need to be differentiated from the white glitter background.
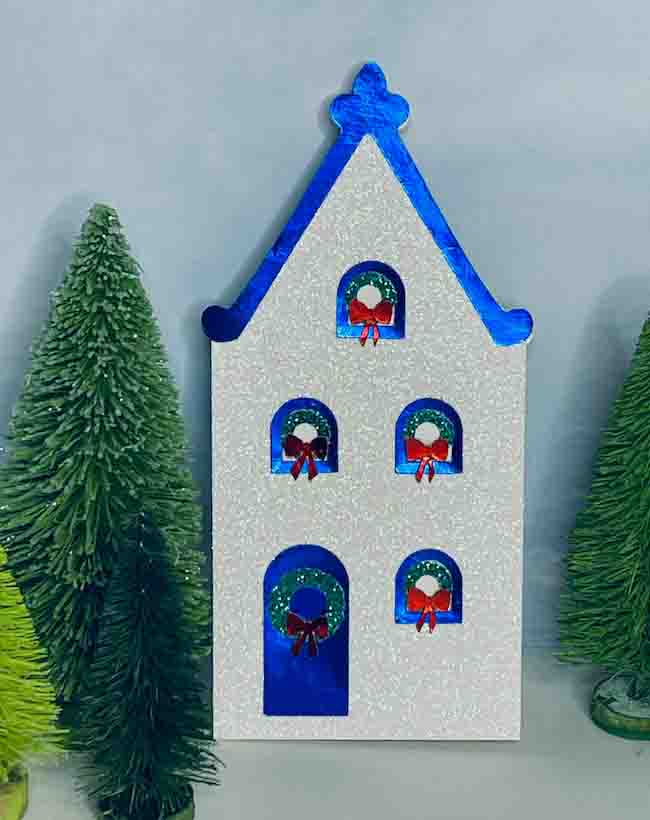
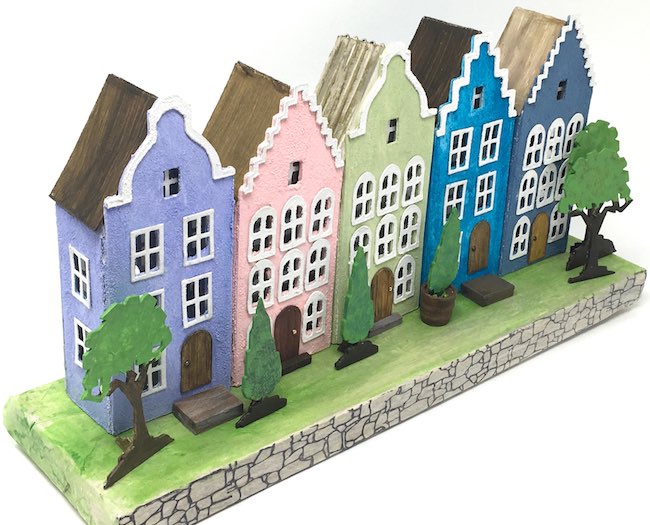
For this card, I mimicked my Delft house colors. Check it out if you want to make a full little house using these kind of house designs.
So glue the Amsterdam house front to the card base, then decorate with the door, the trim around the roof, and the wreaths. I really like the wreaths. I think they add a lot to the design.
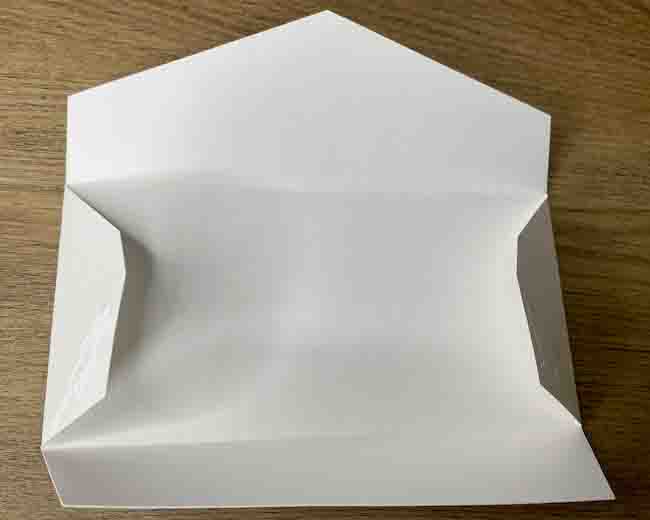
4. Make an envelope for your little house card
The envelope is easy to make and fits each of the houses well.
Just remember to score along the score lines. And when you glue along the side pieces, be sure not to glue the envelope shut.
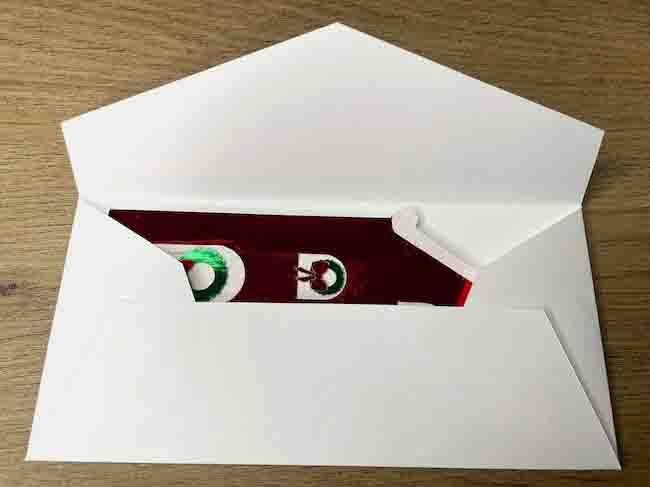
And here is how the house card fits in the envelope.
5. Send the card to the people you love
Now that you have your Christmas card and envelope finished, send your card to someone you love. They will be delighted with your beautiful card and you will bring a smile to their face.
Basharat
Dear Lucy,
You make awesome projects I love all your projects
Thanks
Where can I find your video tutorials for the houses
Lucy
I don't have a video for making the cards, but constructing the cards is very similar to making the Amsterdam House boxes. You decorate them the same way without making the 3-D box.
Go to Youtube and search for PaperGlitterGlue - my channel. Then search for Amsterdam canal houses. For some reason I can't put a YouTube link in the comments.
Please let me know if you have any other questions. Lucy