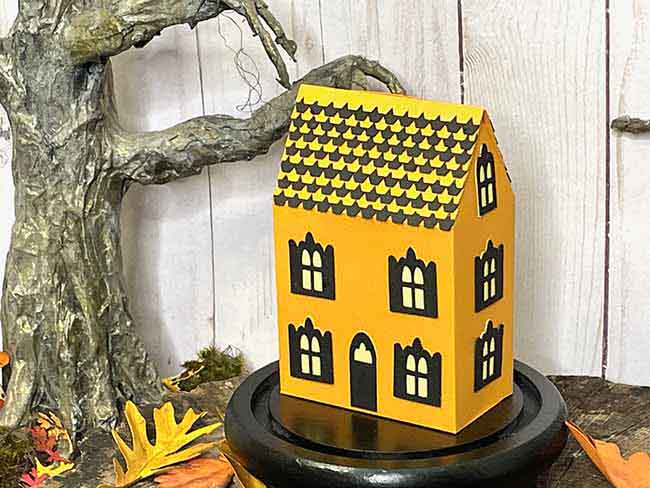
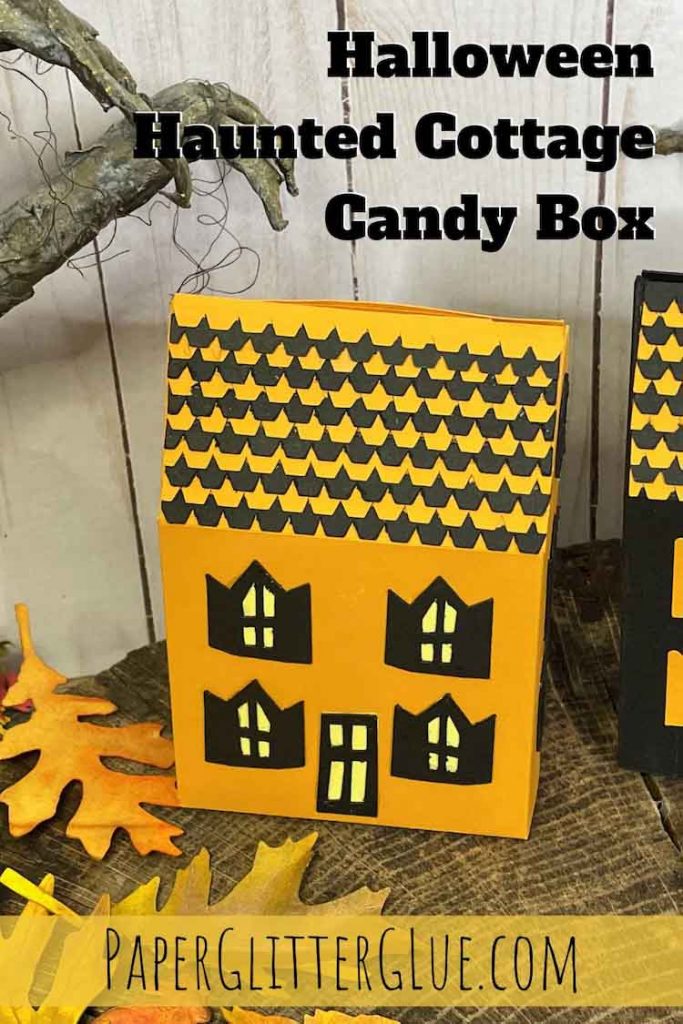
For the Halloween season, I'm making several miniature Halloween houses that can hold candy or treats. Seriously, you can make these little candy boxes in 5-10 minutes. You can decorate them by either drawing and coloring the house. Or if you prefer, use the window and door templates provided in the free Haunted Cottage candy box pattern. I've included examples of both.
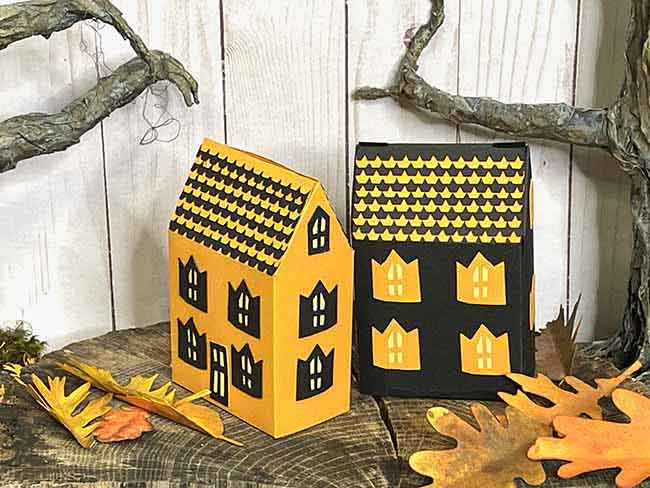
The first house in the series is the Halloween House treat box. The Haunted Cottage candy box in this tutorial is a bit larger which allows for more decorations - and candy, too.
Oh, one other cool thing is that when the season is over, you can just fold them and store them flat in a box for the next year. That's a great advantage, isn't it?
Let's get started.
This post contains some affiliate links for your convenience. Click here to read my full disclosure policy.
Table of Contents
What do you need to make the Haunted Cottage Candy Box?
- Cardstock - either 65# or 110# works. I prefer the heavier weight, but sometimes you can't find the colors you want in certain colors so you have to go with the 65# cardstock
- PVA glue - this is the glue I used because it is easy to control and dries fast
- A way to cut out your materials - I used my Cricut Maker, but you can cut it by hand
- Markers or a white gel pen - this is my favorite white gel pen
- Candy - you need candy or treats, of course
Steps to make the Haunted Cottage Candy Box
- Download the pattern - Design No. 126 - from the Paper Glitter Glue library
- Cut out the pattern pieces for the little cardstock house
- Decorate with cut out windows and doors
- Adhere the roof shingles to the roof, if desired
- Optional, decorate with pens or markers
- Glue the house along the side glue tab
- Assemble the candy box by folding the flaps
- Fill with candy or other treats
See more detailed instructions and photos below.
And here is a video on the construction of the first Halloween House Candy Box. The construction technique is exactly the same, this one is just taller and slightly less deep.
First, download the pattern - Design No. 126 - from the Paper Glitter Glue library
Click on this link to go to the Paper Glitter Glue library. In the middle of the page there is an additional link that says CLICK HERE, that takes you to the page where you add the password.
The Haunted Cottage pattern files are located in the October 2021 section of the library.
But if you don't have the password, all you have to do is subscribe to my Paper Glitter Glue newsletter where I keep you up-to-date on all my cool new crafts.
For your convenience, the files are available in both a printable format (PDF) and as SVG cut files which you can use for electronic cutting machines.
Now that you have the files, it's time to get to the making of the candy box.
Next, cut out the pattern for the Haunted Cottage Candy Box
Upload design to your cutting machine software
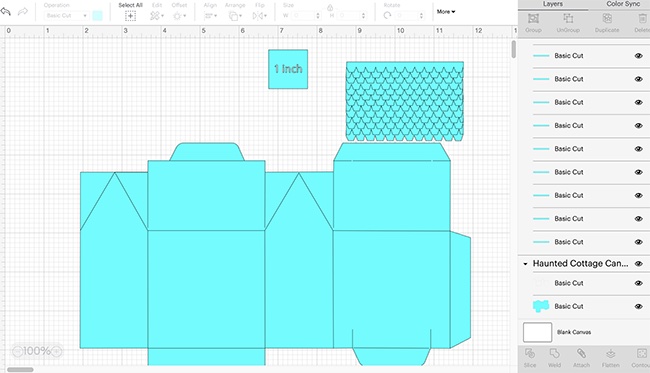
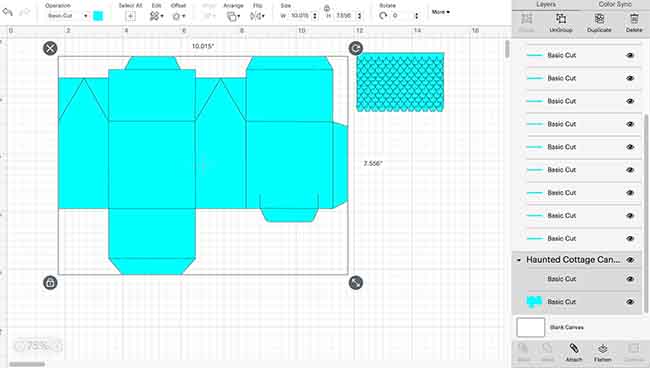
If you are using a cutting machine like the Cricut Maker, here's how the Haunted Cottage looks when you upload it to Cricut Design Space. Note the one inch box. I use that so you can easily make sure the pattern uploads correctly. When you are sure that it has uploaded correctly, you can delete the little one inch box.
Ungroup the file
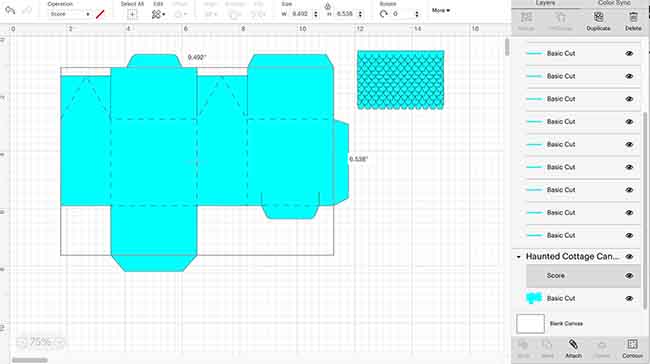
Next, ungroup the file. After ungrouping, you see that the house pattern has two parts. One is the outline of the house. The other is a collection of lines that have to be changed to score lines.
Select the score lines and set to score under the operation function
Select the lines on top of the house (listed first in the house group). Then click SCORE under the operations menu in the upper left hand corner. When the score lines are properly designated, they turn into dotted lines on the screen.
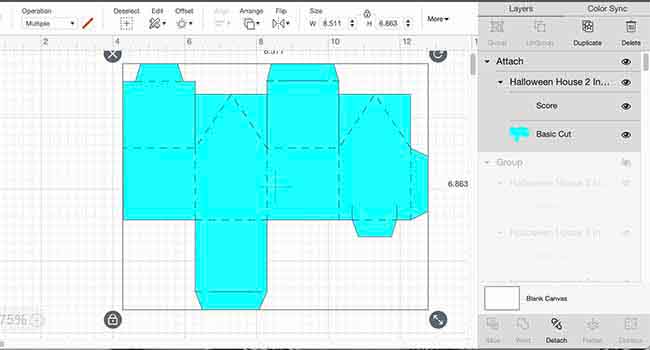
Attach the score lines to the house pattern
Now attach these lines to the house piece itself. That way your cutting machine knows what to score and what to cut on this particular piece of cardstock.
Cut out roof shingles - 2 sets
If you want to make roof shingles, cut out two sets of roof shingles. Just click duplicate to make them. I chose contrasting colors for these little house boxes. So I made one set out of the house color and the other set out of a contrasting color.
Cut out windows and doors
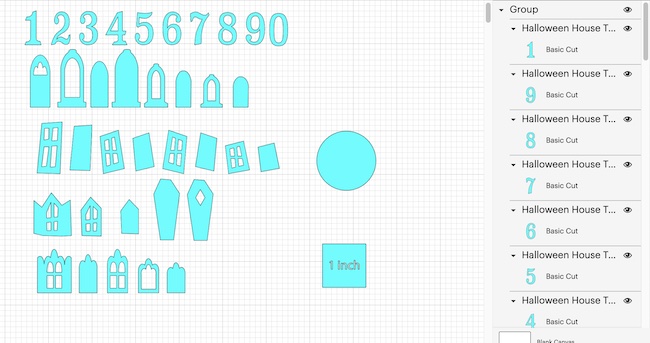
For the windows and doors, here is how that file looks in Cricut Design Space. Choose the set of windows that you like and cut out enough to use on the house. On the Haunted Cottage, I used about 11-12 bigger windows and 2 smaller windows for the eaves.
Another option you have in the cut file is a backing piece for the windows. You know, adding a a lighter color to look like light shining through the windows. I didn't do that on the previous set of little houses because I liked the way those colors contrasted. But for this particular set of house boxes, I did use a lighter color behind the windows on some of the examples.
What do you think? Does the black house need the light in the windows? I don't really think so.
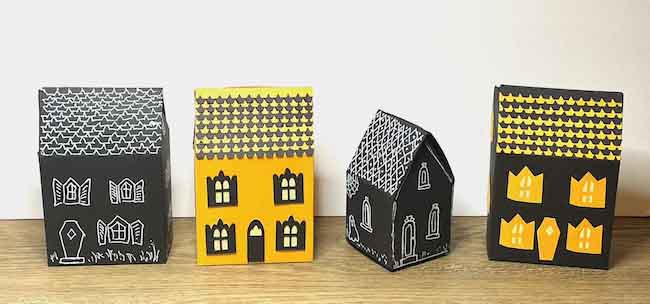
Here's another photo to help you decide about window back or not.
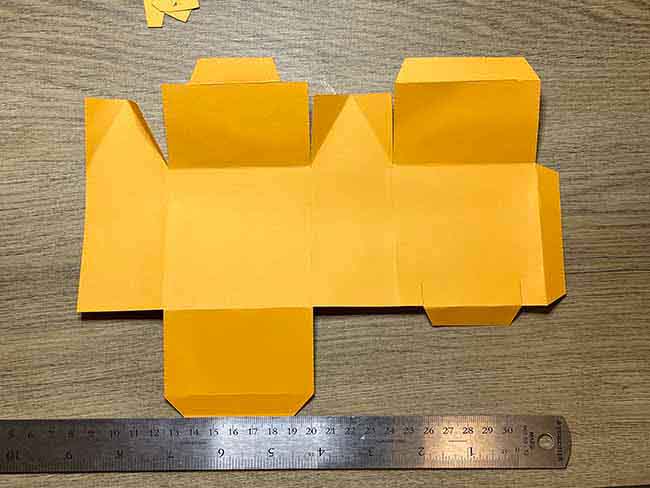
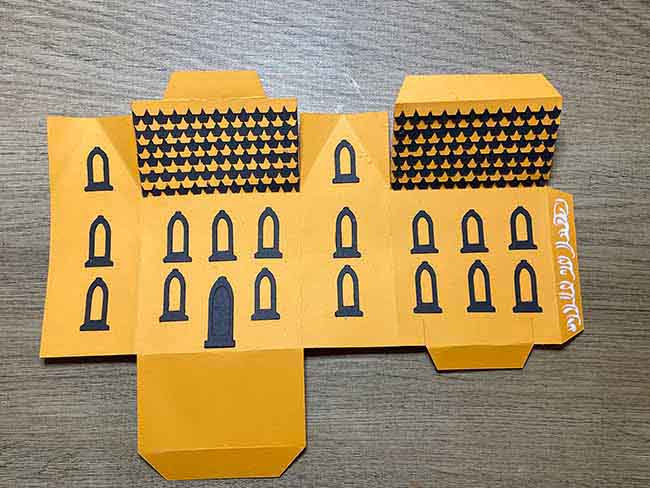
Fold along all the score lines to make assembly easier
When you fold along all the score lines before you decorate the house or assemble the house, it's easier to see where to put the door, the windows and the shingles.
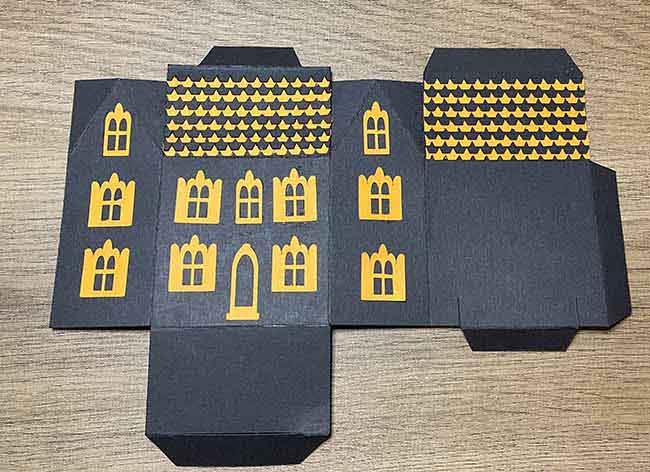
Next, glue on the window and door cut outs that you chose. One important point is to remember that the front of the house has the bottom flap hanging down. As seen below, the back of the house has two small cuts to allow the tab to slide easier into the bottom flap.
See the options below. The window and door options are the same as in the Halloween House Treat box pattern, but they are included in this file as well.

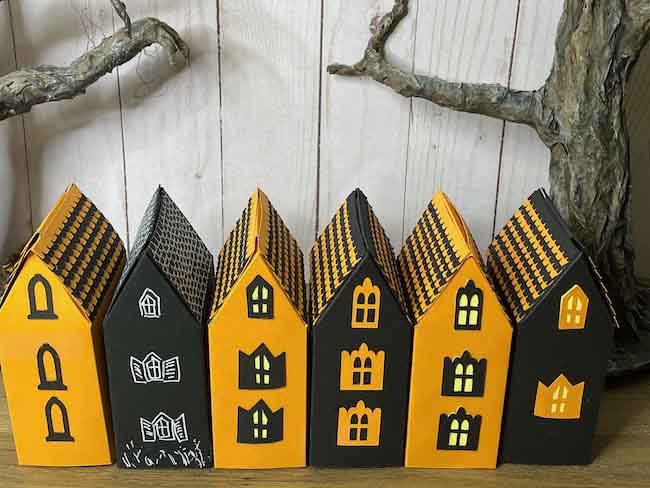
If you want to make a bunch of houses as a Halloween countdown series, you can use the numbers and the circle to highlight how many days until Halloween.
Decorate the roof with shingles, if desired
I really like the way the alternating colors of shingles look on the roof. For this house, there is a specific set of shingles to fit the 3 inch wide roof.
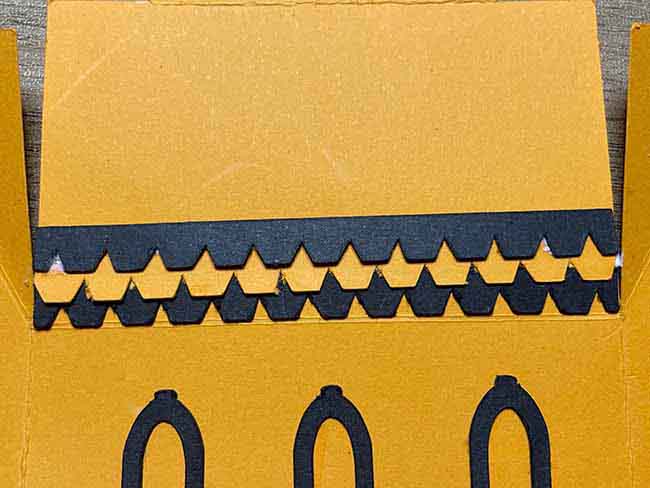
On these houses, I used about 12 row of shingles. In the pattern, there shingles are staggered. That means that one set has a full shingle on each side and the other set starts with a half shingle on each side. That way you don't have to worry about cutting each row of shingles to stagger them.
So cut out one set of shingles in one color and one set in the other color. When you use the shingles, start with a row that has a full shingle as the first row. For the second side of the roof, start with ½ shingle. That way you will have enough of each to complete the roof.
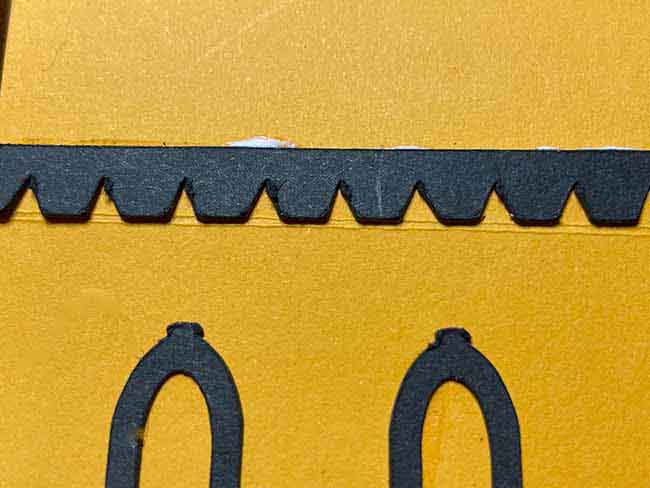
In addition, start gluing the shingles with the bottom right at the score line.
Then glue on the contrasting colors.
Finally, this is how the roof shingles look on the house. The photo makes it look like I used a different color for the shingles, but it's really orange just like the house.
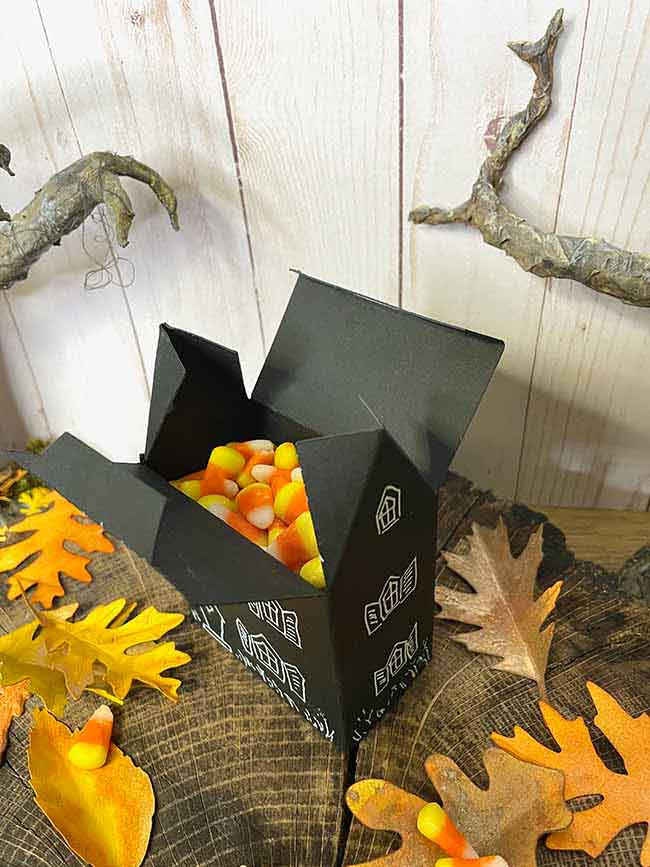
Optional, decorate with markers or gel pen
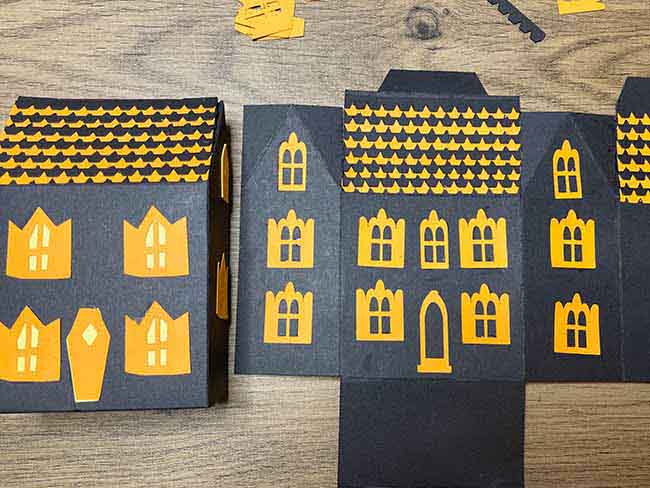
If you have read my blog before, you know I love my white Uniball Signo gel pen. I had a lot of fun last Christmas making tiny houses out of brown cardstock and using the the white pen to make them look like tiny gingerbread houses.
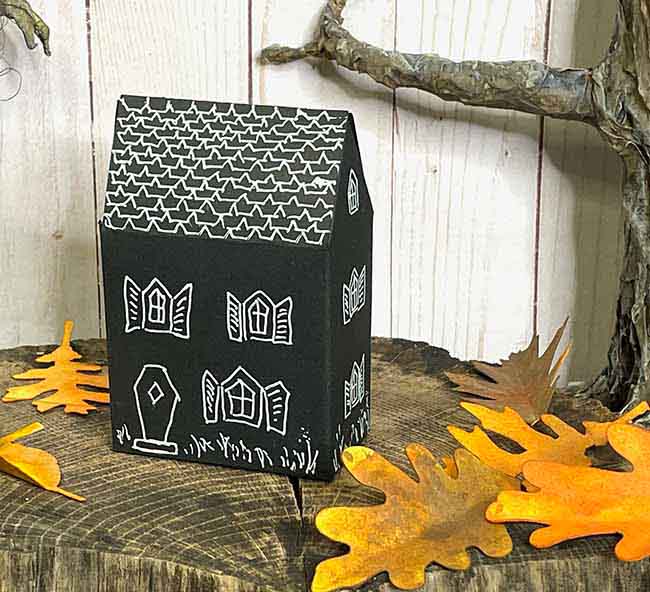
Well, I just love the look of the white on black cardstock to make spooky houses. As much as I like the candy box houses decorated with cut outs, I really am crazy about the ones with the white gel pen - even if my art work is kind of primitive.
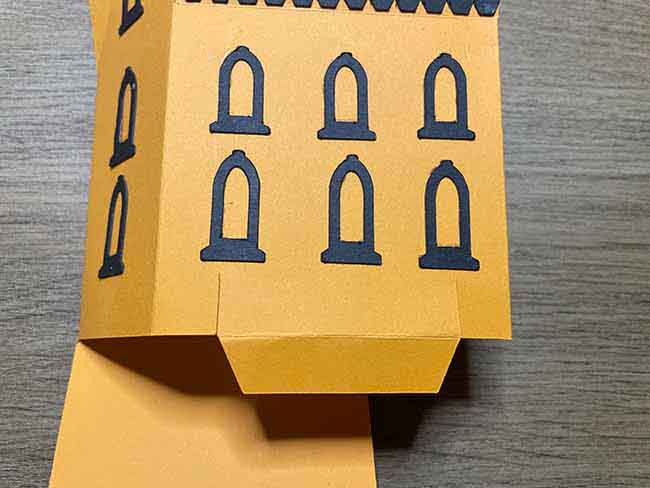
Glue the house together along the side tab
You can assemble the house before decorating or wait until all the embellishments are glued on.
To assemble the house, really it's only one step - glue the side tab to the body of the house. Apply glue to the side tab. All the other tabs aren't glued together.
Then fold it underneath to attach to the other side of the house.
You can see that I decorated the house before gluing it together in this case. Either way - before or after decorating - because the house folds flat.
Assemble the candy box by folding the flaps
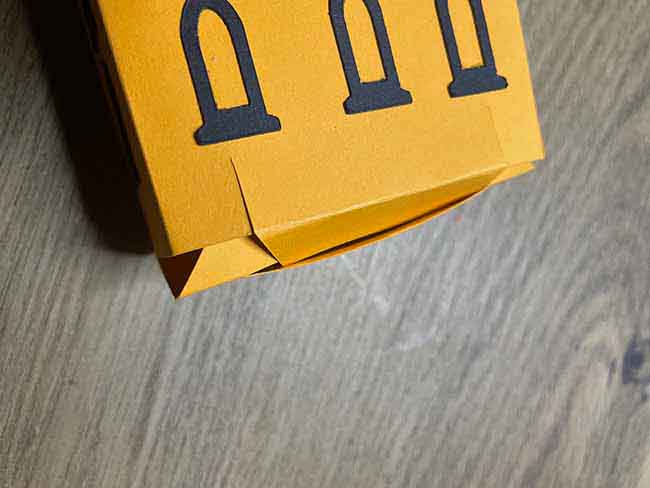
Now, to assemble the candy box, start with the bottom flap. The bottom tab on the back of the house (the one with the 2 little cuts above) slides into a slit on the larger bottom flap. The two little cuts are there to make it easier to insert the tab. It gives a bit of flexibility for the tab.
You basically do the same thing for the flaps on the roof. First, fold down the larger tab from the back of the house and then insert the smaller tab into the cut on the roof flap.
Fill with candy or treats
Because of the way the box is designed, it's really pretty sturdy. I mean, I wouldn't fill up with heavy metal, but it will easily hold some candies or little treats without the bottom falling out.
Related Posts:
Halloween House Treat Box (first little paper house in this series. I'll add more as the series goes on)
Stay tuned for lots more crafts coming your way.
Questions about the Haunted Cottage Candy Box?
If you have any questions about making this little house box, feel free to email me at [email protected]. And please remember to pin a photo to your favorite Pinterest board so you can remember where you found this Halloween craft.
Thank you for stopping by. Have a great day.
Lucy
Kat
Lucy, your Halloween treat boxes are adorable!
I especially love how you made different houses using only 2 Halloween colors 🙂
They would look so lovely grouped throughout the house. As always, thank you for sharing💕
Lucy
Kat,
Thank you so much. It makes me happy that you like using only 2 colors. I thought it was an easier way to design each set of houses. Each house design will have a different pair of colors. The next one will be purple and black. Thank you again.
Lucy
Karen Long
Lucy,
I'm looking forward to making this treat houses for my granddaughter's PreKindergarten class party. The children will love them, but especially the treats inside. Thank you for your creative ideas.
Karen
Lucy
Karen,
I think little kids will love them for a party.
And thank you so much for taking the time to write to me and letting me know that you like my project.
Lucy