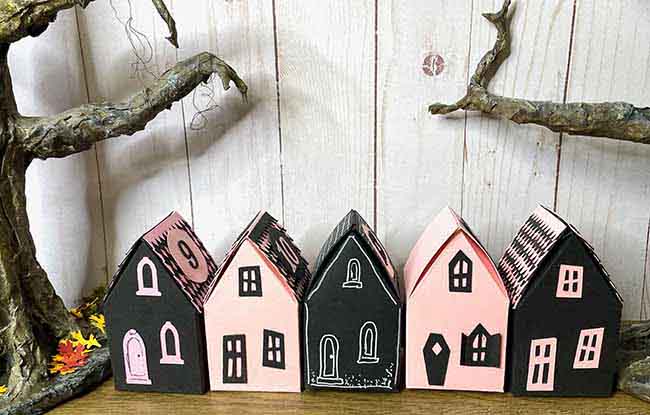
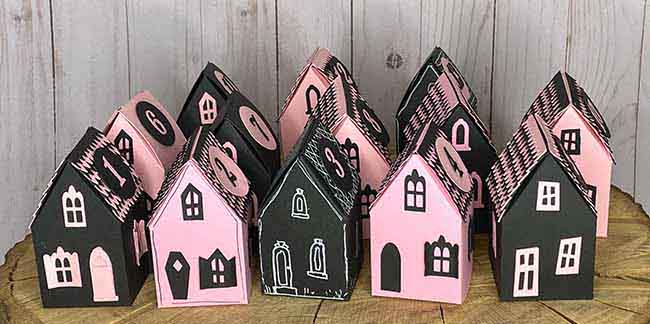
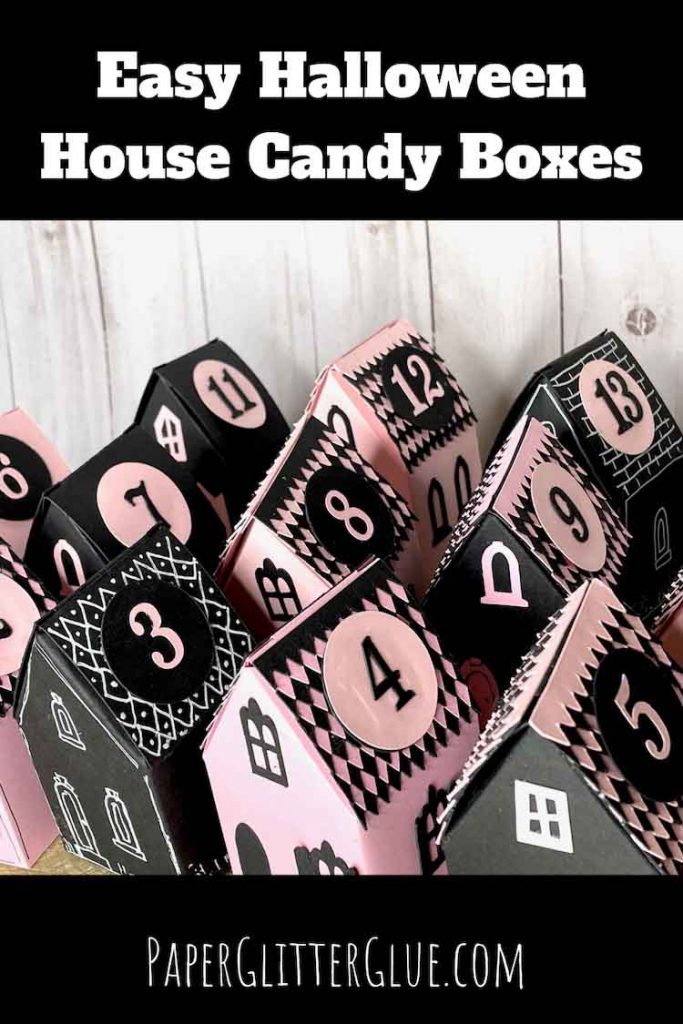
You know I love little houses, right? Any kind of miniature house just makes me happy. Well, what about making an easy Halloween house treat box? Doesn't that sound like something fun to make? And really it is easy. Literally, you can make the Halloween house treat box in about 5-10 minutes after you cut it out the pattern pieces. In the pattern there is even a set of numbers with a circular piece so you can use them for a Halloween countdown calendar.
While I've made these little paper house treat boxes specifically for Halloween, you can change the colors to match any season or occasion. What about treat boxes for Christmas for an advent calendar? Or use them for treat boxes for a party? There are so many ways you can use the Halloween House treat boxes. But I will have some additional variations this month.
Here's are the instructions to make the Halloween House Treat Box
This post contains some affiliate links for your convenience. Click here to read my full disclosure policy.
Table of Contents
Materials to make the Halloween House Treat Box:
- Cardstock - at least 2 contrasting colors - I used 110# black and pink cardstock, but 65# cardstock works well, too.
- White PVA glue like Art Glitter Glue (which doesn't have any glitter in it) or Bearly Art Precision Craft Glue
- White gel pen or markers, if decorating the house by drawing designs
- A way to cut out the pattern - I used my Cricut Maker, but you can cut it by hand or use other cutting machines like the Silhouette or Scan N Cut
- CANDY! (or other treats)
Directions to make the Halloween House Treat Box:
- Download the pattern - Design No. 125 - from the Paper Glitter Glue library
- Cut out the pieces for your Halloween House Treat Box
- Glue the door and windows to house
- Adhere the roof shingles to your house, if desired
- Optional, decorate your house with a pen or markers
- Glue the house structure together
- Fold the box together
- Fill with candy or other treats

For more detailed instructions, read below.
And here is a YouTube video to show you the construction of the house.
First, Download the pattern - Design No. 125 - from the Paper Glitter Glue library
To download the free pattern for the Halloween House Treat Box, go to the library page, then click the link in the middle of the page. That takes you to the password page. If you already have the password, type it in the password box. The file for the Halloween House Treat Box is located in the October 2021 section of the library.
If you do not have the password to the library, just subscribe to the Paper Glitter Glue newsletter with the form below. I send out a newsletter with the password every 1-2 weeks letting you know about the new crafts. Don't worry I will never send you any spam.
The Halloween House Treat Box is available in 2 formats in a compressed (zipped) folder:
- Printable PDF files
- SVG files for use with cutting machines
But first you have to unzip the folder to use it. Here's how to unzip a folder on a Windows-based computer. On a Mac all you do is double click on the folder if it doesn't automatically unzip.
Next, cut out the pattern pieces for the Halloween Treat Box
Once you have the pattern downloaded, cut out the pieces for the treat box. Fortunately, you can easily cut out the pattern by hand. However, the windows and doors are more challenging to cut out by hand. In that case, it might be easier (and perhaps more fun) to draw the windows and doors on the cardstock. Kids will enjoy coloring their own houses.
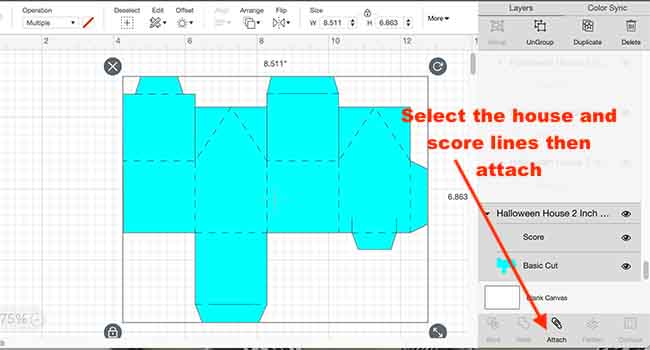
Here is how the pattern looks in Cricut's Design Space when you first upload it.
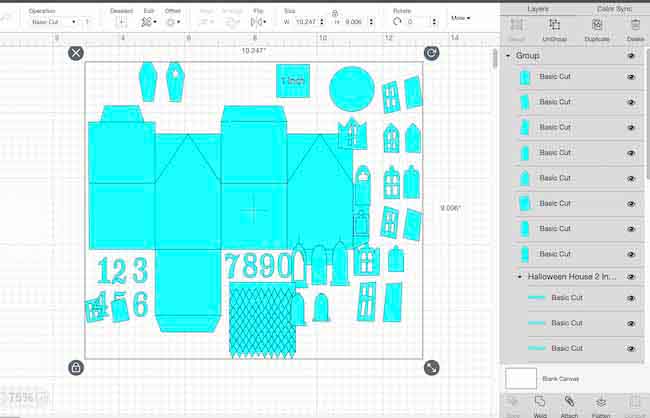
I've included a one inch square for scale in the pattern. When you are content that the size is what you want, then delete the one inch scale box.
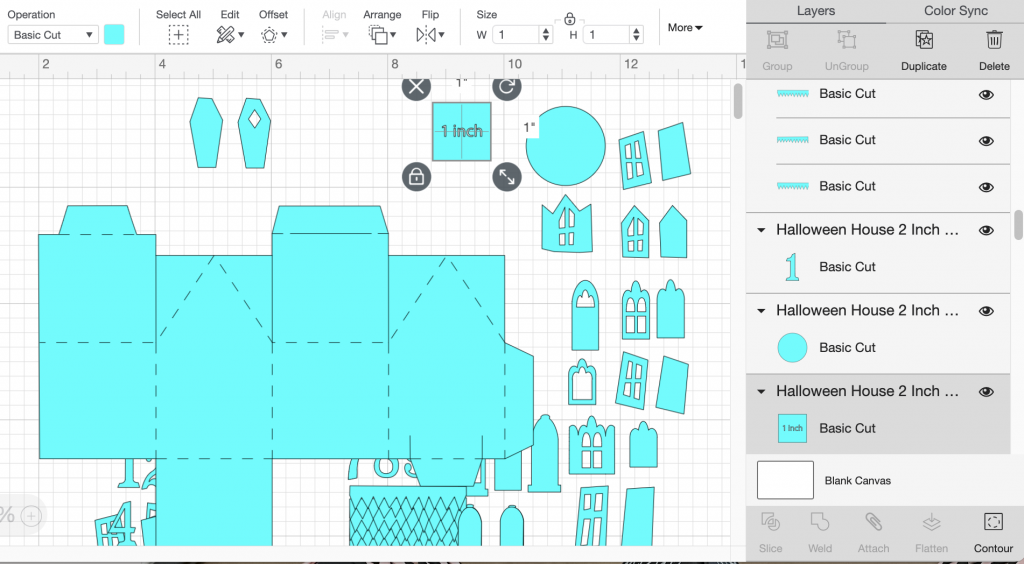
The only score lines in the pattern that you need to change from cut lines are on the house itself.

Then be sure to attach the score lines to the house itself.
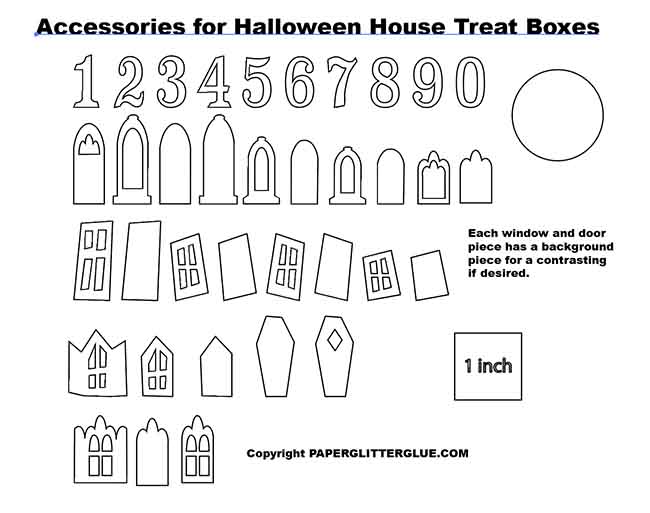
These are the window and door options for the little Halloween House box.
Additionally, note that each window and door has a solid piece that matches the outline. That is so you can back the window or door with a contrasting color if you like.
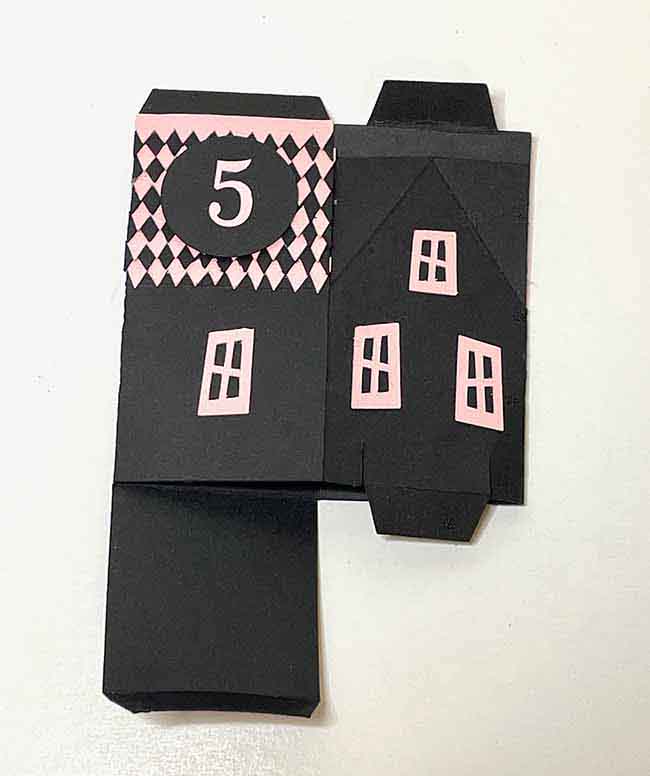
And this is how the pieces look after cutting them out in contrasting colors.

These are the roof shingles for this Halloween House Treat box. Note: You need two sets to complete the roof.

And here are the number tags if you want to make a set of countdown houses.
Glue the windows and doors to the house box
Before you do anything to make the house structure, fold the cardstock along all of the score lines. Make sure they are well creased. It makes construction much easier.
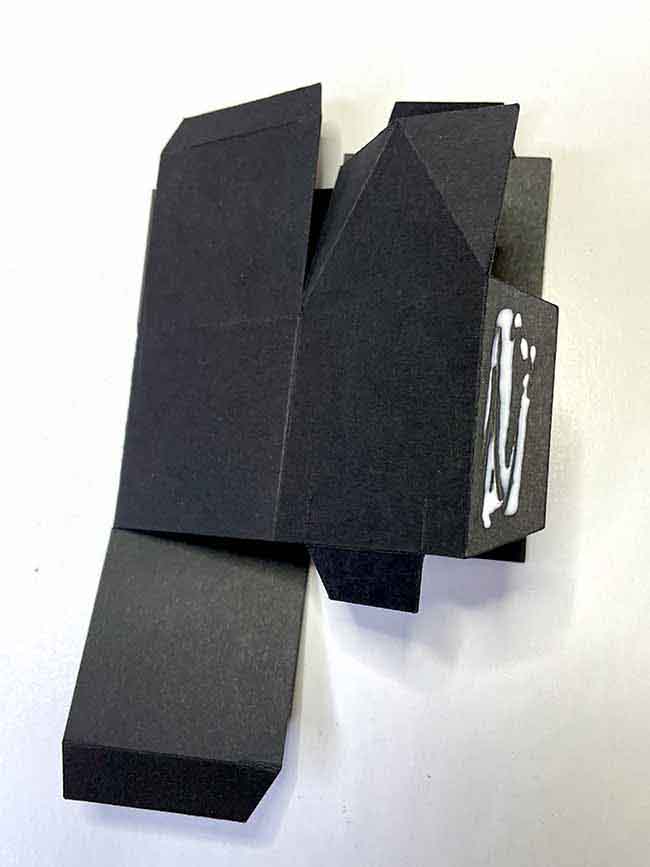
It is important to note that the front of the house is the side with the bottom flap hanging down as shown below.
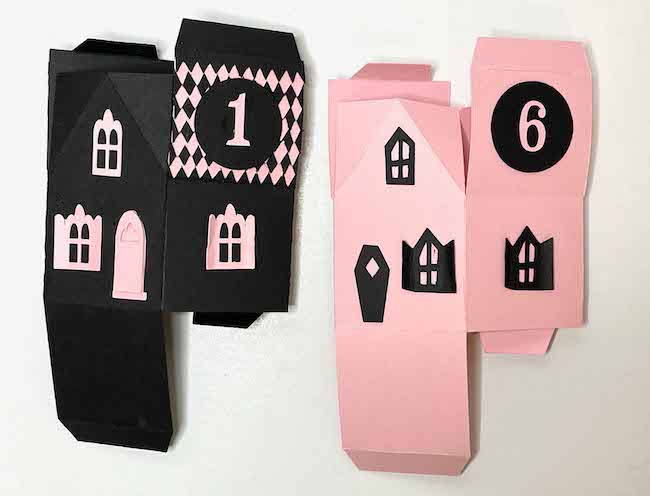
The back side of the house has two tiny cut lines to allow the tab to fit in the bottom flap of the box easier. In the photo below, see the two cut lines and the bottom tab showing the BACK of the house.
Choose whatever windows and doors you like to decorate your little house. To adhere the cardstock window and door pieces, I used a quick-drying glue called Art Glitter Glue (which does not have glitter in it, by the way). The glue bottle has a small tip and the glue dries really quickly.
In the photo below, you can see the front of the house has a smooth front with no tab in the front.
Adhere the roof pieces to the roof flaps on the house
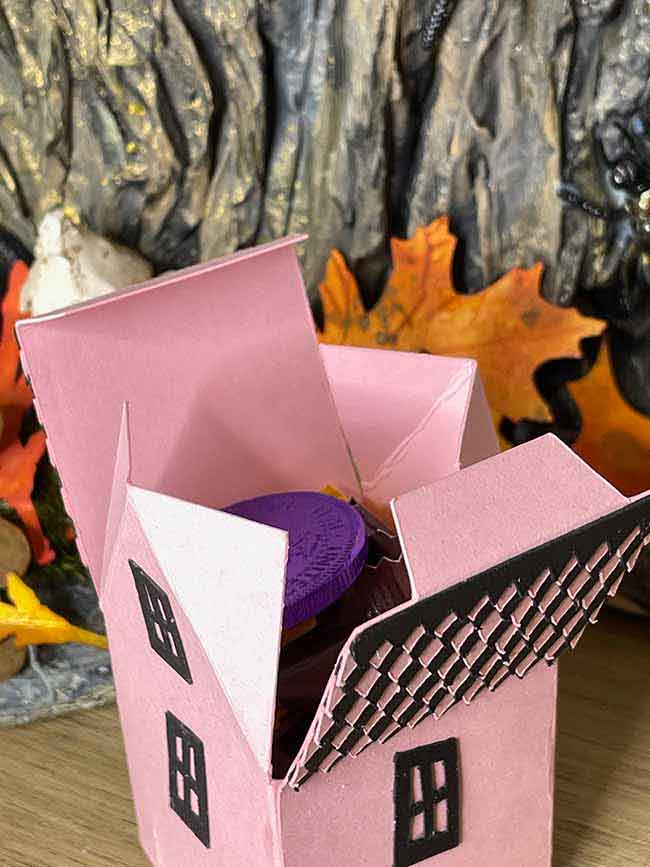
If you like, use the pointed roof shingles to decorate the roof. There are three things to remember here.
- Don't glue the shingles below the score line on the roof flap. You have to leave room for the roof flap to fold to make the roof itself.
- If you alternate colors, cut out one set of roof shapes in each color.
- And start at the bottom of the roof just above the score line with the same color strip on each side. BUT you need to use a different shape strip so you have enough strips of each color.
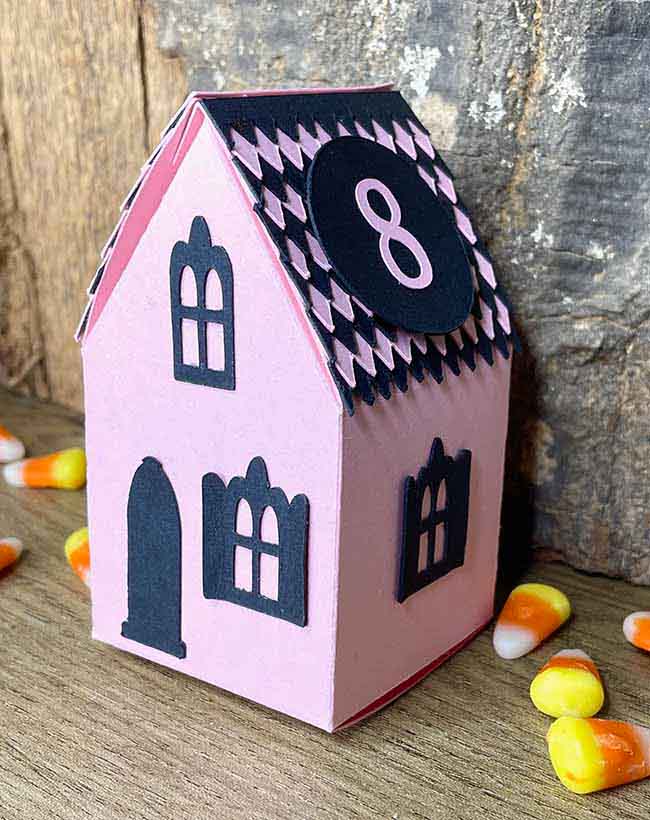
Let me explain the last statement a little bit better. There are two different shapes of shingles so you can alternate them to get the harlequin shape - one shingle has a full diamond at each end and the other shingle has a half of a diamond.
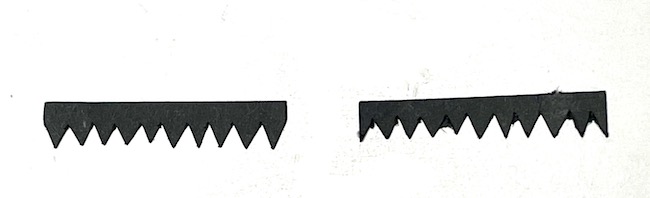
So start one side of the roof with the full diamond roof shingle strip and the other side with half diamond shingle strip. That way you will have enough for both sides of the roof.
Try to finish on the same color so the top of the roof is consistent, but it didn't always work out that way for me. It's ok.
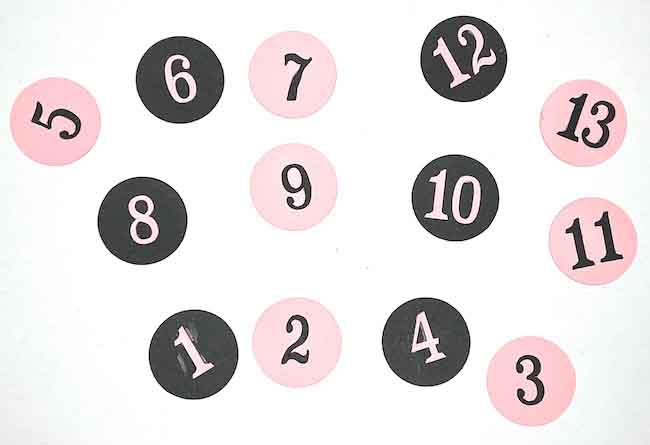
If you want to make a countdown calendar, glue the circles with the numbers on the roof.
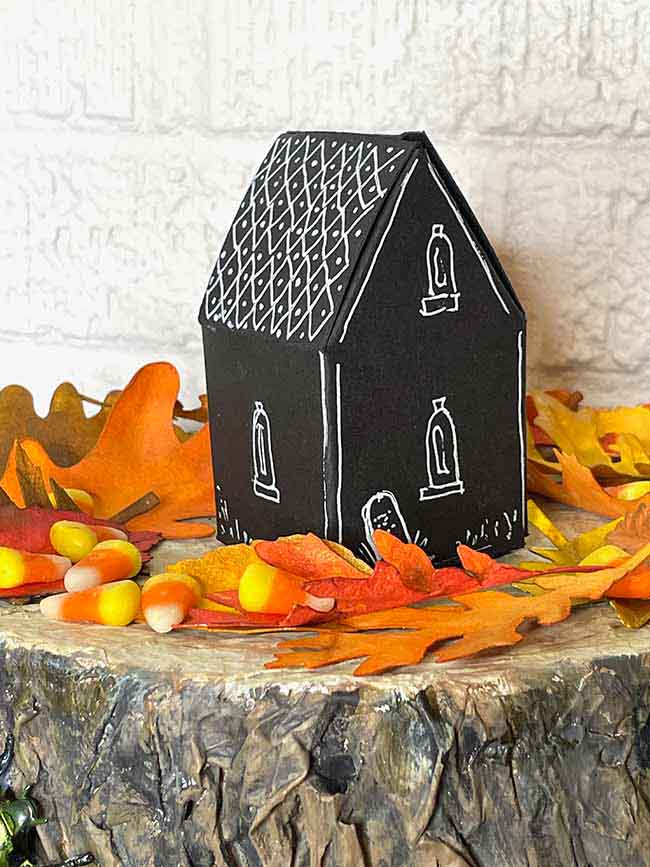
Optional - Decorate the paper house with a pen or marker
Additionally, you can decorate your paper house box with a white gel pen or markers. Don't you think kids would enjoy this option to personalize their little house box?
I love my white gel pen - the Uniball Signo. I just love the effect on black cardstock. You don't have to be perfect - sketch some windows, the door, and other details. It adds a lot of personality to your paper house.
Glue the house structure together
You can glue the house together before or after decorating.
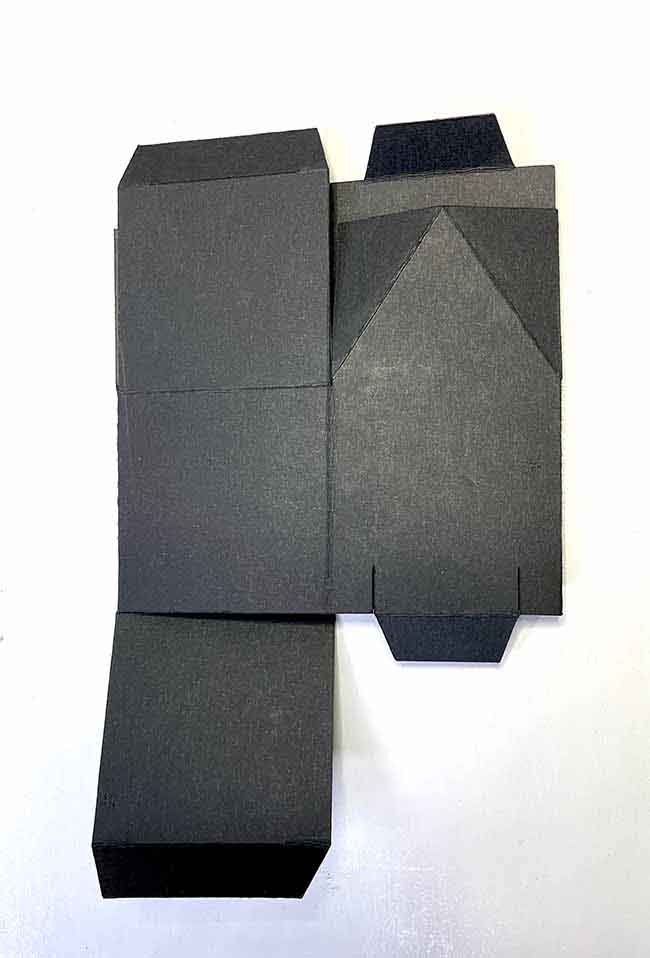
You can see in the photo below that I have pre-folded along all the score lines.
Since the flaps make up the top and bottom of the house, the house box is designed so you only have to glue only one side tab to make the house structure.
Next, glue the tab to the opposite side of the house. Please note that the photo below shows the back piece of the Halloween treat box.
Fold the little house candy box together
After you have glued the side to the other side of the house, it's easy fold the box together is pretty simple.
On both the top and bottom of the house are flaps that close the box to hold little treats.
Insert the bottom tab into the cut on the bottom flap to form the bottom of the box.
Next, insert the smaller roof tab into the slit on the other roof flap to complete the box. The photo below shows the smaller roof tab on the left.
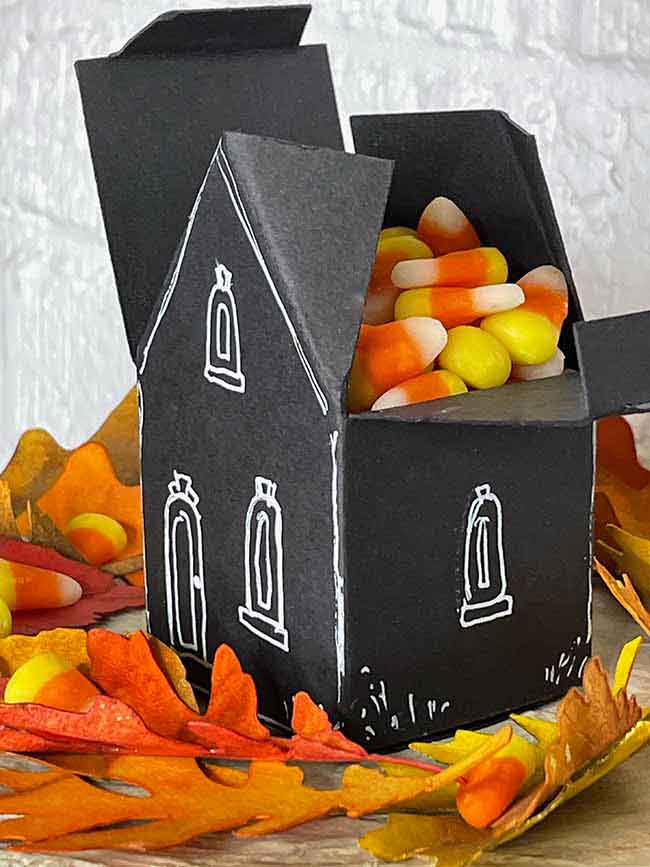
Fill with candy or other treats
Now is the fun part - filling your adorable little Halloween house candy boxes with treats and share them. Everyone will enjoy them so much.
That completes the little Halloween candy box. There will be 3-4 other houses in the Halloween candy box series that I will share with you as soon as they are completed. That way you can make an entire village of little houses easily.
Here are some other Halloween Gift Boxes you will like:
Pin the Halloween House Treat Box to your Favorite Pinterest Board
I hope you enjoy making the Halloween house candy box. Be sure to save it on Pinterest so you can remember where you found the design and can come back to it.
P.S. If you love to make Halloween Houses, I have a book of 13 Handcrafted Halloween houses that you will enjoy
Here is the link to my Paper Glitter Glue shop and the 13 Handcrafted Halloween Houses book.
Brigitte
Thank you so much for this Halloween house treat box pattern and the video.. Even if Halloween is not as popular in France as it is in the US, I will give it a try. I love the idea of the candy box. How about Christmas colors for an Advent calendar?
Lucy
Brigitte,
I am so glad you like the little Halloween House treat box.
And, yes they work perfectly for Christmas too. I am going to modify them a bit for a Christmas series - different windows and maybe snow on the roof or icicles, something like that.
Thank you for the encouraging words.
Lucy