How to Make Sisal Bottlebrush Trees - the Bottle Brush Tree Tutorial
I've been making bottle brush trees for my houses for a few months now. It took me a while to get the hang of it, but now I am much more confident. So I thought it was time to write up a bottle brush tree tutorial.
Your bottle brush trees might be a little wonky at first
My first trees were definitely on the wonky side at the beginning, but they continue to improve. If your first trees are too lopsided or uneven, you can just toss them as the cost is minimal or you can cover them with glitter and lots of fake snow and paint and beads and baubles to compensate for any errors.
There are a number of tutorials on the web, some free and some for a nominal fee. I did purchase one such tutorial just to get some additional advice, but I had already read that author's free version long before. I make mine using a slightly different method because this is what I've found to be the easiest way for me to make the trees.
This post contains some affiliate links for your convenience. Click here to read my full disclosure policy.
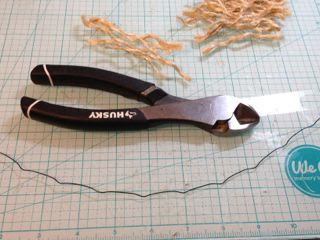
Supplies for this tutorial on making Bottle Brush Trees:
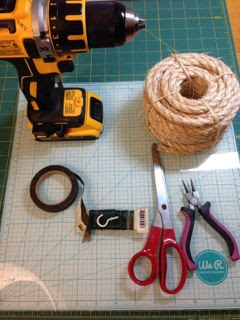
Materials to Make Sisal Bottlebrush Trees:
Sisal rope - easy to find in the hardware or home improvement store or you can order online
Floral wire - 18 gauge is a good wire size, but I've made them with 22 gauge wire
Floral tape to wrap trunk
Drill (it's an easy way to twist the wire)
Cup hook to be used instead of the drill bit
Scissors
Needlenose pliers or hemostats to hold the wire when twisting
Wire cutters (not shown)
Comb (not shown - I use a pet comb to comb the coarse sisal fibers into submission)
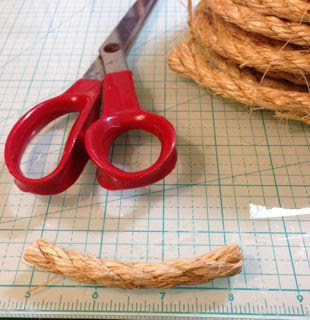
1. Cut the sisal rope into sections
Cut the rope in about 3 inch segments. You don't have to be precise because you're going to cut a lot of it off when you shape the tree.
2. Untwist the sisal rope segments
Untwist the rope segments. You can tell pretty quickly which way the segments are twisted together. Just go the opposite way and the segments separate easily.
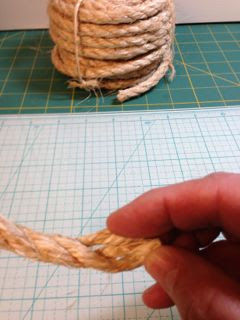
For the rope I used (which is pretty typical) you get 3 main segments as shown below.
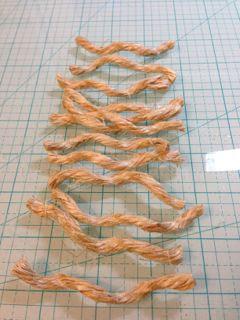
Untwist these 3 segments to get 6 thinner pieces from each of these segments.
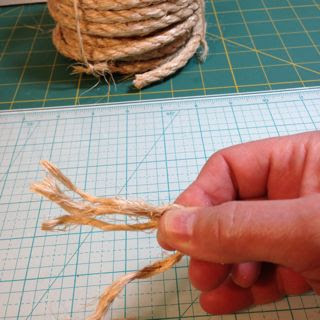

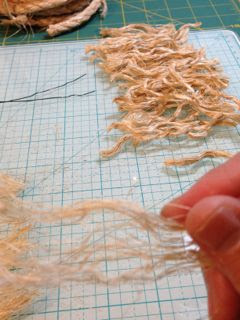
3. Next, separate the individual strands of sisal fibers for your bottle brush tree
Finally, you separate the individual fibers just by pulling and untwisting a little bit to straighten them out. Some of the fibers have some pretty gnarly tangles, just pull those off so you don't incorporate them into your tree.
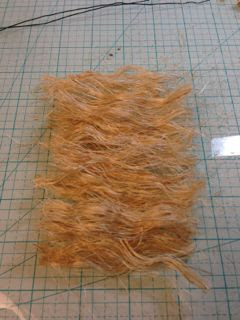
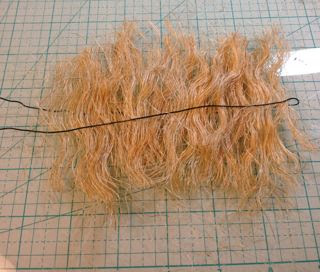
4. Make a pile of sisal fibers
Line up a pile of your fibers. How much to use? You're going to have to eyeball this one your own. I make the pile thick enough so I don't really see through the pile. That is probably at least 3 segments of rope all together.
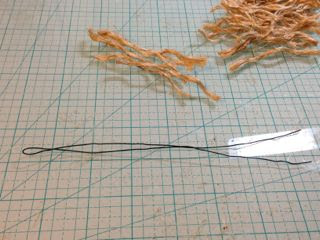
5. Cut wire for the bottlebrush tree trunk
Cut the wire more than twice as long as the height of your tree. Because you have to do lots of twists to hold the fibers in place, you need your wire to be pretty long.
In addition, I like really long trunks because I want a tall tree that won't obscure the details of my little house. You can always cut off the extra wire if you make it too tall.
6. Straighten the Floral Wire
Straighten the wire by pulling on it and fold it over to make the trunk. But don't sweat it if you can't get it perfectly straight. That's ok.
7. Place the sisal fibers between the folded floral wire
Place fibers between the 2 sides of the wire. This is one of the harder things to do because it keeps slipping off. That's why you cut the rope much longer than you need so you have some margin of error in terms of centering the fibers.
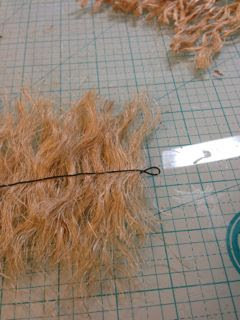
8. Make a loop at the closed end of the floral wire
Make a loop at the closed end of the wire so you can attach it to the drill. You can also insert a pencil or dowel here and twist without a drill if you don't have a drill. That's the method that Martha Stewart uses in her bottle brush tree tutorial.
8. Place loop over the cup hook in the drill
Place loop over the cup hook that is inserted in the drill. A cup hook is just the easiest thing I could find at my house to put in the drill. Another option is to cut a piece of a clothes hanger into a hook shape. But I happened to have cup hooks so that is what I used.
After that, use pliers to hold the open end of the wire tight, but you could use hemostats, or some kind of clamp to hold the wire. Whatever you use, it must be secure, otherwise, the fibers fall out and fly all over your house when you start the drill. You also have to apply some counter-traction (pull, in other words) to keep the wire straight.
9. Hold the wire tightly at the base of the bottle brush tree
I have found that it helps to hold the wire at the base of the tree so most of the twisting happens where the fibers are. After the tree is twisted enough I move my pliers further down the wire to twist the trunk of the tree.
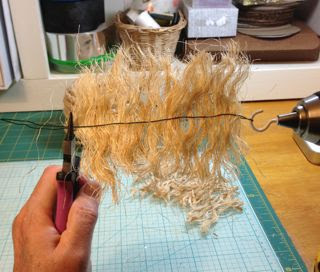
10. Run your drill slowly for control while twisting the wire
Run the drill slowly for control. You don't want to break the wire.
And don't worry if your bottle brush tree looks ugly at first. I mean, seriously ugly, but really don't worry. We'll fix it.
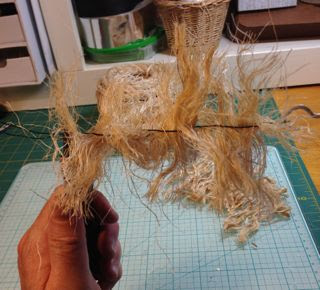
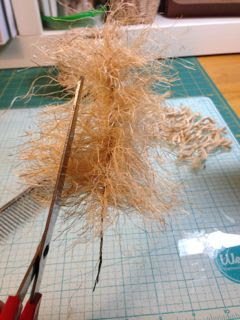
11. Comb the sisal fibers
Here's the tree after the comb out with a strong comb - like a pet comb. I used a metal pet comb to comb out these stiff fibers. Be sure to straighten the trunk before you do the cutting. You can see that my tree is curved. This is 22 gauge floral wire which is fairly flexible. Now I recommend a stronger wire - 18 gauge is better.
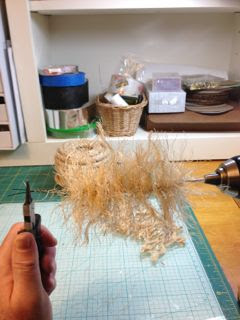
12. Trim the sisal fibers into a tree shape
Cut the fibers into a tree shape.
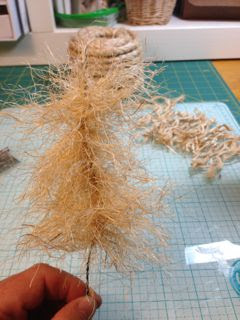
13. Optional - dip the tree into warm water to straighten the sisal fibers
Ta-dah! An almost finished tree.
You can use warm water to straighten out the fibers. I noticed that when I dye the bottle brush with fabric dye, some of the fibers loosen up and straighten out more so you have to do more trimming at that time.
At first I dyed or stained my trees, but often the dye would run into the snow on the trees. So after a suggestion from my friend, Rhonda, who writes the blog - Christmas Notebook, I now paint them. The only disadvantage is that regular acrylic paint makes the fibers stiff, but that is a small inconvenience compared to having green snow at the base of every tree.
14. Decorate your little bottle brush trees
One nice thing about using the trees for little glitter houses is that you can coat them with glue and glitter and snowtex and paint to cover up your mistakes or bald spots. You can also glue on beads, birds, stars, etc.

And that is my Bottle Brush Tree Tutorial
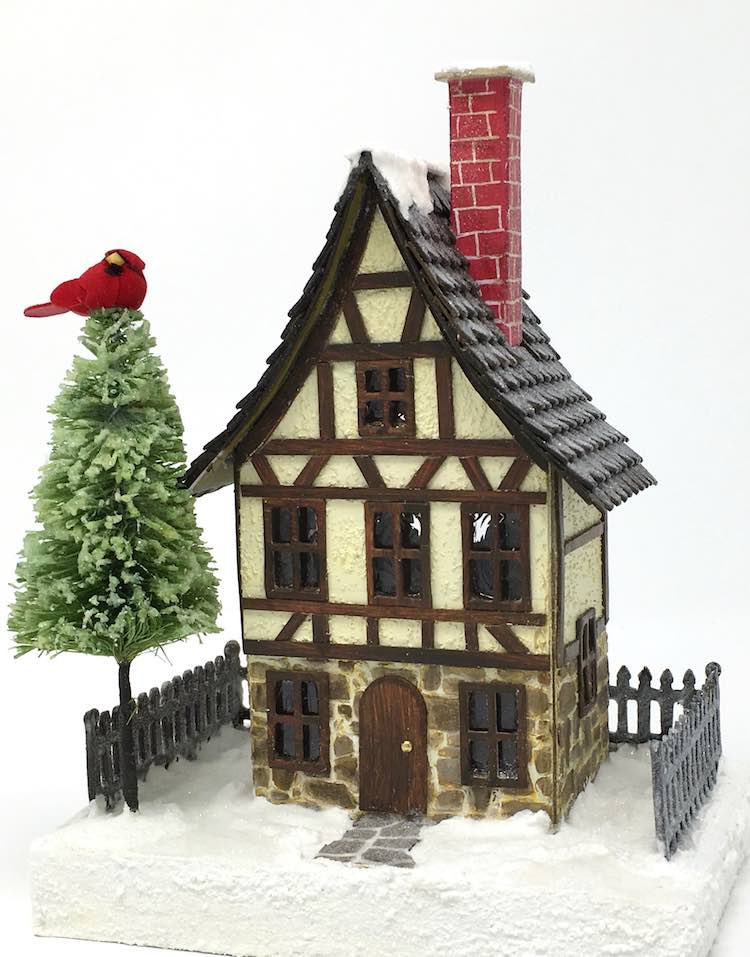
And here is one of my very best trees. What I like is that the trunk is much longer than what you can purchase so it's easier to add to your little house without obscuring the details at the bottom of the house.

Other References for Making Trees
Here are some references for making trees if you want to look into some slightly different methods.
Pink House Pages - the first bottle brush tree set of instructions that I found
Martha Stewart's video on how to make the trees
Fynes Designs Bottle Brush Trees - she makes them out of twine and yarn as well
Just Something I Made - Cathe Holden makes the most beautiful trees and displays them in wonderful vignettes.
And if you want to make spooky trees for the Halloween season - here's the tutorial for Twisted Trees.
More later on dyeing and decorating the trees.
Lucy
Jo Ann,
You learned how to comment!! Very good. My trees have improved, haven't they?
Everybody, thank you for your comments. Lucy
Jo Ann Webb
Very good tutorial! Happily I was there when you made your first tree.
die amelie
Sooo coool! Love this tutorial as I love everything selfmade! Thank you so much for sharing! Mwah! X
Claudia
Lynn Koeppen
Nice tutorial!