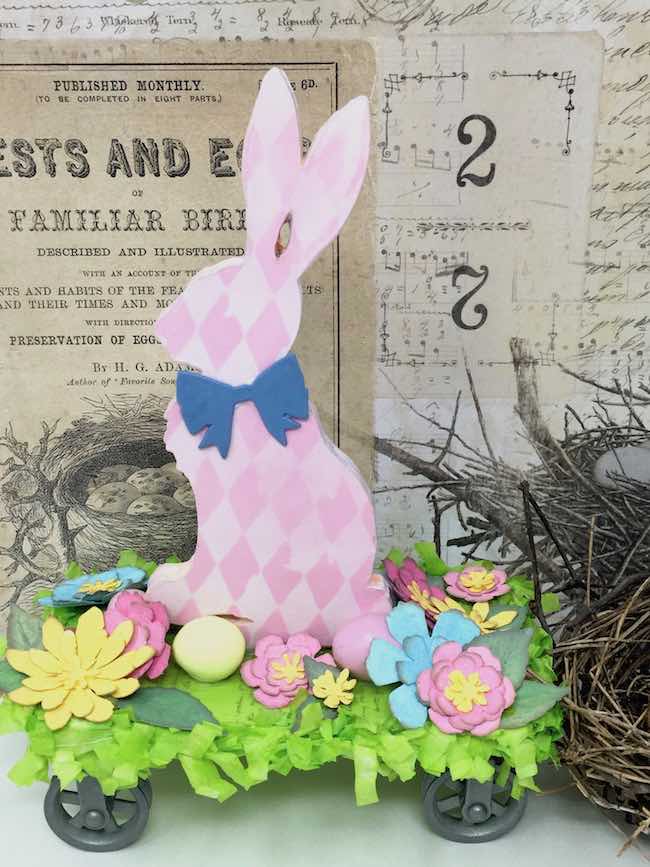
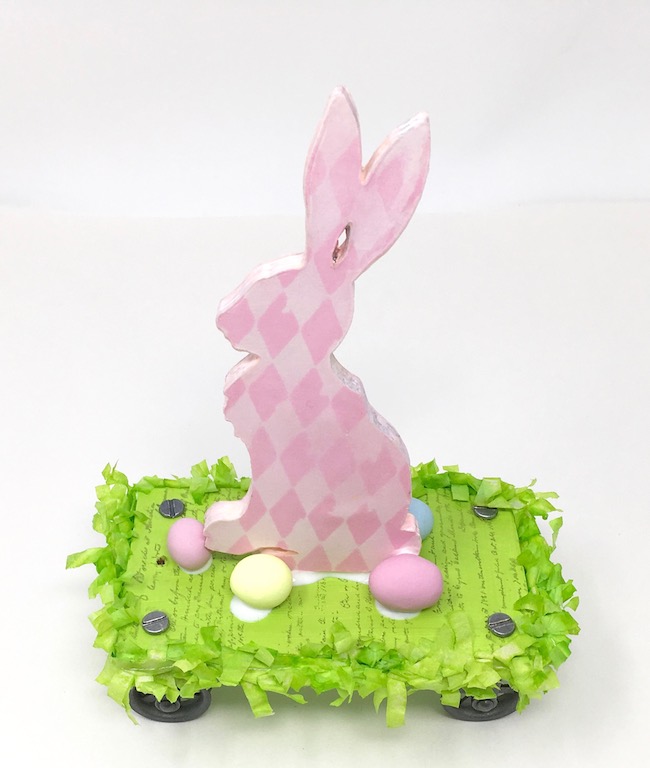
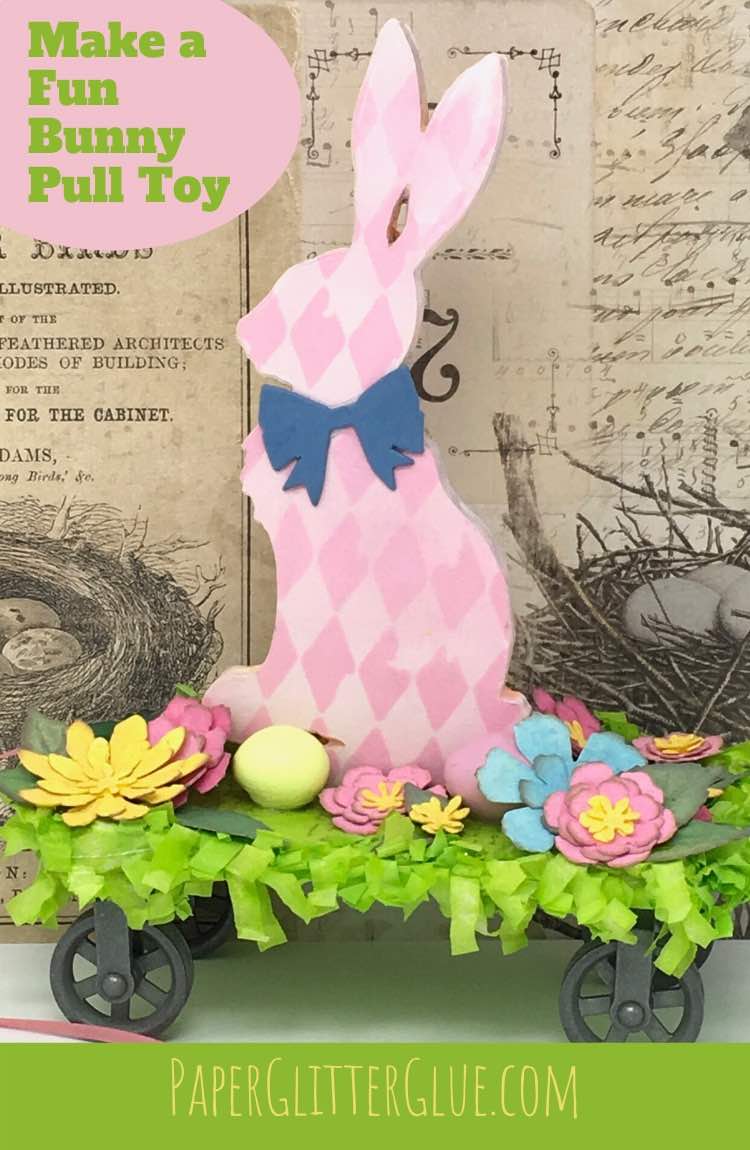
Looking for a cute Easter Bunny decoration that is fun, easy to make, and makes a great Easter decoration? Well, here it is. This Easter Bunny Pull toy is made from a bunny rabbit die, flower die cuts and metal wheels on decorated cardboard base.
This project is one of the 14 Days of Spring Crafts and was inspired by a vintage pull toy on Pinterest. When I saw the Tim Holtz die called Cottontail, I knew it was perfect for this craft project. Also I love the Ideology Mini Pulley Wheels and I always look for crafts to use them. And on top of all that the Simon Says Stamp online challenge this week is "Things with Wheels" so I will share the rolling Bunny Decoration there.

Here's how you make this cute Easter decoration.
This post contains some affiliate links for your convenience. That means if you make a purchase after clicking an affiliate link, I will earn a small commission but it won’t cost you a penny more. Click here to read my full disclosure policy.
Materials to make the Easter Bunny Decoration - the Pull Toy Bunny
- Cardboard
- Thick cardboard
- Glue
- Watercolor paper
- Cottontail Bunny die from Tim Holtz and Sizzix
- Small Tattered Florals from Tim Holtz and Sizzix
- Distress Paints:
- Stampers Anonymous Harlequin Stencil
- Distress Oxide Inks:
- Distress Spray Stain - Twisted Citron
- Ranger Tim Holtz Distress Micro Glaze
- Ideaology Paperie Fringe
- Ideaology Mini Pulley Wheels or wooden wheels
- Vignette Hardware Ideaology
- Polymer clay for Easter Eggs
Outline of how to make the Pull Toy Easter Bunny Decoration
1. Make the Bunny
- Cut out cardboard Cottontail Bunny, glue together
- Die cut 2 cottontail bunnies from watercolor paper
- Ink and stencil the bunny
- Glue the stenciled bunny cut outs to the die cut cardboard bunny
- Coat stenciled bunny with Distress Glaze
2. Make the Flowers and decorations for the Bunny Pull Toy
- Die cut flowers from watercolor paper
- Ink the flowers and leaves, glue flowers together
- Make polymer eggs and bake
3. Make the Cardboard Base
- Cut thick cardboard for the base, glue together
- Drill holes in the cardboard base for the wheels
- Paint the cardboard base
- Add the wheels
- Glue fringe around the edge of the base
- Glue the bunny to the base
4. Decorate your Easter bunny pull toy
Subscribe to get my newsletter for to keep up with all the new craft projects here.
Now here are more detailed instructions to make the Easter Bunny Pull Toy
1. Make the Bunny
First cut out cardboard Cottontail Bunny and then glue together

To make this cute bunny so that it would look like a wood cut out, I used 8 layers of cardboard. That makes a bunny about ¼ thick. Be sure to align the layers of cardboard well. I used Aleene's Fast Grab glue to hold the layers together.
Die cut 2 cottontail bunnies from watercolor paper
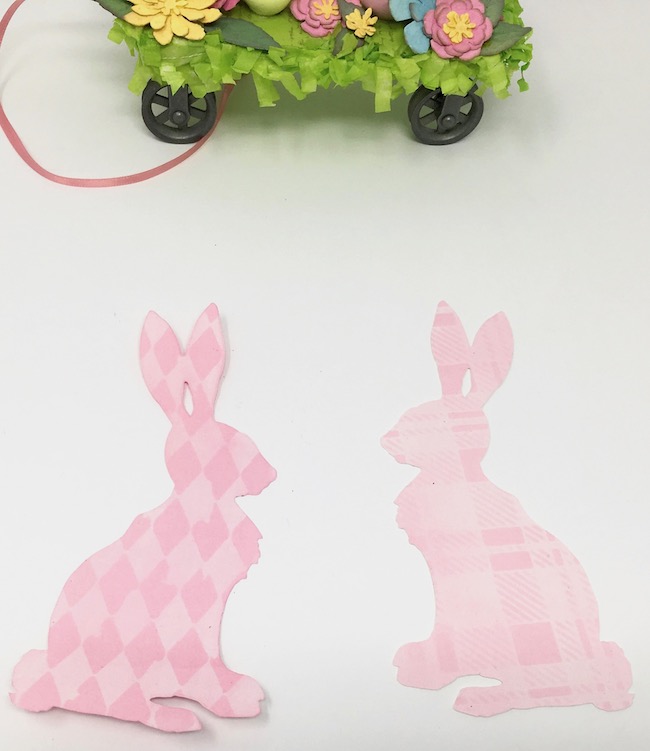
To give a little extra dimension to the bunny, I decorated it the bunny with a stenciled pattern, so I cut out two cottontail bunnies that I could color and ink. When you color them make sure you color a front and back piece. They need to be mirror images.
Ink and stencil the bunny
For the surface decoration on the bunny, I inked it with the base color - Spun Sugar. Then I inked over a Stampers Anonymous Harlequin stencil with the same color to give a subtle effect.
Glue the stenciled bunny cut outs to the die cut cardboard bunny
Next glue each stenciled bunny to the front and back of the cardboard bunny.
Coat stenciled bunny with Distress Glaze to prevent the ink from smearing
Unfortunately, the Distress Oxide inks are not waterproof and can smear so I coat them with Distress Glaze, a resin that seals the ink.
2. Make the Flowers and Decorations for the Bunny Pull Toy
Die cut flowers from watercolor paper
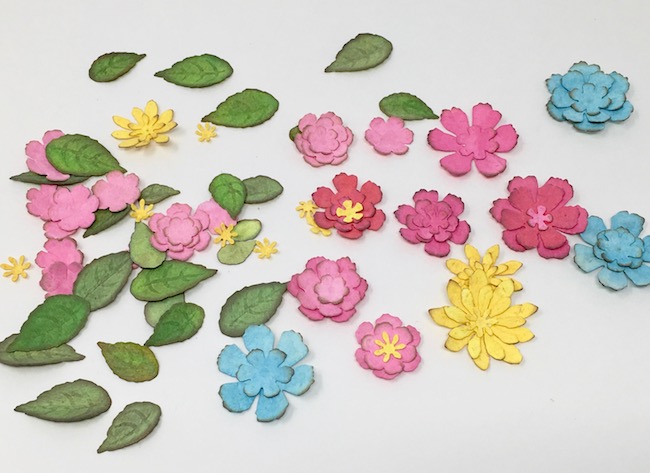
Cut some cute flowers to decorate the cardboard base. I used Tim Holtz Small Tattered Florals dies to make all these flowers. But you could use a flower punch, rolled up tissue paper or dried flowers or moss from the craft store.
Ink the flowers and leaves, then glue them together
I used Mustard Seed, Spun Sugar, Picked Raspberry and Faded Jeans Distress Oxide inks to color the flowers. For the leaves, I used Mowed Lawn and Peeled Paint Distress Oxides. Glue the flower layers together and glue leaves behind the flowers.
Make polymer eggs and bake
For Easter crafts I like to make polymer eggs to decorate my houses. You will find them so easy to make. Just pull off a ball of polymer clay (I usually use Sculpey Clay because it is readily available) and roll it into an egg shape. You can paint the eggs, but I usually just pick a specific color of clay and use that. Bake the eggs according to the directions on the package. Then let them cool and you have your own little eggs - perfect decorations for this crafty project.
3. Make the Cardboard base for the Bunny Pull Toy
Cut thick cardboard for the base and glue together

You know I love cardboard. Well, I save the thick cardboard at the back of sketchbooks specifically for projects that need a strong base such as this. This type of cardboard is much thicker than the cardboard used for my houses. I used 4 layers to make this base. Again, these layers mimic wood and will hold the screws for the mini pulley wheels.
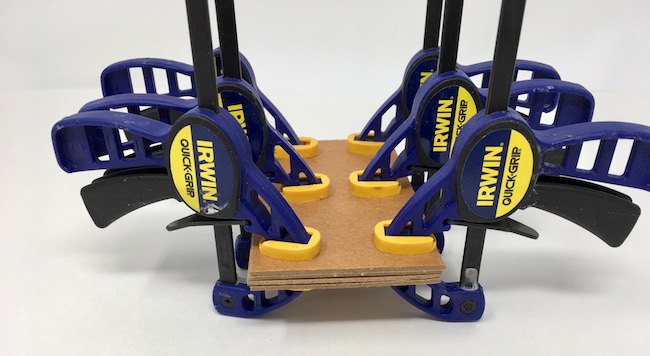
To ensure all the layers stuck together well, I used these Quick-Grip Clamps.
Drill holes in the cardboard base for the wheels
Now drill 5 holes in the cardboard base. Why FIVE? Well, if you are making a pull toy, you need a string to pull the toy. So on the front drill 3 holes and 2 holes on the back. I moved them in about ⅜th of an inch.
We'll cover up the screw heads with flowers. Don't worry about that.
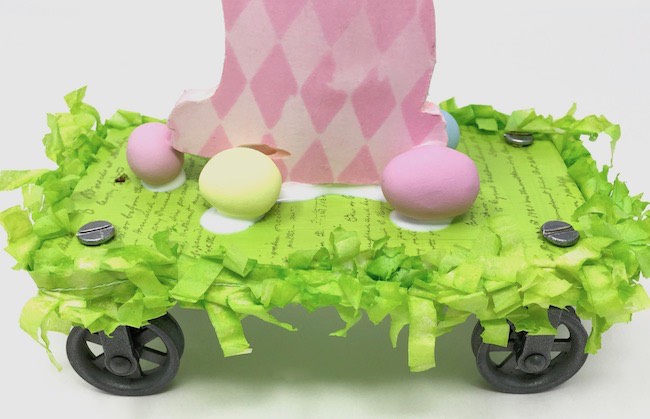
Paint the cardboard base
You can paint before or after drilling the holes in the base. Twisted Citron is my color of choice.
Add the wheels
You probably could glue the wheels on the base of the cardboard, but I think they are much more secure if you drill a hole so the screw can fit through the hole and screw into the mini pulley wheels. In order for this to work, I had to use an extended screw from the Vignette Hardware set.
The other option you have is to drill a hole in one layer of cardboard and then glue that layer to the rest of the cardboard base. Then you don't need the extended screw.
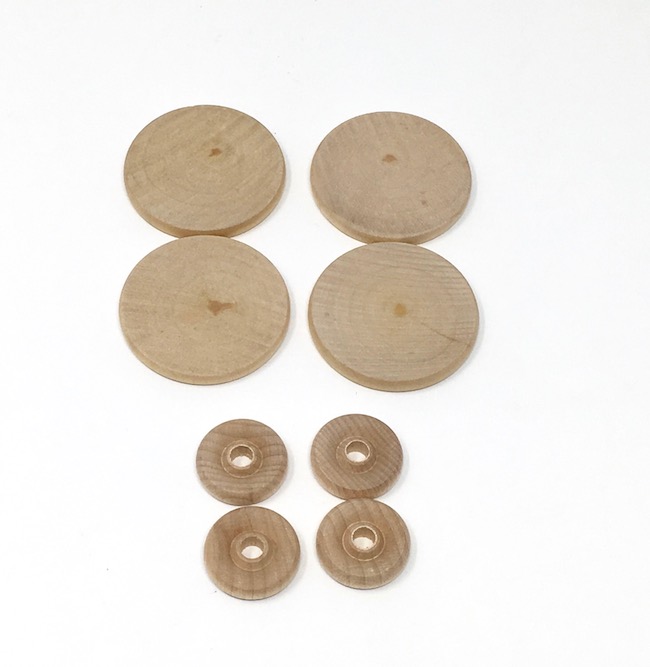
And another option is to use wooden wheels glued to the side of your base but the wheels won't roll in that case. Still this is a decorative Easter Bunny so that's ok.
4. Decorate your Easter bunny pull toy
Glue fringe around the edge of the base
Now is a good time to glue fringe to the base. To match the color of the base, I sprayed the fringe with Twisted Citron Distress Spray. But the only problem is that it makes the tissue paper fringe kind of fragile. I just used a lot of glue to make it adhere so that worked anyway.
Glue the bunny to the base

So the bunny would stand up nicely, I glued the polymer Easter eggs around the bunny for extra support. Again I went to my favorite glue, Aleene's Fast Grab. It takes a while to dry (like overnight) but it really holds things down while they are drying.
Now glue on the flowers
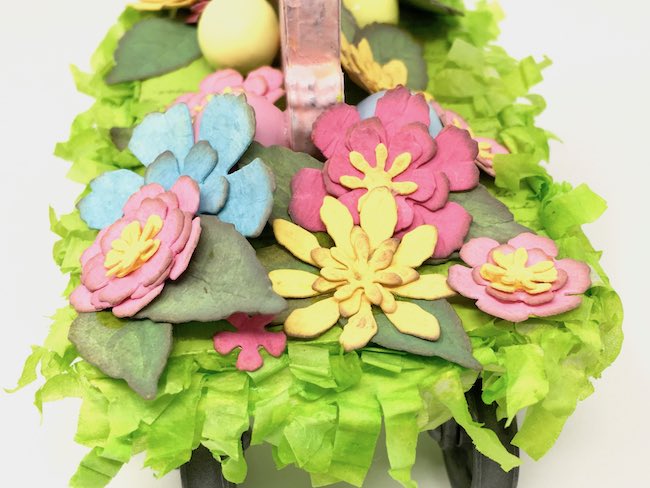
Finally, glue the flowers to the base. Remember you don't have to use these type flowers, you can use your imagination to make other flowers or decor for the Easter Bunny Pull Toy. Dried moss would work, lots of eggs, a tiny basket. You know whatever strikes your imagination.
Then tie on a ribbon and your Easter Bunny Pull Toy is ready to roll.

Let me know if you make one of these Easter Bunny Pull Toys. And if you like this project, be sure to pin it to your favorite Pinterest board.
Lucy


Sherry T.
No! not a jigsaw, you need a scroll saw to make items like wooden toys with any kind of detail...a jigsaw jumps all over the place and is hard to control...love the Bunny as well...trying to figure out if I have time to make one of these with my Niece when my Brother and SIL come to visit next month...she would love it!
Lucy
Sherry, thank you for the information about the scroll saw. I don't like any kind of saw that "jumps all over the place and is hard to control." That is not my kind of saw. The bunny is easy to make. You could have the bunny layers and the base layers glued together before she gets to your house, then it's mostly decorating which is fast and the part most people like the most anyway.
I'm so glad you like the project. Lucy
Howard
This has to be one of your BEST projects ever!
Lucy
Howard, thank you so much. It's a fun and pretty easy. You know I love cardboard, but if I knew how to use a jigsaw I would learn to make little wooden pull toys.