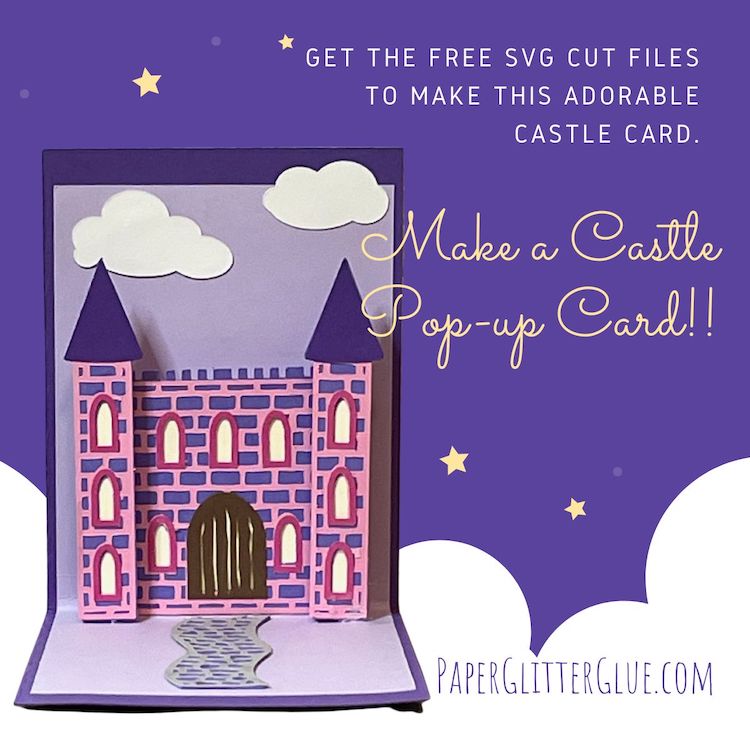
Do you know someone who loves castles or princesses or knights and dragons, then this Easy Castle Pop-Up card is perfect for them.
You can make it easily with your Cricut or other cutting machine. Or by hand if you are so inclined. The pop-up mechanism is simple enough that you could use it with cutting dies or other cut outs.
This post contains some affiliate links for your convenience. Click here to read my full disclosure policy.
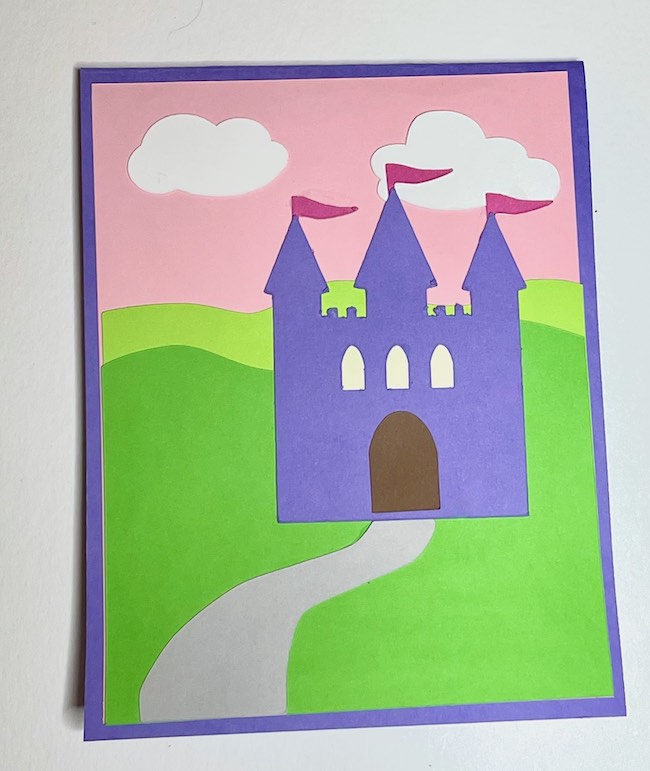
Table of Contents
Supplies to make the Easy Castle Pop-Up Card
- Easy Castle card SVG pattern from the Paper Glitter Glue Library - Design No. 141
- Cricut Maker or Cricut Explore Air or other cutting machine to cut out the pattern
- Light Grip Cutting Mat (or use a standard grip mat that has been used a lot and isn't too sticky)
- Scoring stylus or Scoring wheel for a Cricut
- Contrasting colors of 65# card stock 8.5" x 11"
- Background card stock 4.25" x 11"
- Glue - I prefer Bearly Art Glue
Steps to make the Easy Castle Pop-Up Card
- Download the free pattern - Design No. 141 - from the Paper Glitter Glue library.
- Cut out the pattern pieces for the Easy Castle Pop-Up Card.
- Assemble the 3 main castle pieces for the inside portion of the card - the middle section and two towers.
- Fold the pop-up background piece along the score lines.
- Glue the castle middle section to the middle pop-up section on the background piece.
- Glue to tower pop-up strip together to construct a support rectangle for the two tower. Or see option below.
- To simplify the card, you can omit the tower supports and use foam tape to give dimension to the towers.
- Glue tower support rectangle to each side of the middle castle section if you want the towers to pop-up up.
- Adhere the two towers to the middle section of the castle.
- If using the pop-up strips for the towers, glue the bottom section of the strip to the background piece of the card.
- Finally, glue the pop-up card to the background piece of card stock.
- Decorate the front of the card with smaller castle and hills.
- Glue front castle decorative piece to card.
- Give the card to someone who will love it.
Watch this video to see the how to construct the Castle card
The video below shows the steps to construct the Pop-Up Castle card.
Also subscribe to get notifications of new videos to help you with your paper crafts.
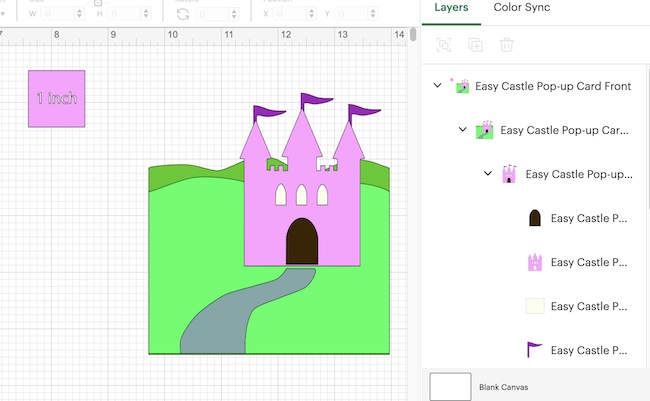
1. Download the pattern for the Easy Castle Pop-Up Card
Subscribe with the form below to get the password to my free Paper Glitter Glue library. The Easy Castle Pop-Up card is design no. 141 in the December 2022 section of the library.
The pattern is available in a compressed folder (also called a zipped folder) that includes both printable PDF files and SVG files. The PDF files are useful if you cut out the pattern by hand, while the SVG files work on cutting machines like the Cricut or Silhouette Cameo.
If you have any trouble unzipping or extracting the files, follow these instructions from Microsoft to help you.
- First open the file explorer and file the zipped folder - Easy Castle Pop-Up Card.zip
- To open up the entire folder, select EXTRACT ALL, then follow those instructions.
2. Cut out the Pattern Pieces for the Pop-Up Card
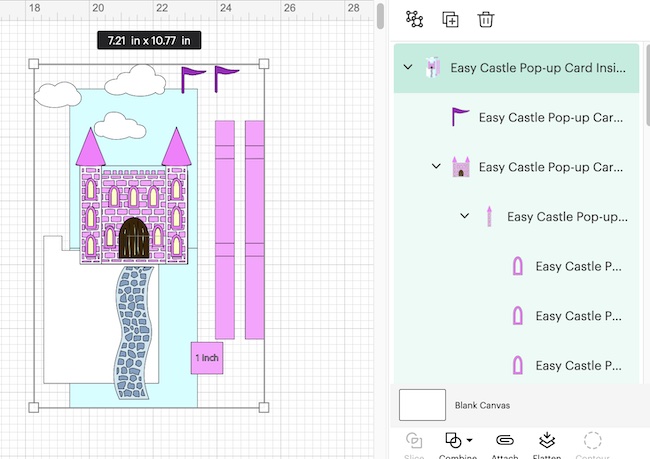
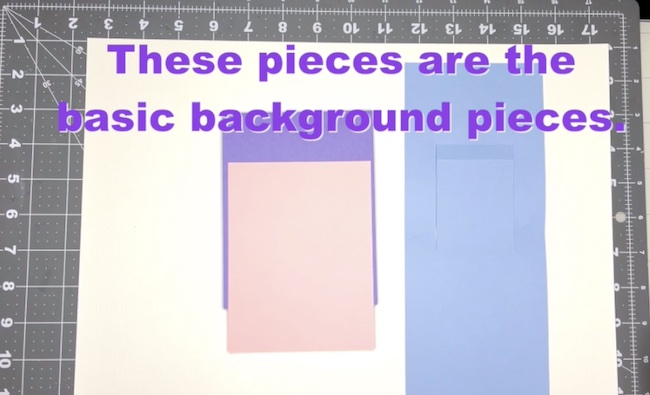
The sizes for the background pieces are shown below:
- The blue piece is the pop-up mechanism. It is 4 x 10" (10.16 x 25.4cm)
- The purple card stock is the background for the entire card - 4.25 x 11" (10.8 x 27.9cm)
- I used this pink card stock piece for the background on the front of the card - 4 x 5.25" (10.16 x 13.33cm)
*Important: The purple background piece is not in the design because it's so much easier to cut out without a machine. Just use a 8.5 x 11 inch sheet of card stock and fold it in half. That's it.
To make sure my designs import into Cricut Design Space properly, I include a one inch square (2.54 x 2.54 cm) on each design. Delete that square when you know it imported at the correct size.
I used 65# card stock (176gsm). To cut it out on my Cricut Maker, I used the Cardstock for Intricate designs.
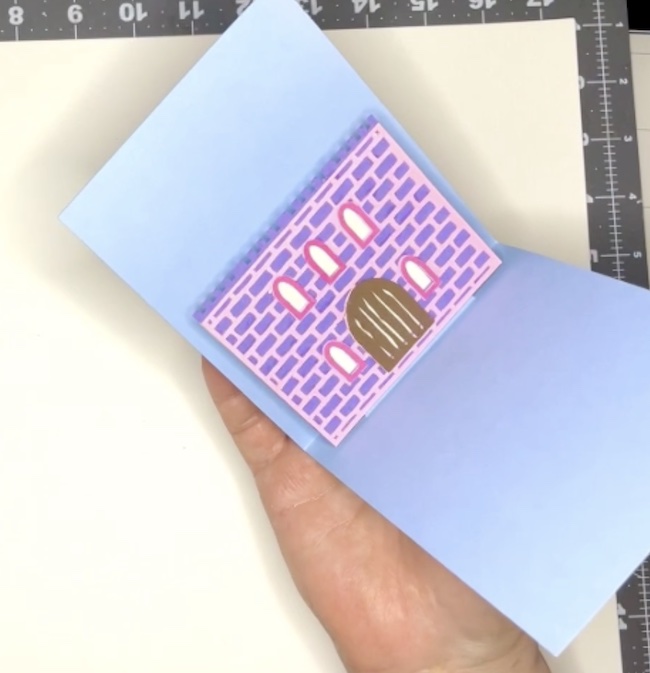
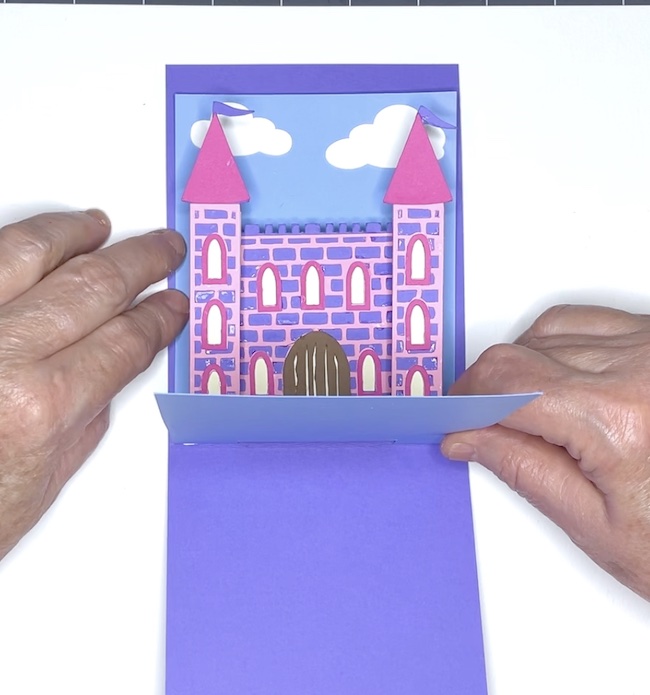
3. Assemble the 3 main castle pieces for the inside portion of the card - the middle section and two towers.
Glue the stone overlay to the main castle piece, then glue on the windows and the drawbridge. Do the same with each of the towers. If you like, use a contrasting color for the top of the towers. Glue on the flags as well.
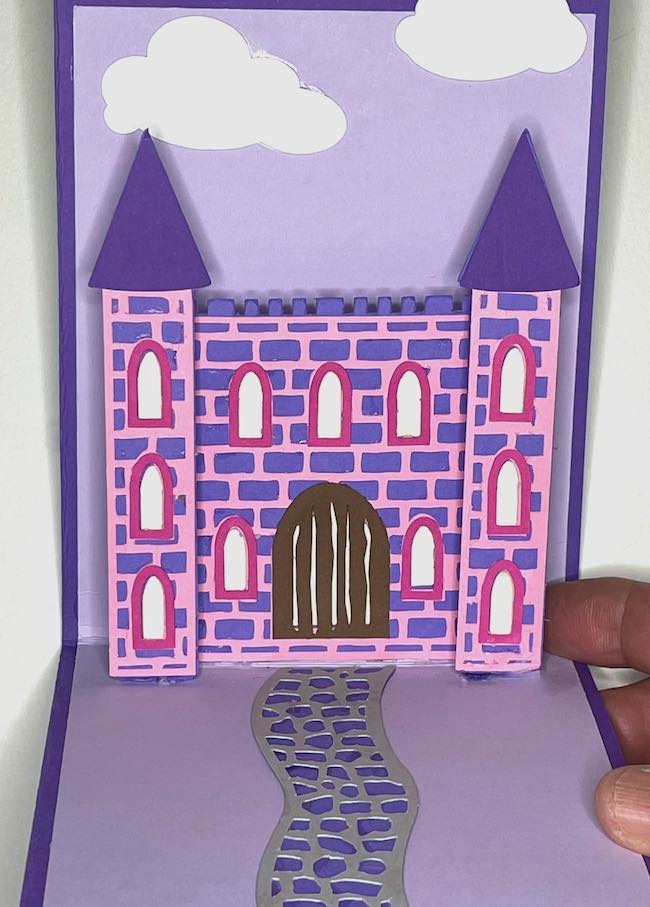
Also make the pathway by gluing the stone overlay on top of the background path.
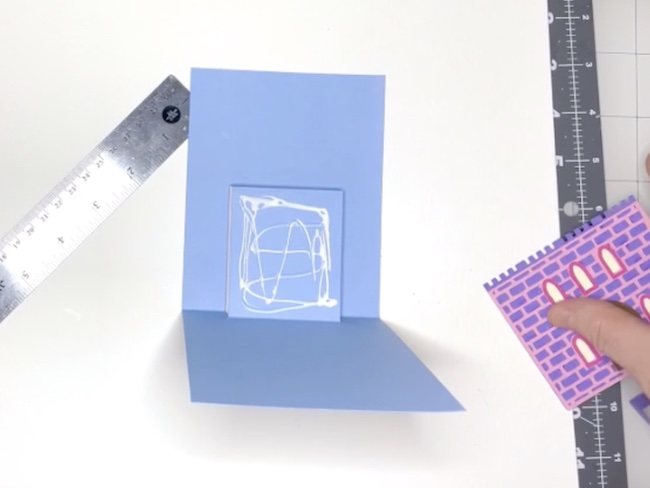
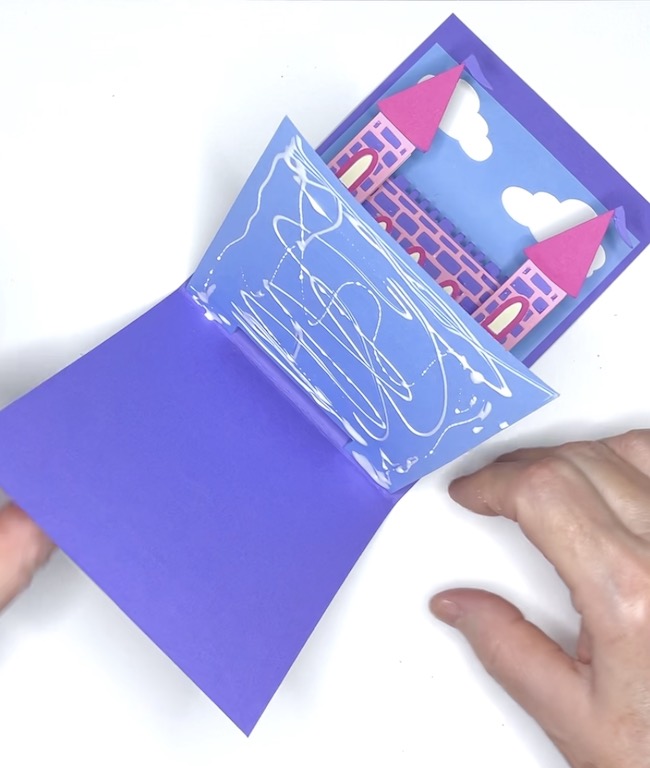
4. Fold the pop-up background piece along the score lines.
To do this, I use my ruler to help me fold along the score lines. Three of the lines are valley folds - that means that the fold away from you. The only mountain fold is the fold that brings the castle forward.
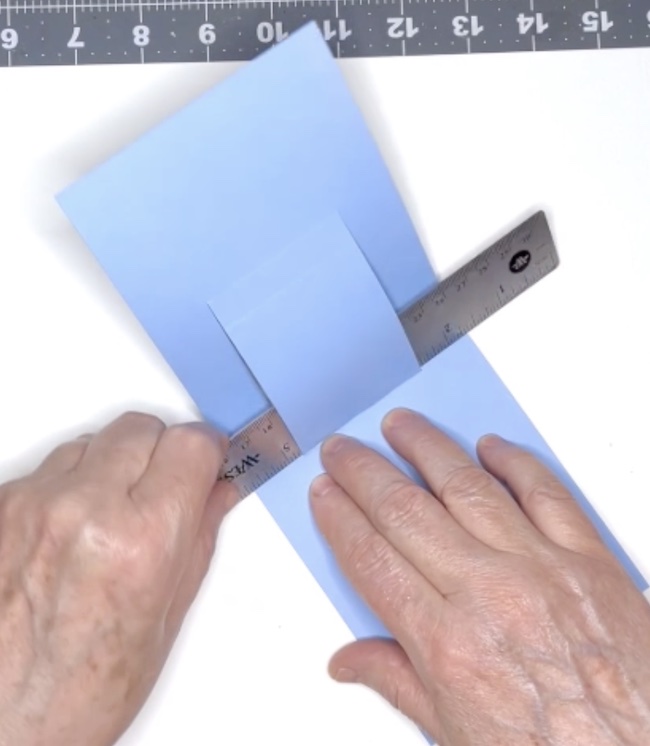
The ruler helps you isolate the fold so you don't inadvertently fold the wrong lines. This is easier to see on the video.
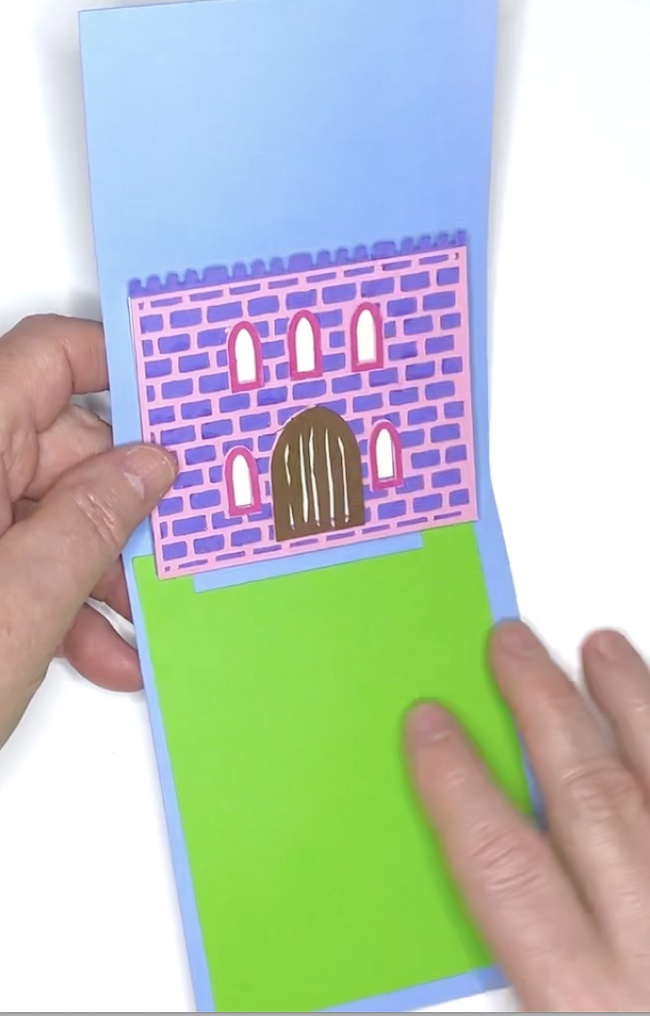
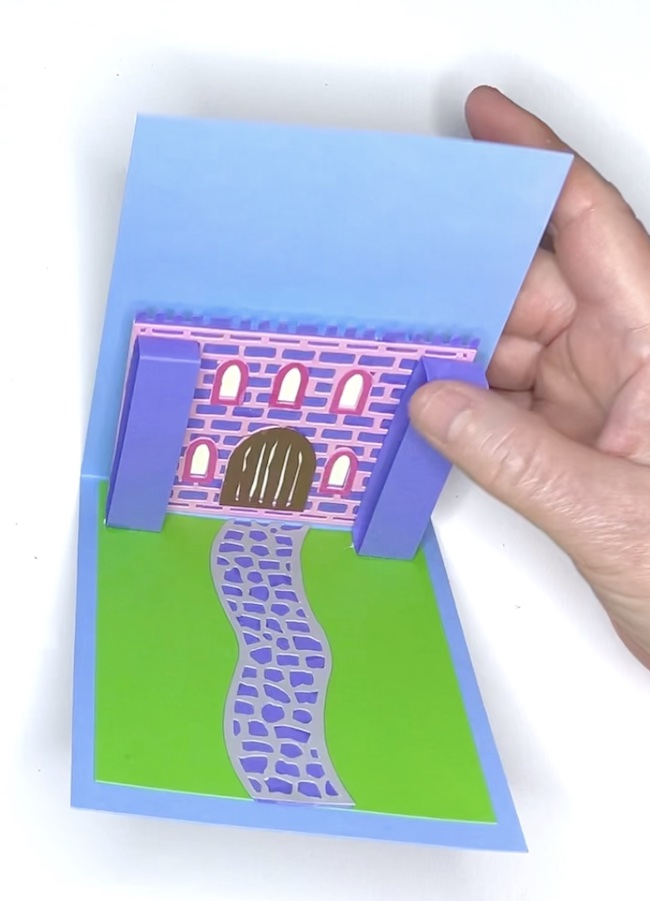
5. Glue the castle middle section to the middle pop-up section on the background piece.
After you have the pop-up mechanism folds done, you can glue the main castle piece to the pop-up up.
When I glue the castle in place, I move it just slightly above the fold line so there is not a lot of bulk at the fold line.
Glue the "lawn" and pathway in place before you add the towers.
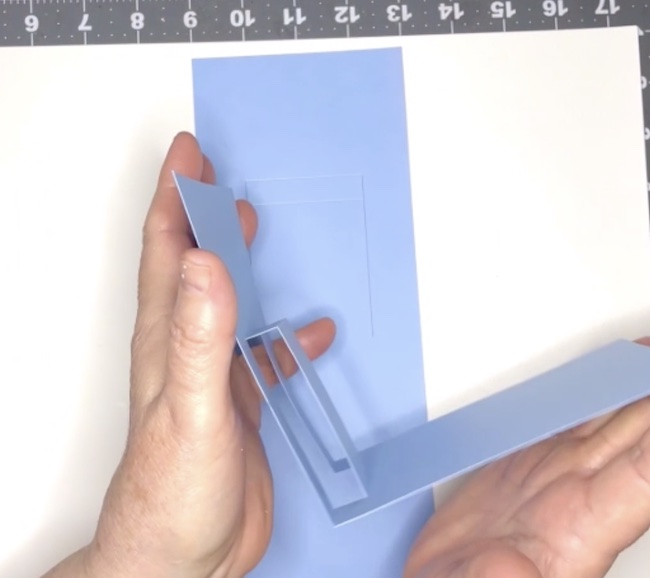
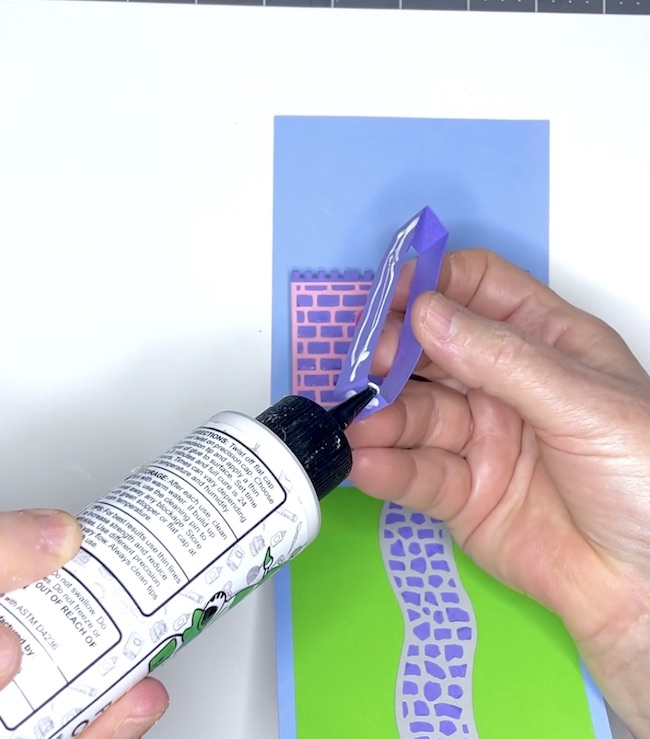
6. Glue to tower pop-up strip together to construct the support pop-up rectangle for the two tower.
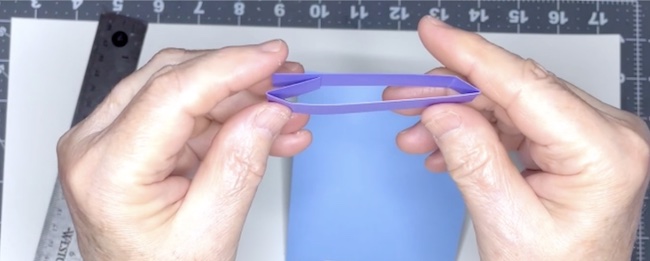
The support strip needs to fold flat. First fold along all the score lines so it makes a rectangle.
The easiest way to make sure it lays flat is to apply glue to the short glue tab you see in the photo above. Then fold it flat to let the glue dry.
7. To simplify the card, you can omit the tower supports and use foam tape to give dimension to the towers.
Adding the pop-up towers is a little fiddly. So if you want to simplify the card, just use foam tape to adhere the towers to the main part of the castle. *** BUT the important thing to remember is to move the towers slightly upward on the main part of the castle so the towers don't interfere with folding mechanism.
8. Glue tower support rectangle to each side of the middle castle section if you want the towers to pop-up up.
Flatten the pop-up strip rectangle and apply glue to the back and the lower portion where it adheres to castle and to the card as well.
In the video, I suggested that it might work better to adhere the tower to the strip before you glue it on, but I don't think that works quite as well.
If your strip doesn't adhere in the perfect place, then you can just take it off.
Do make sure that the bottom piece adheres well before you glue the towers in place.
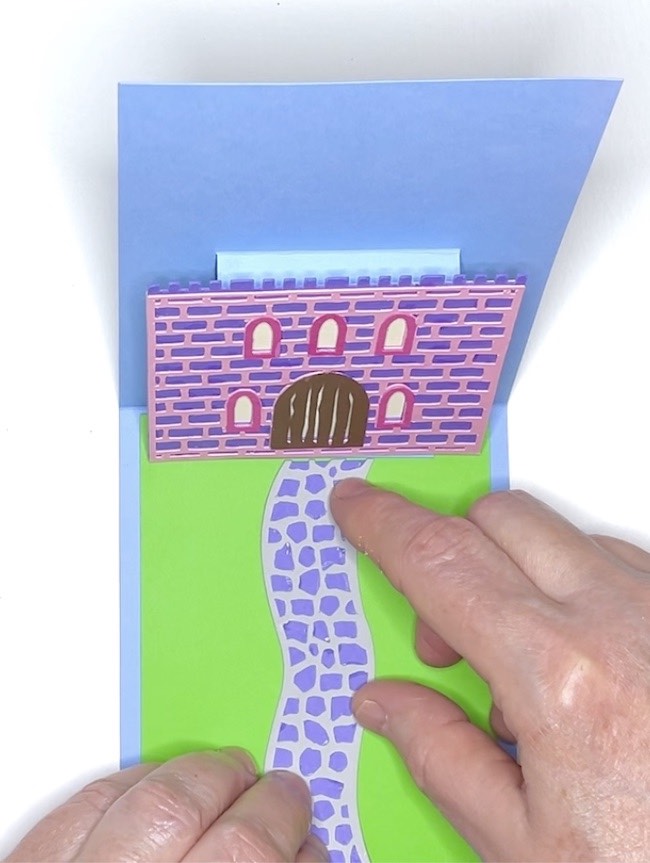
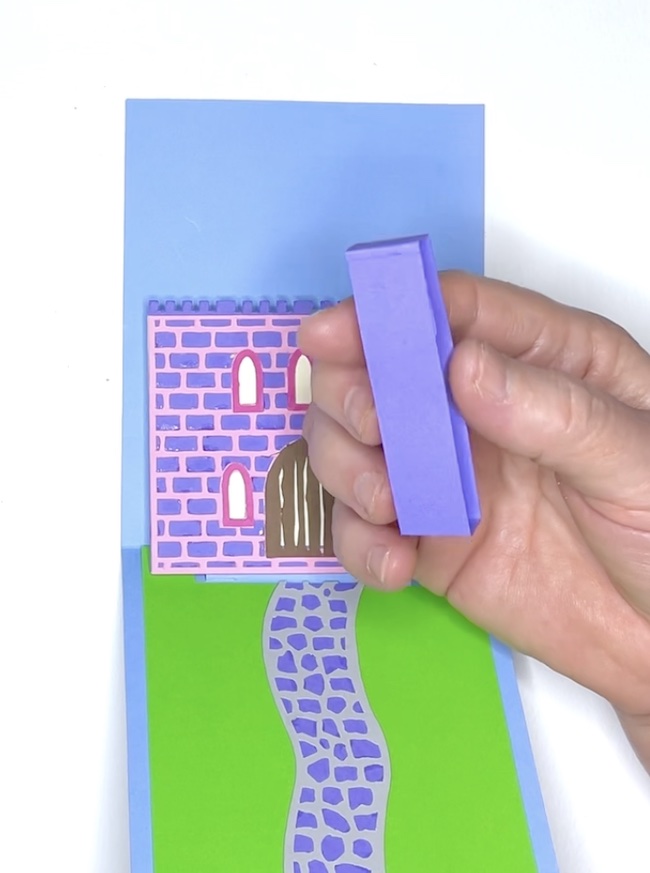
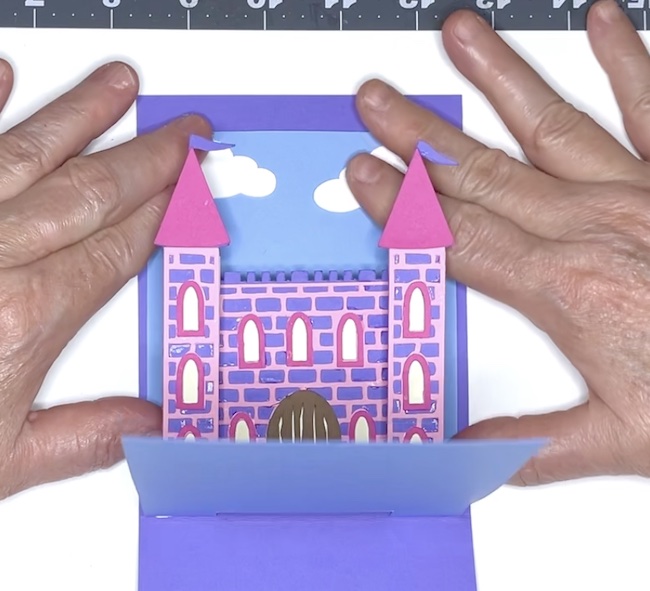
9. Adhere the two towers to the pop-up strips on the sides of the castle.
Glue the towers to the pop-up strips. When you apply the tower to the strip, move it up ever so slightly so it doesn't interfere with the fold line. Again, that reduces the bulk in the fold so that the card pop ups better.
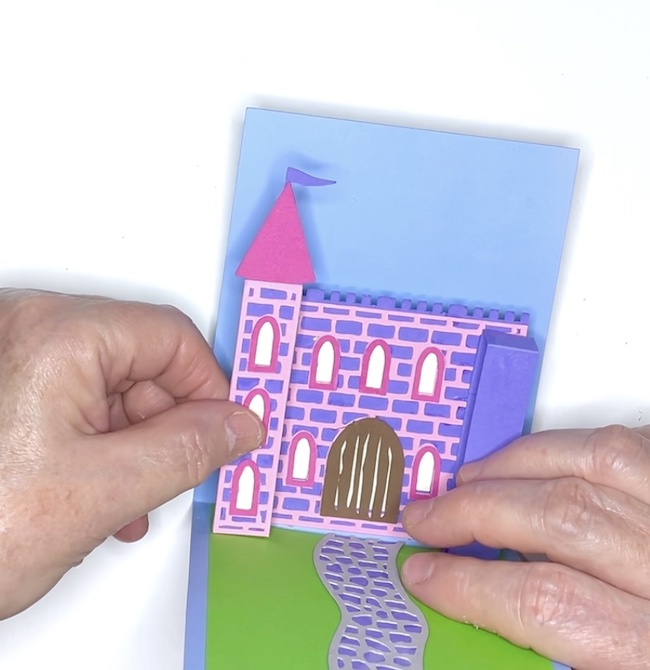
Make sure that the pop-up strip is fully adhered before you glue the tower in place.
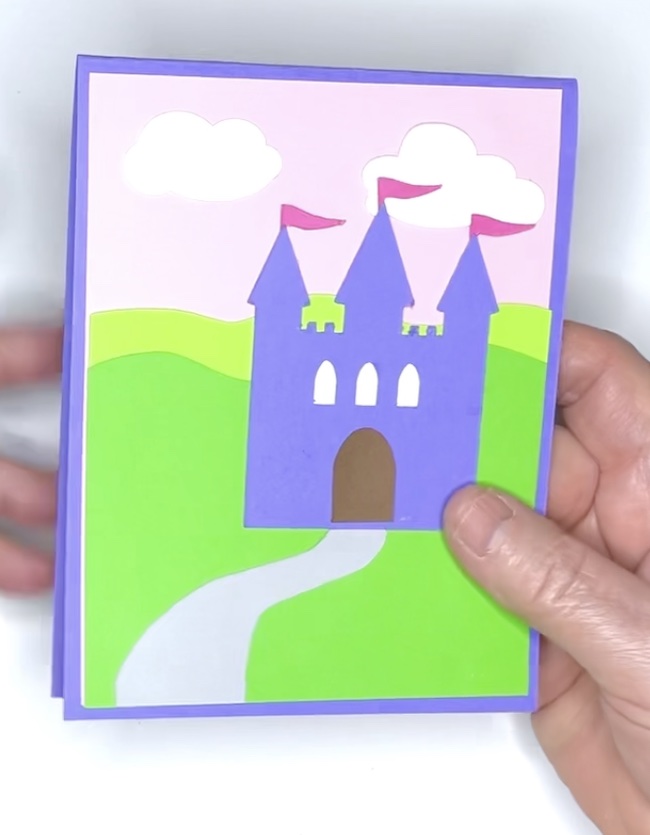
Glue the clouds on after you have the towers attached.
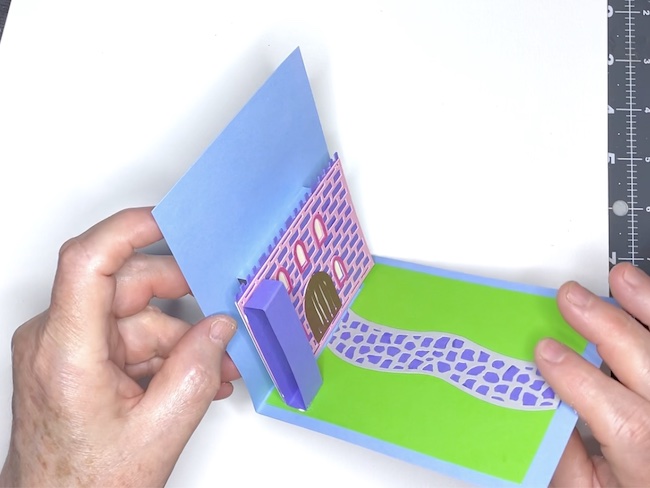
10. Finally, glue the pop-up card to the background piece of card stock.
Apply glue to the back part of the card so you can adhere it to the larger purple background piece.
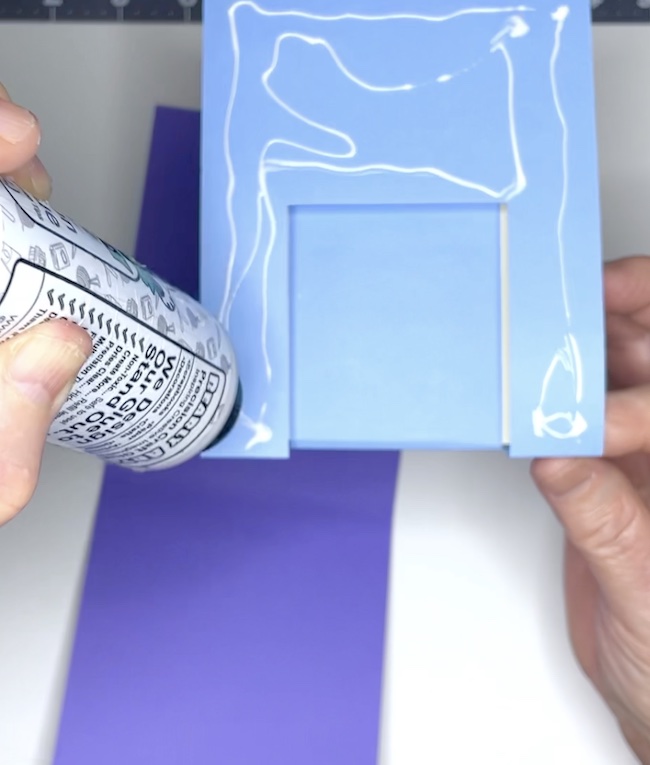
Glue the top part of the card first. Center it on the purple background piece. Make sure it fits in the folded crease line on the purple background piece.
Glue the bottom half to the purple background piece. Sometimes you realize it wasn't centered as well as you hoped. Just move it to make sure it is centered correctly.
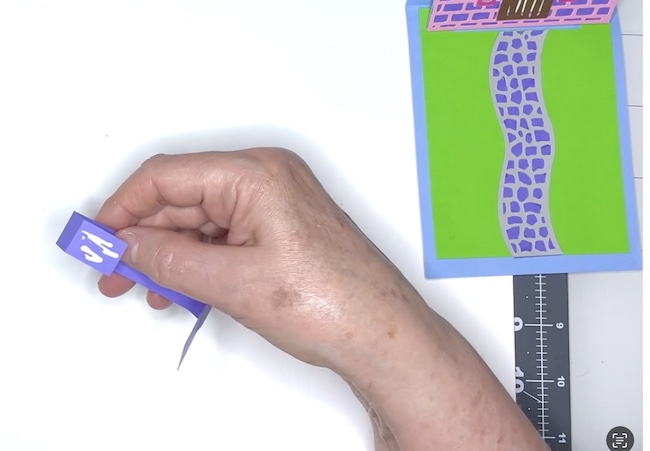
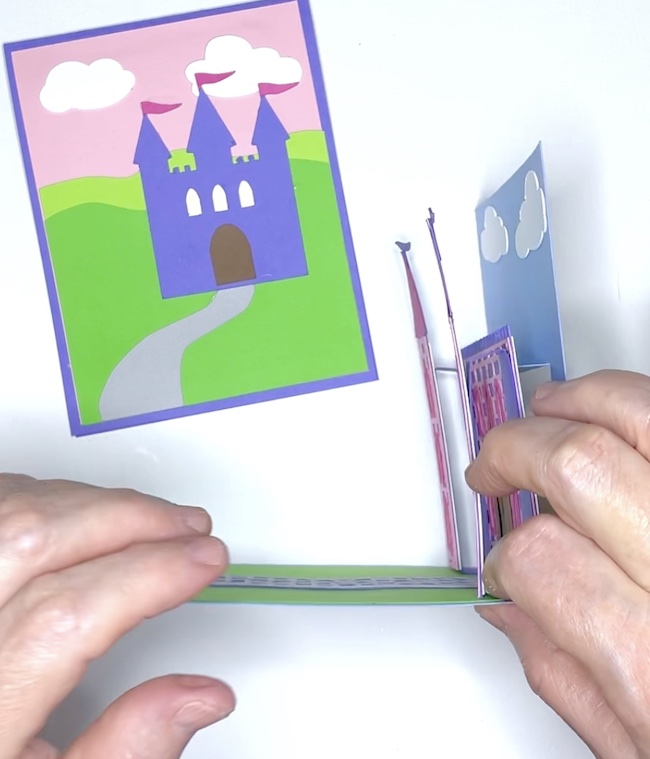
11. Decorate the front of the card with smaller castle and hills.
It's pretty obvious how to layer these pieces. However, I suggest that you glue the hills together first, then place the pathway before you glue the little card stock castle down. The pathway kind of determines where the castle fits.
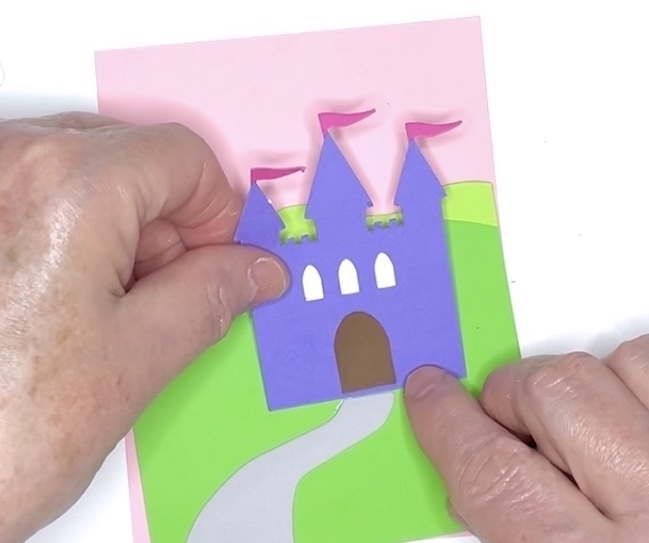
12. Glue front castle decorative piece to card.
Center the small front castle on the front of the card.
13. Give the card to someone who will love it!
You know, people who love medieval castles, princesses, dragons, knights and so on - most everyone really.
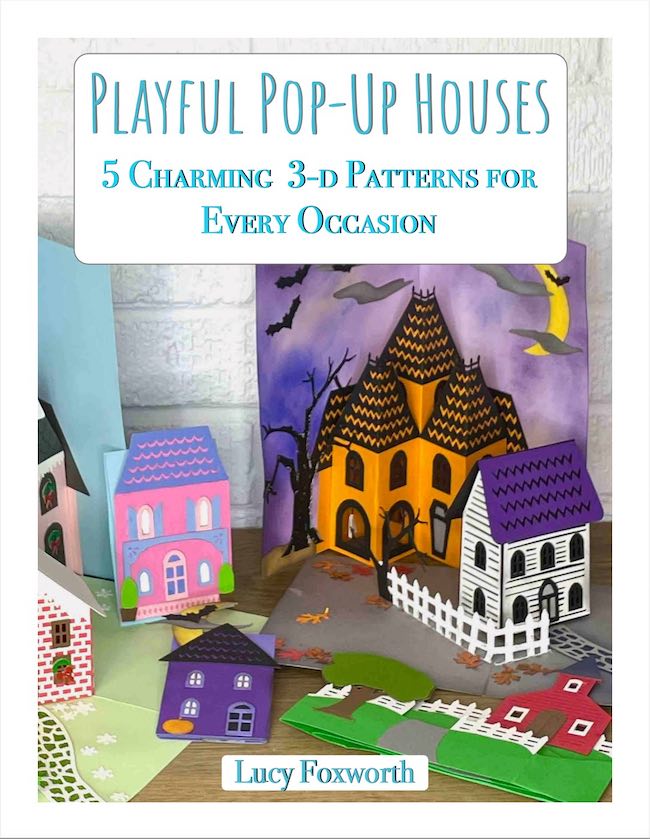
Check out my book, Playful Pop-Up Houses, for more card ideas
Because I had so much fun making these pop-up cards, I wrote a book called the Playful Pop-Up Houses with 5 basic designs that with many variations for any season.
Be sure to Pin to Your Favorite Pinterest Board!
Pin to your favorite Pinterest board so you remember where you found this cool castle card. And then make it and share a photo with me. I love to see your projects.

Questions?
Just email me at [email protected] so I can answer any questions you have about making this card. Or suggestions for future projects.
Thank you for reading.
Tina
Hi Lucy! See I told you that you'd do Great on your Presentation! I Love it ❤️ and can't wait to make the Castle Card Myself!
Your Crafty BFF!
Lucy
Thank you so much, Tina. You are very kind.
Lucy
Ida
Hi Lucy!
I just found you at Cricut Craftfest and have been excited by your projects that you so willingly share with everyone. Your castle card is adorable. Thank you so much for your kindness. Working on these projects is cathartic and calming for me.
Lucy
Ida,
That is the nicest thing that you could say to me.
Thank you so much.
Lucy
Sue
Lovely card, just what I was looking for and easy to make once cut out. Thank you Lucy.