Table of Contents
Make Your Own Crackle Paint Cheaply and Easily
In the past I've made crackle paint using purchased crackle medium, but you can also easily make your own crackle paint with white glue. It's cheap, easy, and readily available. Almost every crafter has plain white glue at their house, right?
Want to learn how to make great crackle effect on your paper crafts?

Read all the tips and tricks below.
This post contains some affiliate links for your convenience. Click here to read my full disclosure policy.
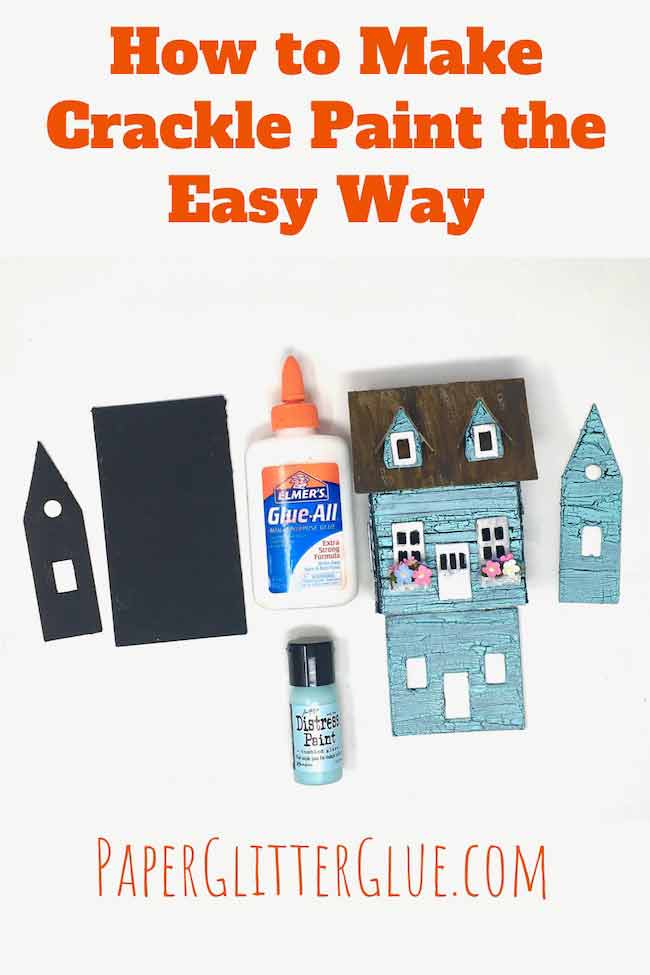
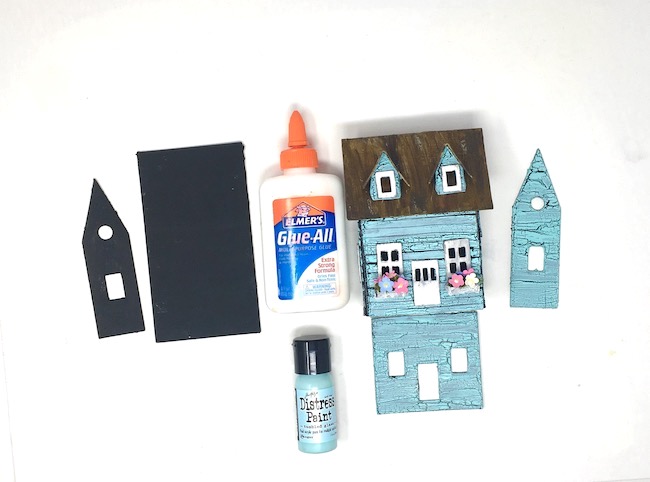
Materials for Easy Crackle Paint
- White PVA Glue like Elmer's Glue-All
- Base paint like Black Gesso
- Contrasting Top Coat Acrylic Paint Color
- Card stock or cardboard as your paper source
Directions for Making Crackle Paint
- Paint the card stock or cardboard with the base color, let dry
- Paint the cardboard with a layer of white glue
- Let the glue partially dry
- Paint the contrasting top coat of acrylic paint on the partially dry glue
- Let the top coat color dry
- Use the distressed, crackled paint cardboard for your paper craft
For more specific details, continue reading. Also, you can watch the short video I made to show you how to do this.
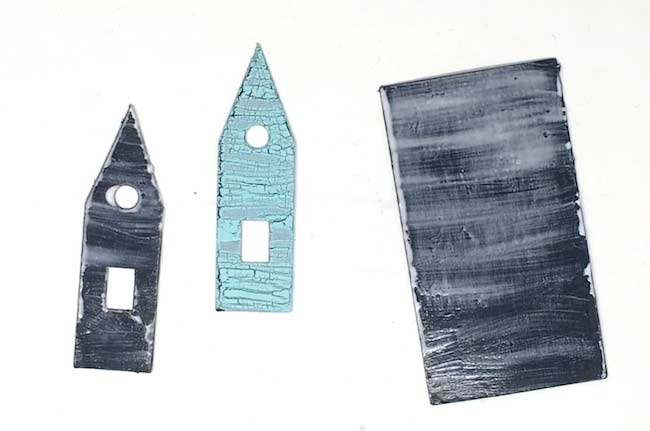
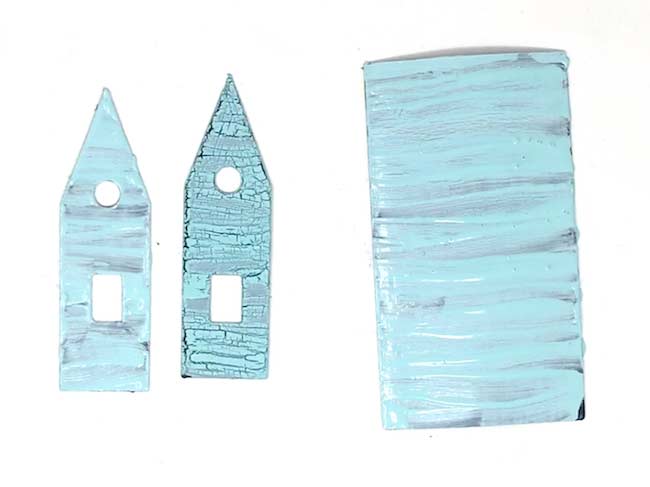
First, paint your card stock or cardboard with the base color
Choose a contrasting color to show through the crackle top coat paint layer. Since many of my distressed projects are for Halloween, I use black gesso as the bottom layer to show through the cracks.
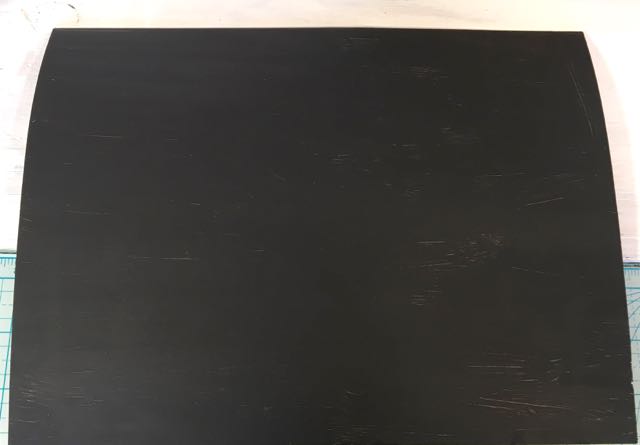
Paint that layer in the direction you want the cracks to go. Again, since I mostly make little houses, I paint the piece so the crackles predominately go in horizontal streaks. You can see this in the video above.
Let the paint completely dry before you move to the next step. When you use gesso primer, the paint dries quickly - often in about 5 minutes.
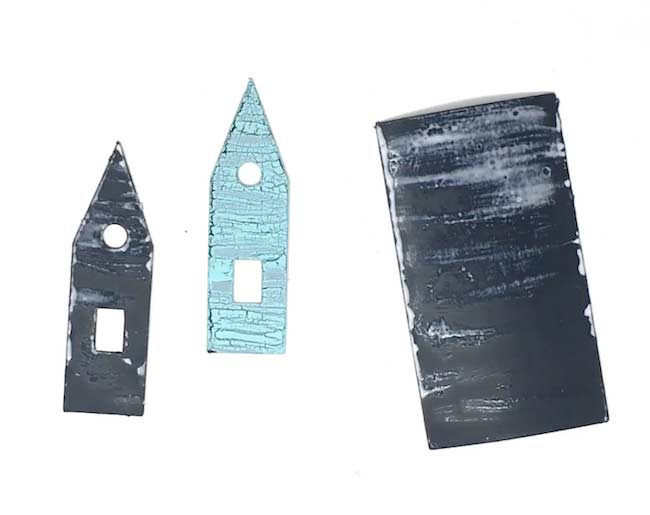
Next, paint the glue layer on top of base layer
For the next step, apply white PVA glue such as Elmer's Glue-All. I like Elmer's Glue-All because it is easy to find, inexpensive, and spreads perfectly for this process.
The easiest way to apply the glue is with a stiff paint brush. Once again, paint the glue in the same direction you want the crackles to go.
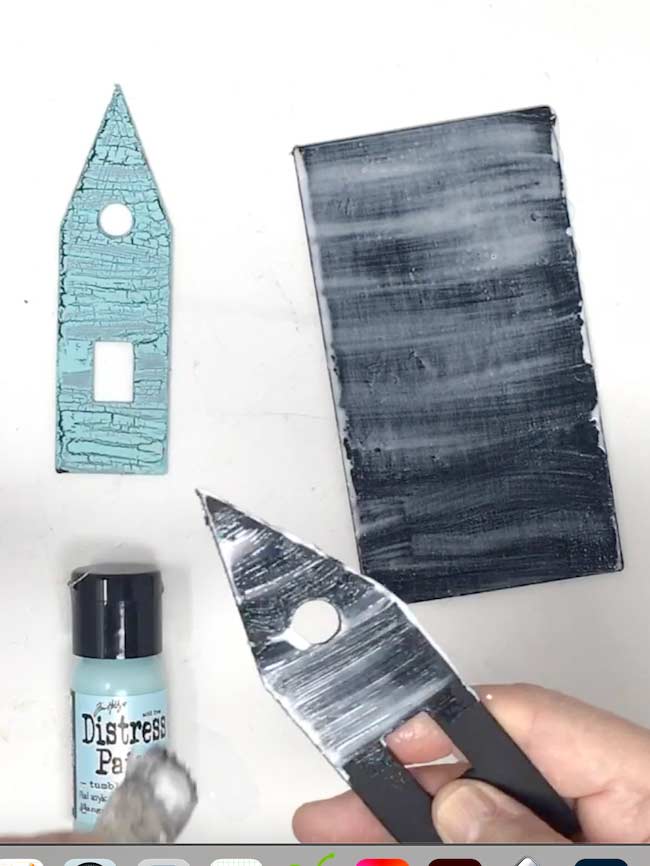
To get tiny crackles, paint a thin layer of glue. That is my goal in this particular project.
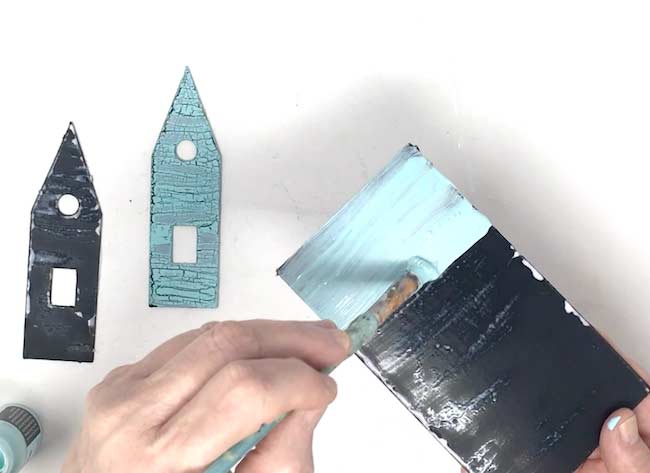
Important: Allow the glue layer to partially dry
This step is the only step where you have to pay attention to the timing. In order for the crackle step to work, there have to be different rates of drying between the glue layer and the top paint coat. What you want is the glue layer to be partially dry so it continues to dry after you paint the top coat on.
And how do you determine the correct time to paint the top layer on? Well, white PVA glue like Elmer's Glue-All dries kind of translucent, but some of it will still be white. See the photo below to see the subtle changes.
However, I didn't time the process because glue will dry based on the thickness. You have to go by how it looks each time.
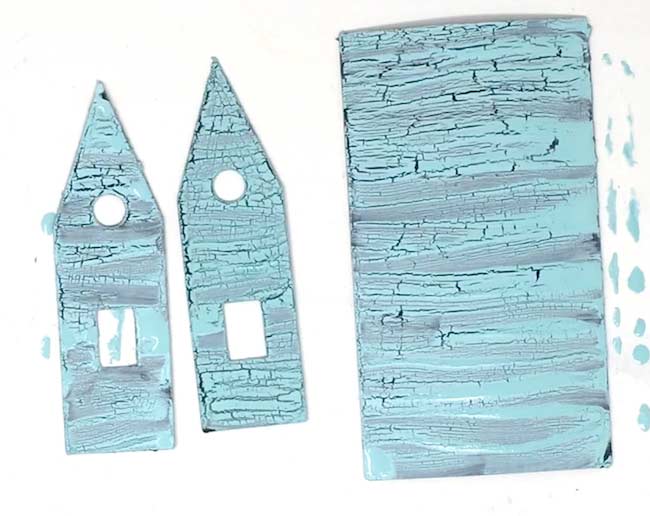
After the glue is partially dry, paint the top layer with the color of your choice
Just like you painted the base coat and the glue layer, paint the top coat in the same direction. Thinner layers of paint will make tinier cracks. And that is exactly what I want for this project.
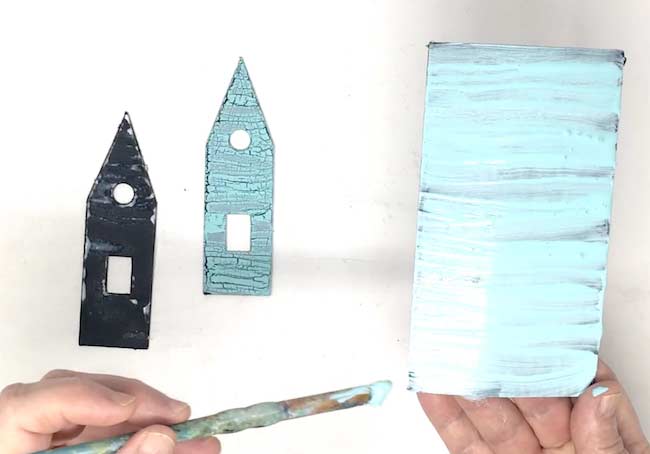
Now you wait and let the crackle process proceed. If you try to hurry it up by using a heat tool, for example, the cracks will be larger. But for me, I want tiny cracks so I just left it alone.
And this is the result - tiny cracks and beautifully distressed siding
So happy with the result.
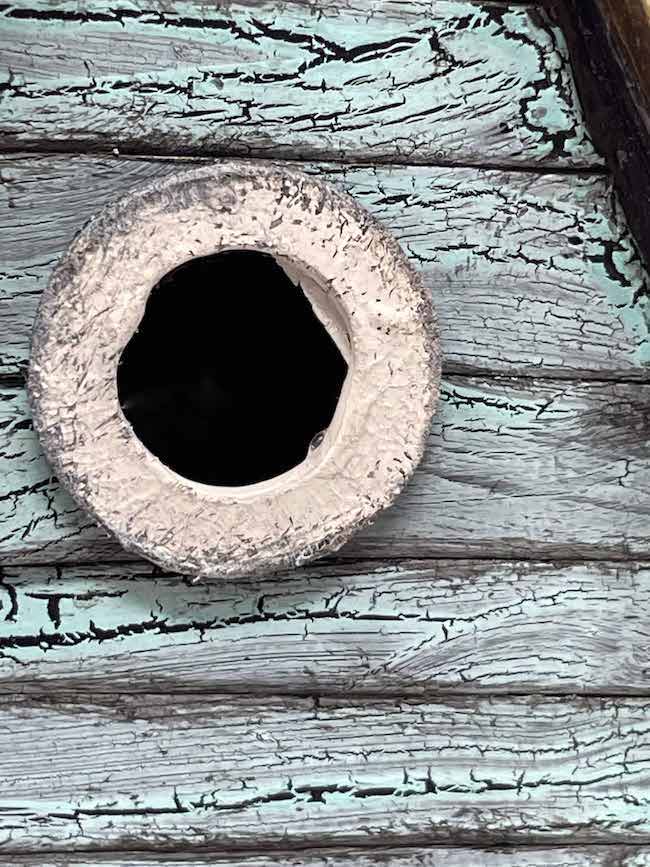
And this is how it looks on the Sea Shack, my latest little house. I just love the effect of crackle paint on my little cardboard houses.
I hope you will try it because it is fun and adds such great distressed details to your paper projects.
Questions?
If you have any questions, please email me at [email protected]. I will happily answer any questions you might have.
Happy Crafting!
Lucy
SM
Hi Lucy, love your projects! Can I use watercolours at any stage of this process or should it be acrylics/gessos. Thanks!
Lucy
You can use watercolors, but acrylics are better for a project like this. They are thicker and in effect, protect the cardboard better.
And I am so glad you like my projects.
Lucy
Kat
This is so cool! I love the effect and it’s especially awesome because I can use materials already on hand. You’re the best!
Lucy
That is what is so nice about this technique for crackle paint. Everyone has the supplies already.
Thank you. I've made this before, but I always had much larger crackles and streaks, the trick is to let the white glue layer almost completely dry. And if you paint a thin layer of paint you will get tiny crackles.
Thank you for the kind words.
Lucy
Cheri
please delete my question. I found the answer!
Lucy
If it is ok with you, I will leave the question in place because it might help other people. Sometimes they read comments better than they read the tutorial itself.
Cheri Grundmann
If you use black cardstock do you still need to paint with the black gesso?
Lucy
If you use black cardstock, you do not have to use black gesso. The only thing to remember about using black cardstock is that it will get a bit wavy. After you have done the crackle process and everything is dry, then place it under a heavy object to flatten the cardstock somewhat. But if you are distressing things, it's ok if it is mildly wavy. At least that is my perspective.
Natalie
This is amazing! Thanks for the tutorial. Does the base layer have to be gesso, or can you just use acrylic paint for it?
Lucy
No, you don't have to do gesso. I like gesso because it is such a flat paint. But you can use any contrasting color you like.