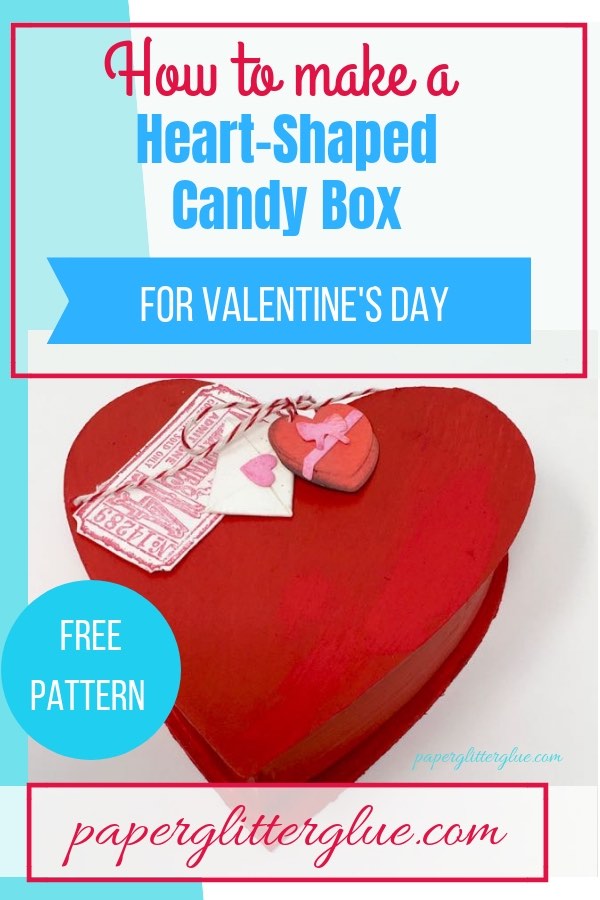
Want to make your own custom heart-shaped candy box for Valentine's Day or any special occasion? Though I call it a candy box, you can put any kind of treat in it such as a small toy or a nice note or whatever strikes your fancy. These boxes are easy to make with the patterns provided in the Paper Glitter Glue library and the instructions below. So let's get started.
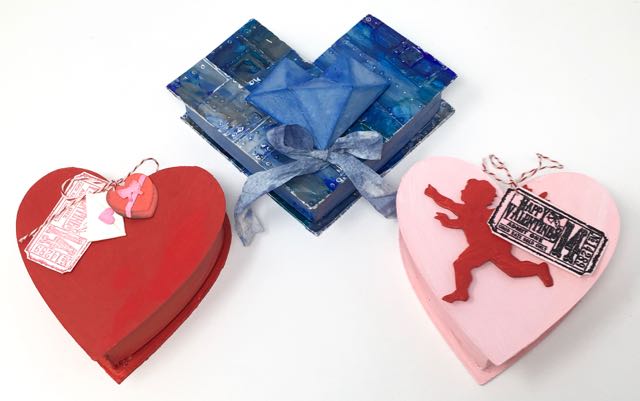
Candy boxes made for Valentine's Day, but you could make them for any special occasion such as weddings, for example
First what do you need to make your own candy box?
This post contains some affiliate links for your convenience. That means if you make a purchase after clicking an affiliate link, I will earn a small commission but it won’t cost you a penny more. Click here to read my full disclosure policy.
Materials
- Candy box pattern - Design No. 44 - from the Paper Glitter Glue Library
- Cardboard
- Cutting machine such as a Cricut
- Xacto knife
- Cutting mat
- Paint (these are the ones I used):
- Aluminum tape for the abstract heart-shaped metallic candy box
- Alcohol ink to color aluminum tape:
- Hot Glue
- Glue Gun
- Aleene's Tacky Glue Fast Grab
- Sizzix Dies from Tim Holtz:
- Stampers Anonymous Stamp Sets from Tim Holtz:
- Candy
I know that looks like a lot of supplies, but you can choose to make your candy box much simpler if you want. Just paint the box red and that looks good by itself.
Outline of Directions to Make Your Own Heart-Shaped Valentine Candy Box
-
- Download the pattern from the library - Design No. 44
- Cut out the pattern
- Hot glue the cardboard box together
- Paint the cardboard
- Decorate
So let's get started.
First Download the Pattern from the Paper Glitter Glue Library
If you already have the password to the library, just go the the first library page, type in the password and download the Candy Box pattern. If you do not have the password to the library, then subscribe to the Paper Glitter Glue newsletter with the form below. You will get a message with the password right away so you can open the library and access all my free patterns.
For your convenience I made these patterns in 2 forms - as a printable PDF and an SVG file. Unlike most of my little house patterns which have numerous score lines, there are minimal score lines on these patterns. I did add score lines but they are just markers for the hot glue line when you assemble the candy boxes.
Next - Cut out the Candy Box Pattern
So if you have an automatic cutting machine like the Cricut, then upload the SVG pattern to your design software. You will see the lines just inside the hearts which tell you where to apply the hot glue. You can mark this line as a score line or add a pen to mark the line. I just scored it because it doesn't show up too much, but was still easy to follow when I applied the glue. So be sure to mark that line as a score line or a draw line and attach it to the heart shape.
If you are cutting by hand, it's a pretty simple pattern, you could cut around your printed PDF pattern and then trace it on your cardboard. Then make a mark about ¼ inch from the edge for the top of the box and then mark a line ⅜ inch from the edge for the bottom of the box. The top needs to be larger so it can fit over the bottom of the box.
If you want to add a string to attach something to the heart, punch a tiny hole on the outside top piece before you glue the sides on.
Below you see the Funky Squared-Off Heart pieces before assembly:
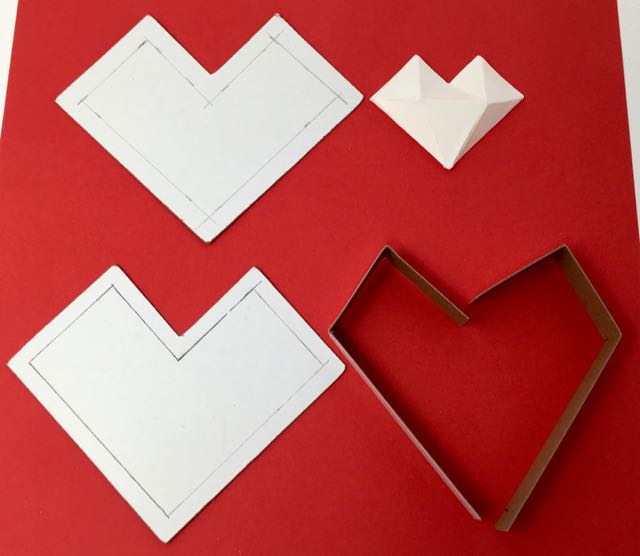
And here are the pattern pieces for the more usual heart-shaped candy box:
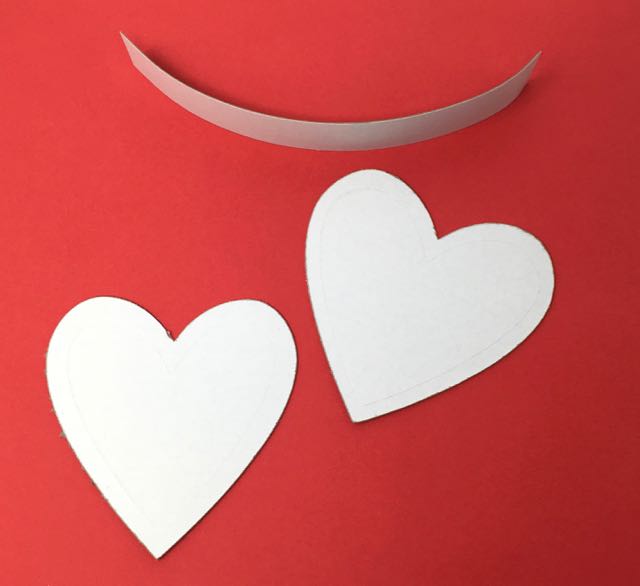
You need 2 cardboard strips for each heart so you need a total of 4 all together.
Glue Your Candy Box Together
Now you get to put the box together. I made the side strips 1 inch wide, but you could make them a little wider or narrower if you desire. Proportionally, this just seemed like a good width for the sides for this little box.
Also for the rounded heart-shaped boxes, you need to gently curve the strips so they will easily adhere to the curves of the cardboard. So I pull a strip through my fingers curving it slightly as I pull. You can see the curvature on a photo above.
The Faceted Heart Candy box needs to have the corners creased before you glue it in place. Line it up to see exactly where the crease needs to be.
Next you glue the sides to the candy box. First, let's start with the top of the candy box. Do ½ of the heart shape at a time. Start at the top of the heart in the crease between the two sides of the heart. Lay down a bead of glue from the crease to the bottom point of the heart covering ½ of the heart. When you apply the glue, apply it just slightly outside the line to ensure that the top of the box will fit over the bottom of the box.
Then place your cardboard strip on the bead of glue. Push it down a little bit so it will adhere well. Yes, it will probably be kind of messy. Also the strip will be too long, cut it at the tip of line your drew on the heart.
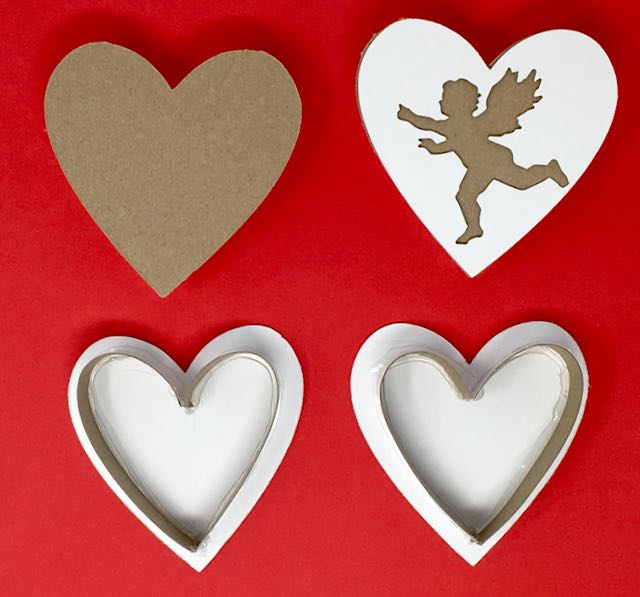
Apply glue to the other half of the heart. And repeat for the bottom piece of the heart-shaped candy box, only apply the glue just INSIDE the line. Test fit to make sure the top fits on the bottom piece.
Paint Your Cardboard
Now is good time to paint the cardboard because you will paint over the hot glue that is visible. Paint doesn't make it invisible, it just makes it less obvious.
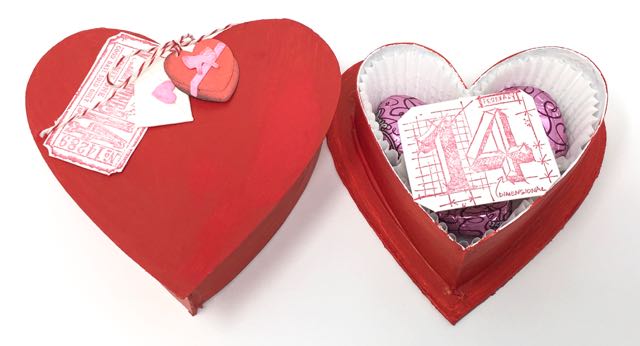
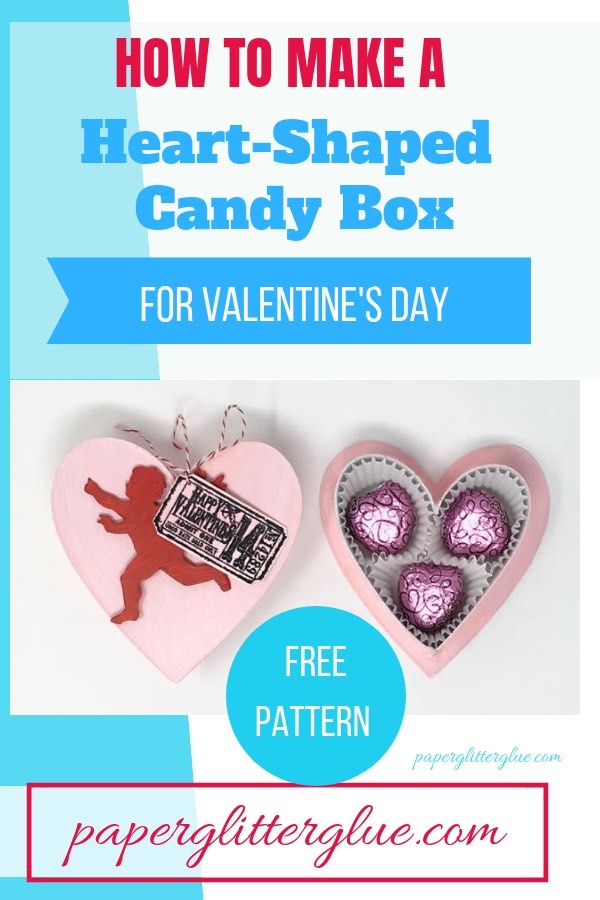
I chose to make one candy box Spun Sugar pink and one Candied Apple red. The funky squared-off heart candy box is painted with Faded Jeans blue as the base color.
Now Decorate Your Little Candy Box
Just like when I make a little house, one of the funnest parts is decorating. I chose a bunch of Tim Holtz Valentine items for these candy boxes. First I will describe decorating traditionally shaped candy boxes, then I will talk about the funky metallic squared-off candy box.
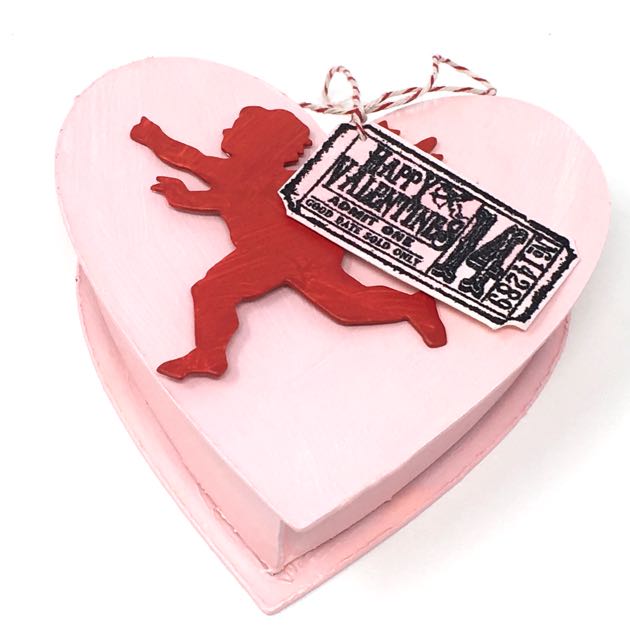
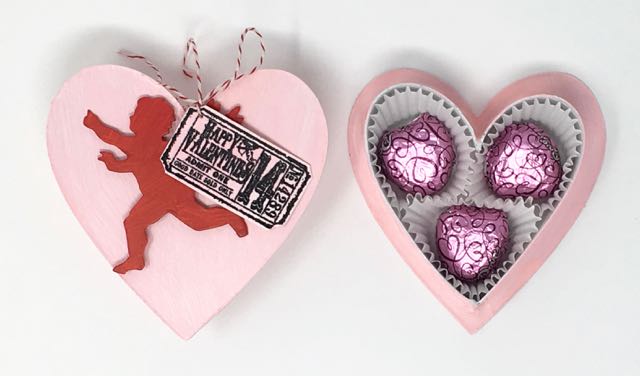
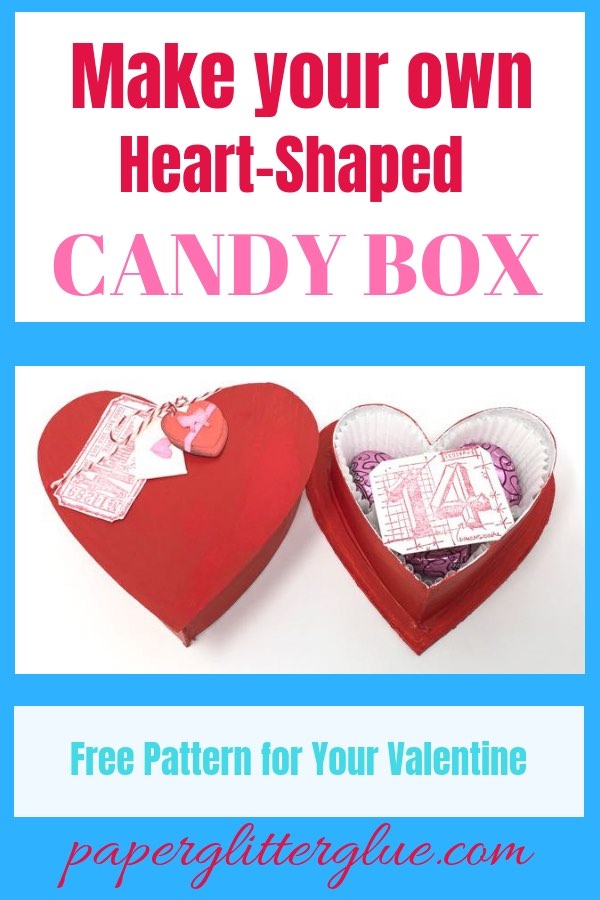
I've had the mini Cupid die from Sizzix for a long time, but have never used it. This project is the perfect place for it. I punched a hole in the top off the wing and attached a stamped Happy Valentine ticket to it with baker's twine. Then I threaded that through the hole at the crease at the top of the heart and tied a bow. I like the effect of the red cupid with the pink here.
For the red heart, I made two tiny Valentine Sidekick Sideorders - the envelope with the heart and the Valentine candy box. Then I added a Valentine ticket stamped in red. So whatever embellishments you choose you can string them together and tie them to the front of the box.
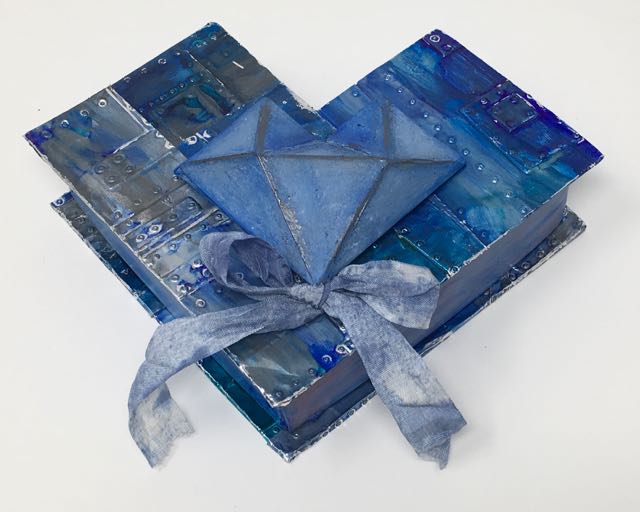
Funky Metallic Squared-off Heart Candy Box
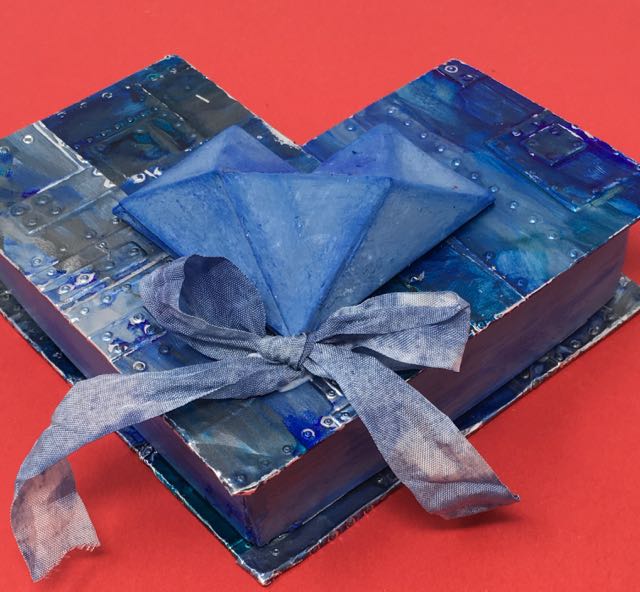
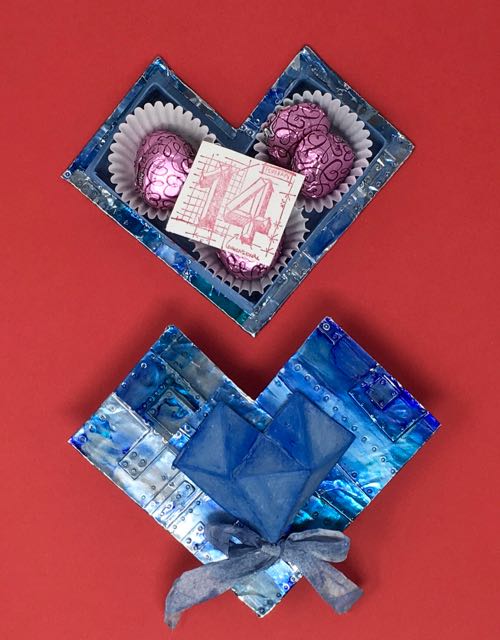
Ok, what's up with the funky squared-off heart candy box? Well, just this January Tim Holtz and Sizzix came out with this incredible die called the Faceted Heart which you see on top of my box. It makes an abstract faceted heart. I saw someone's project online using this die and it inspired me to make a square heart-shaped box.
But I decided to make it even more funky by attaching embossed metallic tape to the front. The metallic tape (true aluminum duct tape for taping ducts) was embossed with the Foundry 3-D embossing folder. I ran the tape with backing through the machine. Then I colored the tape with various alcohol inks. After the alcohol ink was dry, I peeled the backing off and taped to the front the box. My friend, Sara Emily, inspired me to do this when I saw her mixed media vignette using the Faceted Heart.
Then I made a Faded Jeans Faceted Heart and glued that to the middle of the box. It needed just a little more decor so I found some blue ribbon and made a bow and glued that just below the Faceted heart. Later I edged the facets with a silvery metallic paste.
Online Craft Challenges
Sometimes I find online craft challenges that fit my projects. Well, for this project, I found 2 craft challenges that fit - A Vintage Journey: Your Hearts Desire Challenge and the Simon Says: Love is in the Air.
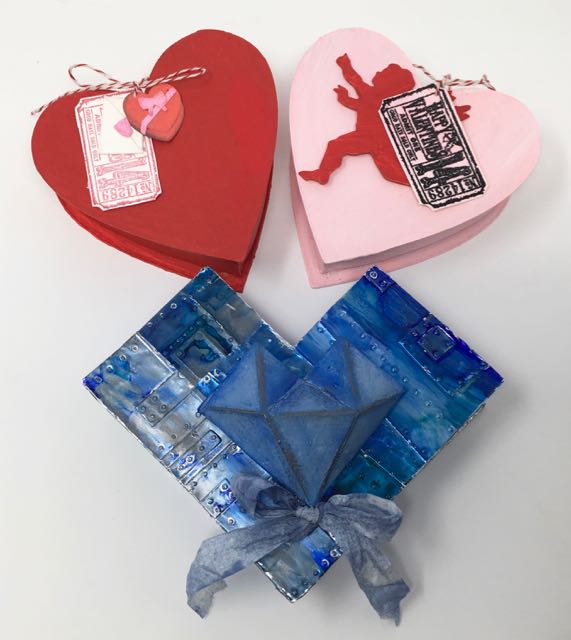
A trio of heart-shaped candy boxes for Valentines's Day or wedding favors or just because.
Thank you for stopping by
I hope you like the candy boxes and will try making one. They are fun and easy and make great gifts.
Thank you for stopping by. If you have any questions, just leave a comment or you could email me at [email protected].
Remember to pin any of these Candy Box photos to your favorite Pinterest boards.
Sarah
When i upload the svg to circuit it says that layers are to large and need to be adjusted to 11.75 x something or smaller . How does one adjust those layers and get cricut to cut it correctly?
Lucy
Sarah,
I will check out the files and let you know.
I just downloaded the files and they work for me. Would you email me at [email protected] and I will send you the files. Sometimes they work better when I send them to you. These were some of the very first files I made. I'll update them with a 1 inch square for scale to see if that helps you.
Lucy
Lucy
Sarah,
I went back and looked at the files. None of them were that large for me. But the way to resize is to leave everything grouped and just scale it down. I added a one inch scale to the design so that might help you.
Please email me [email protected] so I can help you.
Lucy
Annie
What a stunning Heart Box Lucy and it’s great to have you hop on board at A Vintage Journey, taking part in Your Hearts Desire Challenge
Best wishes
Annie x
Lucy
Thank you, Annie. I'm working on some more boxes because I love to make 3-D projects.
kath stewart
beautifully decorated candy boxes, thank you so much for sharing with us at Simon Says Stamp Monday Challenge, hugs kath xxx
Dionne
Love the metallic heart - very unique!
Lucy
Thank you, Dionne. I saw how another blogger, Sara Emily at Sara's Closet used the heart and the idea came to me. It is actually the easiest heart to make. So if someone likes kind of funky stuff, it's a good candy box to make. Lucy
Sara Emily
WONDERFUL project, Lucy! When I first laid eyes on that Faceted Heart, YOU came to mind; it is a match made in heaven. I am so happy you shared this post and have generously offered your templates to make both of these designs. (I have wanted to make a smallish 'traditional' heart shaped candy box for ages.)
Your embellishments on the 'traditional' boxes are perfect in scale and I'm so happy you were finally able to use that cupid die.
Now of course, my favorite is your Foundry embossed metallic heart paired with the Faceted Heart. Be still, MY heart! I love the metallic foil with the AI's in blues; don't you just love contractor's tape???! I'm so happy you were inspired by my project; you have taken that inspiration and soared with it! LOVE, LOVE, LOVE your creativity, my friend!
Oh, and while I'm here, let me say thank you for sharing that creativity and this wonderful tutorial with us at A Vintage Journey! Sending hugs!