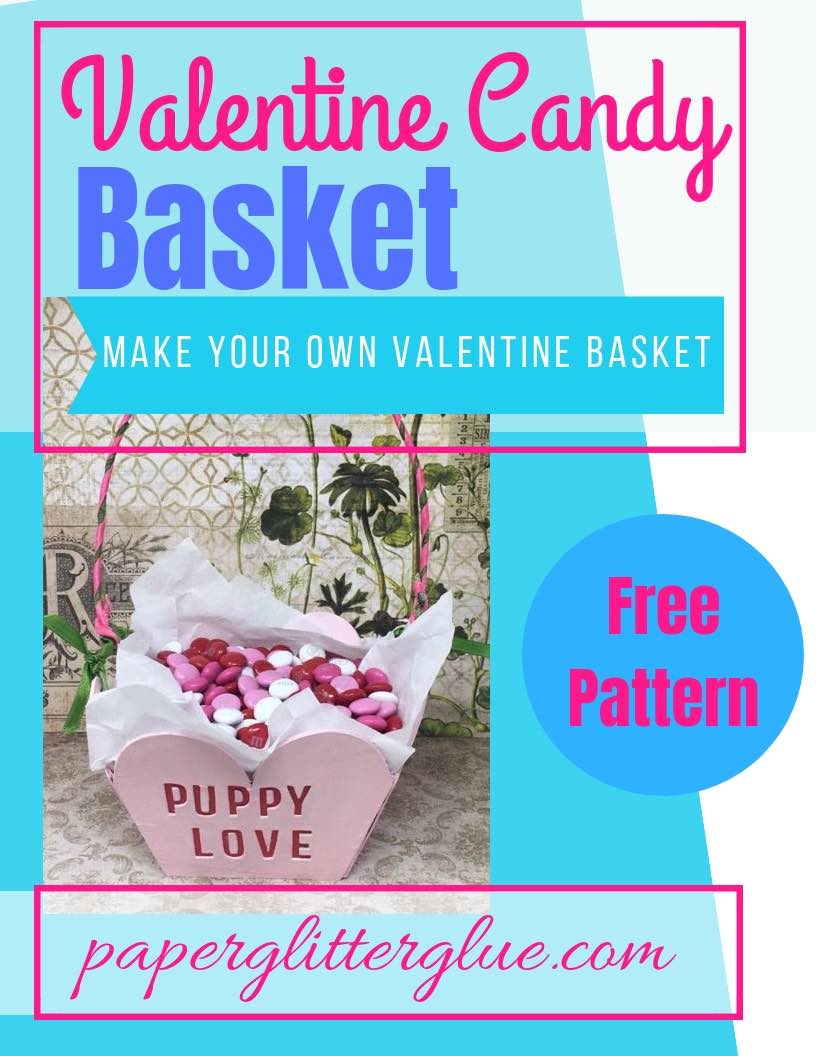
This DIY Valentine Candy basket is an fun heart-shaped cardboard basket inspired by the Sweetheart candies. You know, the candy with the cute little two-to three-word sayings that only come out around Valentine's Day. Each side of the basket has a different saying. It's easy to make the basket with the free pattern from my Paper Glitter Glue resource library. You can find the complete instructions below.
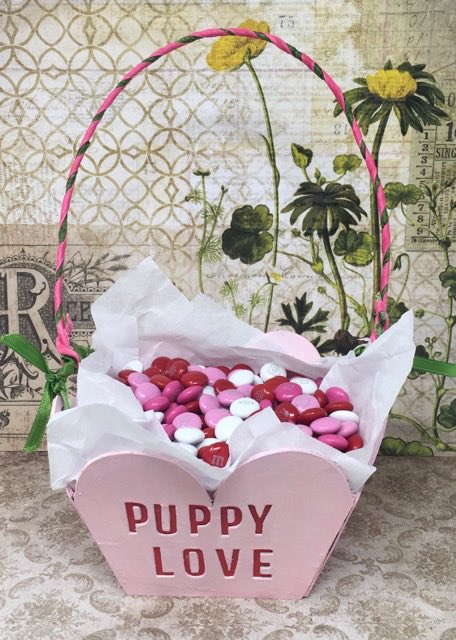
Puppy Love side of the Sweetheart Candy Basket filled with candy
History of the Sweetheart Candy by NECCO
First, a little history about the Sweetheart candies. Here's a updated article on the Conversation Hearts.
The Smithsonian wrote an article about Sweetheart candy in 2011 which noted that 8 billion little hearts were sold in the 6 weeks before Valentine's day. The candies that we know as Sweethearts were invented by the brother of the founder of NECCO candy company who figured out how to stamp the sayings on candy with red vegetable dye. At first they were scallop-shaped, larger and wordier. By 1902 NECCO settled on the heart shape and cut the words to 2 or 3. Generally there are about 80 sayings per year with 20 chosen around a specific theme.
Here are a few examples from a Reader's Digest article on the Sweetheart Candy themes:
Sweetheart Animal Attractions theme from 2007:
- COOL CAT
- PUPPY LOVE
- TAKE A WALK
- MY PET
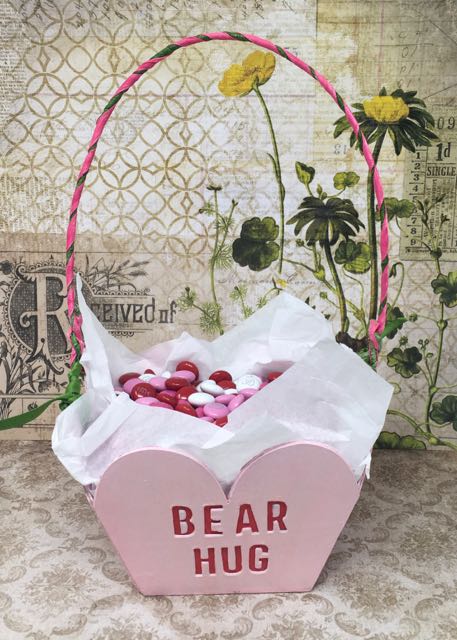
- BEAR HUG
- TOP DOG
- URA TIGER
- GO FISH
- LOVE BIRD
- PURR FECT
Sweetheart Now and Then Theme from 1999:
- YOU ROCK
- LET’S DO LUNCH
- I WONDER
- 1-800 CUPID
- AS IF
- LOVE ME TENDER
- MY WAY
- I GOT U BABE
- LET IT BE
- WALK ON BY
Ok, now here is the bad news. The NECCO company went out of business in 2018. Though the bankrupt candy business was purchased by the Spangler candy company in September 2018, that was not enough time to start production on the 2019 hearts. So the first time since 1902, there will be no Sweetheart candies for Valentine's Day. I hate to break it to you, but maybe it will save you from searching for the candies for naught.
Instead of lamenting the fact that the candy isn't available this year, you can make your own basket celebrating the cool candy with the imprinted sayings. Here's how you can make a basket for yourself or your loved one in time for Valentine's Day.
How to make your own Sweetheart Candy Basket
Sweetheart Candy Basket made like the Conversation heart candies loaded with candy, of course
This post contains some affiliate links for your convenience. That means if you make a purchase after clicking an affiliate link, I will earn a small commission but it won’t cost you a penny more. Click here to read my full disclosure policy.
Materials:
- Free Pattern - Design No. 43 - from the paperglitterglue library
- Cardboard or a heavy card stock
- Glue
- Painter's Tape
- Tim Holtz Alphanumeric Dies #660056
- Gesso Primer
- Distress Paints:
- Stem Wire or pipe cleaners
- Ribbon
- Candy
- Tissue Paper
Summary of Directions to make the Sweetheart Candy Basket
- Cut out the pattern - Design No. 43
- Score the cardboard
- Prime the cardboard
- Glue the sections together
- Paint the basket
- Paint the outside heart
- Cut out the Valentine saying of your choice on the outer heart
- Glue the outer heart to the basket
- Make a handle
- Line with tissue paper, fill with candy
First Download the Pattern - Design No. 43
Download the free printable pattern from the library. If you have already subscribed to my newsletter just go to the library to get your pattern. If you have not subscribed to my newsletter, you can subscribe with the form below. Everything in the library is free.
There are two zip files for the pattern - an PDF version and an SVG version. If you are using an automatic cutting machine, be sure to mark the score lines which I always draw as red dotted lines. And then always attach the score lines before you push the button to cut.
Cut out the pattern
In the 3-D scheme of things, this is a pretty simple pattern. I made it to fit on a 8.5 x 11 piece of cardboard because that is what I have on hand.
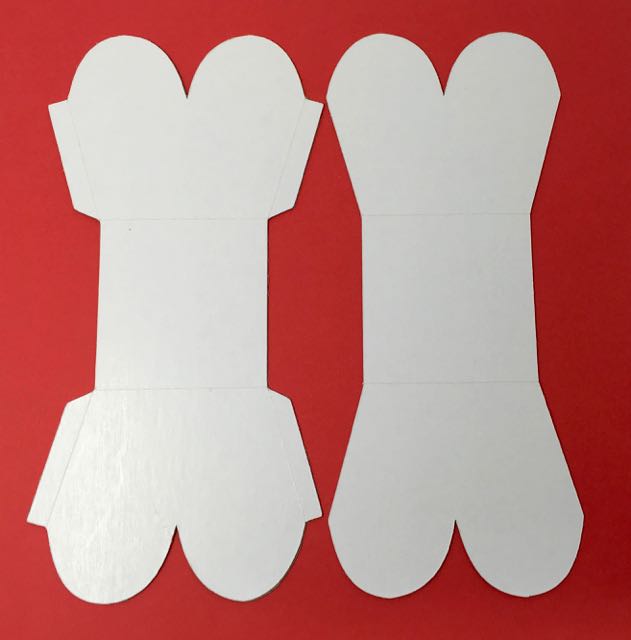
Pattern for the Heart-shaped candy basket with conversational heart sayings on sides
Please note that there are two different patterns in the file - one is the heart-shaped pattern and one is a scallop pattern.
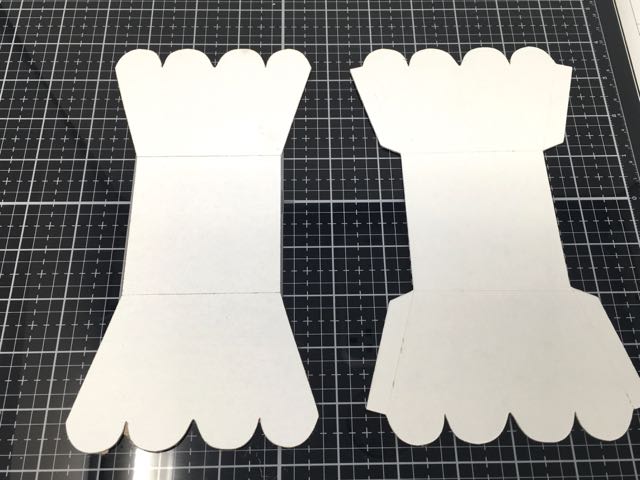
Scallop pattern for a candy basket
Score your cardboard
Even though I used an automatic cutting machine - the Cricut Explore Air 2 - to cut my cardboard, it doesn't score very deeply so I always re-score the lines so it will fold better.
Prime the Cardboard
I always prime my cardboard with gesso because it makes the paint adhere better. You can do it now or wait until you have glued the basket together.
Glue the basket two sections together
Now is a good time to glue the two sections together so you don't mess up the final paint layer with glue. After I apply the glue, I reinforce the sides with painter's tape and binder clips.
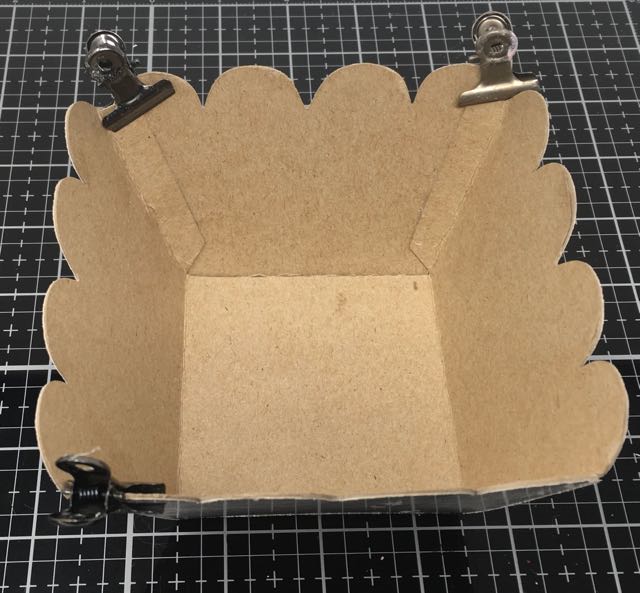
These little binder clips are very useful to hold the flaps together while the glue dries.
When you glue the basket together, it helps to use painter's tape and binder clips while the glue dries. I will prime the basket after the glue dries.
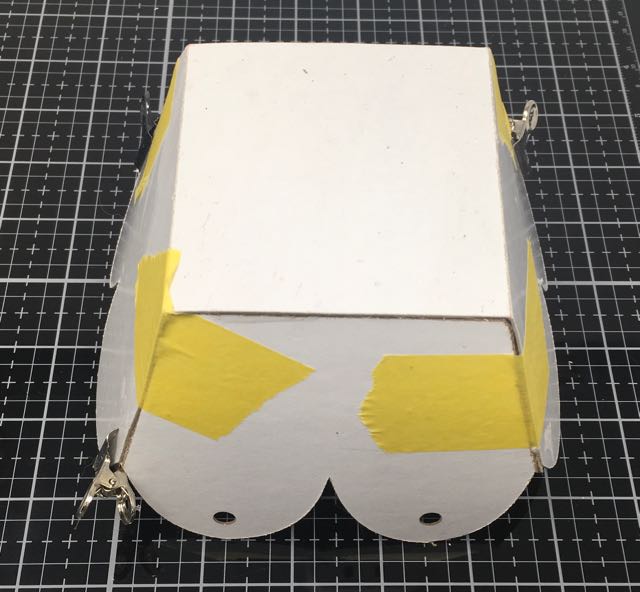
Now Paint the Basket and the outer side pieces
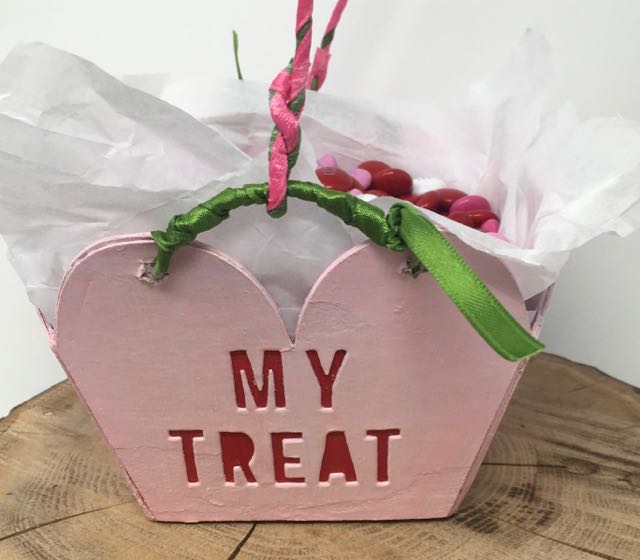
After you have the basket structure together, you can paint the basket. First I painted the area that will form the words with the red Distress paint called Candied Apple. Then I painted the visible parts of the basket pink - the inside and the edges.
Next paint the hearts that will go on the outside of the basket. Paint them the same color as the inside of the basket. Of course, I chose pink - this shade is called Spun Sugar from Tim Holtz Distress Paints. I think it is works better to paint before you cut out the letters because you may need some tiny pieces to glue inside the letters such as middle part of the O. It's hard to paint those tiny pieces so paint them before you cut out the letters. Also be sure to save those tiny pieces.
Cut out the Valentine's sayings
You can find many more classic Sweetheart candy sayings in the Reader's Digest article I linked to above. And then of course, you can come up with your own. But one challenge is trying to fit the saying on the heart. The next challenge is placing the letters in line. You may notice that my letters aren't spaced perfectly. That's a pretty common problem for me.
So here is what I did. I drew two parallel lines for my letters, then placed my letters on the cardboard and carefully taped them in place with the yellow sensitive Frog Tape. What happens is that they move a little bit when you do that. Then I ran them through my Sizzix cutting machine. I had to go back and forth to get the thinlits to cut through the cardboard, but it works.
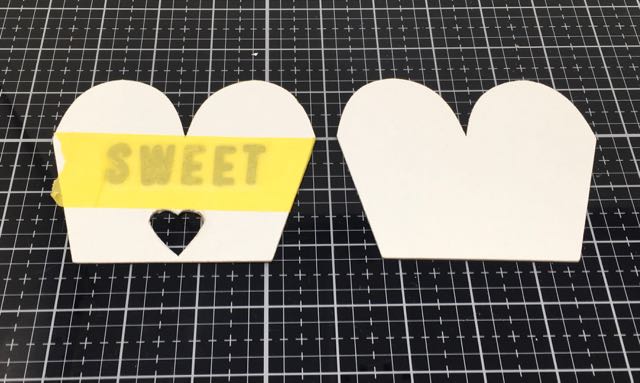
This is how I cut out the letters. I had to cut the heart by hand because I didn't have a good heart punch or die.
Now if you have an automatic cutting machine, you can choose your sayings and have the machine cut out your letters with the design software.
Glue the outer heart to the basket
Finally glue the outer heart to your basket. Glue in the centers of letters if you want. It looks better if you do. You can see where I did that on the Puppy Love and Bear Hug sides.
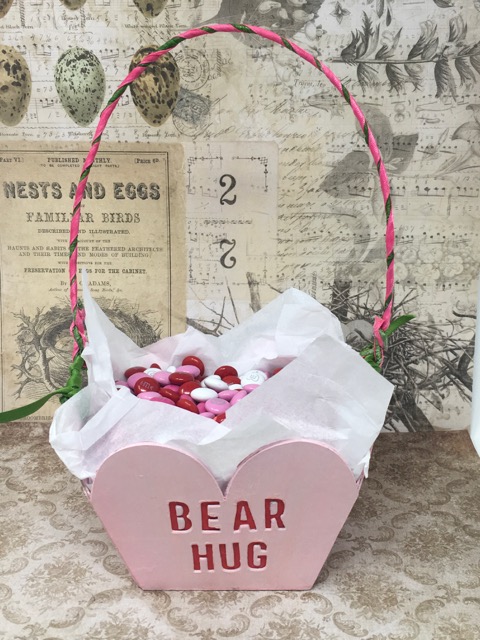
See where the centers of the letters "B" and "R" are glued in place.
Make a Handle for your basket
There are a number of ways to make a handle. Probably the most difficult one is the one I chose. Here's how I did it.
First punch two holes in top of the heart on two opposite sides of the basket. You can see that on one of the baskets above. Using stem wire or a pipe cleaner, make an arched bridge between the two holes. Wrap with ribbon if desired.

Stem wire used to make an arched bridge to hold the handle for the Valentine's heart-shaped basket
Then wire your handle to these two arched bridges on each side of the basket. Wrap with ribbon if you want.
You can see how the handle is attached to the candy basket
But really the way to do this is to hot glue the wire to the inside of the basket. No one is going to see the inside because you are going to tuck in tissue paper and candy. I wish I had done it this way.
Also I think cardboard as a handle would work nicely as well. You could double up two layers to make it more sturdy. And a flat strip of cardboard is easier to decorate with a bird or flowers or a butterfly. I didn't think of that until after I was done.
Once again, I made a brief video showing the steps on how to make this basket.
And finally, it's candy time
I searched all over for some pretty valentine candy. I finally found the pink and red and white M&M's. Line the basket with tissue paper and pour in the candy. Now watch everyone enjoy your delightful little basket and the treats, of course.

Jennifer
This is a very cute idea. You could really go wild with this. Thanks for sharing about the Necco Sweethearts. I shared that to fb. How sad when a company goes bankrupt. Hopefully, Spangler will keep their promise and keep them alive next year. Kinda wish I still had one of the old boxes. But, really this is a great basket. I like the vintage appeal it has 🙂
kath stewart
an adorable gift, thank you so much for sharing with us at Simon Says Stamp Monday Challenge, hugs kath xxx