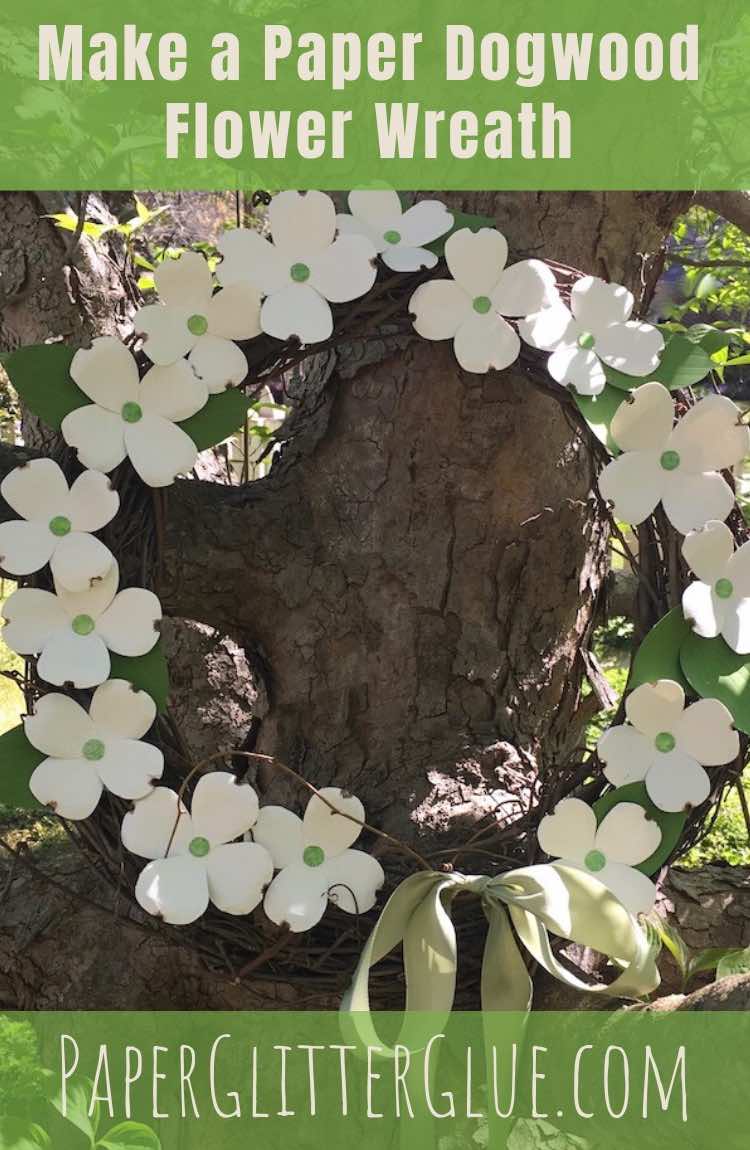
How to make an Easy Paper Dogwood Flower Blossom Wreath
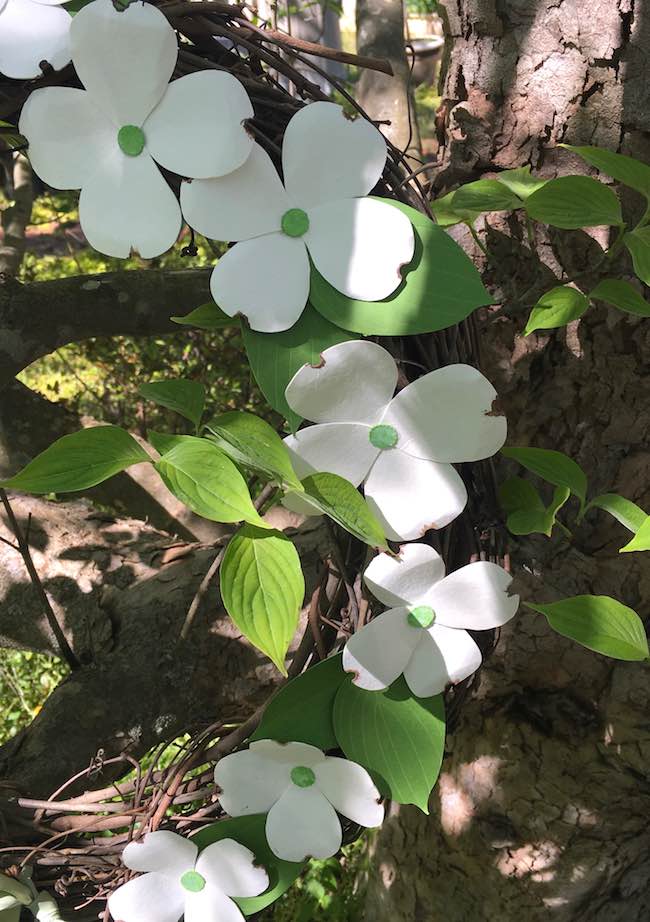
It's Springtime here in South Carolina. And that brings profusion of blooms including the Dogwood Flower blossoms. They cover the trees and are so beautiful. Surprisingly, it's an easy paper flower to make. So here are the instructions for the Easy Paper Dogwood Flower Blossoms for a wreath or garland.
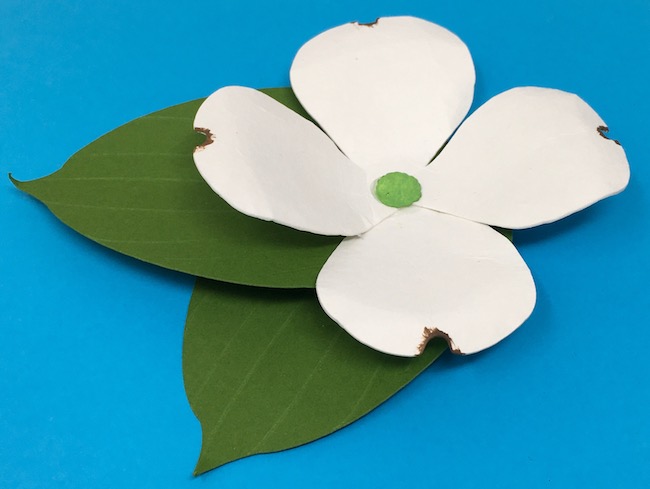
Dogwood blossoms are interesting in that what we see as the 4 flower petals is actually modified leaves called bracts. The flower itself is the greenish yellow center. The average size of a dogwood flower is about 3-4 inches so that is the size that I made the pattern. You can enlarge or reduce as you like.
Now is a good time to make a pretty paper flower wreath, isn't it?
Here's how to make this Spring Flower Wreath.
First, subscribe to my crafting newsletter where I keep you up to date on my variety of papercrafts. The password is included in every newsletter. Subscribe with the form below.
This post contains some affiliate links for your convenience. Click here to read my full disclosure policy.
Materials to Make the Paper Dogwood Flower Blossom Wreath
- Paper Dogwood Flower Pattern - Design No. 79
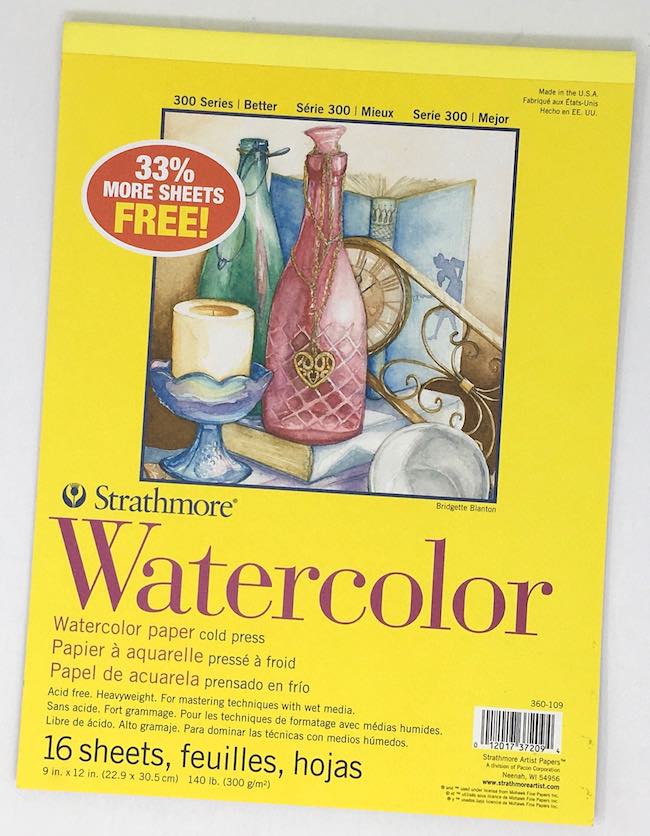
- Card Stock or Watercolor Paper
- Paint - Ground Espresso Distress Paint and Mowed Lawn Distress Paint
- Glue
- Grapevine Wreath - I used an 18-inch wreath
Instructions to make the Paper Dogwood Flower Blossom Wreath
- Download the pattern from the Paper Glitter Glue library - Design No. 79
- Cut out the dogwood blossom pattern
- Paint the edge of the paper dogwood petal as well as the center
- Gently bend the paper petals into a cup-like shape
- Glue the paper petals together, then glue the green flower center in place
- Attach leaves to the back of the paper flower
- Hot glue the flower to the grapevine wreath
Read below for more details on making the Dogwood Paper Flower wreath.
First, download the pattern from the Paper Glitter Glue Library - Design No. 79
The pattern in the Paper Glitter Glue library is in two different formats - as printable PDFs files and as SVG (scalable vector graphics) files for your electronic cutting machine like a Cricut.
To get the pattern, just type in the password to get access to all my files in the library. And remember all the files in my library are free. If you don't have the password, subscribe to my newsletter with the form below and you will be sent the password right away.
Second, cut out the dogwood blossom pattern
These files are easy to cut out by hand or with your cutting machine.
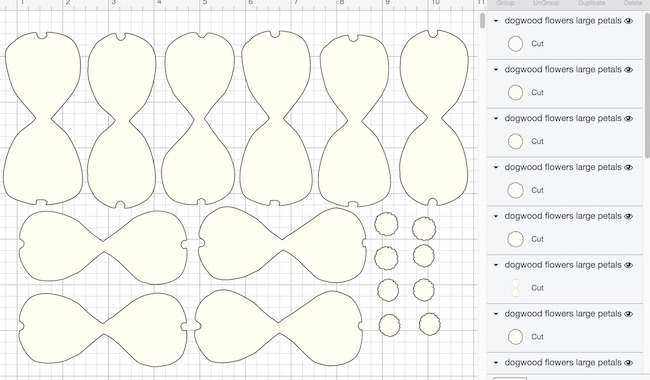
Since I use a Cricut to cut out my projects, I'll show you how the patterns look in Design space. There are 3 sizes of dogwood petals - large, medium, and small. Also the leaves are 3 different sizes.
Below are the large dogwood petals and centers.
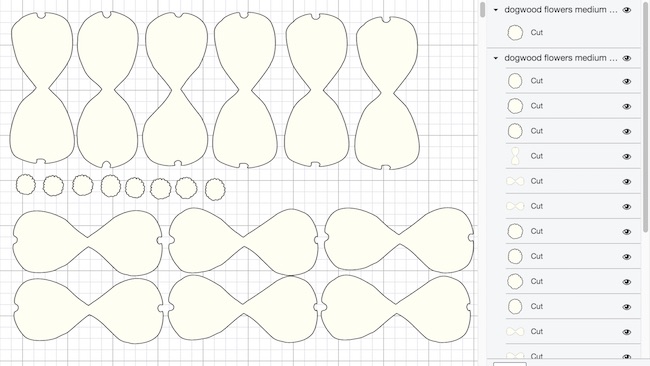
Next are the medium petals.
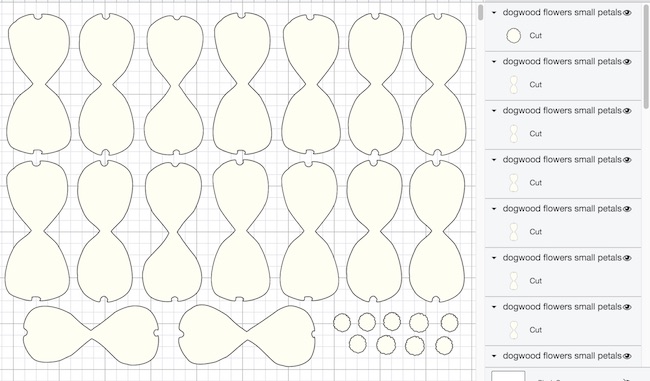
And here are the small dogwood petals.
And finally, here are the petals.
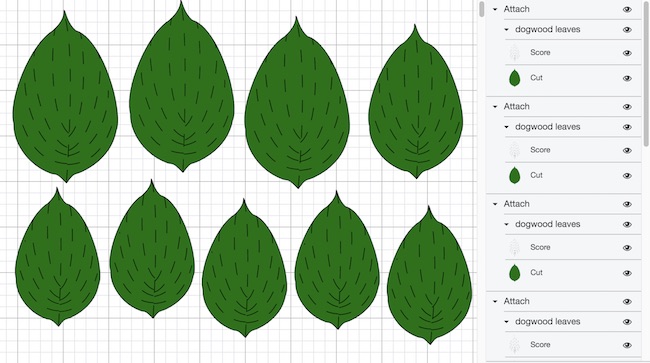
In Cricut Design Space, be sure to change the cut lines to score lines and be sure to attach.
Now what about the kind of paper for your petals?
I tried 3 different types of paper - 65# card stock, 110# card stock, and 140# watercolor paper. And the best paper? Watercolor paper worked the best for several reasons: it is thick, but still flexible to make the curved petals, takes paint well for the brown edges, and it has a nice ivory color. Plain card stock works, but watercolor paper really worked better.
Paint the petals
The indentations on the edge of the petals are a kind of maroon brown color. To simplify painting, I painted the edge with just one color - a dark brown. Just take the side of your brush and smear some brown paint. And if you apply too much, you can just rub it off. It still leaves a brown edge behind. See the edges below.
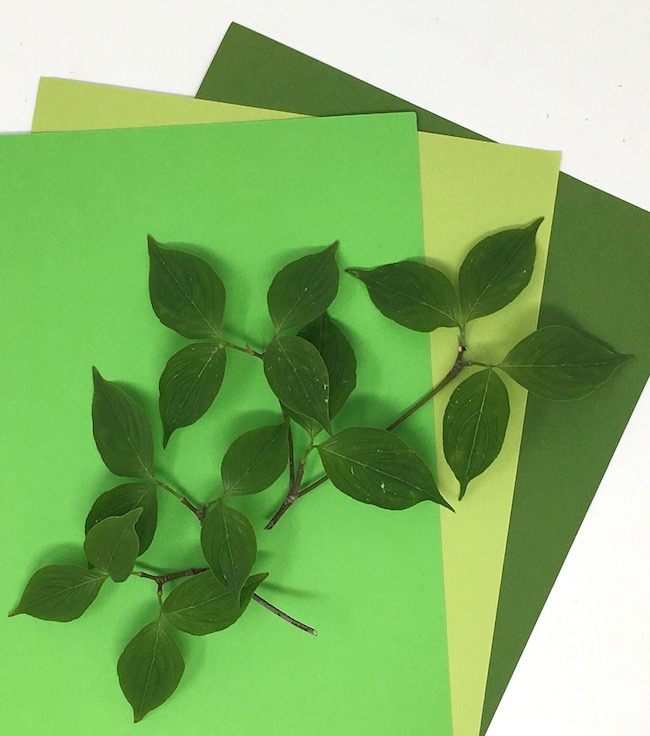
Fortunately, I found a good shade of green on card stock for the leaves so I didn't have to paint those leaves. The dark green worked perfectly.
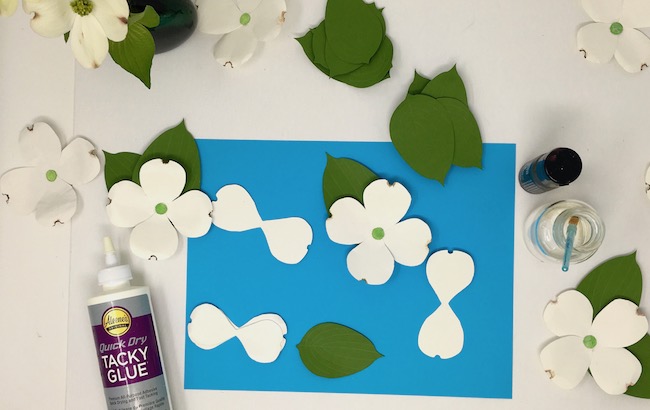
Gently bend the paper petals into a cup-like shape
Next bend each of your paper petals into a cup-like shape. Also bend the edge slightly backwards. You can lightly spray the petals with water to soften the fibers of the paper to facilitate the curves.
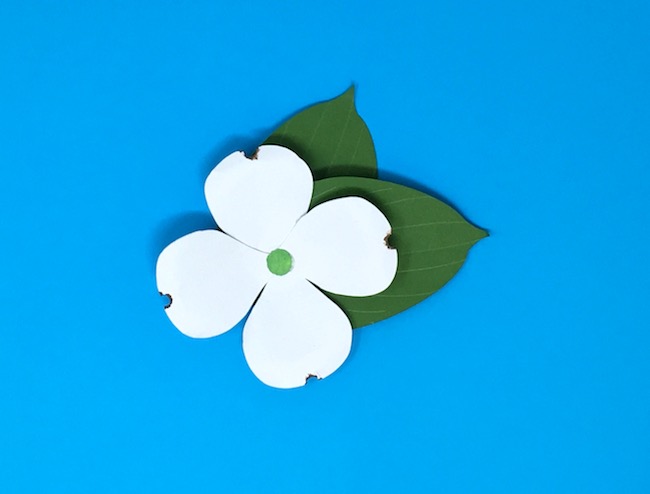
Glue the paper petals together, then glue the green flower center in place
Now glue the paper petals together at right angles to each other. Put a blog of glue on the back of one of the petals and glue them together. Then glue the green center in the paper dogwood flower.
Glue leaves to the back of the paper flower
Adhere the leaves to the back of the flowers. Try to vary the positioning of the leaves.
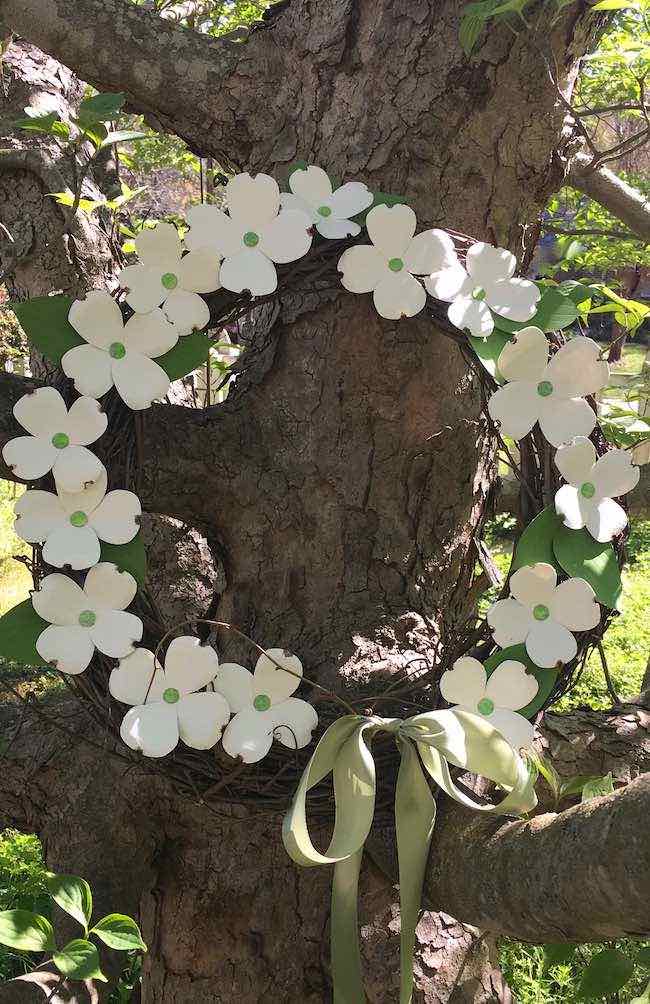
Attach the flowers to the grapevine wreath
Next arrange the flowers on the wreath and apply a spot of hot glue to the back of the flower/leaf combination.
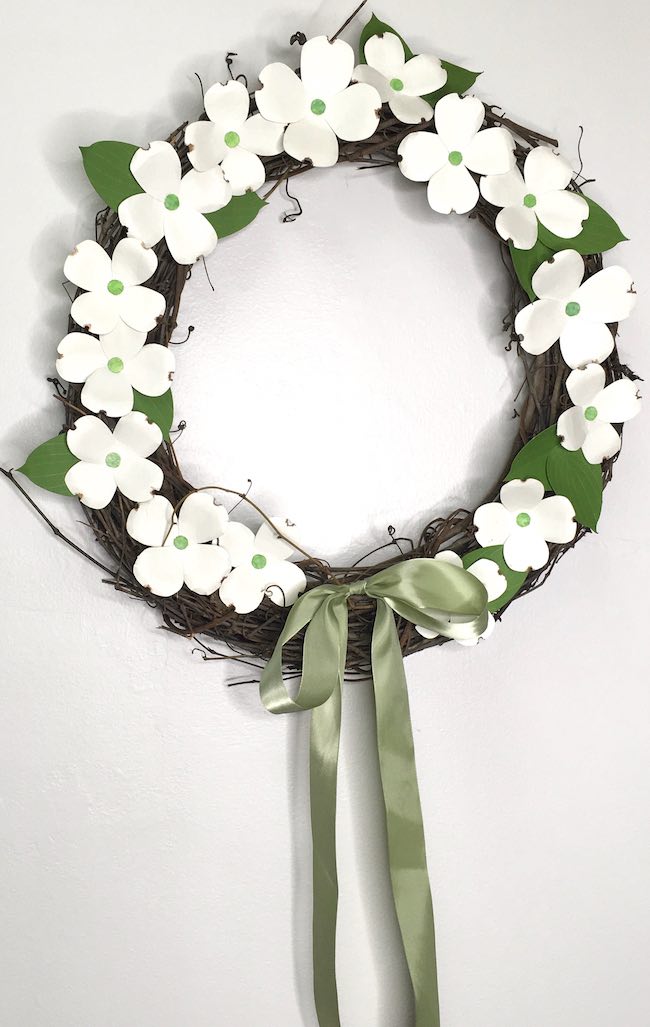
So now you have an easy-to-make Springtime wreath adorned with paper dogwood blossoms.
Questions
Do you have any questions about making this Dogwood wreath? If so, email me at [email protected] because I will glad to help.
Remember to subscribe to get the password for all the free files in the Paper Glitter Glue library.
Thank you for reading.
Lucy
Please feel free to share on Pinterest.
Katie Swigonski
This is so adorable. I may try and make one for my Mamma. I just have to see if I’m daring enough to try my hand at it first. But it’s so dang cute. I love it.
Lucy
I am so glad you like it, Katie. This is an easy craft - you can do it.
Thank you.
Lucy
Laney
Wow Lucy!
This is really beautiful! It looks so realistic I initially thought it was made with real flowers. Great job. And I love the simple green ribbon to finish it off. Nice job. Happy Spring!
Lucy
Laney, I've had the ribbon for over 20 years. Fortunately, I bought several rolls when I found it, but I still try to save it for something special. I am so glad you like the flowers. I was pretty tickled when I made them because they look like dogwood flowers to me. I need to figure out how to get more of a curve to the paper though. I may need to spray it with a little water to bend the paper better.
Thank you so much for your encouraging comment.