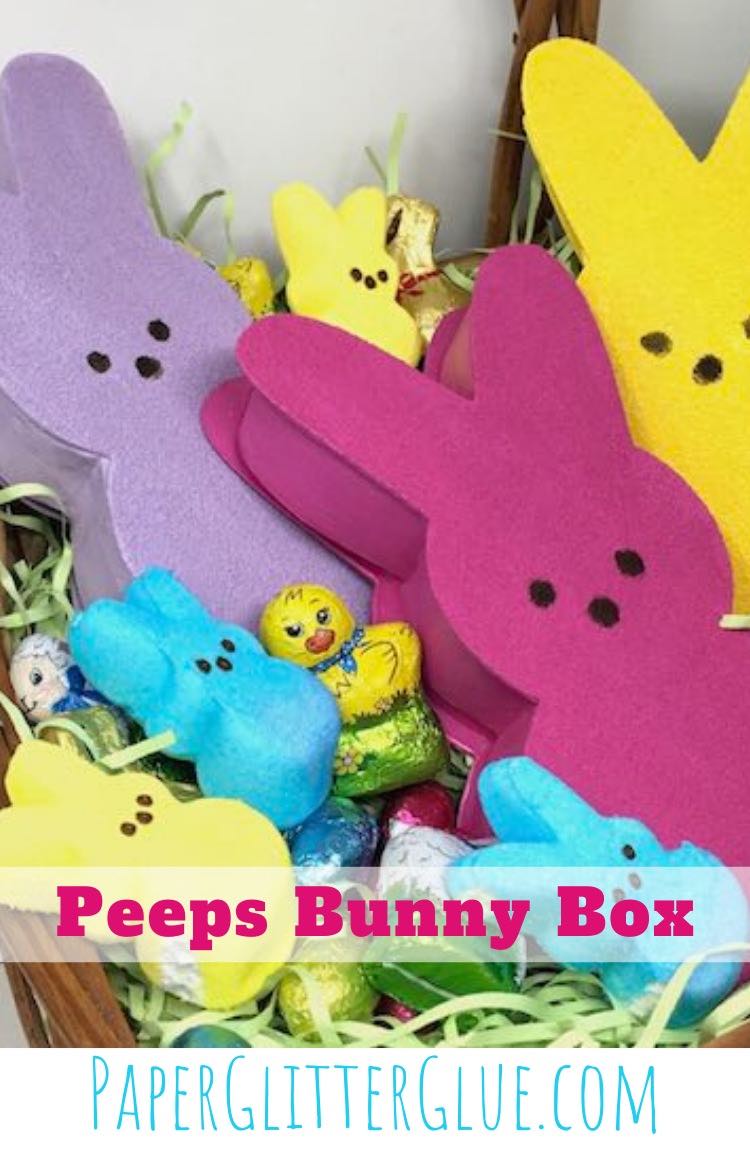
How to make a Peeps Bunny Box
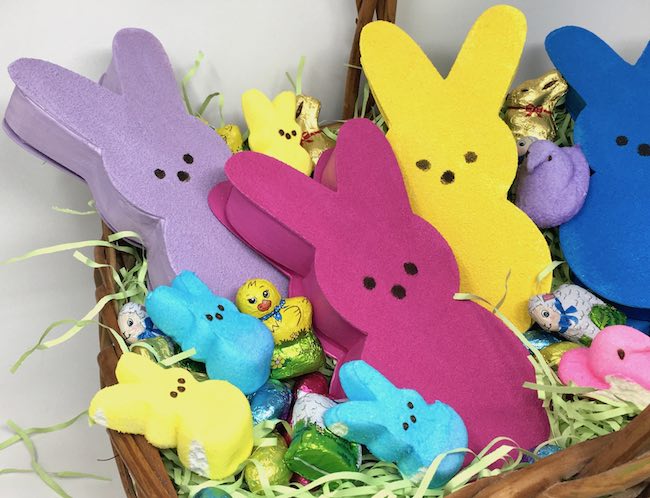
Peeps! What fun Springtime arrival. I love to see them in the stores this time of year. And here is a great craft for Spring that you can make at home - the Peeps Bunny Box. Just like the Paper Mache Surprise Eggs - this will delight the child in anyone.
Here is the complete tutorial to make the Peeps Bunny Box
First, you need to download the free pattern from the Paper Glitter Glue library. It's free as design no. 78 in the March 2020 section of the library - everything in the library is free. You just have to type in the password to get in the library. And how do you get the library password? Just subscribe to my newsletter with the form below and you will get the password right away.
Now that you have the pattern, here is the fun craft tutorial.
This post contains some affiliate links for your convenience. Click here to read my full disclosure policy.
Materials to make the Peeps Bunny Box
- Cardboard
- Card stock - 110# card stock for side strips
- PVA Glue - I used Aleene's Quick Dry Glue
- Paint
- Candy
Instructions to make the Bunny Candy Box
- Download the pattern - Design No. 78
- Cut out the bunny shapes and side strips
- Glue the side strips to the bunny shapes
- Prime and paint the bunny
- Fill with candy
Now let's go into detail on how to make this adorable Easter treat box.
Download the Candy Box Pattern
The pattern is available in 3 formats - as a printable PDF, SVG format for electronic cutting machines like a Cricut, and as a DXF format for desktop plotter cutters.
Remember you can get the pattern for free in the Paper Glitter Glue Library. It's design no. 78 in the March 2020 section of the library.
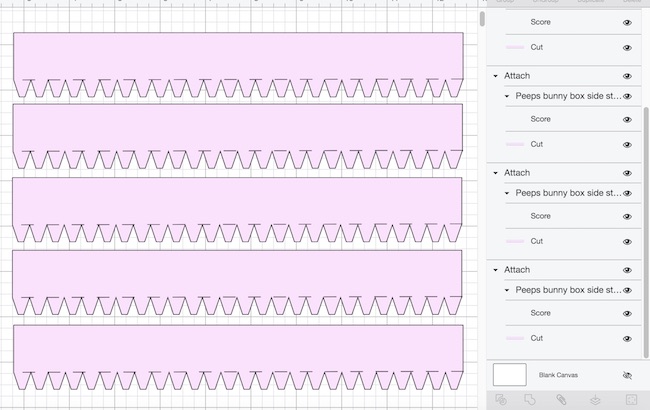
Cut out the following cardboard and card stock pieces
To make it easier to understand how to make the Bunny box, I separated the pattern into 3 pages. Here's a little blurb about each one.
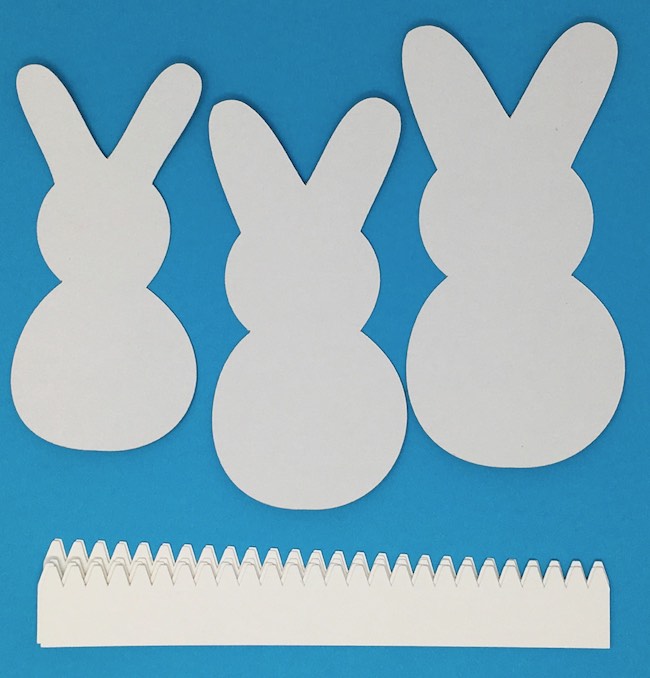
First, here are the larger top and bottom bunny pieces Cricut's Design Space. To make the boxes strong, I glued two pieces together meaning that I cut out 4 of these identical pieces. You don't have to do that, but it does help prevent the top and bottom cardboard from flexing as much.
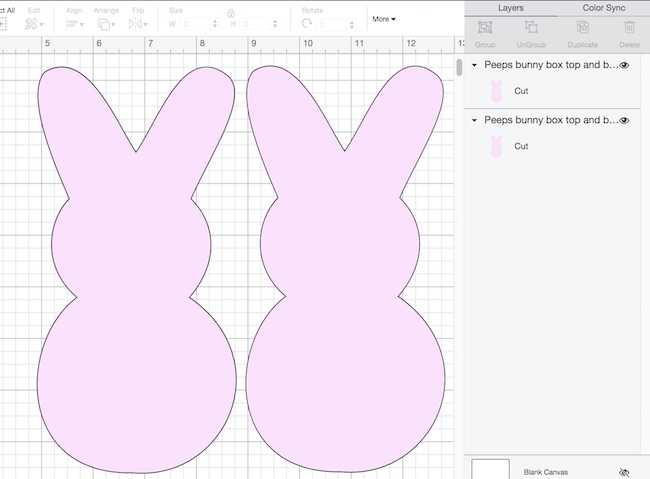
Please note that the bunny is not perfectly symmetrical - that's because the real true Peeps bunnies aren't symmetrical. They're marshmallows. One ear in particular is fatter than the other. It just makes the bunny a little more realistic. When you construct the treat box, be sure to keep that in mind.
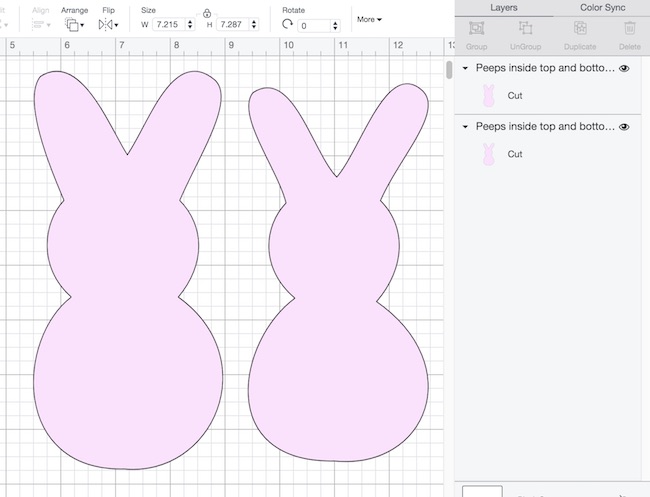
The inner part of the bunny box consists of two bunny shapes - one smaller than the other. That lets one side of the box fit over the other.
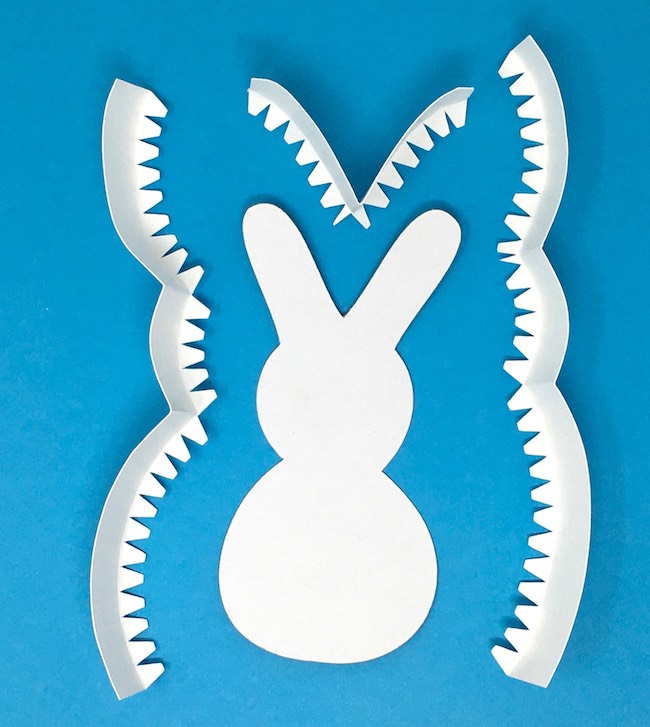
Make the Side Strips out of Card Stock
It is easier to make the side strips out of 110# card stock because it is so much more flexible than cardboard. But I did make one out of cardboard and it works, it's just harder to bend around the curved bunny shape. The card stock worked beautifully, but it is less sturdy.
Finally, cut out the side strips with tabs to go around the inner bunny shapes. When you cut them out on your electronic machine, a Cricut Explore Air 2 for me, be sure to change the cut lines to score lines and attach them.
Now, you have all these pieces to make the Bunny candy box:
- The larger bunnies are the top and bottom pieces. You need at least 2 of the larger pieces, but I duplicated them to make them stronger so they won't flex.
- A medium size bunny template for the top piece.
- A small size bunny template for the bottom side of the bunny box.
- Five card stock side strips with cut out tabs.
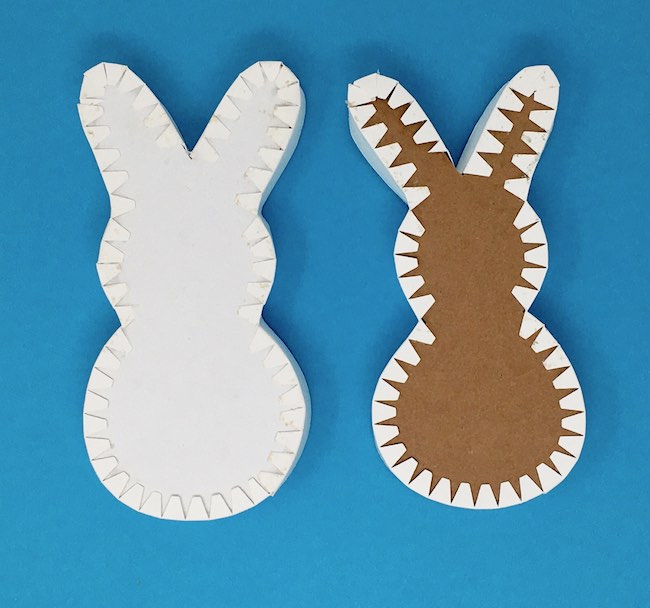
Glue the card stock side strips to the smaller inside bunny shapes
In almost every project, there is one step that is a little more difficult. This is the step. It's not really hard, just a little challenging. You need 2 ½ strips to make each bunny top or bottom.
First, bend the glue tabs along the score line on the card stock strip.
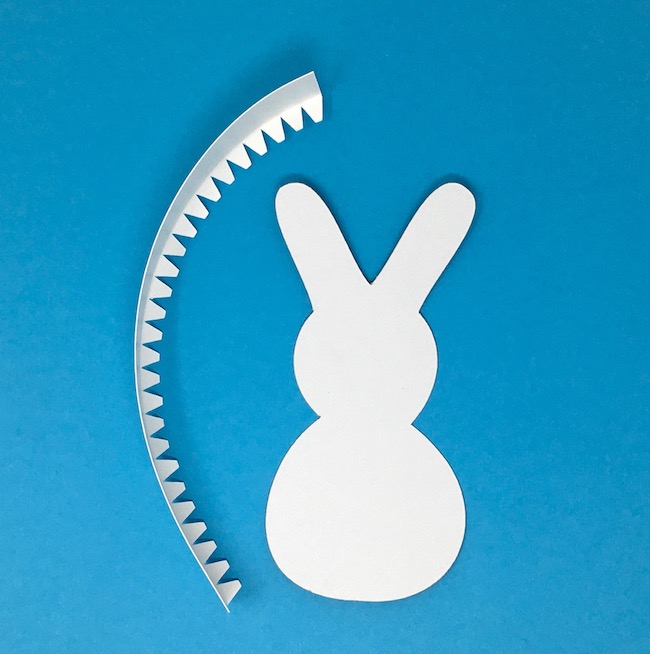
Next, place the strip next to the bunny shape. Arrange it so the bottom covers just over ½ the of the bottom of the bunny. Now, make a sharper line at the corresponding indentations on the bunny's head.
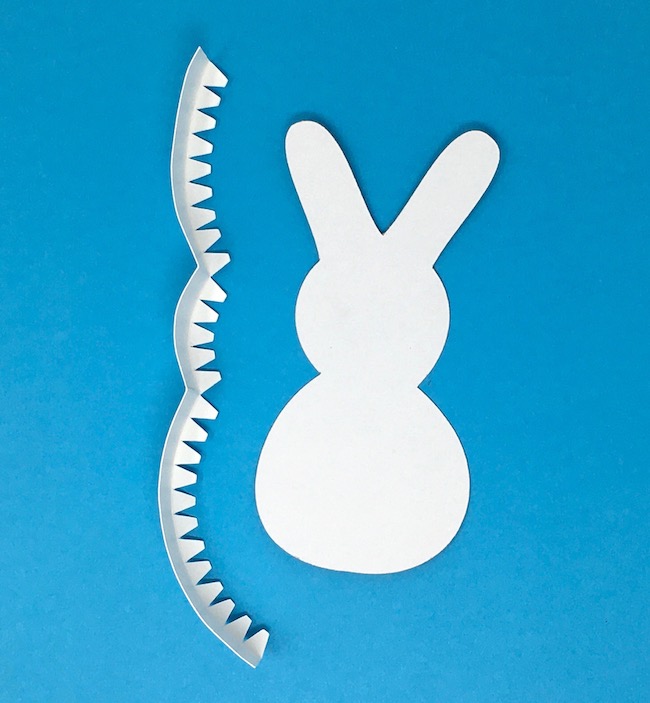
So you will end up with these three strips to make one top or bottom piece of the bunny.
Next, apply a nice thick layer of glue all along the glue tabs on the side strip. Finally, slide the glue tabs under the cardboard bunny shape. It's a little messy and obviously you need to be working on a non-stick mat so the inevitable glue on the bottom can be wiped away easily. You don't need a fancy glue here - any liquid white glue will work.
One thing that did help me was using a little piece of painter's tape to hold the starting point and ending point in place while the glue was drying. You can go ahead and add the second side strip on the other side while this glue dries. Fortunately, we are going to cover up the bottom where the glue tabs are so being messy doesn't matter here.
Last, glue the section between the bunny ears in place. Again, it helps to use a bit of painter's tape to top the ends of the bunny ear side strips in place while the glue dries.
Repeat for the other half of the bunny box
Set the first half of the bunny aside and do the same thing for the other half of the bunny box using the different size template piece. So below is what you have after finishing the two halves.
Make sure the larger half (the top half) fits over the smaller half. If it doesn't, tweak the sides by bending them a little so one half fits inside the other.
And finally, glue the top and bottom pieces to each half of the bunny box.
In the photo below the bottom half of the bunny box has already been glued to the larger bunny shape to form the base of that half.
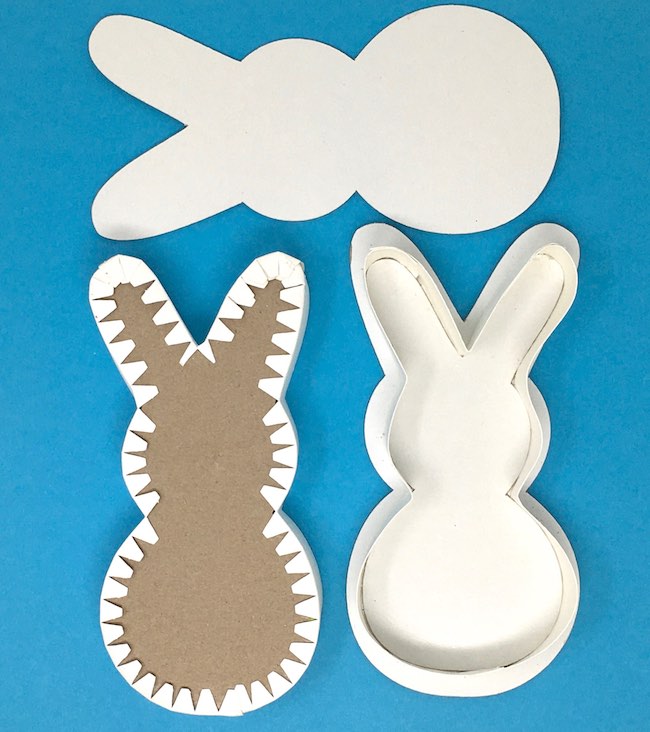
Next glue the other bunny to the top half of the bunny box.
Now, you have the Peeps Bunny Box structure complete.
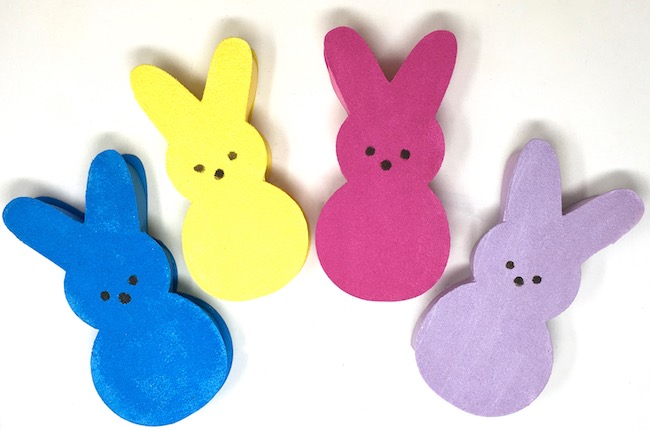
Prime and Paint the Bunny in Peeps colors (or not)
Most often, I paint all my projects with a primer coat before I use the final color. Your final color coat goes on easier and you don't need as much paint to give it a rich color.
For my bunny boxes, I chose to mimic the colors of real Peeps. One of my favorite colors is the pink Peeps box. Picked Raspberry from Ranger's Distress paint line works perfectly for this color.
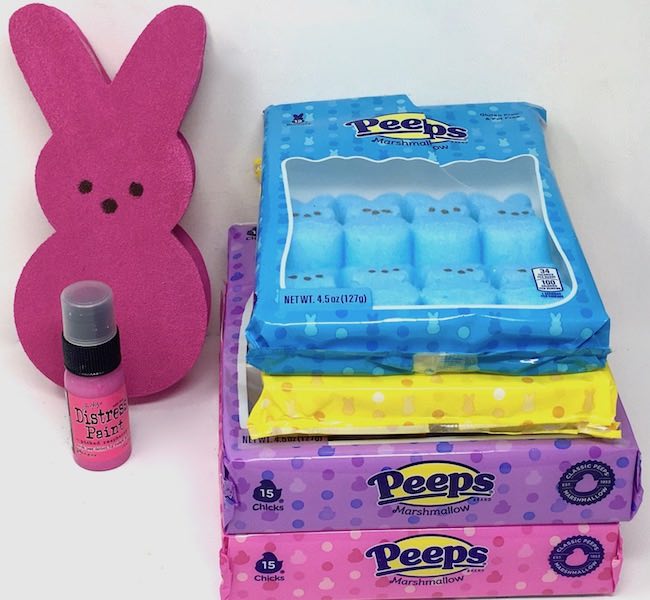
Here's a list of paints that I think would work well for Peeps colors:
- Yellow Bunny - Martha Stewart Sun-Kissed or Ranger's Distress Paint Squeezed Lemonade
- Purple Bunny - Martha Stewart Hailstorm or Ranger's Distress Paint Shaded Lilac
- Blue Bunny - Martha Stewart Blue Calico or Ranger's Distress Paint Broken China, but I'm not sure what paint I used. Broken China is probably the closest.
- And you need brown for the Peeps eyes and nose - I used the Ranger brand Ground Espresso
There are two other colors of Peeps - orange and green. I stopped at 4 Peeps bunnies because I like these colors the best.
If you look at the texture of Peeps, you see that they have a light sugary coating. So to give my boxes a little texture, I coated them with a layer of Mod Podge and sprinkled on a craft sand before painting.
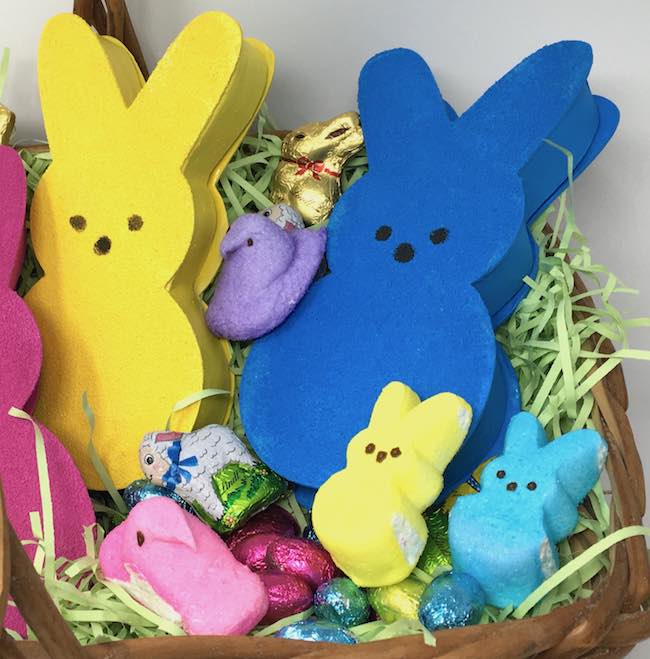
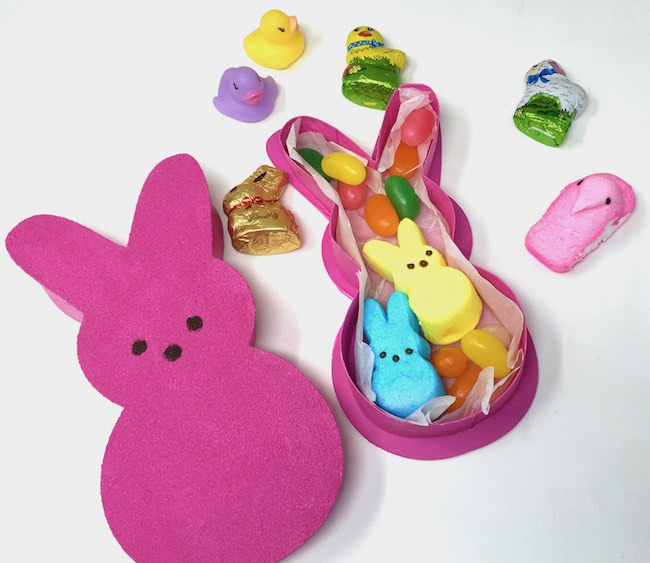
Fill Your Bunny Box with Candy!
This part isn't hard at all. Just put some little pieces of candy in the box. I cut a piece of parchment paper to line the bunny and then fit 2 Peeps bunnies inside and a few jellybeans. It's not fancy, it's not a lot of candy, but it is seriously fun. I think kids will love it. What do you think?
Let me know if you have any questions - write me at [email protected] for questions. I hope you will enjoy making this craft for Easter or Spring.
If you want to make other gift boxes, I have a whole series of unique DIY gift boxes you can make:
- Mini Llama Pinata Box
- Gnome Gift Box
- Shamrock Candy Box
- Valentine Heart Box
- Scotty Dog Gift Box
- Merry ChrisMoose Gift Box
- Happy Hollydeer Candy Box
- Valentine Llama Candy Box
Thank you.
Lucy
P.S. Please remember pin to your favorite Papercraft Pinterest board.
Diana
These are Wonderful!
Lucy
Thank you so much, Diana.
I hope to see your Bunny box.
Lucy
Emily
I just decided I need to do this!! It will be perfect for the kids for Easter.
Lucy
Very cool. I hope you have fun making them.
Lucy
Shirl Lundstrom
So adorable! Guess it is time to put my Christmas Gnome box away and make a peep box!!!
Lucy
Thank you, Shiri. I am so glad you like the Peeps Bunny Box.
Lucy