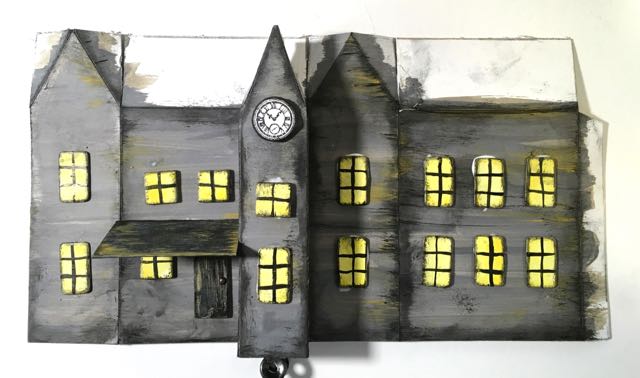
Here's Halloween House no. 11 - the Haunted Boarding House. It's called that because of the many windows in the back that looked like a boarding house to me. This house is the identical pattern at Halloween Paper House no. 10, but with the tower to one side and a porch.
The free pattern for these two little cardboard houses is in the Paper Glitter Glue library under 13 Days of Halloween Challenge House No. 10 and 11. The pattern is available in both PDF and SVG formats- Design No. 23.

Two Halloween House variations for you to try. You can pick much brighter colors (but still spooky) than I did.
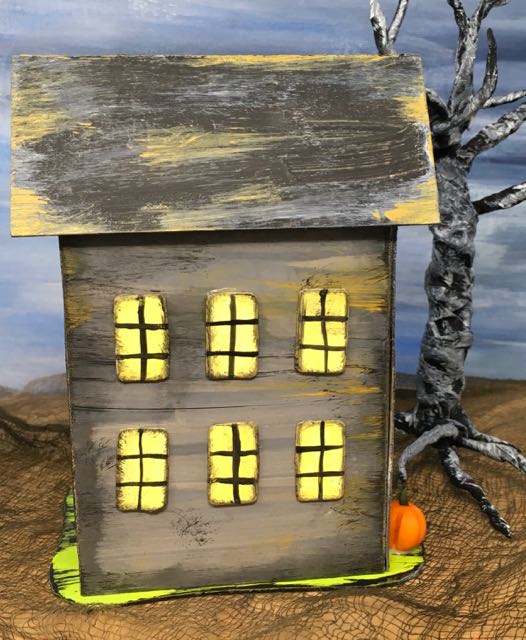
All the windows made the little house just look like a Haunted Boarding house to me
This post contains some affiliate links for your convenience. Click here to read my full disclosure policy.
For these instructions, mostly I'm just going to go over the directions for the porch since everything else is constructed the same as for the previous Halloween house. The addition of the porch adds another fun, but slightly spooky detail to the front of the house.
Jack's House below is the inspiration for this house. The Haunted Boarding House is a smaller version of Jack's house.
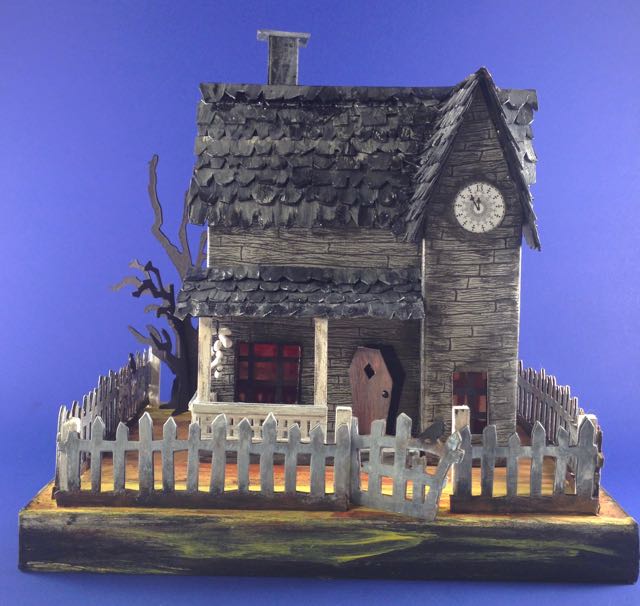
Jack's house - inspiration for the Haunted Boarding House
COLOR CLASH
I'm not sure about the colors in this house. I didn't realize that the orange yellow shade of Fossilized Amber Distress Paint on the roof and the lemon yellow of Squeezed Lemonade and the green yellow of Twisted Citron were going to clash. It should have been obvious just from reading the names of the colors of these Distress paints, but I didn't really notice until I took the photos. I think I can fix it with some color changes on the roof since I really can't change the base or the windows easily.
How to make the Porch on the Haunted Boarding House
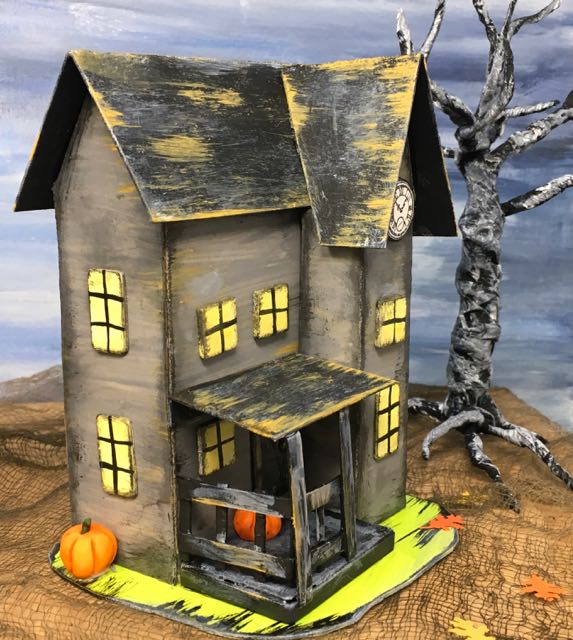
Porch view of the Haunted Boarding House
Before you construct the house, it should already be painted.
First - here is the construction sequence that I think works well. You can glue the porch roof and tower on before you glue the house together, but do a test fit to make sure the tower is located to match the roof cutout.
- Glue the house together
- Add the main roof
- Glue the side tower on
- Now add the angled roof to the side tower
- Measure and make the porch floor
- Glue the porch roof on
- Adhere the house to the base
- Add the porch floor to the base
- Cut porch railing and supports
- Glue supports to the porch
A little more detail in constructing the Haunted Boarding House
Glue the house together
Glue the cardboard house together as usual.
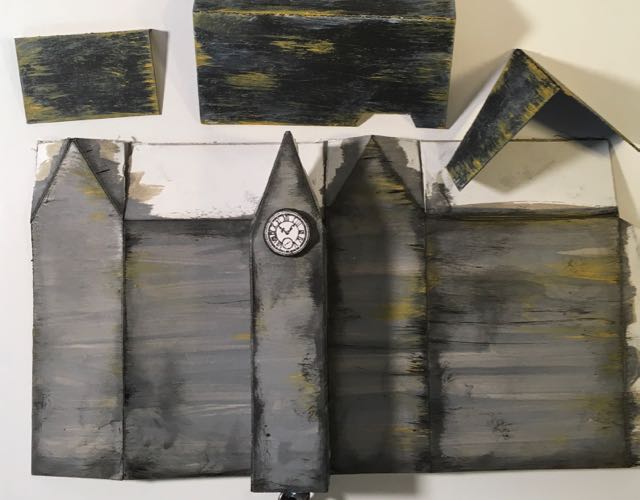
Painted cardboard pieces for the Haunted Boarding House - Halloween Paper House No. 11
Test fit the porch roof and the tower to decide on window placement. I use a binder clip to hold the tower together temporarily
Add the main roof
Add the roof next because you need to place the tower in the proper location with the cut out notch. Locate the cut out on the roof so that there is the same amount of overhang on both sides of the house.
Glue the side tower on
Now you can glue the side tower on, fitting it between the cut out notch on the main roof. Sometimes you have to trim the roof a little bit to fit the tower in place.
Now the angled roof to the side tower
Next, glue the angled roof of the side tower to the main roof. Apply a bead of glue to the angled edge of the roof and to the tower itself. Hold in place. Sometimes I tape it in place to make sure it adheres well. But peel the painter's tape off carefully so it won't pull up the painted surface.
Measure and make the porch floor
This is a good time to make the porch floor. I did not include that in the pattern because it can vary if your tower isn't exactly glued on straight or if the tower measurements are a little different. Place your house on a piece of paper and trace the outline of the house and tower. Cut out a rectangle based on this tracing. You want the to extend just a little bit past the tower. My porch floor is about 2 inches wide and 1.25 inches deep. Yours should be close to that.
Now cut out 2 pieces of corrugated cardboard the same size. Glue them together. Then cut out a strip of cardboard to go around the edge to cover up the corrugated cardboard. Paint the porch floor.

Another view of the porch on the Haunted Boarding House Halloween Paper House
Glue the porch roof onto the paper house
I like to glue the porch roof on at this step. Figure out how high you want the porch to be. I just guess. Also try to figure out what kind of angle you want on the roof. I like a slight downward angle, nothing extreme. (It's not like we have to worry about the rainwater draining properly.)
Adhere the house to the base
Now this step may seem out of sequence, but it is easier to add the porch floor when the house is already glued to the base. So you want to do this step first.
Add the porch floor to the base
This is a good time to glue the porch floor in place.
Cut porch railing and supports
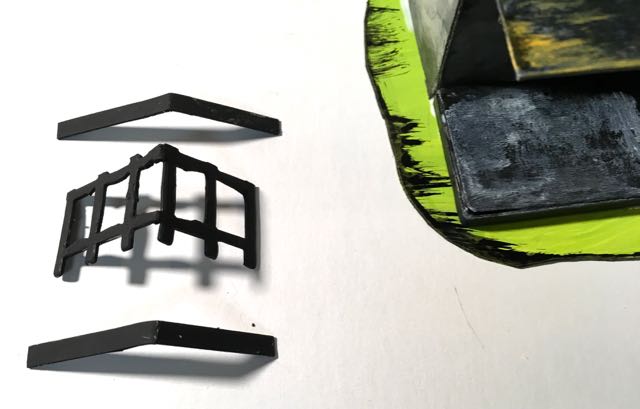
Make the porch railing with a piece of fencing. Cut the top off the fence. Reinforce the railing with strips of cardboard
Now make the porch railing and supports. I used a piece of fencing cut from a Tim Holtz Village Dwelling die as the railing. I cut off the top of the fence because it was too tall. Then I just glued some strips of cardboard to the fence to make the railing. Finally, I cut the porch supports and glued them in place by bending a small tab to glue to the roof. You can use small pieces of dowels for the porch supports, but I think this is easier.
Glue supports to the porch
Finally, I cut the porch supports and glued them in place by bending a small tab to glue to the roof. You can use small pieces of dowels for the porch supports, but I think this is easier.
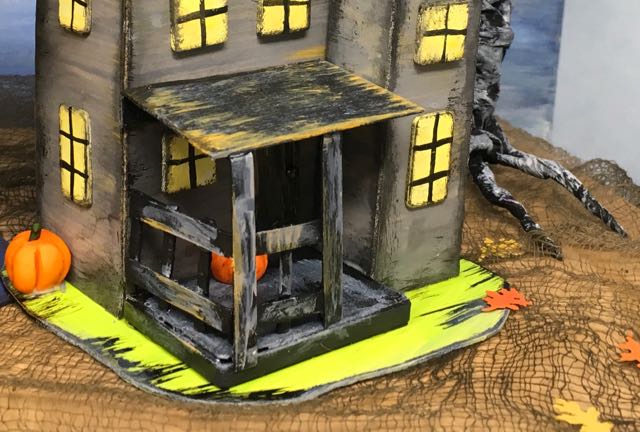
Close-up of the Haunted Boarding House porch supports
And that's how I made the porch for this little house. Again, you can choose better colors than I did. But you can still see that it is a creepy little paper house for Halloween.
Halloween Paper House No. 12 is a simpler house for our next-to-last house. It's the Coffin House and it's much more whimsical than these houses - more like the first set of houses I made. I think you will like it. I figured after the tower houses, a simpler house might be good.
Thank you for reading.
Lucy
P.S. If my directions aren't clear or the patterns are kind of wonky or the files won't download, please let me know. You can comment below or email me at [email protected]. Or you can request to join my private Paper Glitter Glue Facebook group where it is really easy to ask questions, get answers, and find inspiration. Thank you again.


Leave a Reply