How to Host a Successful Craft Party
I got the idea to host a craft party several years ago I noticed that our holly trees were heavily laden with gorgeous red berries. It gave me the idea of a hosting a wreath-making party. My brother worked in landscaping and was able to gather baskets of fresh greens so my first wreath-making party was born. That was my first ever craft party.
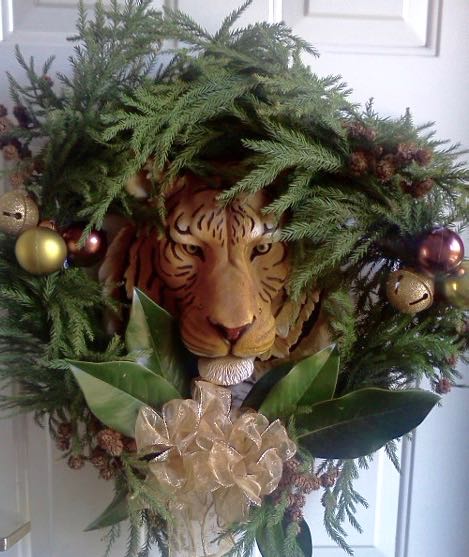
One of the first wreaths made at my wreath making party. I live in Upstate SC so yes, that is a Clemson tiger.
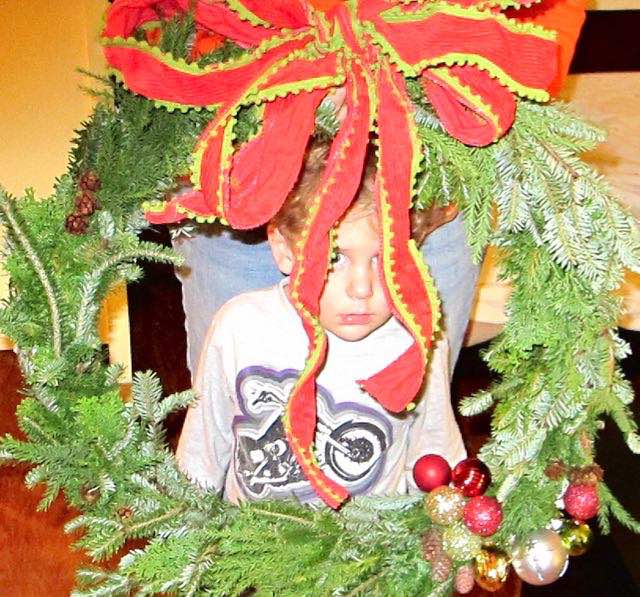
Another wreath made at my first Wreath-Making Party several years ago. Didn't she do a great job? Her child is hiding behind the ribbon.
I hosted that party for several years successfully. When I decided to discontinue the wreath-making party, my friends were so concerned that they actually took over and continue to hold it yearly.
But I still love to host craft parties because I love the idea of getting together and doing something other than standing around trying not to embarrass myself in front of the food table (I love to eat). And I always try to make a craft that people want to have.
Birth of the First Annual Little House Making Party
So last year the first Little House Making Party was born. Because a lot of my friends work in the Emergency Department and often work weekends, I host the party over two nights - Sunday and Monday. That's the plan for this year's party as well - the Second Annual Little House Making Party. I'm sure you're not surprised that making little houses would be my choice.
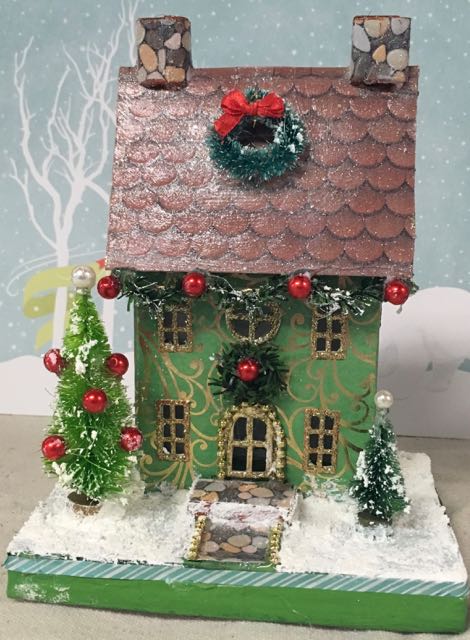
Just one of the beautiful little Putz houses made at the Little House Making Craft Party. Advice on how to host a craft party.
What is involved in hosting a party like this and making it successful?
I'll break it down for you. You can download my checklist from the Paper Glitter Glue library as well. Just subscribe on the form at the bottom of the post and you will get the password to the free library where you can download the checklist as well as lots of other cool patterns and tutorials.
-
Who are you inviting?
Friends? Family? Adults only? Kids only or kids with their parents? I intended for the Little House Making Party to be for adults, but so many people brought their kids who enjoyed it that I am expanding it for families with children.
Also I invite both my friends and family and co-workers - both adults and children. I use this party as my thank you and Christmas gift to people I love so it is open to everyone.
I suspect most of you would narrow your the scope of the party to make it easier - at least for the first time.
-
Choose a Doable Craft
For example, when making wreaths instead of wiring everything on, we hot glue stuff on the wreaths. That makes it so much easier and faster for everyone. Same thing with the little houses. While I rarely use hot glue on the Putz houses that I make, you can't complete a little house in an hour without hot glue. So I have multiple glue guns available at the Little House Making party.
Still I would consider these two crafts fairly involved. For your first party you might want to choose simpler crafts.
-
Choose Something that People Would Like to Have
This is important to me. I want people to make something that they want to have at their house. That's why I choose these more involved crafts, but I am willing to do the rather extensive preparations to make their projects successful. If you don't have time, choose something much less involved like making a Christmas ornament which is so much easier.
At Christmas time everyone loved making their own wreaths with fresh greenery, but you could have people bring a pre-made wreath or an artificial wreath and add some fresh greenery and embellishments.
And my friends seem to love the houses that I make and they were enthusiastic about making their own houses last year.
-
Make a Plan - First the Space
You have to ask yourself if you think you can pull it all together in time because there is definitely a different kind of prep involved in a party like this. It's not just a matter of sprucing up the house. It's a matter of finding the space, the tools, the supplies, prepping the craft, figuring out if it is going to be messy etc.
The first year of the wreath-making party taught me a lot about holly berries - namely that they don't want to stay on the branches. They launch themselves all through the house and they make a serious red blob when stepped on. Nandina berries are even worse. I don't have any carpets (allergies, you know) so that wasn't a concern, but it would be at a lot of people's homes.
Fortunately, I have a large open basement where I craft so it's perfect for this kind of crafting even with red berries on the floor.
-
Make a Plan - Conside the Time involved
Now you really have to figure out how much time you have before the party to get stuff together. Since I use this party as kind of a gift to my friends and co-workers, I go overboard. I set aside at least 2 weeks before the party to devote all my time to working on the party and even the party invitations. I'll write about the invitations in the next post. I always handcraft the invitations so they are always different and fun. Even the people who are not able to attend will have a keepsake.
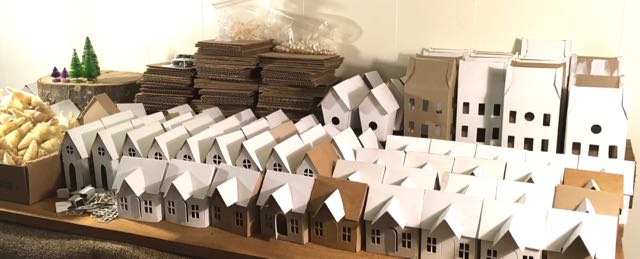
I premade all the little Putz houses for the Little House Making craft party so people could spend their time decorating their little houses
For last year's party I premade over 100 houses so people could concentrate on painting and decorating their houses rather than working on the actual construction of the house.
Someone asked me last year how long it took me to make a little house and I told them about a week. This person looked at me, "And you expect us to make a house in an hour." I laughed, but I had already done all the time-consuming work - cutting out the patterns, windows, doors, gluing the house together, making and hand painting chimneys, dyeing bottle brush trees, made and primed all the bases, gathered up decor. Yes, I did figure people decorate their houses in an hour. Most were able to.
All the chimneys were assembled and painted and ready to go for the Little House Making Craft Party.
What if you don't have that kind of prep time or the inclination to do all that? You can buy little houses already made at any of the craft stores inexpensively. Your friends can either buy their own house or make a small donation to the craft supply fund. I don't charge anything because this as my Christmas gift to my friends.
But prep time is a serious consideration. Remember you always have a choice of making a simpler craft.
-
Invitations
I like to get the invitations out early so people can plan. You know how busy everyone is these days. In fact, for my Little House Making Party where we make Christmas houses I host it before Thanksgiving because everyone's weekends get so booked up in late November and December.
I've made lots of different kinds of handmade invitations the past few years. But that's a whole separate post.
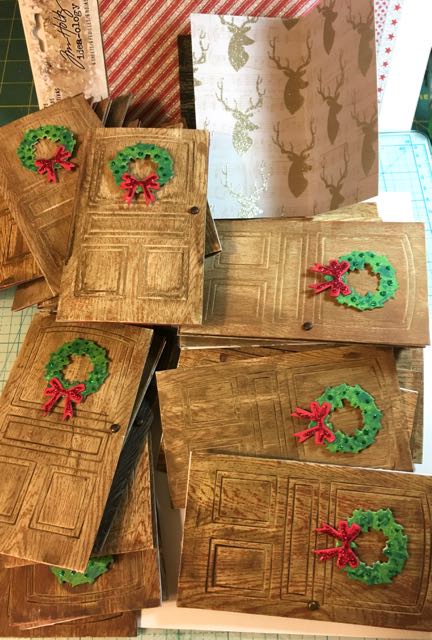
Here are a few examples, but I will go into more detail in the next post which is about making invitations.
This is one of my very favorite invitations. I made 30-40 little logs to hold the invitation for one of my craft parties. Then I added a little bit of candy as well.
I sewed lots of invitations for the Wreath making craft party one year.
Inside view of one of the wallets for the craft party. One side held a little map and one side held the actual invitation
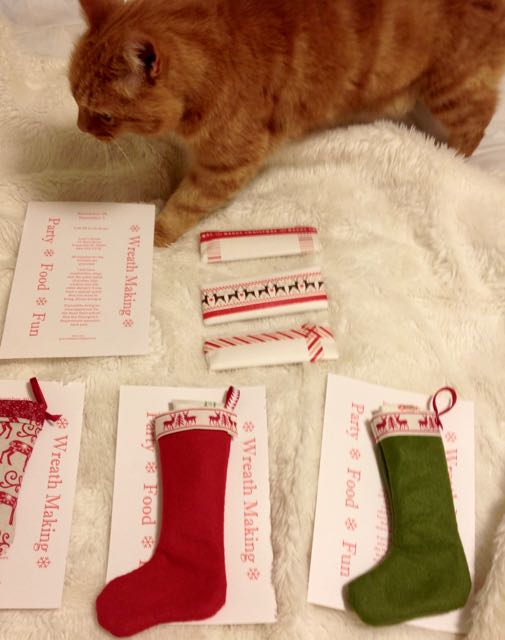
My cat, Daisy, photobombing the Christmas stocking invitation to the Wreath Making craft party. The little wrapped presents are candy bars which went into each stocking. I mailed them in padded envelopes.
-
Food and Drink
If you are going to be crafting, the food and drink need to be simple and not too messy. You don't want people spilling stuff on the crafts. Since I have the basement for crafting, I use the upstairs for food and drink. That seems to work well.
-
Set-up
Think about how people are to make the craft. What goes first? Is there a bottleneck? How do you spread the project out so people can work on the same thing at the same time?
-
Craft Tables covered with drop cloths and brown paper
Since my craft parties are pretty elaborate, the set-up is also pretty elaborate. I have several long tables covered with drop cloths and brown paper. The craft supplies are arranged in order - the first table holds the little houses which guests choose from. Usually I make about 3 different houses - the Tim Holtz Village Dwelling house, Tim Holtz Village Brownstone (which looks like a church) and some Eileen Hull birdhouses.
Also if you are going to have children crafting, you need a shorter table where they can work.
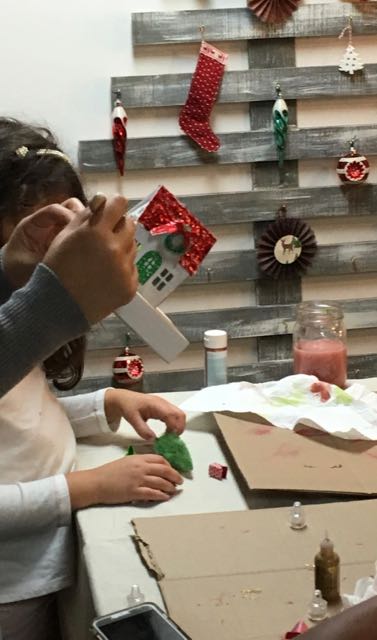
One of the shorter paint stations at the Little House Making craft party where children could paint
I ask people to only work on one house at a time. I don't care if they want to make more than one, but I hope they finish one house before moving on to another.
-
Paint Station
Then comes the paint station where I put out bottles of paint and brushes and water and paper towels.
You may recall that my favorite brand of paint is the Tim Holtz Distress Line. Well, I hide that paint during the party. I use cheaper paint for the party - not the good stuff. Just sayin'.
-
Dry the little houses
I have fans and an old stove to help dry the paint on the houses. I get the stove barely warm and put the houses on a cookie sheet for a few minutes.
After the house painting, people can paint the cardboard base and glue their little Putz house on top.
-
Glue Gun and Embellishments - The Decoration Station
This is where the glue gun comes in handy - the decoration station.
Then they start choosing embellishments for their little houses - Santas, snowmen, trees, baubles, candy canes, fences, snow, greenery, ribbon - whatever they can find that suits their fancy.
-
Clean Up
Make sure you have lots of trash cans about to catch the paper bits, glue blobs, all sorts of debris.
And for my craft party I make sure there are lots of hand wipes and paper towels around so people can keep their hands clean.
-
Post Party Review
Finally after the party review what worked and what didn't because you probably want to do this again. At least I hope you want to do it again because you and your guests had so much fun.
Ask yourself the following questions:
Was the craft too easy? Too hard? Too many steps? Could you eliminate some steps by doing more prep before if that was the case? Could you outsource steps (buy some pre-made materials, for example) if it was too hard on you? Is there a better time of year for this craft party such as Christmas in July? How can you make clean-up easier?
You have to go over things so you can make the party better each time.
In summary those are the steps I follow to host a craft party. Each time I find it incredibly rewarding. Tiring, but rewarding.
Let me know what you think about hosting a craft party. You can email me at [email protected] or leave a comment below. I love to hear from you.
Jo Ann Webb
I love that you share how to do a craft party. I’ve always wanted to be at one of your parties and I’m so excited I get to this year!! And I’m so happy to help you as well.
Love you my dear sister!
Jo Ann
Lucy
Jo Ann,
I am so glad you will be here as well. We will have fun!!
Lucy