
Little pop-up gingerbread houses (made of paper) painted with brown paint mixed with cinnamon for a craft party invitation
One of the people who got a little house invitation used it to decorate her cake for Christmas.

Little House Pop-Up Invitation
When I host a craft party, I think it is important to make a unique invitation because you are going to make something unique at the party. This year's craft party invitation for the Little House Making Craft Party is a pop-up house. And not just any kind of little pop-up house - a cinnamon-flavored miniature gingerbread house. This little gingerbread house is made of paper, of course, because that's my favorite crafting medium.

Here's how the house fits in the invitation envelope
Here's how I made the little pop-up house. There are free templates and directions in the Paper Glitter Glue library as well. To get access to the library just subscribe in the form at the bottom of the tutorial and you will immediately get the password to the library.
This post contains some affiliate links for your convenience. Click here to read my full disclosure policy.
Materials for Your Craft Party Invitation:
- Tim Holtz Village Dwelling Die or
- House pattern - Design No. 27 - download from the Paper Glitter Glue Library
- Roof pattern and roof beam pattern for either house in the Library
- Card stock
- Brown paint
- Cinnamon
- White pen - I love this pen - the Uniball Signo
- Glue
- Binder clips
Outline of steps to make the Gingerbread Pop-Up House for Craft Party Invitations
- Cut out your basic house pattern and the roof - Design No. 27
- Glue the two Village Dwelling pieces together before painting
- Mix brown paint with cinnamon
- Paint your little house with the paint mixture
- Draw the icing on your miniature gingerbread house
- Glue house together
- Glue roof beam in place
- Adhere the roof to the tabs
- Fold your little house to fit in envelope
Now for more detail on how to make your Pop-Up House
-
First cut out your basic house pattern and the roof
For this little house I used the Tim Holtz Village Dwelling die to cut out my houses. In order to turn this pattern into a pop-house you have to trim off the front gable and the tabs on the roof. The house won't work with the front gable in place. And you are going to glue the roof to the house with a center roof beam, not the tabs provided on the die.
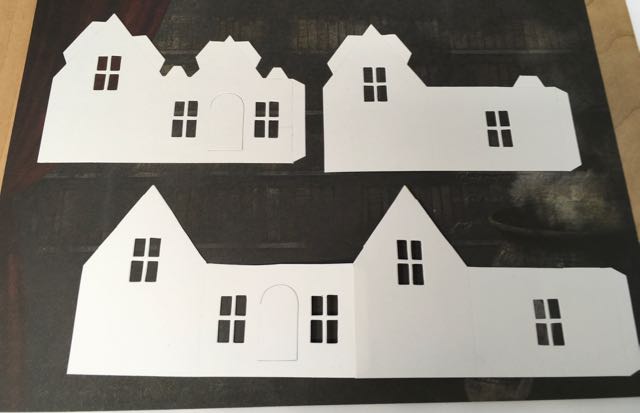
The top 2 pieces are the original Village Dwelling die cuts. The bottom shows the two pieces glued together after trimming off roof tabs and the front gable. Now your house can fold and unfold to pop-up.
-
Glue the two Village Dwelling pieces together before painting

Here are stacks of card stock cut-outs of the Village Dwelling die for the Little House Making Craft Party invitation
It is much easier to paint the house when it is flat and all in one piece.
If you don't have that die, I have included a two inch house pattern in the library that you can use. It's all one piece so don't glue it together yet. Please note that it has different dimensions from the Village Dwelling house which means it has a different roof size and roof beam. Also I would cut out a simple square or rectangle for the windows just to make it easier to cut.
All of these patterns are in the same zip folder in my library to make it easier for you.
-
Mix brown paint with cinnamon
Ok, so for this step mix your paint with cinnamon. You may know that my favorite paints are Tim Holtz Distress paints and they are kind of precious to me. So when I set out to make about 50+ invitations for the craft party, I did not want to use bottle after bottle of these relatively expensive paints. I just used a basic brown paint from one of the craft stores. That way I could use up one tube and it wouldn't cost much at all. And I wouldn't be sad about it either.
Also I wasn't sure the cinnamon-flavored paint was going to work. And just like I didn't use my expensive paints - don't use expensive cinnamon. Find a larger bottle of a cheaper brand for this step. I don't have precise measurements for this step. I just squirted a big blob of paint and then mixed cinnamon until I had a mixture that was not too gritty and stuck to the card stock. Stir well because the cinnamon makes clumps. Add water if you need to. I did add some water.
It's not a real strong cinnamon smell, but you still get the cinnamon fragrance which is nice. I think it's a fun detail to the invitation.
What about ginger? I thought about trying that. I'll save that for another year.
-
Paint your little house with the paint mixture
Now paint your house with the cinnamon-paint mixture. It's harder to paint with than just plain paint because it's gritty and the cinnamon can be lumpy. Remember you are mimicking gingerbread so the variation is just like what you have with the gingerbread dough.

On the side you can see how the paint covers unevenly. That's ok. It was a little challenging to paint with the cinnamon paint. But it sure does smell good.
Also paint the roof at this step as well.
-
Draw the icing on your miniature gingerbread house
Now with your white pen, draw the details around the windows and doors to look like icing. I just made up a pattern that was fairly easy to draw. Another option is to use puffy paint from the craft store or glitter paint, but I didn't have any on hand when I made the invitations.
You could use paint as well, but the Uniball Signo white pen is more precise and easier in my opinion.
-
Glue house together
After all the decorations are done on your miniature gingerbread house you can glue the house together at the glue tab on the side. Be sure to glue it so that the bottom of the house is straight so it will fold properly. This is very important.
-
Glue roof beam in place
The roof beam is the part that allows the house to fold and unfold while holding the roof in place. It's the real pop-up mechanism for the little house. It is important to glue it in the middle of the gable. The photos show it better than I can describe it in words. This is where I use the binder clips to make sure the roof beam is glued in the right place.
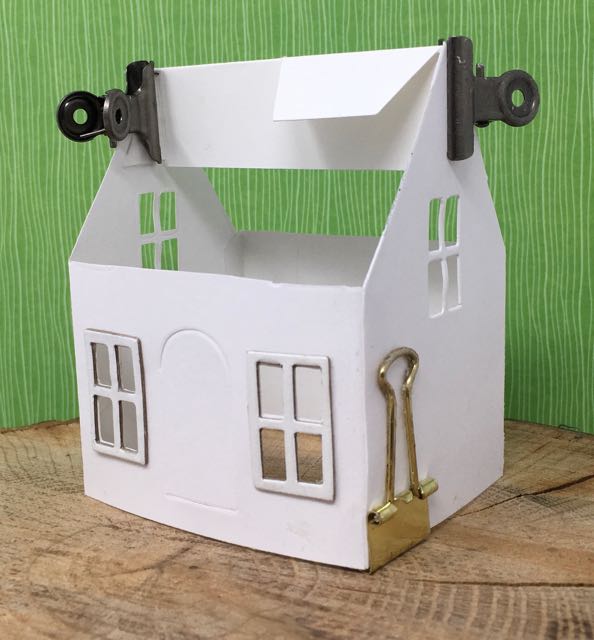
These little binder clips help me hold the roof beam in place while the glue is drying.
And now for my confession. Here I made a mistake when I first drew up the pattern for the roof beam. I made it ⅛ inch too long so that's why you see how it curves in the middle on the photo below. I did think that I measured at least twice before I cut, but I didn't make the pattern right for my houses. The correct pattern is in the library, however.

See how the roof beam flexes and curves in the middle? That is because I made it ⅛ inch too long. It is correct on the free pattern in the library. I didn't paint the inside of the house because I had so many to make.
The roof beam for the Village Dwelling die cut on the correct pattern (which is the one in the library) is should be 2 ⅝ inside of the angled tabs.
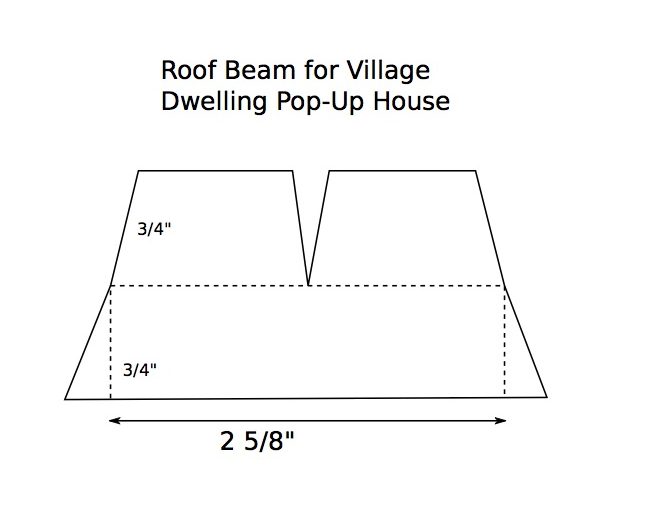
Roof beam pattern to convert the Village Dwelling die cut into a pop-up house
My motto when I make a mistake like this: I make these mistakes so you don't have to.
-
Adhere the roof to the tabs
After the roof beam is firmly in place, adhere the roof to the tabs on the top of the roof beam. One tab should be facing forward and one tab facing backwards. I usually apply glue to the tabs, then hold the little house upside down and center it on the roof, then apply pressure to the tabs when the house is centered well.
The roof pattern should have ¼ inch on either side when it is centered properly. But I don't actually measure this, I just kind of eyeball it.

First center the house on the roof, then glue the tabs to the roof.
-
Fold your little house to fit in envelope
All done, now you can fold up your little house and add it to the invitation. I made up over 60 invitations so I didn't adhere the house pop-up onto a card like I did on these 3 cards.
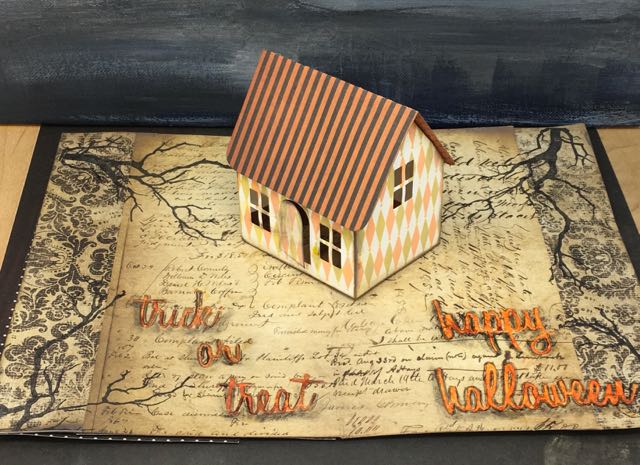
Completed inside of the Halloween Village Dwelling pop-up card.
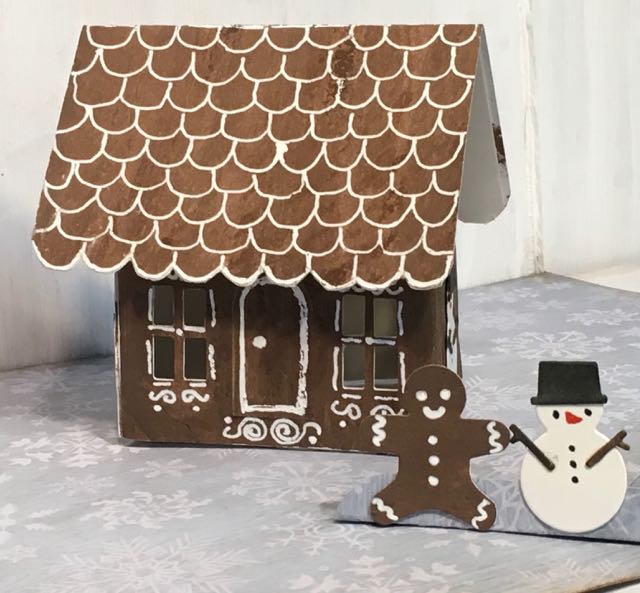
Close-up of the gingerbread man and snowman for the Gingerbread house popup card
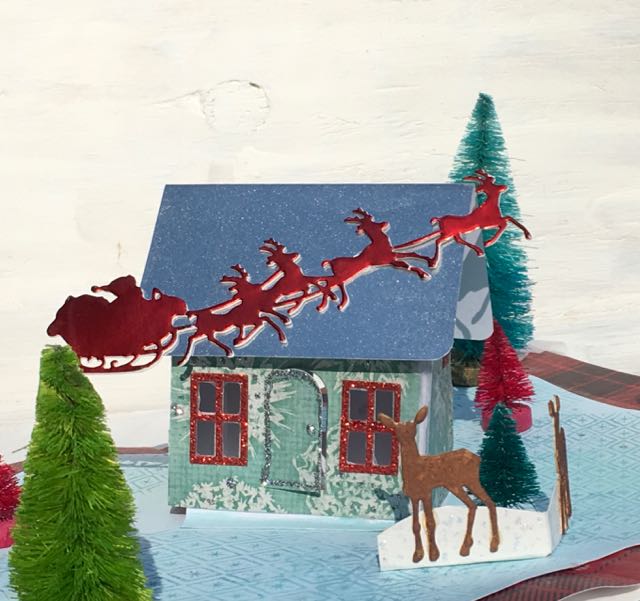
Inside view of the Village Dwelling house modified as a pop-up house for the Christmas card
That would take too much time for this many invitations, but I still think the invitation looks cute anyway.
The Craft Party invitations are now on their way.

If you have any questions, feel free to email me at [email protected] or comment below.
Thank you for reading. I hope your crafty day goes well.
Lucy


Leave a Reply