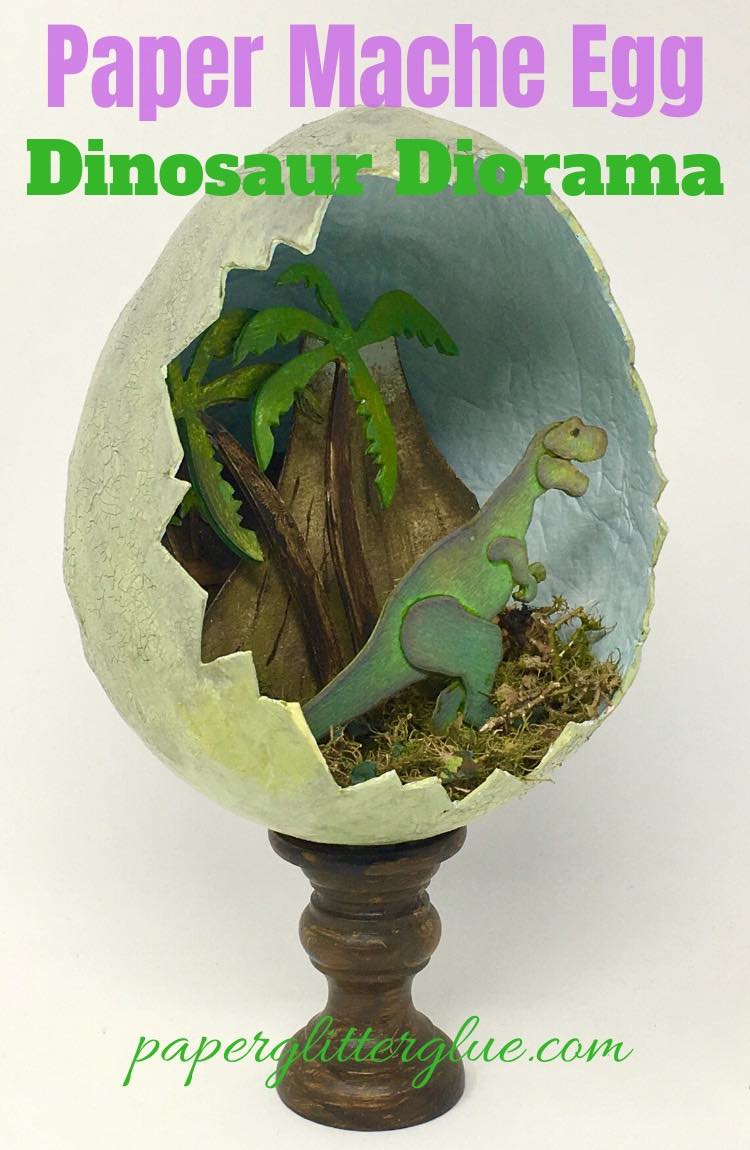
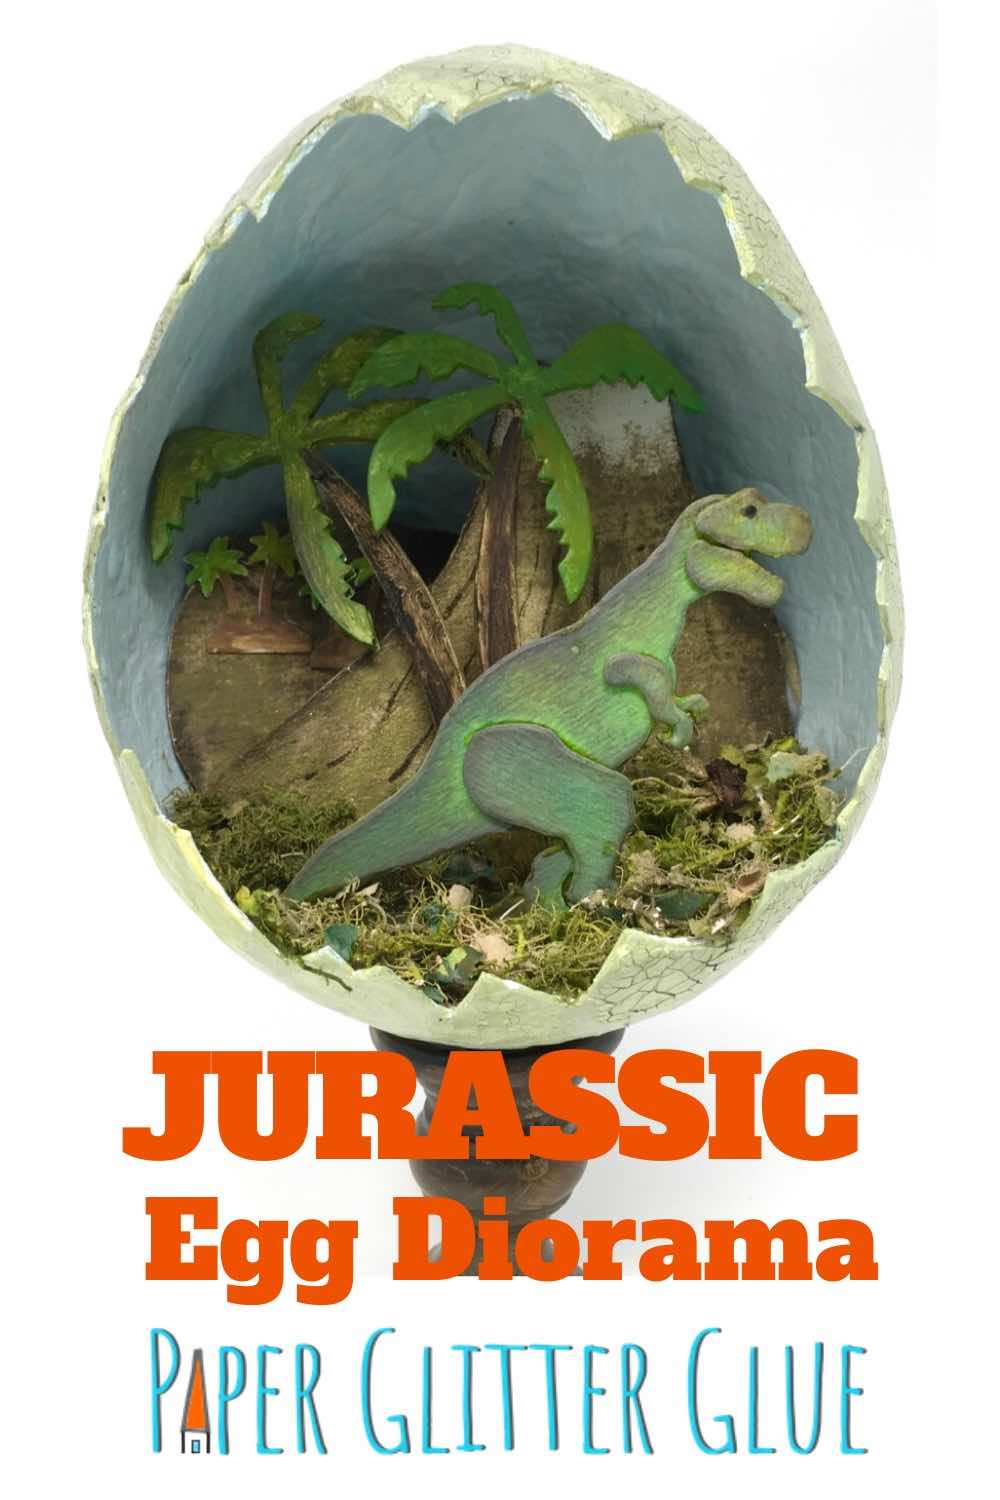
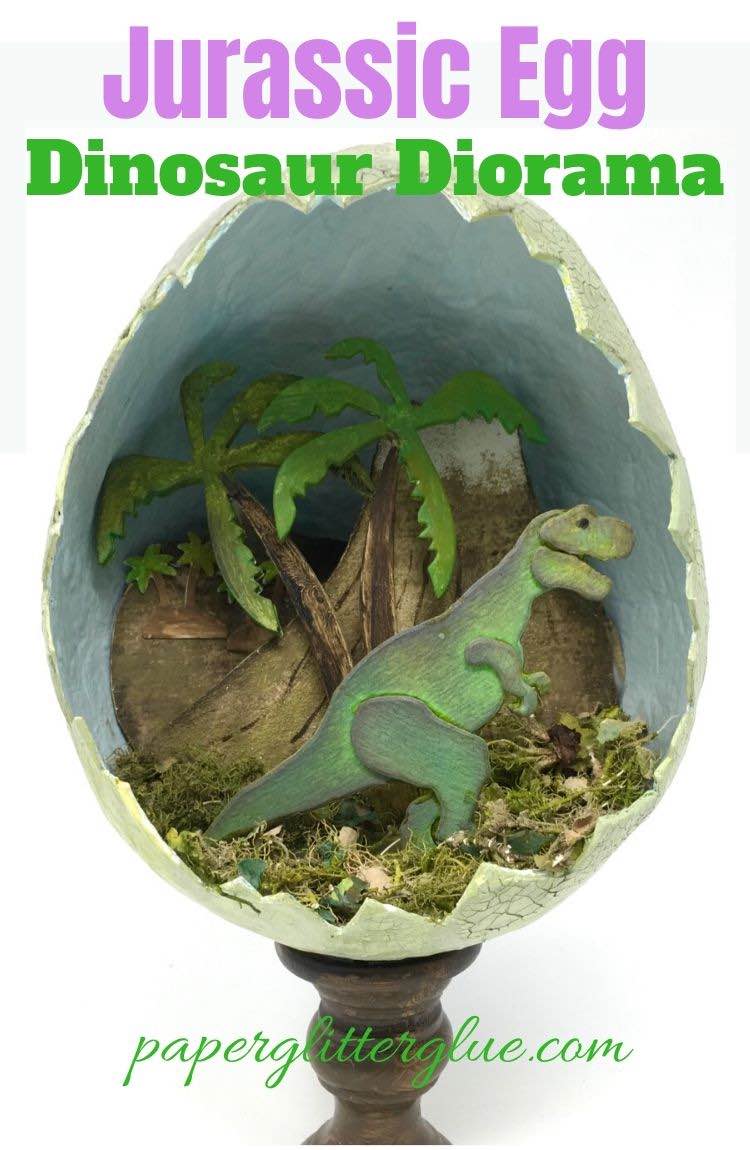
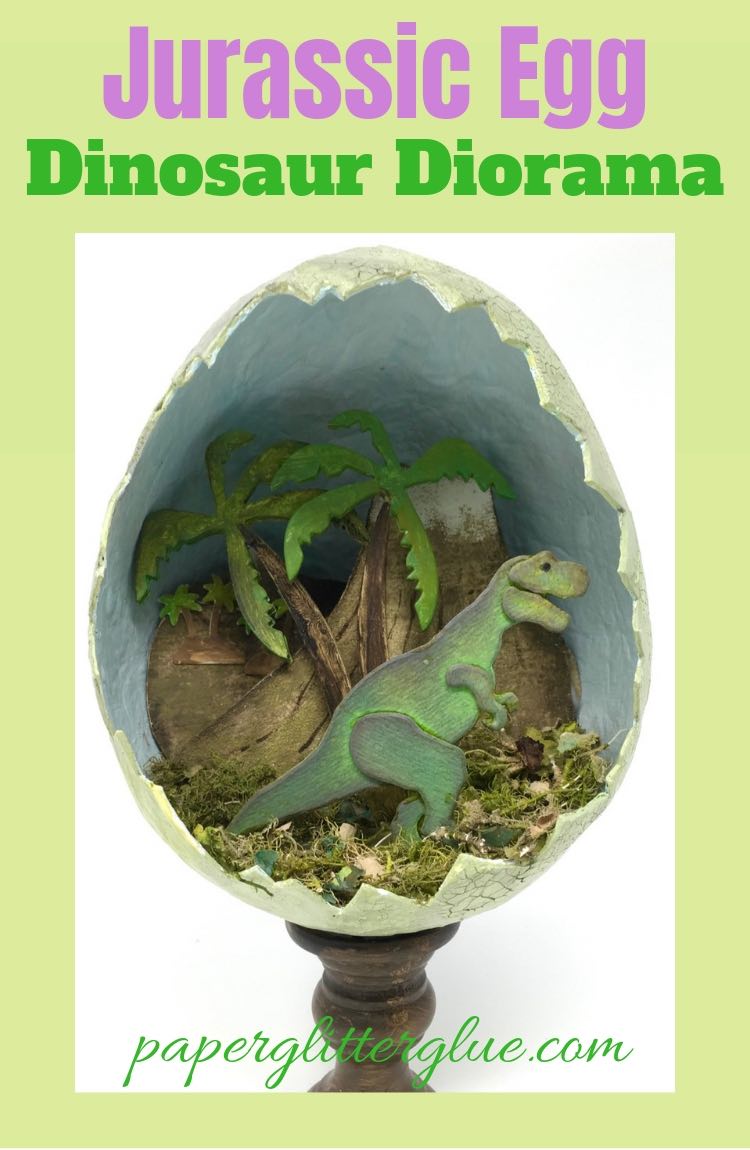
How to make the Jurassic Egg - a fun Dinosaur Diorama in a Paper Mache Egg
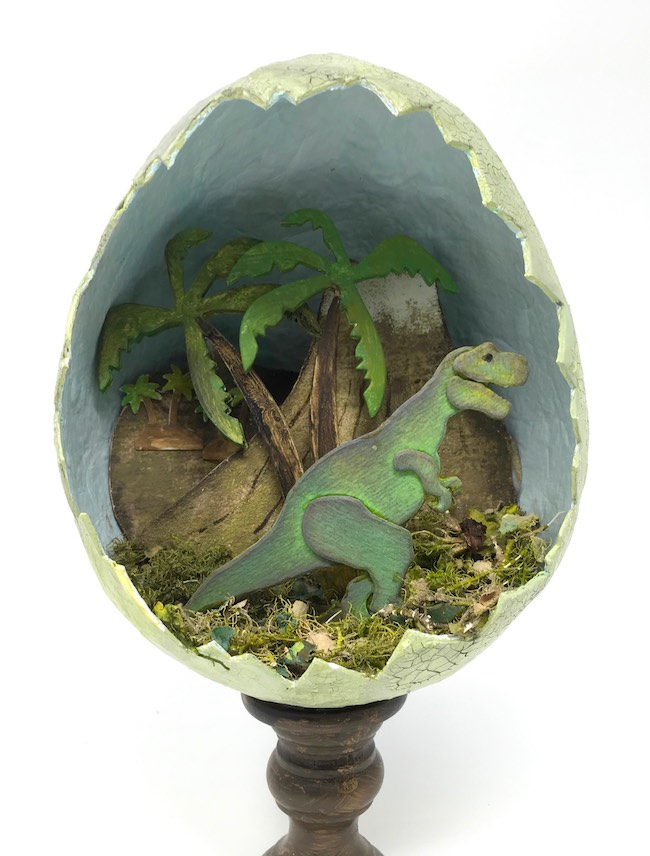
Ever since I made my first Paper Mache egg I planned to make a Dinosaur diorama inside the egg. I call it the Jurassic Egg. It is the perfect setting for the Tim Holtz Tyrannosaurus Rex to go roaming in the volcanic landscape.
Here's how you make the Jurassic Egg Dinosaur Diorama
This post contains some affiliate links for your convenience. Click here to read my full disclosure policy.
Materials for the Jurassic Egg
- Paper Mache Egg (see the instructions for the Paper Mache Easter Egg)
- Crumpled paper
- Cardboard
- Watercolor paper
- Glue
- Vignette Finial
- Tim Holtz Sizzix dies:
- Ranger Texture Paste - Opaque Crackle
- Ranger Distress Paints:
- Distress Oxide Inks:
- Moss
Brief Summary of Directions for Making the Jurassic Egg Dinosaur Diorama:
Prepare your paper mache egg
- Make the Paper Mache Egg - instructions at this link
- Paint the egg and finial
- Add crackle paste
- Paint the egg again
- Enhance the crackle with dark paint
- Make the base for the landscaping
Make the landscape elements
- Cut a template for volcano background
- Cut out the volcano background
- Paint the background
- Make trees to prehistoric background
Make the dinosaur
- Cut out the dinosaur die
- Glue layers together
- Color the dinosaur
Arrange the dinosaur diorama elements in the paper mache egg
- Glue the background in place
- Next add your vegetation for the diorama
- Place the dinosaur
- Add moss
Now here is more detail to help you make the Jurassic Egg Dinosaur Diorama
First Make Your Paper Mache Egg
The instructions on how to make a paper mache egg are here.
When I made my first paper mache Easter egg, I actually made several at the same time because I knew I wanted to make more egg projects.
The major thing you need to know about making these eggs is that they take a while to dry. If you do 3-5 layers of tissue paper, it will take at least 2 full days to dry. Just factor that into your time when you plan on making a project like this.
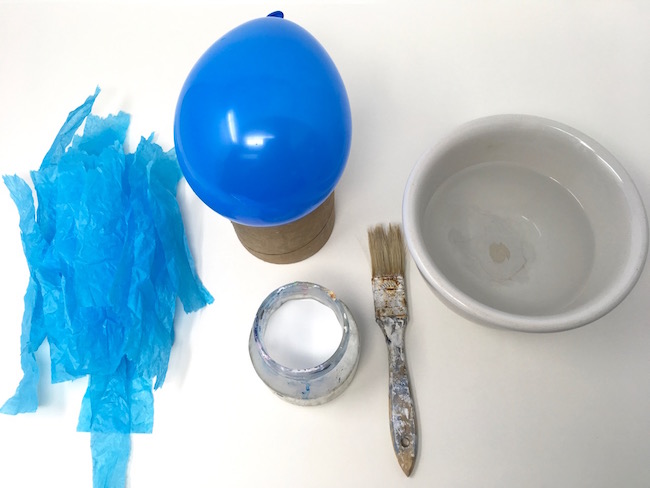
What I really like about making these eggs is that it's a great craft that costs almost nothing - a bunch of water balloons from the dollar store, diluted white glue and left over tissue paper or scrap paper. That's it. The only investment is time and most of that time is allowing the project to dry.
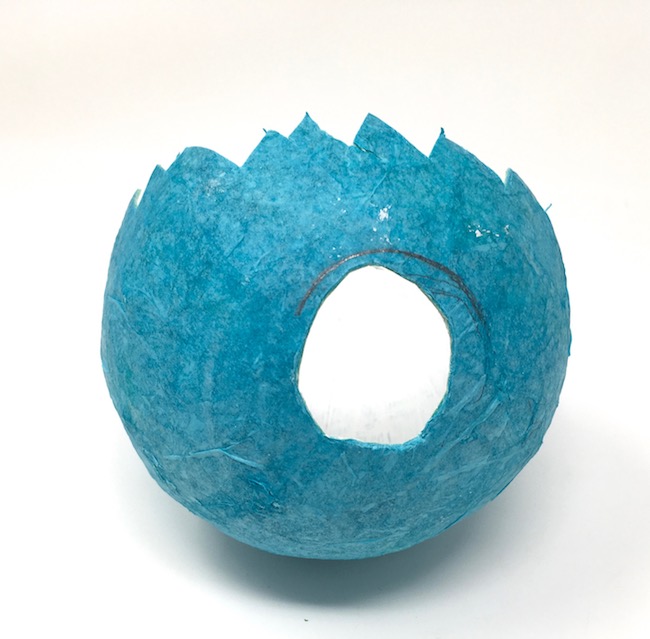
There are a couple of ways to do this, but to make my egg balance on the finial, I cut out a circle smaller than the finial top. When I was ready to glue the egg to the finial just ran a thick bead of glue around the edge. I covered the hole with a piece of paper and more glue.
But the easiest way to do it is to use hot glue. Just squeeze a big blog of glue to the top of the finial and then balance the egg on there until it dries. You have to make sure your egg is balanced the way you want when you use the hot glue.
Also it's easier to work on the landscaping if the egg is already glued on the finial.
Now paint your egg
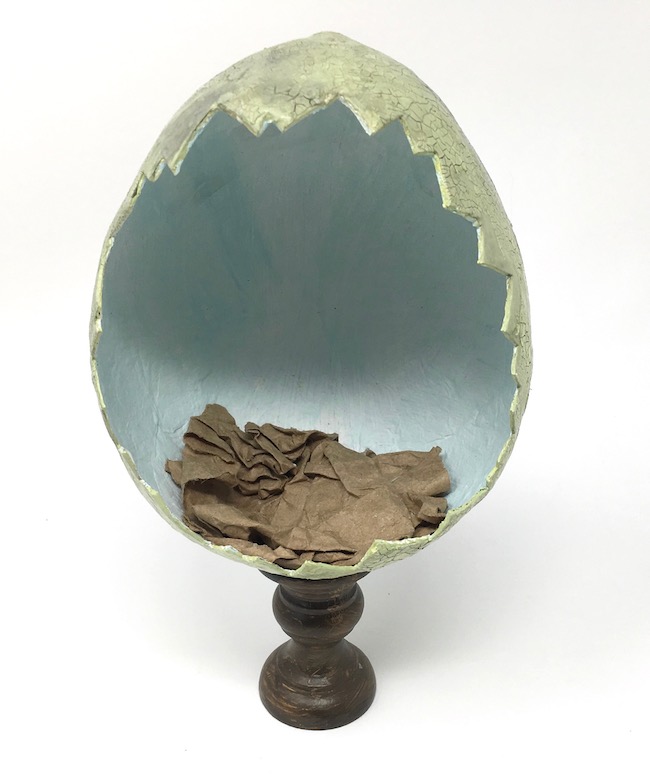
For my first paper mache Easter egg, I wanted it to look all springy and bright so I painted it a lovely shade of blue. For this egg, I want it to look kind of grungy like it was dug up from the ground so I painted it a muted green called Bundled Sage.
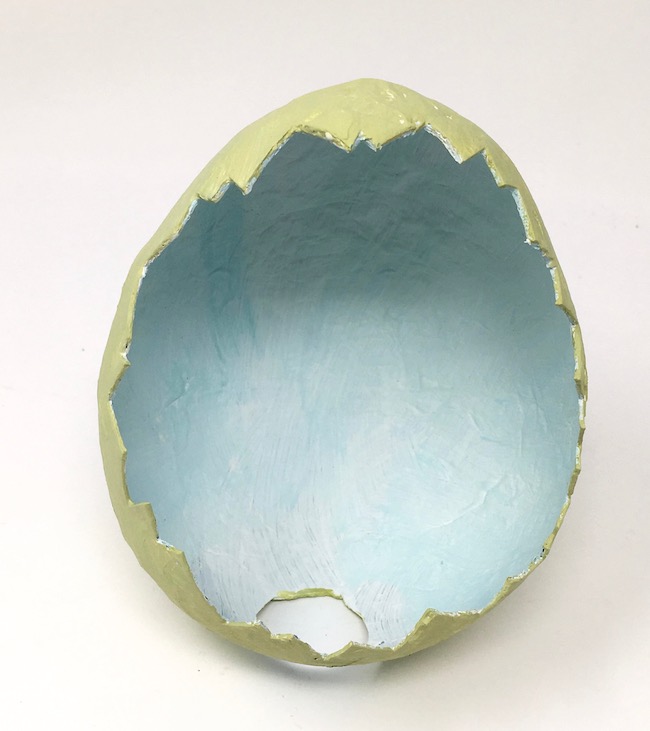
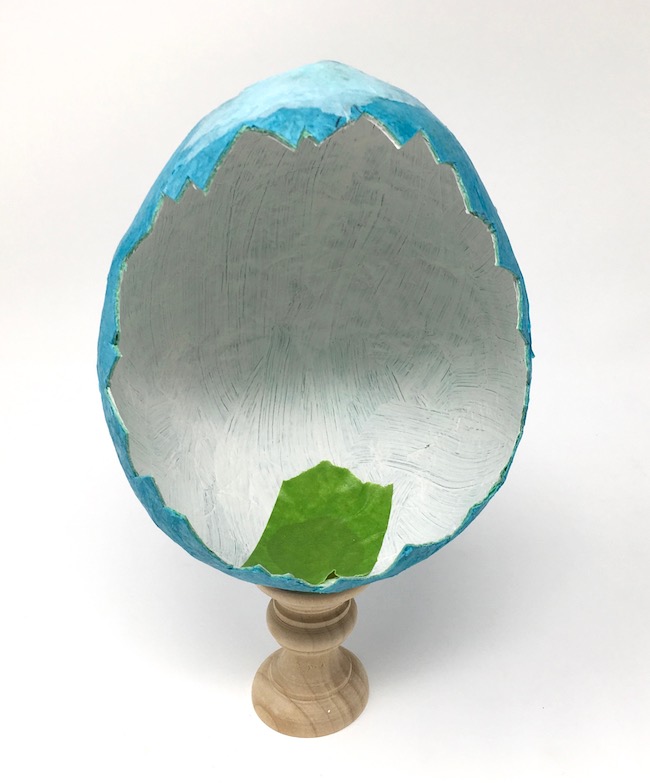
One thing I learned from the previous egg projects is that the inside is kind of dark. To help prevent that I painted the inside with gesso primer and then a very light layer of Tumbled Glass blue mixed with gesso. So there is only a hint of blue inside the egg.
Next add crackle paste for the cracked egg look
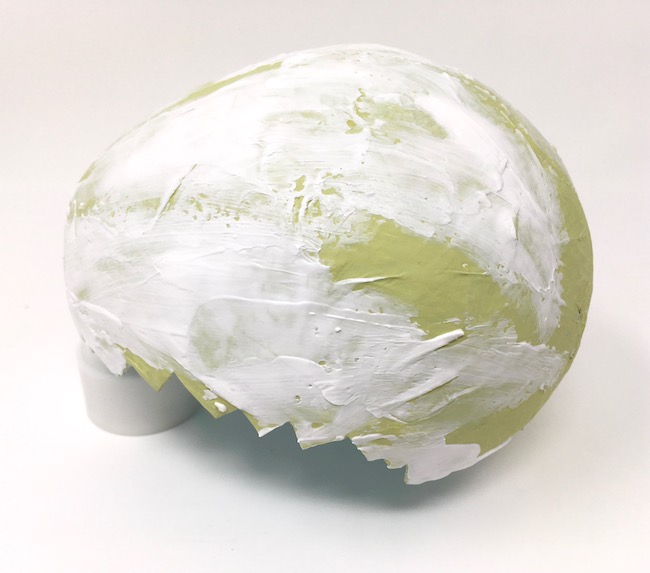
Again going with the grungy look, I coated the egg with Ranger's Texture Paste Opaque Crackle. Just randomly smear it on with your finger. No need to be neat about it.
Paint the Egg Again to enhance the cracks
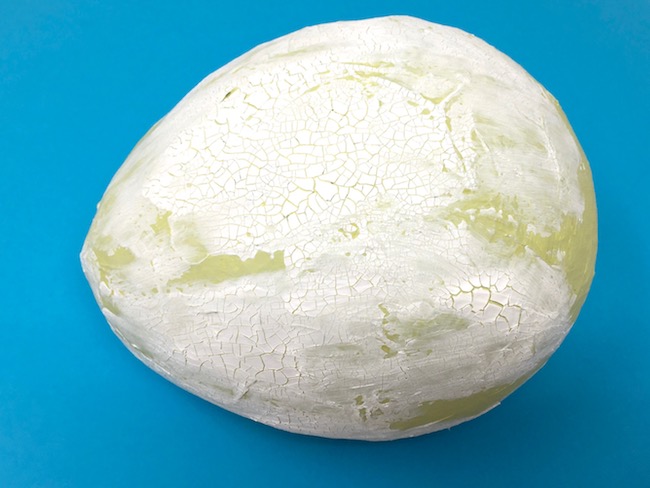
Now go over the egg with another layer of paint. To enhance the cracks I put some black paint on the brush and dipped it in water. Then I painted that over the cracks and almost immediately wiped it off. That way the black color was mostly in the cracks.
Make the base for landscaping the diorama
To make the base of the landscaping, crumple up some paper and glue to the bottom of the egg. It doesn't really matter how it looks at this time because you can always add more paper and then cover it up with moss later.
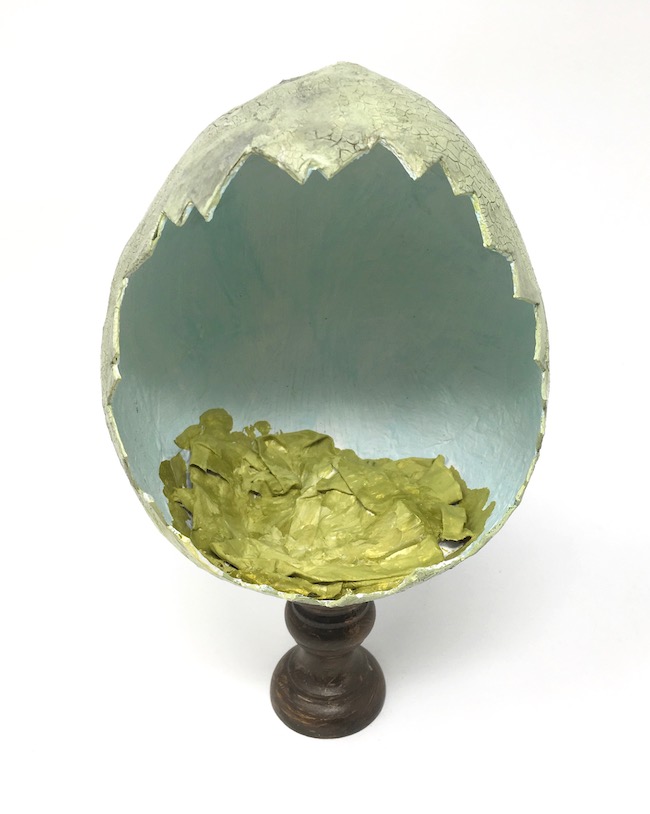
I chose Mowed Lawn green for the base color. Like I said, it will get covered up later so the color doesn't matter much here.
Now make your Landscape elements
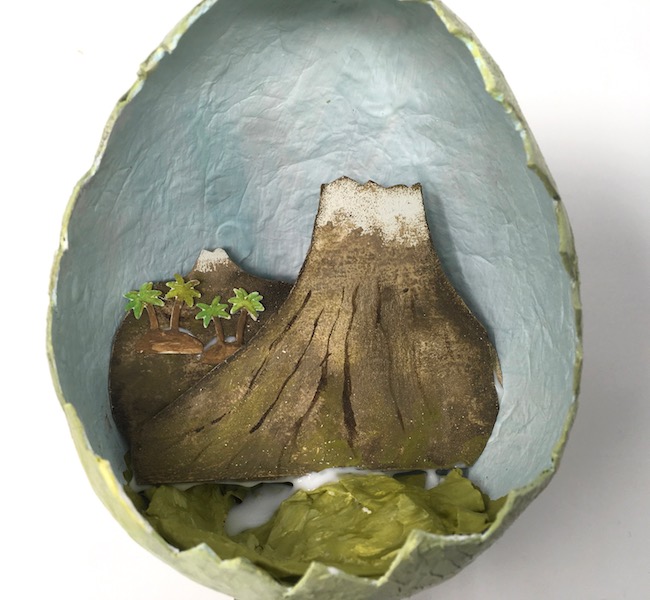
To make my prehistoric scene I chose a volcanic background.
Make the template for your volcanic background

First estimate the size of your background. Cut out an oval shape that fills the background approximately the way you want. This is your rough template for the background. Make your template a little bit big so you can trim it to fit your balloon egg.
Next I cut out a few volcano shapes in paper until I like the way they looked. Then I played around fitting them in the egg.
Do the same thing with the volcano template - make it a little big for trimming later.
Cut out the volcanoes
After making the templates, I cut out the volcanoes in cardboard and painted them.
Next make some trees
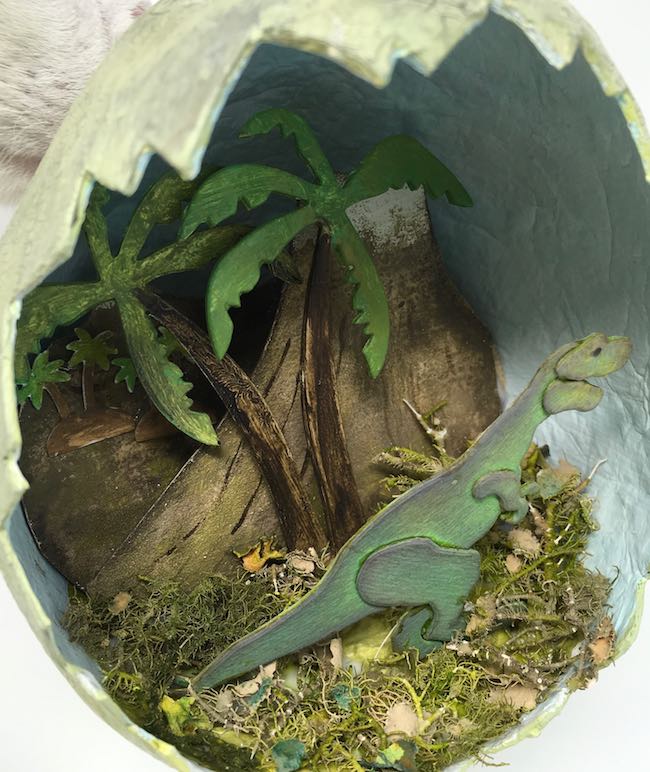
Fortunately, I have a palm tree die from a Tim Holtz die set that fits my idea of prehistoric setting. So that was nice.
I glued more than one layer of cardboard together to make these trees more substantial. Also I glued some extra cardboard behind the tree in front to give more dimension.
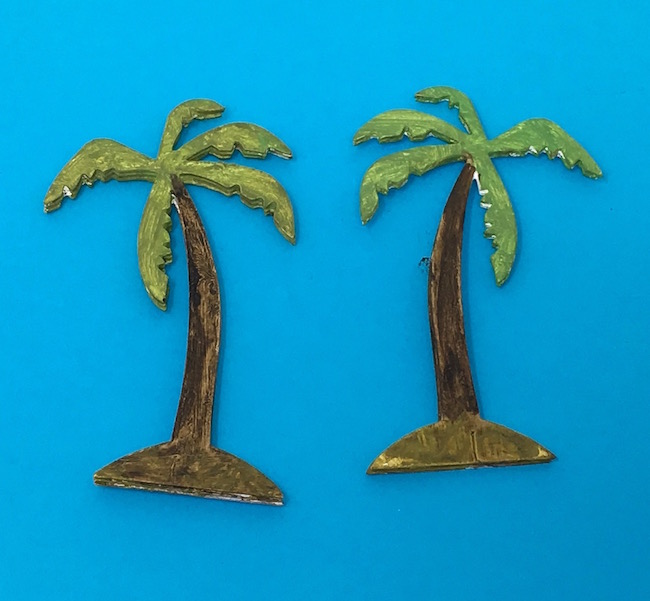
After I took this photo I noticed the white spaces on the edges so I painted them better before I glued them in place.
There is also a really cute die called Tiny Travel Globe that has these tiny palm trees that I added to the background. They aren't very obvious, but I sure do like them as a fun detail in landscaping. Glue the tiny trees to the volcanic landscape before you glue it in place. They are too small to maneuver in place within the egg.
You can see them best in the photo below where I glued the volcanoes in place.
And make the dinosaur
Now for one of the really fun parts - making the dinosaur. This is also from a Tim Holtz die called Prehistoric. There are 3 dinosaurs in this set, but only 2 fit in this egg. Unfortunately for my design only one actually fits - the Tyrannosaurus rex.
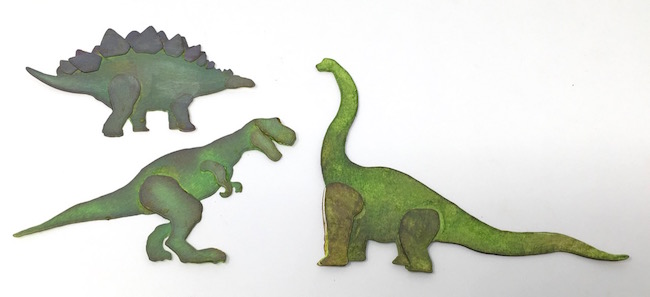
To make my T. rex sturdy, I glued 2 or 3 layers of thick watercolor paper together and then inked the dinosaur with what I think of as dinosaur colors - shades of green with a bit of purple edging.
Arrange the diorama elements in the paper mache egg
First glue your volcanoes background in place
I used my regular glue, Aleene's Fast Grab, but I think hot glue would work better because it dries so much faster and is more secure.
Next add your vegetation for the diorama
Now glue the trees in place. I messed up a bit here. The top of my volcanoes doesn't show because the trees obscure them. Oh well, it's still looks ok.
Place the dinosaur
Next glue your dinosaur in place. Again, hot glue would probably work better and faster.
Add moss
And for the final element, add moss. I just like the way it looks as the base for the Jurassic egg. You can purchase moss online, from a craft store, or just find some outside.
The "moss" I used is probably a lichen (a combination of a fungus and algae) that falls off our trees. I stained it a bit with some Mowed Lawn Distress Spray to make it just a little bit more green.
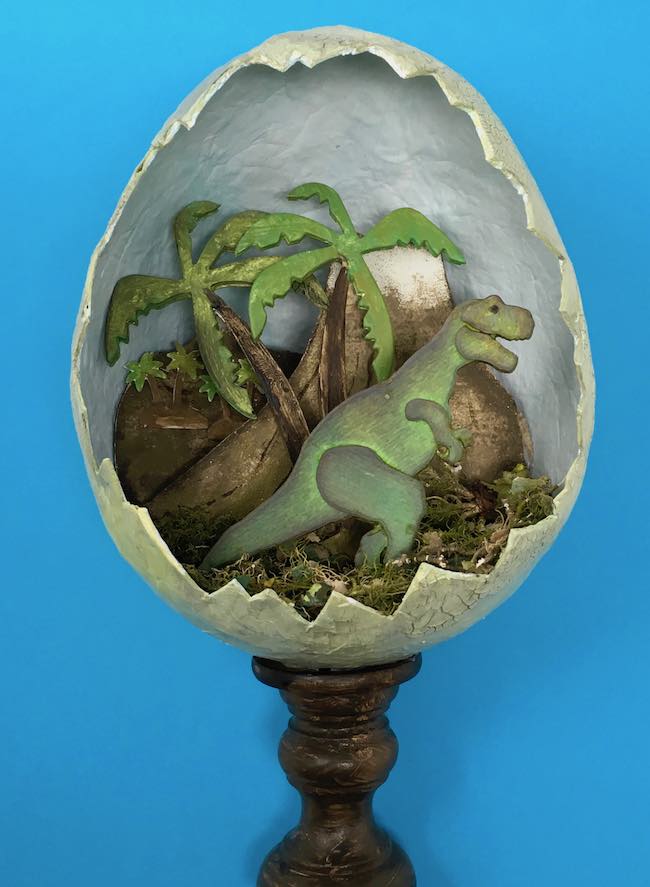
And that is it for this fun prehistoric variation on the Paper Mache Egg.
I am sharing this with the Simon Says Stamp Wednesday Challenge called "Animal Antics". Don't you think the T. rex roaming his volcanic landscape counts as an "Animal Antic"?
Have fun making things.
Lucy
P.S. Pin to your favorite crafting boards on Pinterest!
Lucy
Thank you, Anita.
Anita Houston
Absolutely fabulous and great tut!!!
Lisa Hoel
Seriously Lucy, this is the best thing ever!! I love it. =)
Lucy
Thank you so much, Lisa. I know you like 3-D projects so it means a lot that you like the Jurassic Egg.
Lisa :)
SO SO SO SO COOL!!!
Cindy Jones
Absolutely Amazing! Your steps are fabulous! Nicely done!
Lucy
Thank you, Cindy. I work pretty hard trying to write clear instructions. I am so glad you like them.