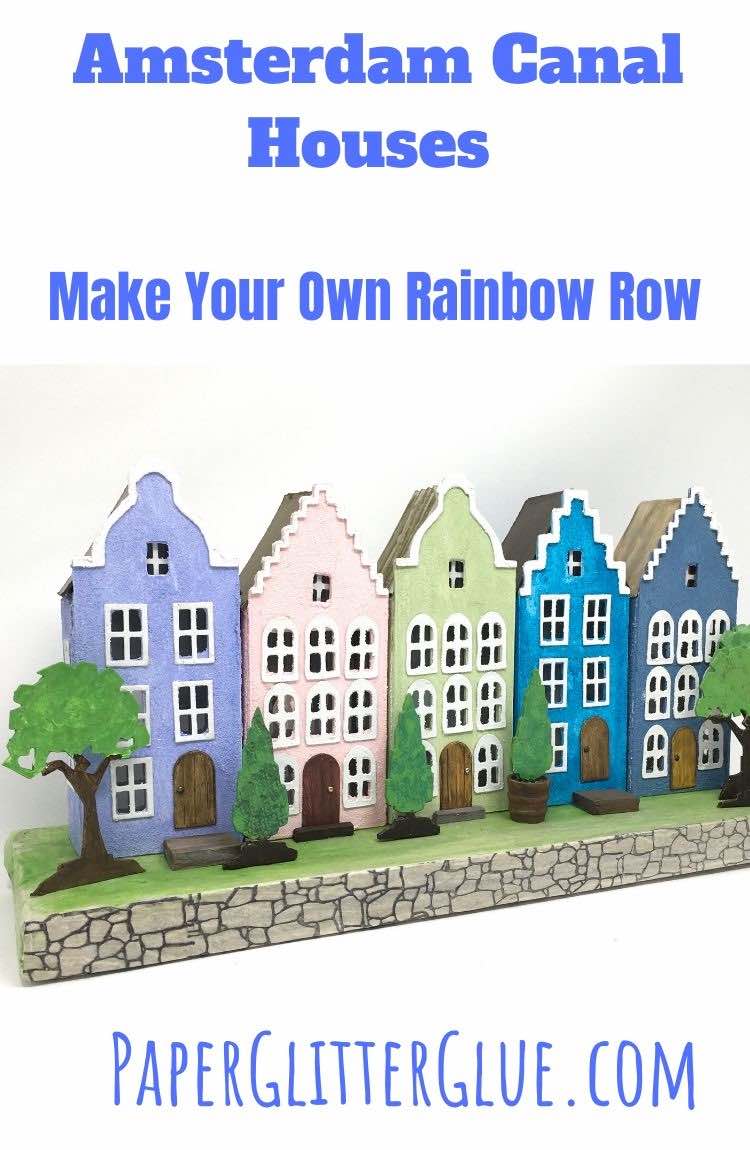
How to make cute miniature paper houses based on the Amsterdam Canal Houses
I am always looking for inspiration for making little houses. Three years ago I made two Putz houses based on the Amsterdam Canal houses. Ever since that time I have planned to make a pattern for this house. Finally, I am happy to report that I have finished a set of paper patterns for these miniature Dutch Canal Houses.
You can read about the history of the Amsterdam Canal houses and see the two different designs I made.
Another inspiration is Rainbow Row in Charleston, SC where I went to school for 4 years.
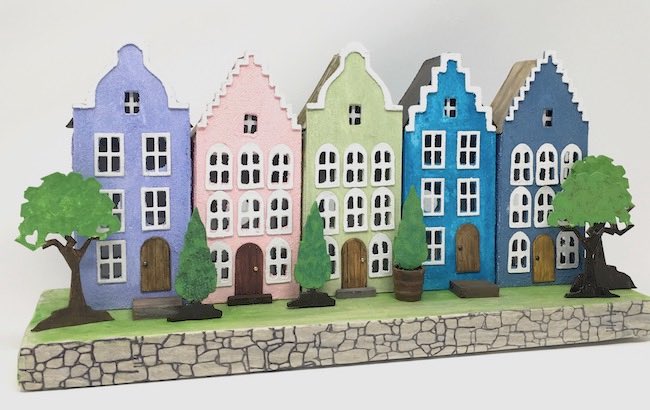
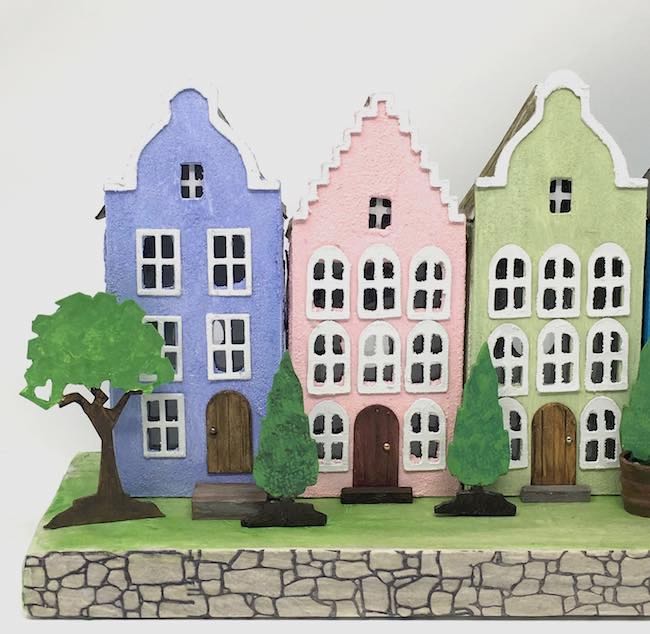
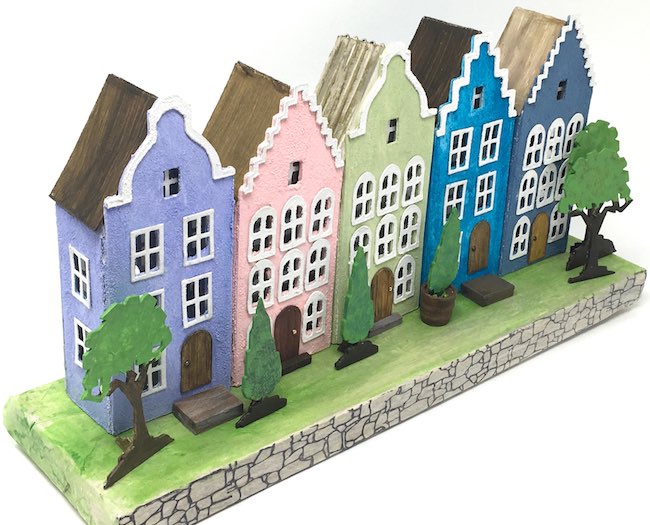
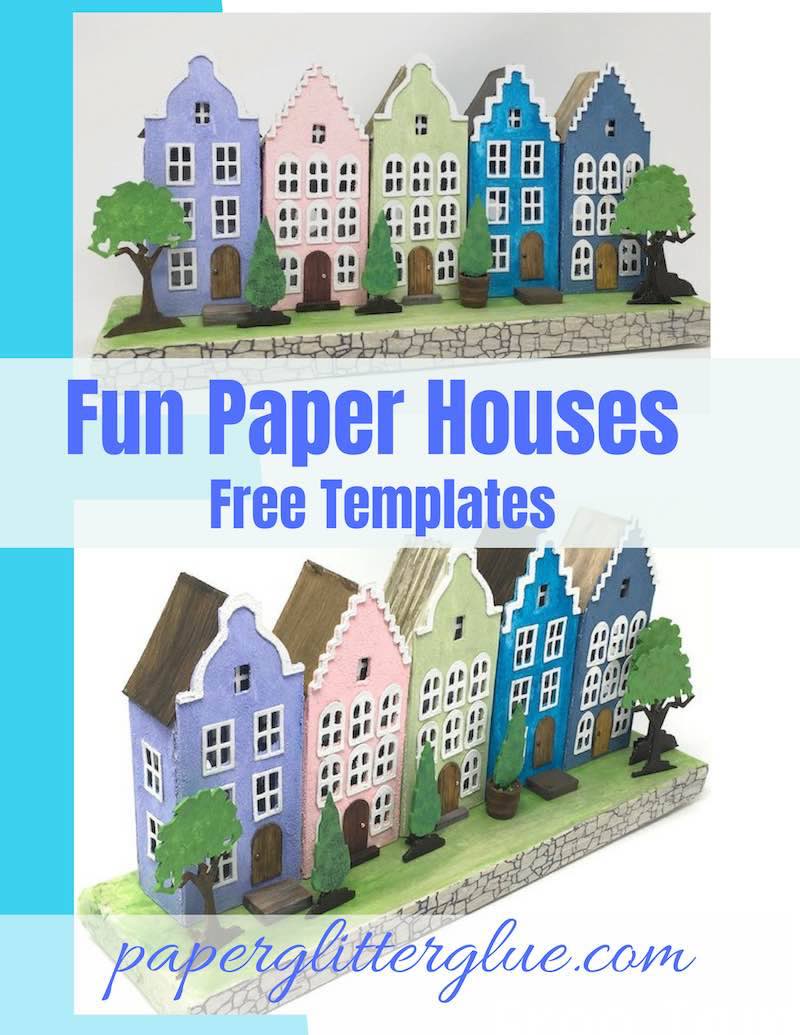
Since I had to make so many prototypes, I ended up making 5 different designs which then morphed into my own Rainbow Row of colorful miniature houses along a canal.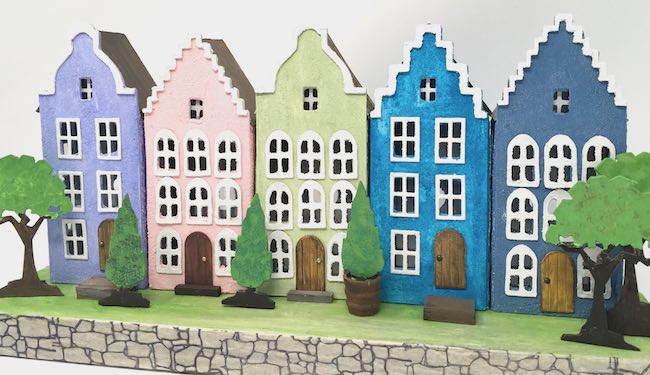
I simplified this design so it is easy to cut out and construct - unless, of course, you have to hand cut the windows in which case I would only cut 6 windows on the front. And you don't have to cut out the doorway either.
Earlier I mentioned that I made many prototypes. Literally, I must have designed and tweaked 20+ patterns before I settled on these 5 Dutch Canal paper pattern templates in my Paper Glitter Glue library.
Now let's get started on making these cute little cardboard houses.
This post contains some affiliate links for your convenience. Click here to read my full disclosure policy.
Materials to make the Amsterdam Canal Paper Houses
- Pattern - Design No. 49 - from the Paper Glitter Glue library in the April 2019 section
- Cardboard
- Glue
- Cutting materials
- Cutting machine like a Cricut or a Silhouette
- Hand cutting materials - craft knife, cutting mat, steel edged ruler
- Binder Clips
- Painter's Tape
- Gesso
- Paint - these are the colors I used:
- Shaded Lilac Distress Paint
- Spun Sugar Distress Paint
- Bundled Sage Distress Paint
- Mermaid Lagoon Distress Paint
- Stormy Sky Distress Paint
- Ground Espresso Distress Paint
- Mowed Lawn Distress Paint
- Gathered Twigs Distress Paint
- Pine Needles Distress Paint
- Pumice Stone Distress Paint
- Walnut Stain Distress Paint
- Fossilized Amber Distress Paint
- Grit Paste, optional
- Acetate packaging for windows
- Sizzix dies:
- Stampers Anonymous Stamp - Slate and Stone
- Archival Jet Black Permanent Ink

Steps to make these cute miniature Dutch Canal Paper Houses
- Download the pattern template - Design No. 49 - from the Paper Glitter Glue library
- Cut out the template
- Prime the pattern pieces
- Glue on the facade to the base house template
- Add texture
- Paint the house and pieces
- Add window material
- Glue the house together
- Adhere the roof to the house
- Glue to the base (how to make the cardboard base for these houses on Rainbow row)
- Landscape your little houses
- Show off your creation
First Download the Amsterdam Canal Paper House Pattern from the Paper Glitter Glue Library
Even though I try to make downloading as easy as possible, it can be confusing. So here are some directions.
Just subscribe to the Paper Glitter Glue Library for the Password
First you need the password to the Paper Glitter Glue library which you get when subscribe to my Paper Glitter Glue newsletter. You can subscribe below.
Go the the Paper Glitter Glue Library Page
Next go to the first page of the library which is the doorway to the password protected part of the library. Click the blue link in the middle of the page. Now you are in the password protected library. Type in the password and the library opens.
I add the files chronologically. So the most recent files are first. All of them are free for you to download. The Amsterdam Houses are in the April 2019 section of the library.
Download the Amsterdam Canal Paper House Pattern Templates
Most of the files are in zip file format so they download faster..
Here's how to open up a zip file on a Windows based machine. Use one of the methods below:
- To unzip a single file or folder, open the zipped folder, then drag the file or folder from the zipped folder to a new location.
- To unzip all the contents of the zipped folder, press and hold (or right-click) the folder, select Extract All, and then follow the instructions.
If you are on a Mac just double click the file and it automatically opens. Then you can access the file.
PDF and SVG files are available for this Putz house pattern
For this set of little Putz house patterns, I made both PDF and SVG files. PDF files are for printing and the SVG files are for uploading for an automatic cutting machine like a Cricut or a Silhouette.
If you are using an automatic cutting machine, you need to tell the machine which lines are for scoring. I try to make that clear 2 ways. First I use a dotted line to indicate a score line and on the SVG files, I color the scored lines red.
Cut out the Paper Pattern of Your Miniature Amsterdam Canal Paper houses
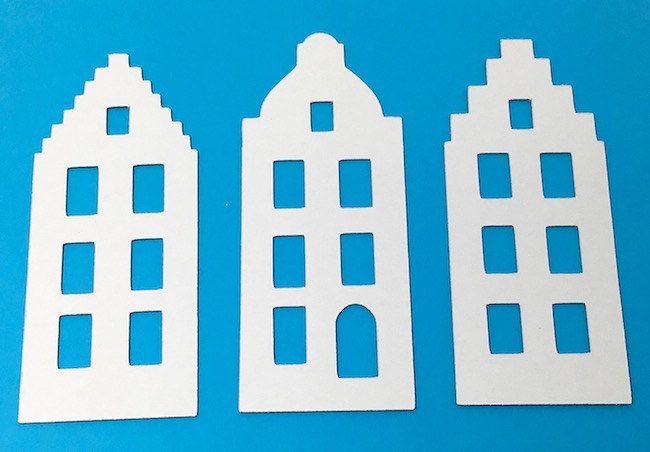
Ok, now I need to explain that there are 5 different variations for this pattern. I made 2 different base patterns - one has lots of windows on the front and the other has 6 windows and one door on the front.
This photo shows the difference between the two patterns. But this is not the actual download of the pattern templates because the sizes won't be right.

Photo of the patterns so you can see the difference between the one with a lot of windows and the one with 6 windows in front
Also please note that the cut outs are larger than the windows on the facade. That is intentional to give you a little flexibility if the facade isn't placed exactly right.
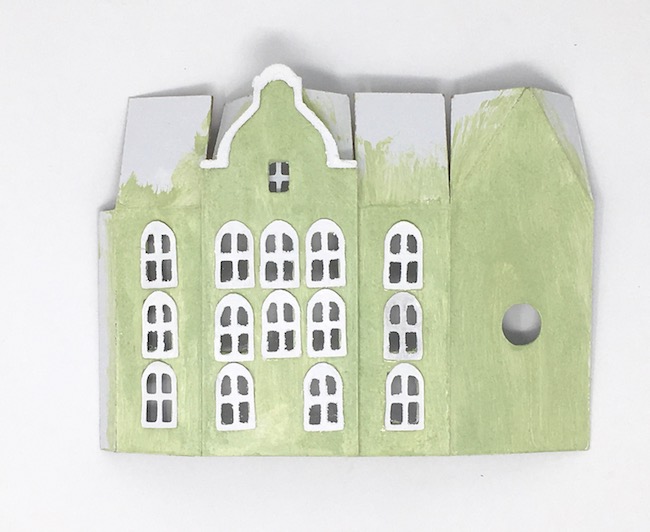
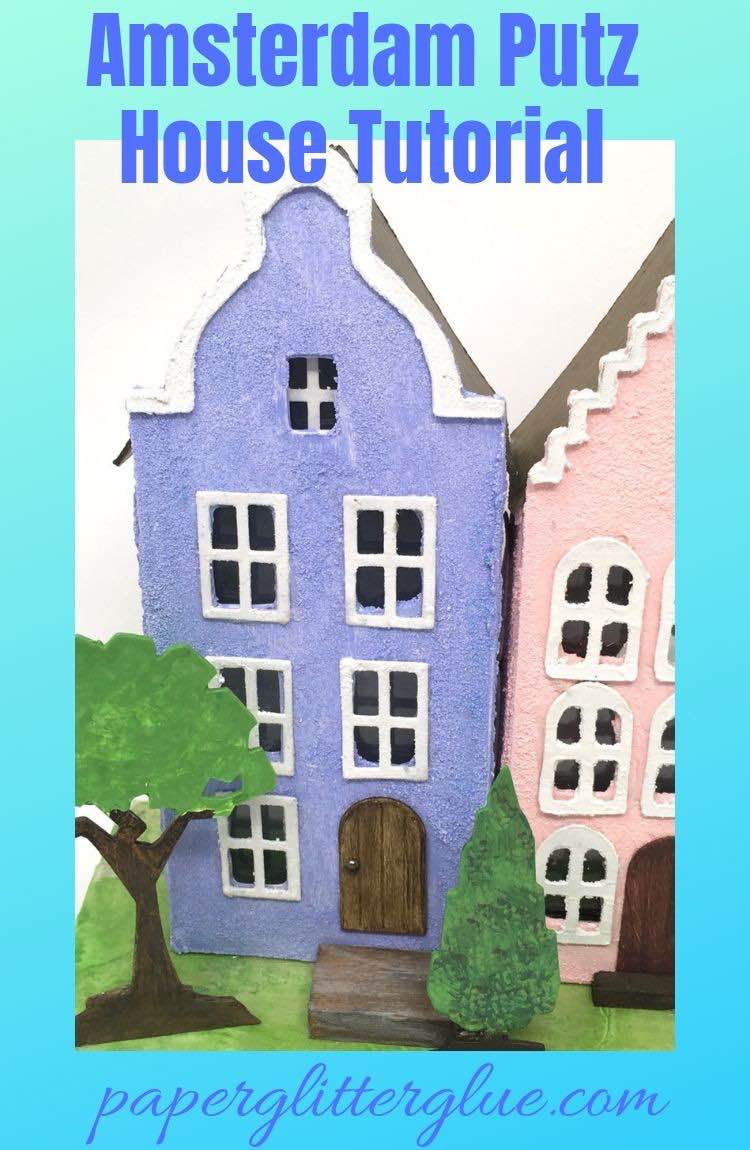
Below shows the little Dutch Canal house facades that have 9 windows on the front. Use the base pattern that matches these facades. These are facades no. 1 and 2 with 9 windows. But in the files I call these the patterns with lots of windows.

After I made 2 houses with this initial pattern, I decided that there were too many windows so I modified the next Canal House pattern with only 6 windows.
I like these facades better. These are facades no. 1, 2, and 3 with only 6 windows. On facades 1 and 3, you can decide to put a door over one of the bottom windows on the left or right.
Glue the facade of your choice to the base pattern
Now pick out which facade you like the best. For Rainbow Row I used each of the patterns for variety. Though I didn't vary the heights of the houses, you can do that by cutting off a bit from the facade and the cardboard base pattern.
Prime your little house with gesso
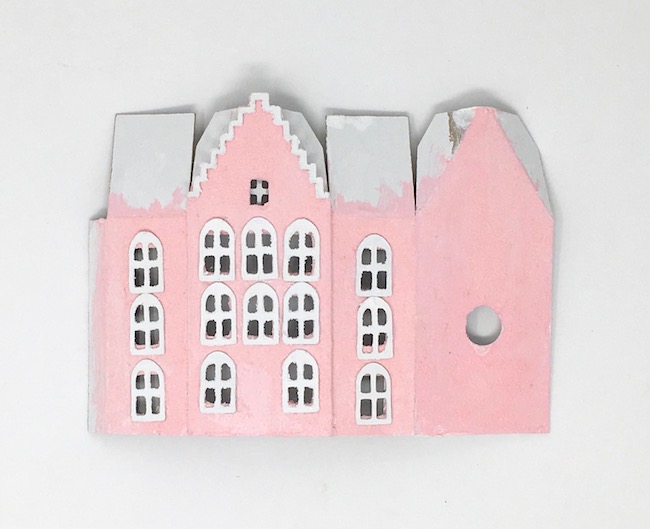
Here is facade no. 2 glued to the base pattern.
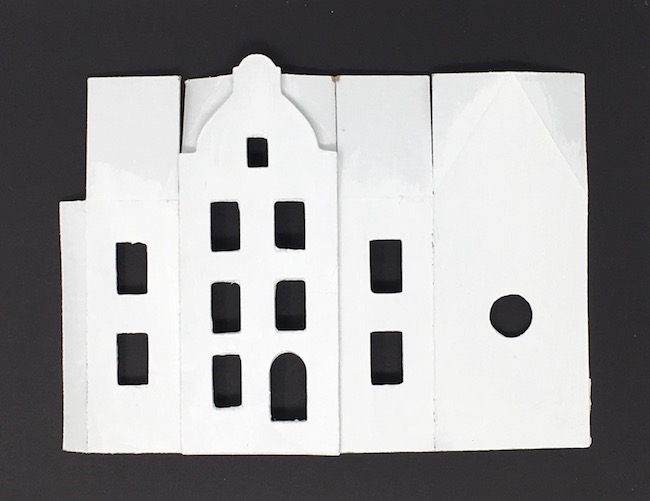
I always paint the little house with gesso, a specific primer which helps paint and texture paste adhere better.
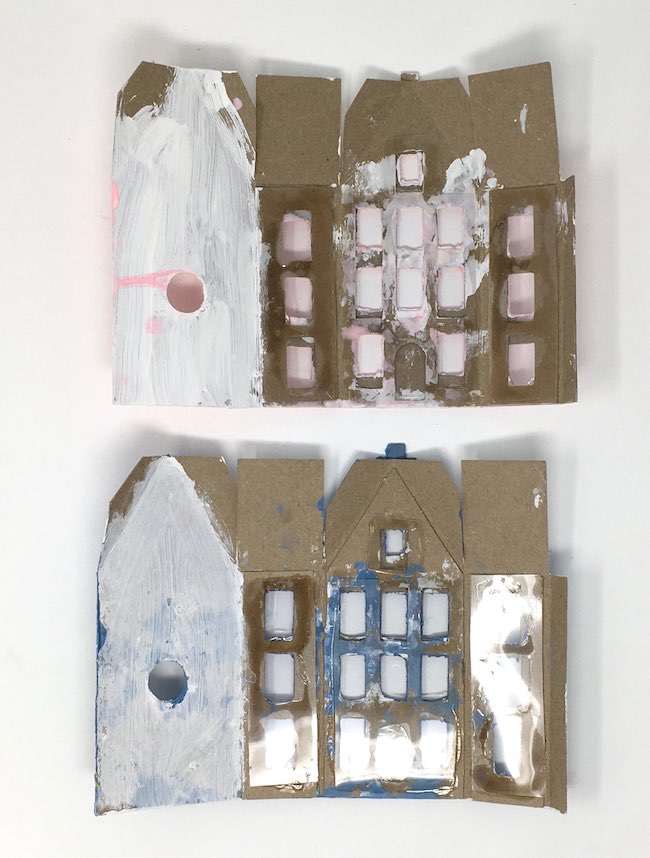
Add texture to your miniature Amsterdam Canal Putz house
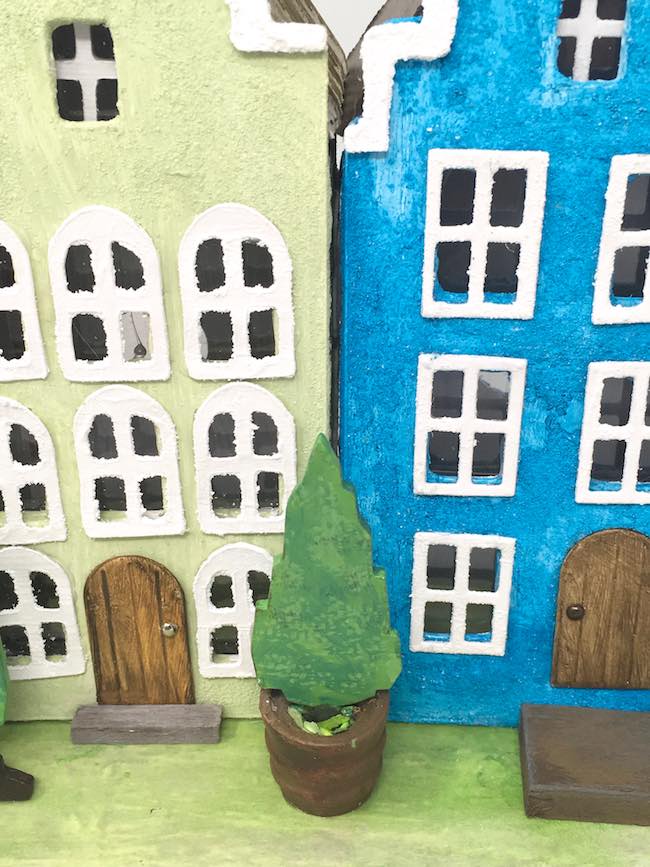
Because the real true houses along the Amsterdam canals are brick and stone, I decided to make mine look like plaster by coating the pattern with a texture paste. For these little houses I used Ranger's Grit Paste. On the previous houses, I mixed the paint with decorative sand like this that I bought at a craft store.
You can see the texture on the back of the houses. What is that hole in the back? That's a tribute to the old timey Putz houses which always had a hole in the back for lighting.
These little houses would also look good with a stone stencil texture like I used on the Irish Stone Cottage.
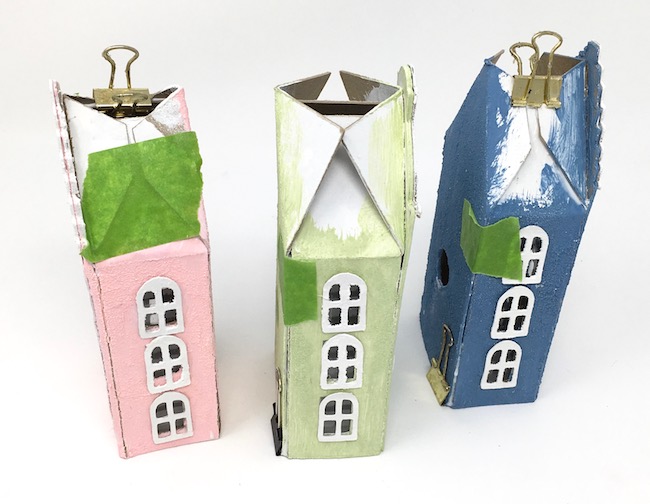
Now paint the cardboard house the color of your choice
Pastels - I picked pastels for these little houses since it is springtime and these houses are part of my 14 Days to Spring Crafts series. But the series may extend into summer at the rate I am going.
And after painting the house, adhere the facade decorations and the windows and doors. I used window dies from the Tim Holtz Village Dwelling series. In the patterns I also included some simple window frames if you want to use them.
Add window material to the inside of your little house
Before you glue your house together, you can recycle clear acetate plastic packaging as window material. I just cut strips and glue it to the inside of the house.
Below you can see the plastic packaging cut into strips and glued on. No one sees the inside of the house so it doesn't matter how messy it is. Also please note that on the final pattern, I only put 2 windows on the sides to make the house sturdier.
Glue the Amsterdam Canal Putz House together
Now you get to see the house come to life. First glue along the glue tab on the side. I use a small binder clip at the bottom like you see on the sage green house below. Also add a small piece of painters tape at the top of the side wall to give it extra support while the glue dries.
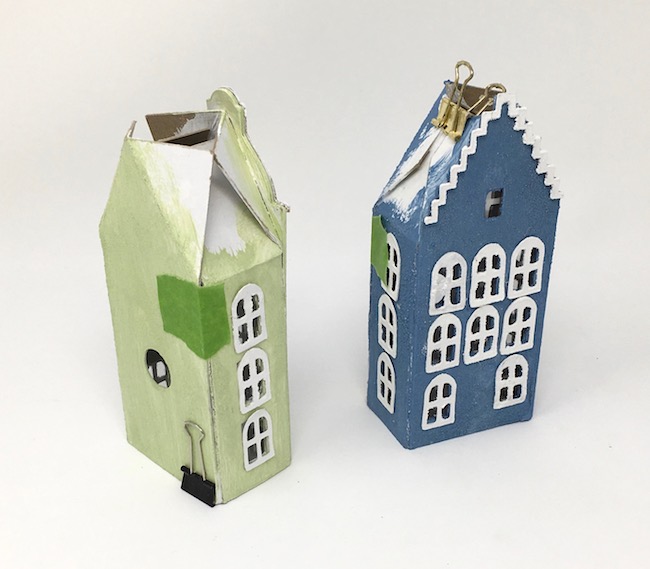
Please note the structure of the roof. The part I call the roof flap folds inside the house and the roof tabs go on the outside. Because the house is only 1.5 inches wide, you need to trim a little bit off the roof tabs. I do that in this step rather than on the pattern to make the pattern easier to cut out for people who cut by hand.
You can see how I use the binder clip on the roof as well. On a narrow house like this only one binder clip fits at a time.
Binder clips, painter's tape, and glue make for very sturdy little cardboard Putz houses.
To complete your Dutch Canal Paper House, glue on the roof
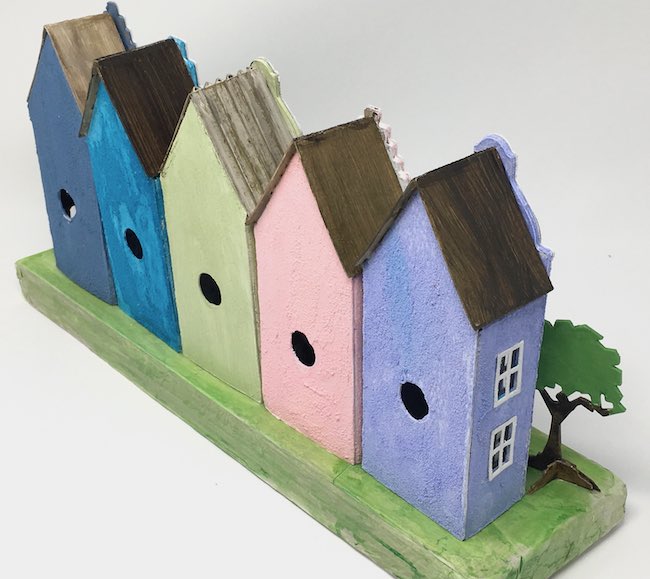
So now that the under-roof structure is dry, glue on the over-roof. Because I wanted the colorful little houses to be the focus, I made pretty generic looking roofs - nothing fancy here. But shakes or shingles would look very nice as well.
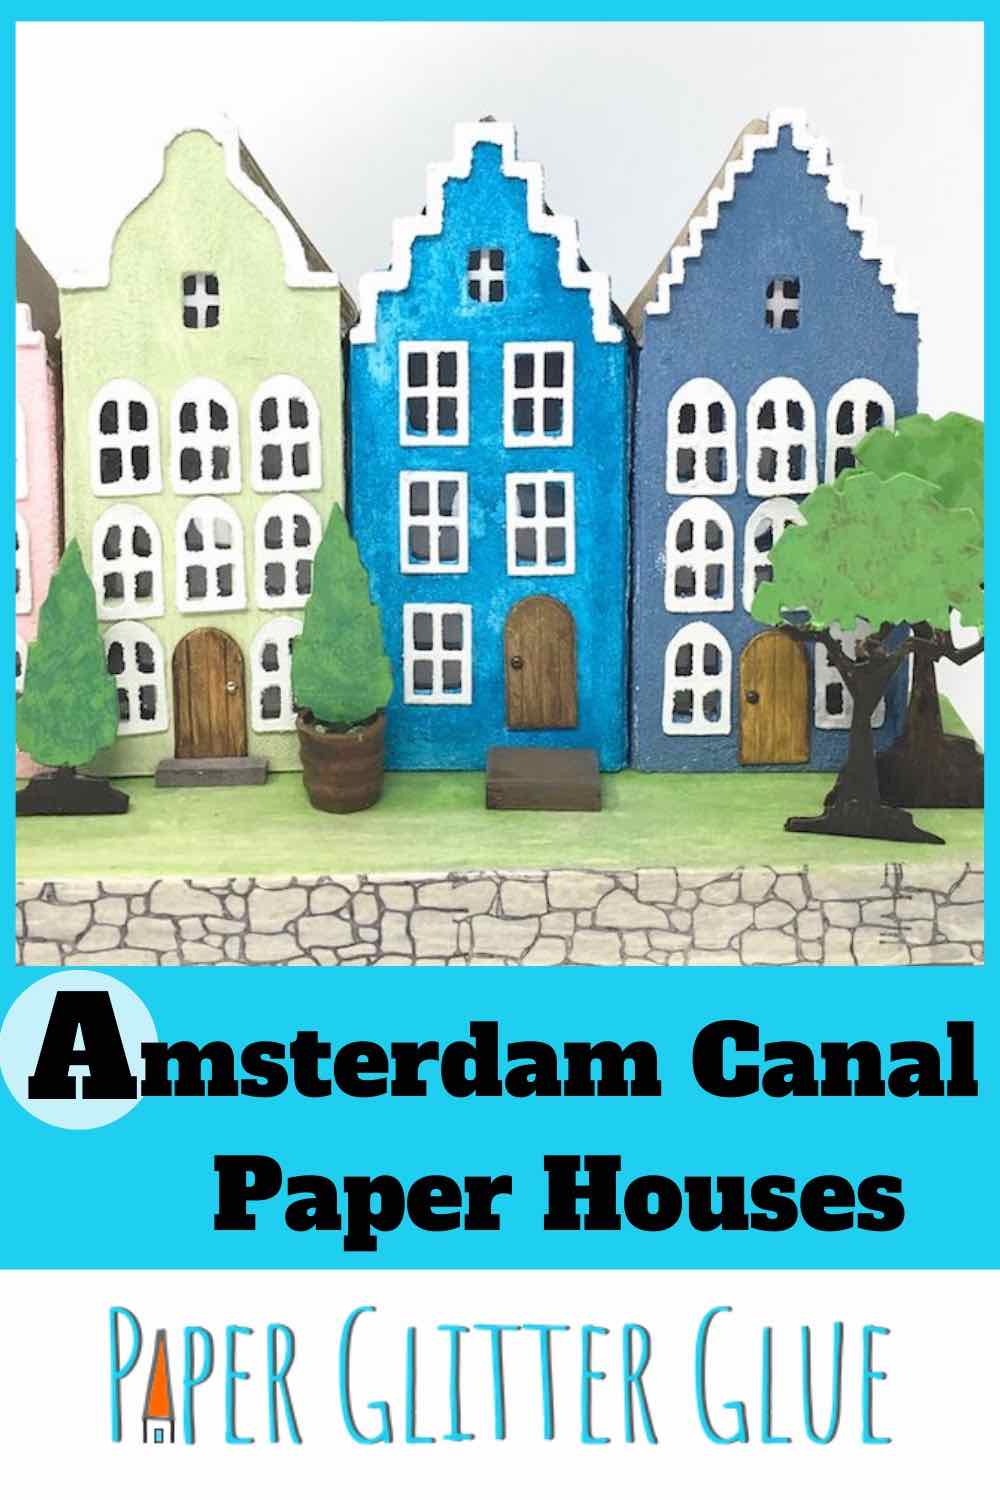
You can see the Amsterdam canal house rooftops the best on this photo.
Since I wanted the little houses to have the option for being adjacent, I didn't design the rooftops to hang over the edge of the house. If you have a stand alone house, you can make the roof top piece longer and wider.
Next to the last step - glue the house to the base
The instructions for the cardboard base for the rainbow row of Amsterdam Canal Putz houses are in a separate post. I didn't want this post to be too long.
I just run a thick bead of glue along the bottom of the house to adhere it to the base.
And finally, landscape your cute little cardboard Putz houses
This is the first time I have used this set of dies called the Village Landscape, but it won't be the last.
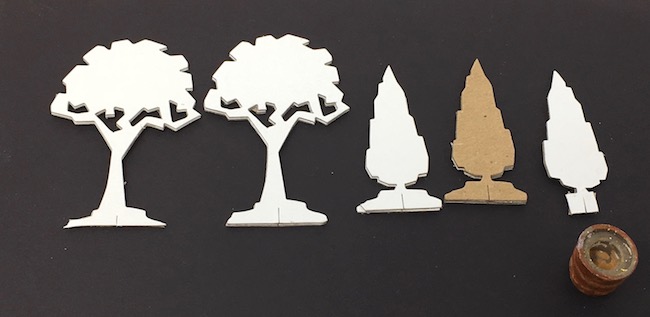
I like having landscaping options for decorating my little cardboard houses. Christmas Putz houses get bottle brush trees. Halloween houses get twisted trees. And these paper Springtime houses get landscaping appropriate for a Dutch canal. I could also use my Cherry Blossom Flowering trees.
But for Rainbow Row I painted these little trees to sit in front of Amsterdam Canal Paper Houses.
One tree is glued in a wooden stand. But the others are glued directly to the cardboard base which has space for 5 LED tea lights.
So that is how you make the Miniature Dutch Canal Putz Houses.
I hope you will try out this pattern. Let me know what you think.
You can email me at [email protected] if you have questions or comments.
Thank you for reading.
Lucy
And remember, you can always pin to your favorite crafting board on Pinterest. Thank you.
Cindy
These little houses are so cute! I thought of a cake when I saw them. I'm fasting today so everything looks like food . . .
Sara Emily Barker
Lucy, I love these little canal houses! the texture on these is perfect and I love the spring colors. So many wonderful details like the roofs and gingerbread. It always amazes me how much detail you get into such a tiny space! It's so fun to 'watch' you make these, and I really appreciate the tutorial. It looks like you had a blast making this street scene. I am slowly trying to catch up, so please forgive my absence. Hugs!