Don’t we all need a Candy Cane Confections or a Yuletide Bakeshop at this time of year? Here’s how to make your very own miniature Christmas bakery. This is Day 6 of the 12 Days of Christmas Papercrafts. To see all the other projects so far, check out this post.
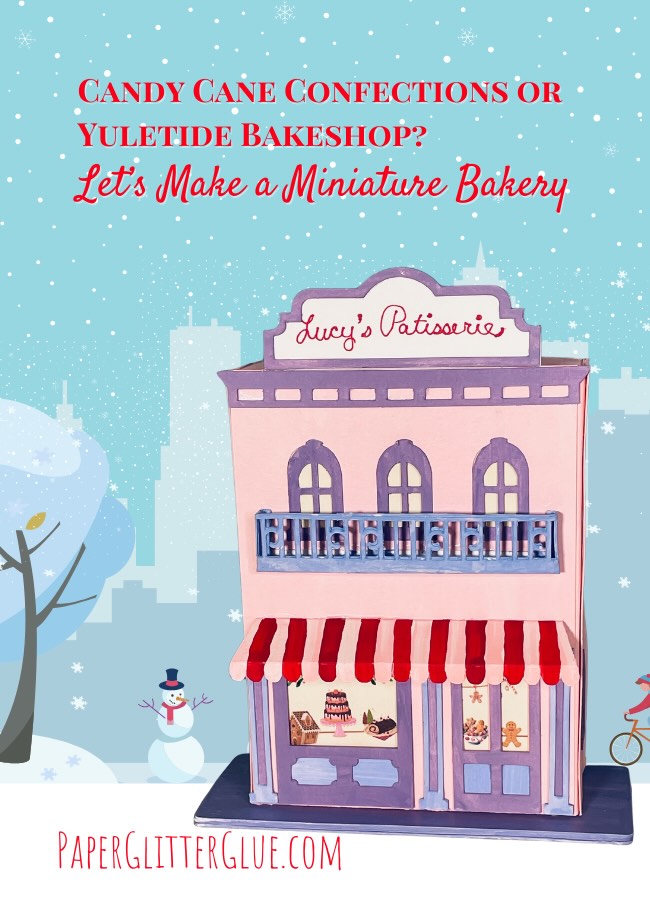
In this tutorial, I’ll show you how create a charming miniature Christmas bakery entirely out of cardstock! The bakery features a festive storefront adorned with tiny Christmas baked goods in the display windows, capturing the cozy spirit of the season. The open back of the bakery reveals shelves, perfect for displaying miniature treats. Whether as a unique centerpiece or a playful addition to your Christmas decor, this project is both fun to make and brimming with seasonal cheer.
What do you need to make the Christmas Bakery?
This post contains some affiliate links for your convenience. Click here to read my full disclosure policy.
Here is a list of supplies I used to make this Yuletide Bakeshop:
- Cardstock - Heavier #110 cardstock is the best cardstock for this structure
- Watercolor paper - I used 140# watercolor paper for my version of the bakery
- Paints if using watercolor paper
- Glue - this is my favorite for cardstock
- Quick Dry Tacky Glue - I use this glue when I am gluing cardboard
- Glitter - this is my favorite brand
- Cutting machine - I use my Cricut Maker, but other cutting machines work as well
- Standard Grip cutting mat
- Scoring stylus
- Decorative elements - the Santa Mug is my favorite
Steps to Make the Christmas Bakery
This tutorial walks you through creating the charming miniature bakery out of cardstock. With festive details, display shelves, and space to showcase tiny or real baked goods, this project is perfect for holiday crafting.
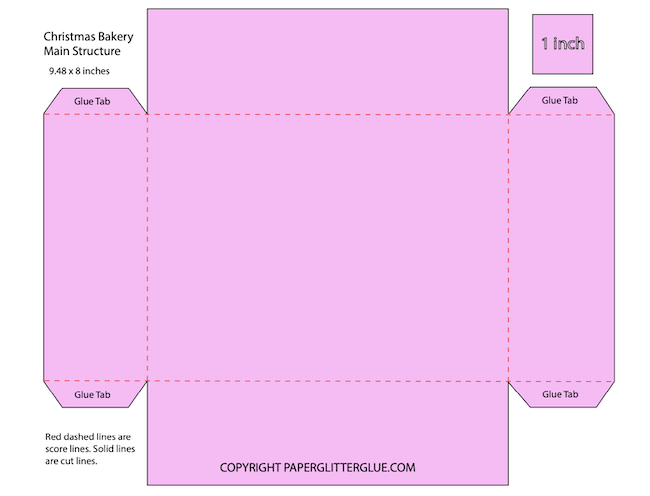
1. Download the Free Pattern - Design No. 175 in the Paper Glitter Glue library
2. Cut out the Pattern Pieces
3. Prepare the Facade Pieces
4. Fold score lines on Main Structure and attach Facades to the Main Structure
5. Assemble the Awning and Balcony
6. Build the Shelves
7. Assemble the Main Bakery Structure
8. Create the Cardboard Base and Attach the Bakery
9. Decorate Your Adorable Bakery
Here's the YouTube Video to help you make the Christmas Bakery
1. Download the Free Pattern - Design No. 175
Head to my Paper Glitter Glue library and download Design No. 175.
The Christmas bakery pattern, Design No. 175, is available for free in the Paper Glitter Glue library. You can download it as a printable PDF or an SVG cut file for cutting machines like the Cricut.
If you don’t already have access to the library, simply subscribe to my newsletter to receive the password instantly. The design includes three decoration options for your chalet and two chimney styles: a side chimney or a rooftop chimney with its matching roof piece.
2. Cut Out the Pattern Pieces
Cut out all the pieces.
Important: If using a cutting machine like the Cricut, identify and designate the score lines on:
- The main body of the bakery
- The bakery shelves
- The awning
- The balcony and its reinforcement
For structural strength, I recommend 110# cardstock or thicker paper. I used 140# watercolor paper, which I painted.
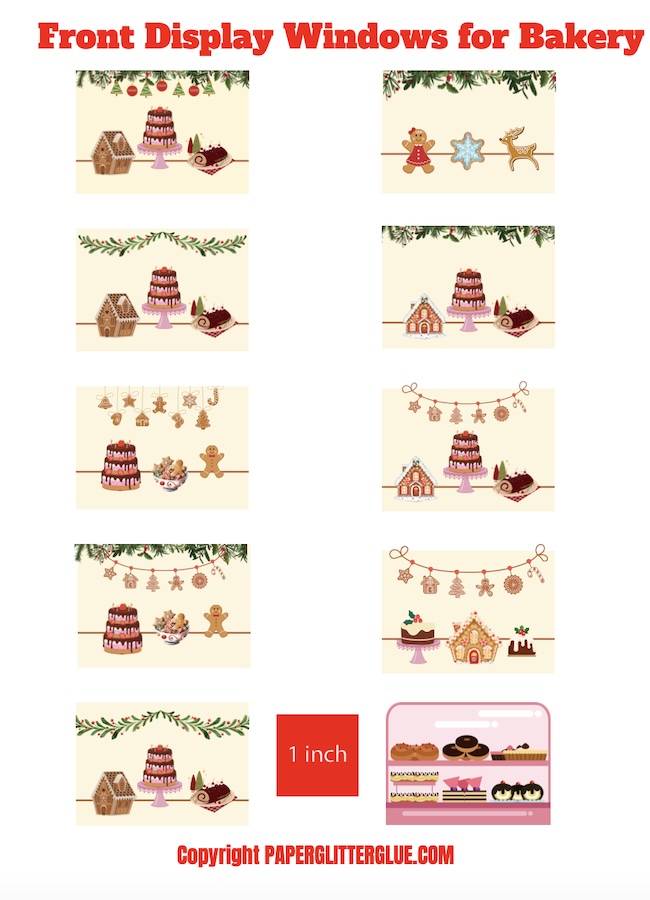
3. Prepare the Facade Pieces
The facade pieces (front, left, and right) are where you’ll add decorative details before assembling the bakery.
These are the decorative window options for your bakery.
- Add Dimensional Details:
- Glue contrasting pieces behind the door frame, display window frame, top trim, and columns to mimic wood paneling.
- Create the Marquee Sign:
- Choose a name for your bakery, glue it onto the marquee background, and attach the decorative trim.
- Decorate the Side Windows:
- Select open or framed windows, depending on your display preference. I used open frames on the lower side windows and added cut-out bakery items for a festive touch.
- Glue the window backing of your choice behind the facades:
- The large display window is the most fun window to decorate. Choose from the printable PDF files included in the pattern folder or make up your own window designs.
4. Fold score lines on main structure and Attach Facades to the Main Structure
Before gluing, fold along all score lines on the main structure piece to ensure proper alignment.
- Start by attaching the side facades, as one trim piece on the front facade slightly overlaps the sides.
- Apply glue to the main structure and press the facade pieces into place.
5. Assemble the Awning and Balcony
Both pieces involve narrow strips, so work carefully. It helps to use a metal edge ruler here so you can fold along these narrow strips of cardstock.
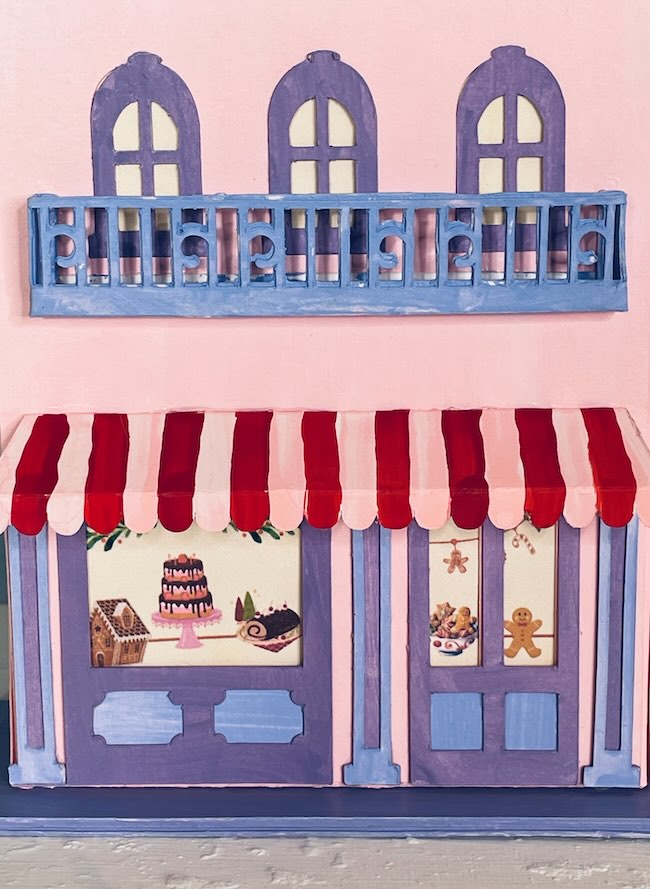
- Awning:
- Fold the back edge at a steep angle for proper positioning.
- Balcony:
- Reinforce the railing by gluing the extra railing piece provided in the pattern.
- Fold the edges to form the balcony shape. Refer to photos for guidance.
6. Build the Shelves
While my bakery has only one shelf, I recommend adding two for both stability and style.
- Fold along the score lines and apply glue to the inside rectangle of the shelf. Do not glue the tabs.
- Fold the shelf in half and press to adhere, ensuring the tabs remain free.
- When you are ready to attach the shelf to the main structure, apply glue to the side tabs and insert it into the bakery structure.
7. Assemble the Main Bakery Structure
- Glue the side tabs to connect the bakery into a rectangular shape. Let it dry.
- Insert the shelf(s), securing them with clips or tape until the glue sets.
Note: Try not to apply too much side pressure when adhering the shelves because it may cause an indentation in the sides of the bakery if you do that. On my version, the shelf was not quite wide enough. I've fixed that on the pattern.
8. Create and Attach a Cardboard Base
The bakery can be top-heavy, so a sturdy base is essential.
- Glue 3-4 layers of cardboard together to form the base. To avoid warping, dry under a flat, heavy object.
- Paint the base or cover it with cardstock, then glue the bakery to the base.
9. Decorate the Bakery
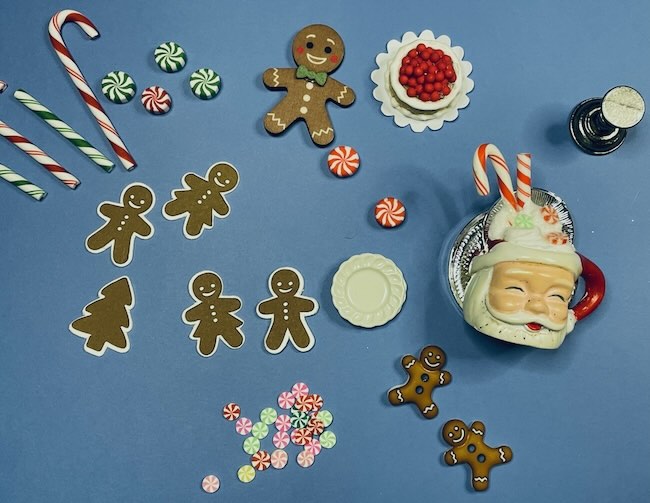
Bring your bakery to life with tiny treats!
- Visit dollhouse sections of hobby stores for miniature cakes and breads.
- Add creative touches like tiny gingerbread buttons or gingerbread garlands made my free file of tiny gingerbread cookies - Design No. 176 in the Paper Glitter Glue library.
Your Tiny Bakery is now ready to shine as a festive centerpiece or display! Share your creations and tag me—I’d love to see how you decorate yours.
Questions?
If you have any questions, please leave a comment or email me - [email protected]
Leave a Reply