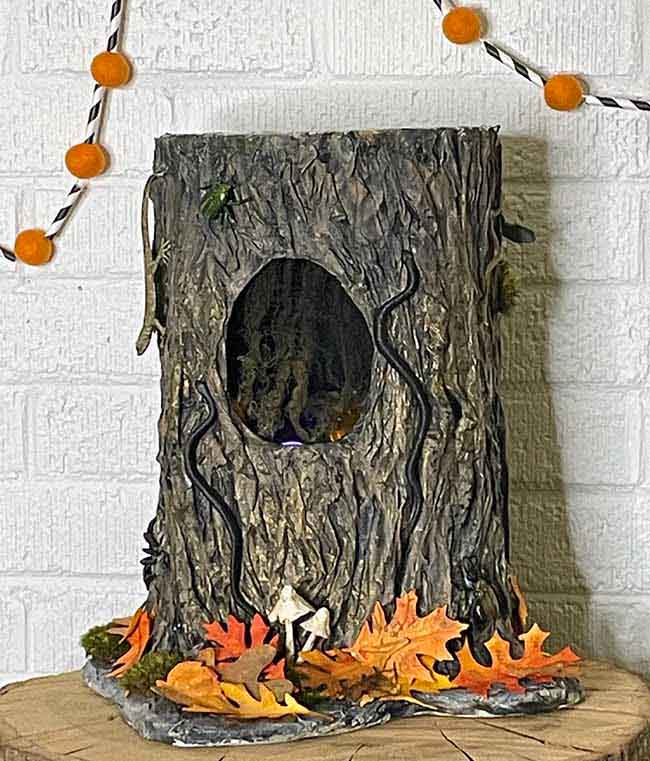
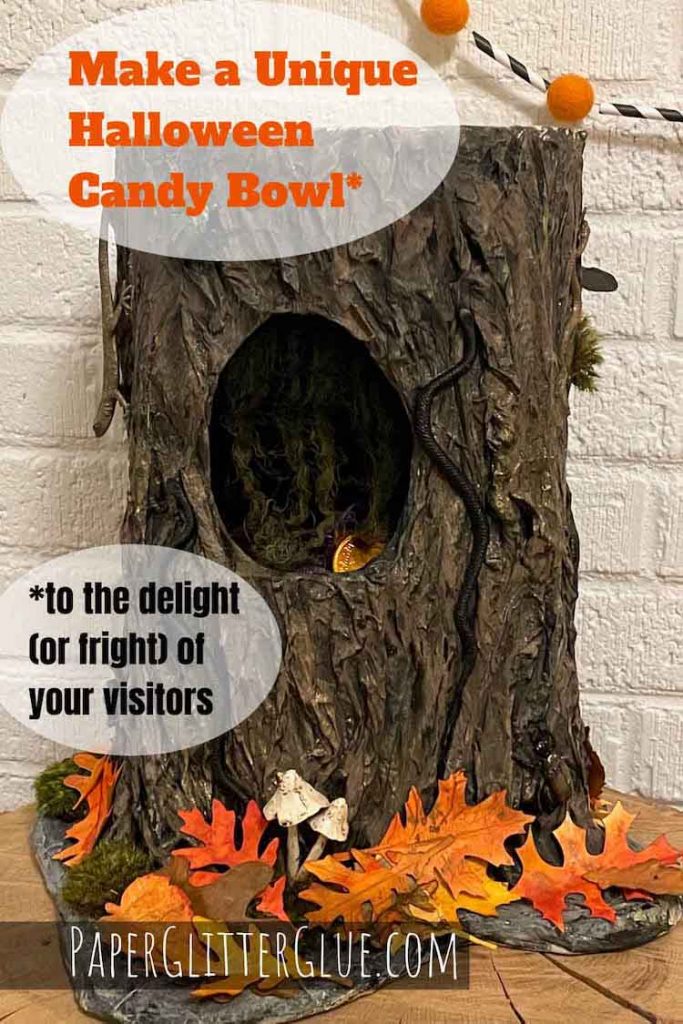
Want a great way to display the candy for Halloween? If you like to give out candy for Halloween, you will love this Halloween Candy Bowl dressed as a tree stump with scary (but not too scary) creepy crawly snakes and insects surrounding it. Will they bite? I don't think so.
It's a great Halloween decoration that you can make with simple and inexpensive materials.
Oh, and the Creepy Crawly Tree Stump Candy Bowl is such a fun craft to make - both fun to make and fun to see people's reactions to it. Here's to make how to make a the Halloween Candy Bowl that looks like a tree stump. The paper mache tree stump is easy and you can make it as scary (or not) as you wish.

But first I must confess, I didn't come up with this idea on my own - it's from Martha Stewart. I wish I could say the idea just jumped into my head - but that is just not true. I saw a Halloween candy bowl that was made from vase shaped like a log with all these snakes and other scary insects hot glued on the vase.
Well, you know you how I LOVE wood grain and trees so I immediately imagined a way to make a candy bowl where you have to reach into a rotted tree stump past creepy crawlies to get to the candy. A paper mache tree stump is the perfect solution.
Here's my YouTube LIVE video about making the Tree Stump Candy Bowl
This post contains some affiliate links for your convenience. Click here to read my full disclosure policy.
Table of Contents
What do you need to make the Creepy Crawly Tree Stump Halloween Candy Bowl?
- Poster board or other cardboard for the main tree stump structure (22" x 28")
- Strong corrugated cardboard for base
- Brown packing paper or newspaper
- Masking tape
- Paper Mache mix - flour, water, white PVA glue
- Gesso primer - both black and white
- Acrylic Paint in tree bark colors, these are what I used:
- Optional, Distress Mica Stain for shine
- Fall Paper Leaves - here is how to make them
- Other decorations for the paper mache tree stump:
- Fake Snakes
- Fake Insects
- Optional - Alcohol Pearls Ink to decorate the plastic snakes and insects
- Cheesecloth
- Mushrooms
- Moss
- What else you can think of to decorate your spooky Halloween Candy Bowl?
Steps to make the Tree Stump Halloween Candy Bowl
- Construct a strong base for the tree stump candy bowl
- Make the tree stump form with poster board
- Make up paper mache mix
- Start applying paper mache inside tree stump, then paint inside
- Glue on top of tree stump
- Add paper mache bark to the tree stump structure
- Prime and paint tree stump
- Decorate your paper mache tree stump for the real fun
There aren't any specific patterns for this project, but if you want to get my newsletter where I share my newest crafts, subscribe below.
So let's get started making this cool Halloween decoration, ok?
Construct a Strong Base for the Tree Stump Candy Bowl
Because the tree stump has a lot of wet paper mache during construction, the base needs strong with several layers of cardboard to hold the structure without curling. I like to use coated corrugated cardboard from cat litter boxes. If you use 3 layers, you base is much less likely to curve or flex.
I made this base similar to the way I make the bases for my little houses - layers of corrugated cardboard glued together with hot glue and covered with brown packing paper or newspaper.
For this specific project, I used 3 layers of corrugated cardboard glued together. You can see it in some of the next few photos.
Make the Tree Stump Form with Poster Board
Poster board is useful here because it is flexible enough to make a circular framework for the tree stump. But use whatever works for you. Use two sheets of full sheet of regular poster board (22"x 28").
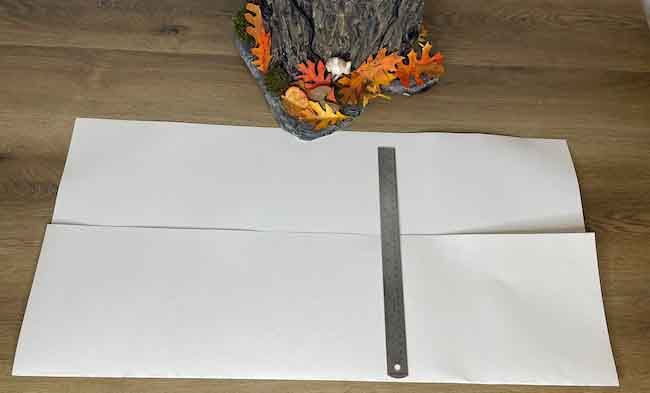
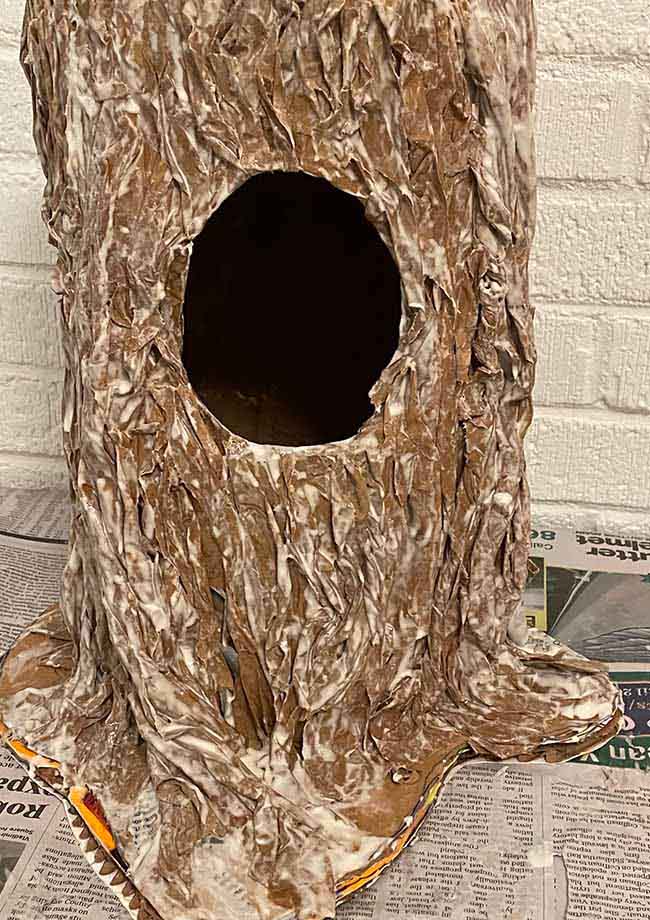
To make it stronger, I fold the poster board so it is thicker at the bottom and My tree stump is 14 inches tall about 8.5 inches in diameter. Also I used two sheets for extra support.
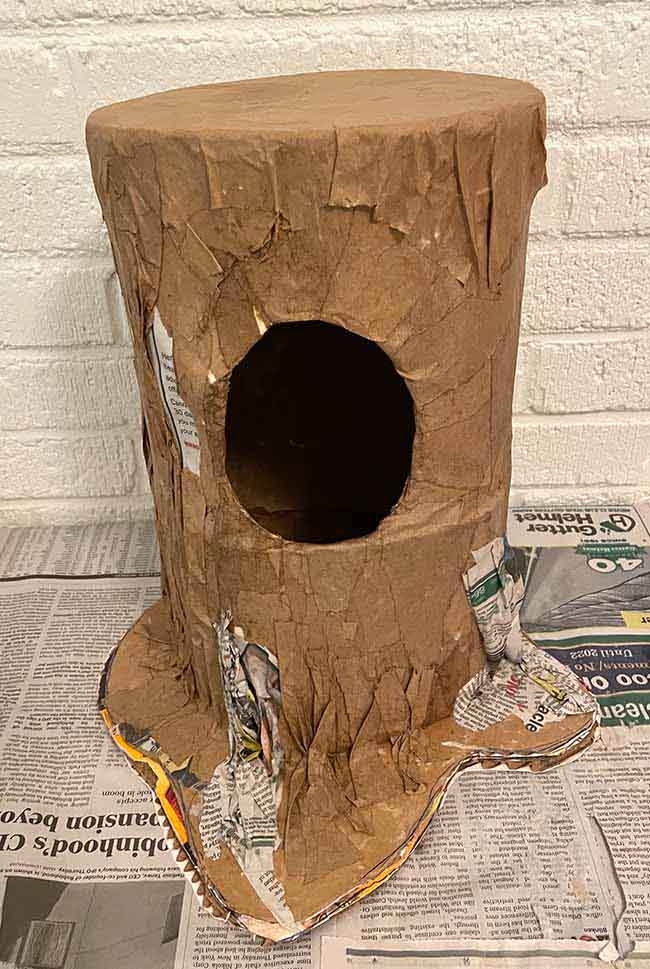
Below you can see what I am talking about. In addition, you can reinforce the inside of the tree stump form with extra poster board. You need it to be strong to withstand the moisture from the paper mache.
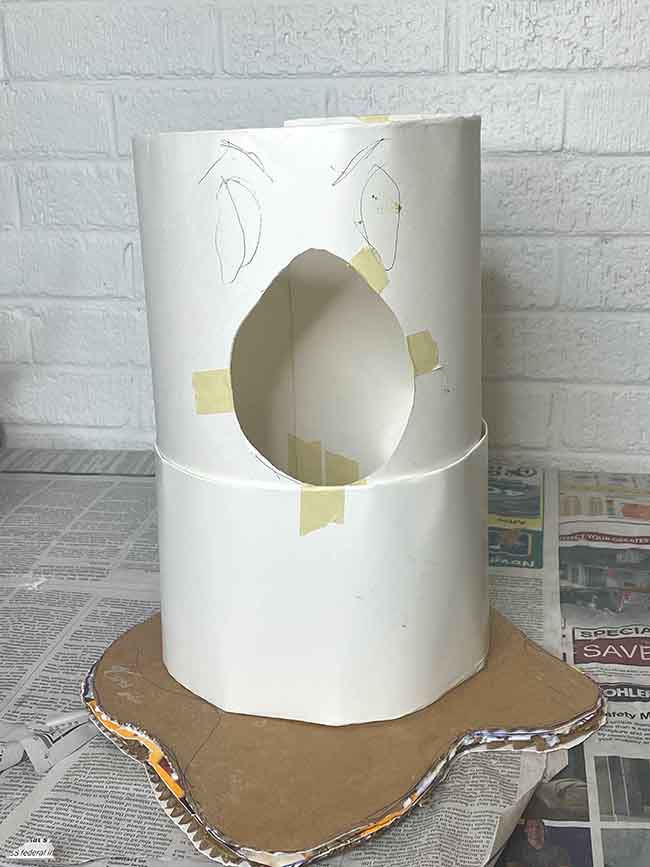
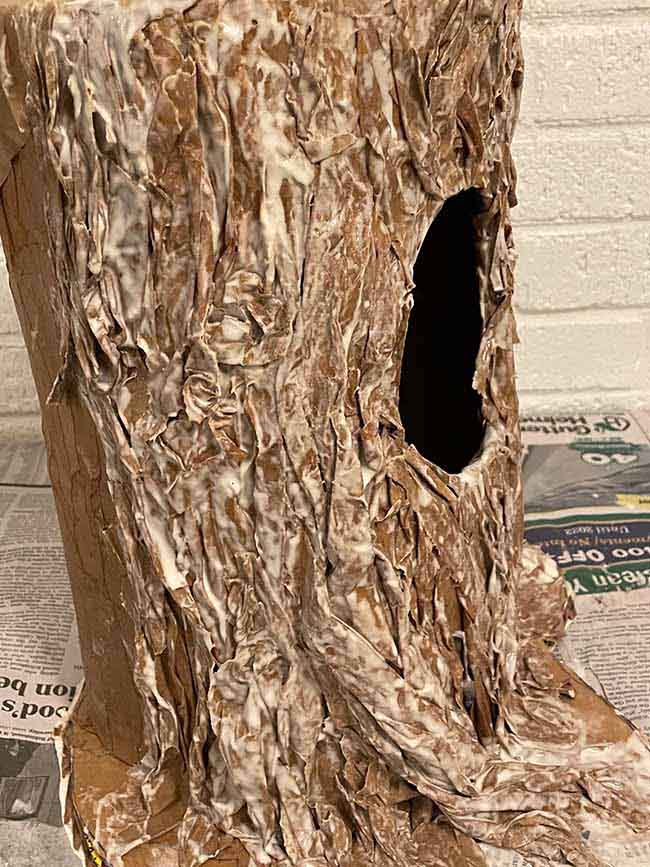
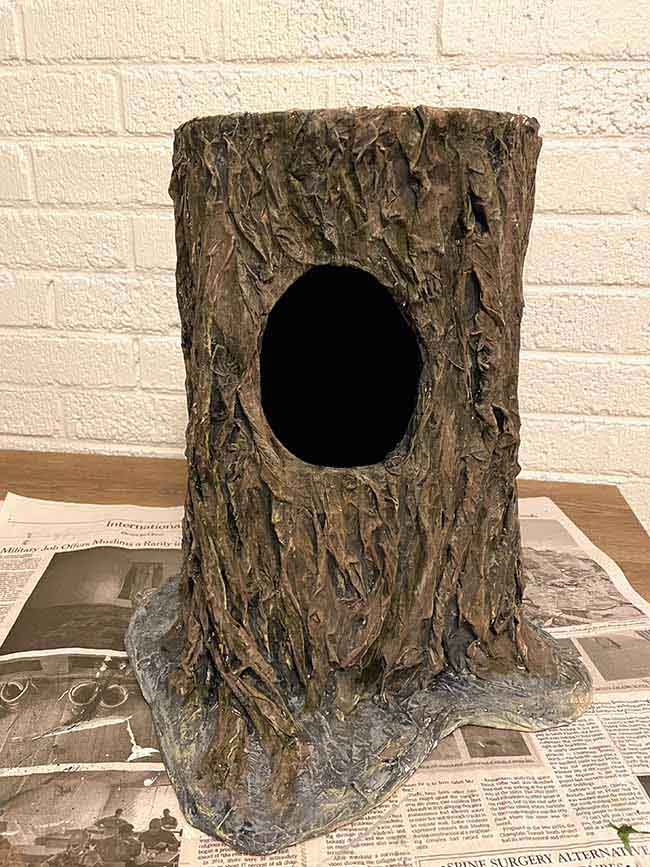
Tape the circular form together with masking tape. Cut a hole in the tree stump form big enough for someone to reach in for candy. The dimension for the opening is approximately 4 inches in diameter.
And above you can see that I thought about making some eyes with the opening as a mouth, but I eventually decided against that.
Make up the Paper Mache Mix
The recipe for a simple paper mache mix is:
- 1 cup flour
- 1 cup white PVA glue
- Water to make it thin enough to apply
Just mix everything together. Start with a smaller amount of water - say ½ cup, then add more to thin it enough to spread on the paper.
Start applying the Paper Mache inside the Tree Stump, then Paint Inside
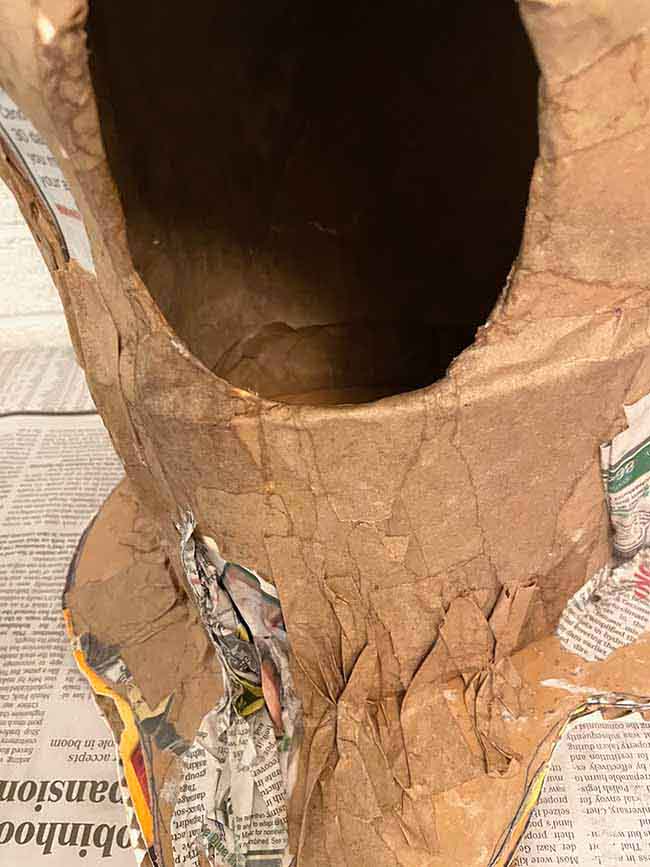
First, tear the paper in long strips. Dip the paper strips into the paper mache mix and apply to the inside of the tree stump.
This step ensures that the tree stump form adheres to the base and makes it stronger to hold the subsequent layers of paper mache on the outside.
Allow this step to dry completely, otherwise the form may get soggy and sag on you.
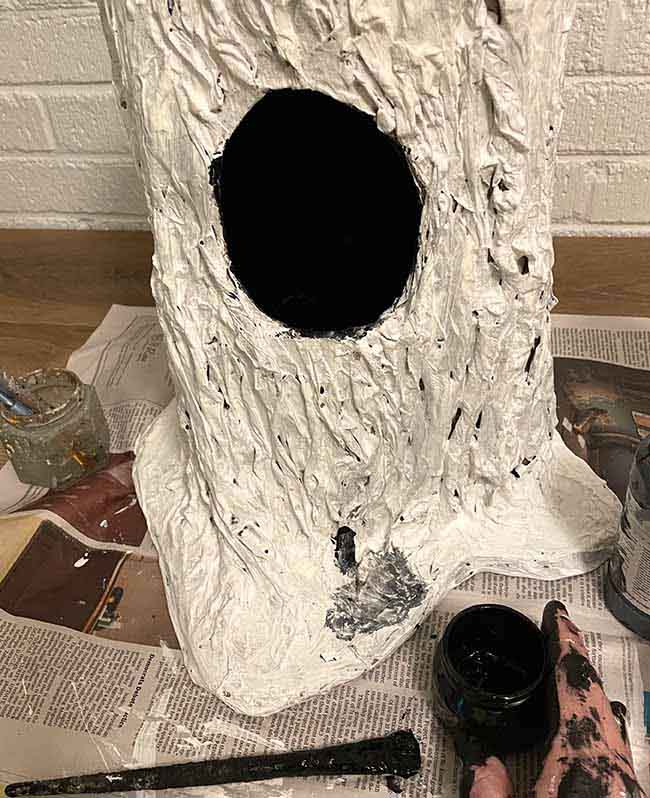
In addition, it is important to paint the inside with black paint before you put the tree stump lid on. It's not easy to paint with the top of the tree stump is already glued on. If you wait, the process is extremely messy as seen below
Glue on the Top Tree Ring Section
Next, cut a circular piece of cardboard big enough to cover the top of the tree stump. As with the base, I used very sturdy cardboard for this.
Now, glue that cardboard to the top of the tree stump using paper mache strips.
When you apply the paper mache strips to the top of the tree stump, try to mimic the circular tree ring pattern. I wasn't real successful in doing that, but it's worth a try.
Add Bark to the Tree Stump Structure
For me, this is one of the best steps in making the Halloween Candy Bowl.
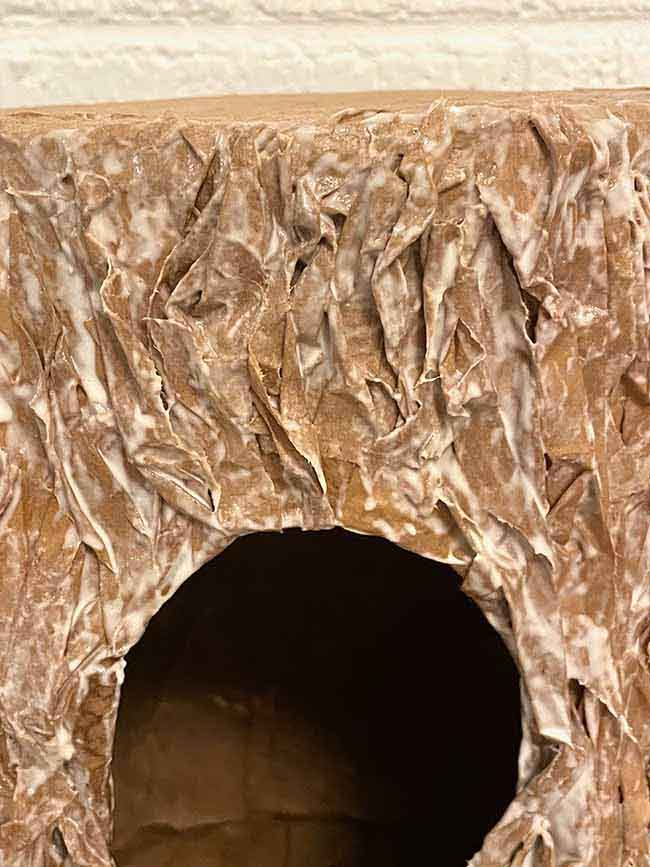
First, crumple the brown packing paper or newspaper to add more texture. Then tear the strips from 1-4 inches wide so you can wrinkle or twist them longitudinally to mimic bark even better.
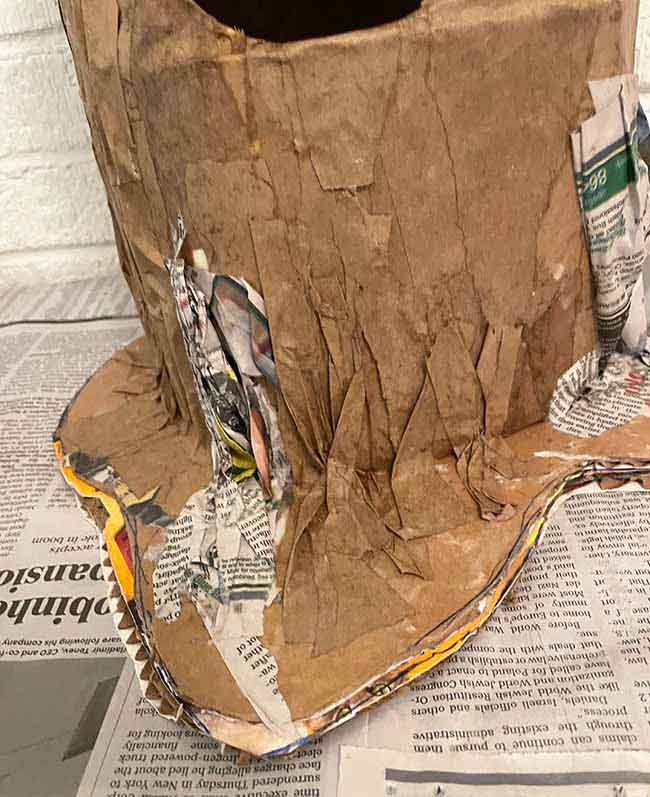
In the photo below, you can see one thick section of paper twisted to make one side of the tree stump and root.
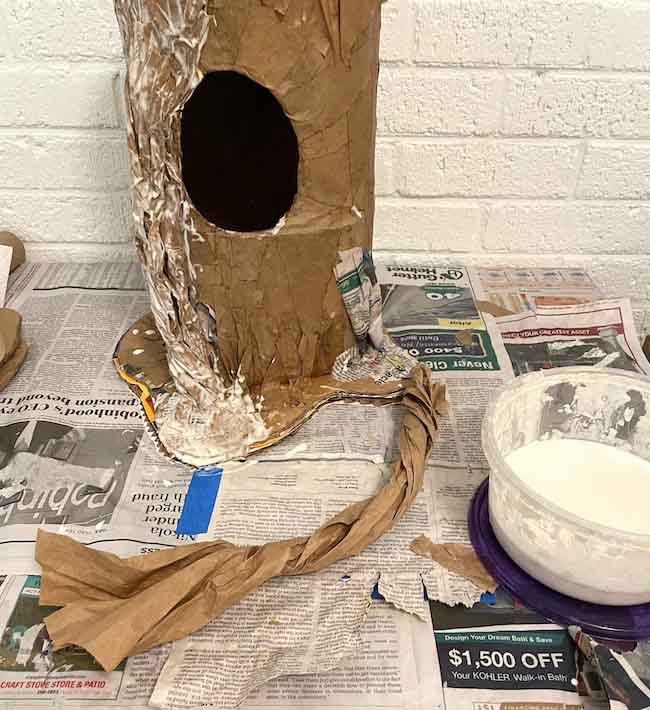
Dip the paper into the flour-glue-water paper mache mix and apply to the outside of the tree stump. Don't worry, you can't mess this up. If you apply some paper that looks kind of funky, just cover it with another layer.
Really, just have fun with this paper mache step.
And it is very important to let the paper mache completely dry so the form doesn't start to sag. I dried mine in front of a fan.
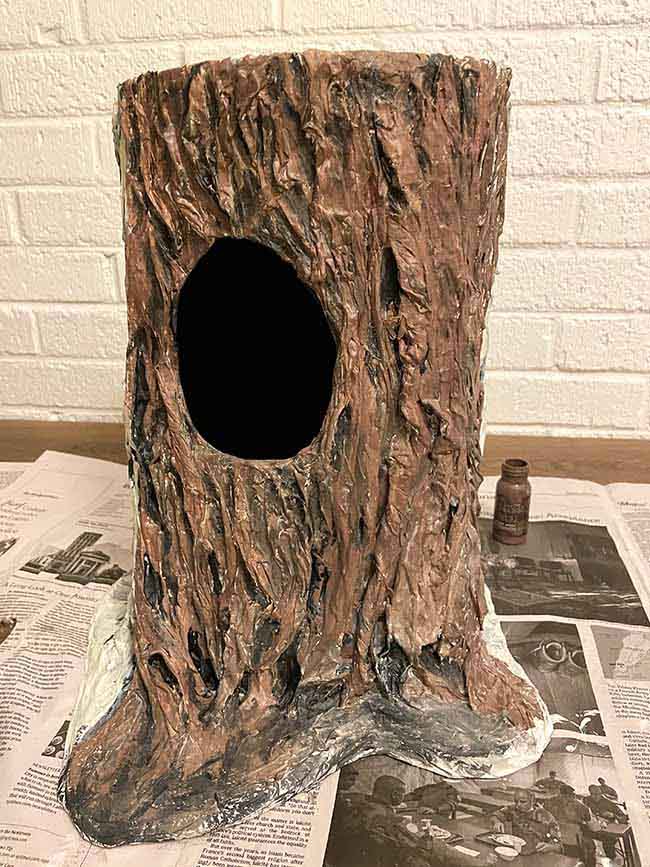
And here is the tree stump with all of the paper mache applied.
Prime and Paint the Tree Stump Candy Bowl
Another step that I love to do. Using paint to mimic wood or bark is just one of my very favorite crafting thing to do.
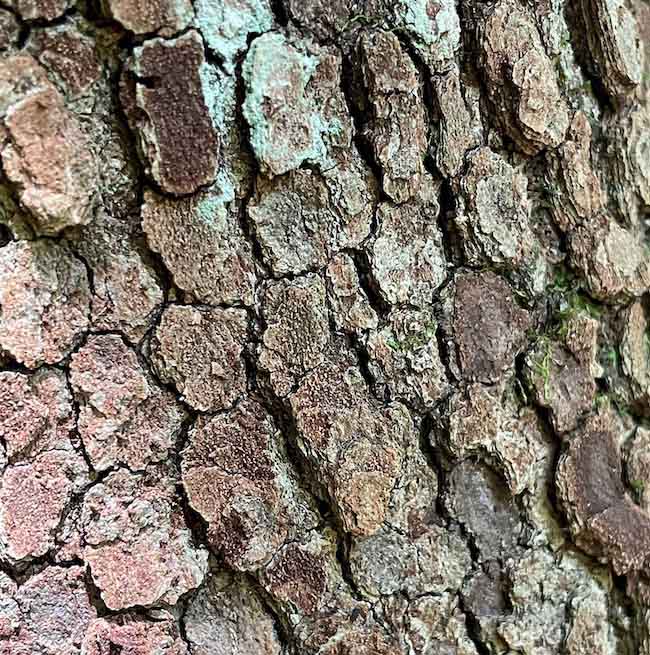
And it is not hard. All you have to do is remember to use layers of color because that is what the surface of real bark looks like.
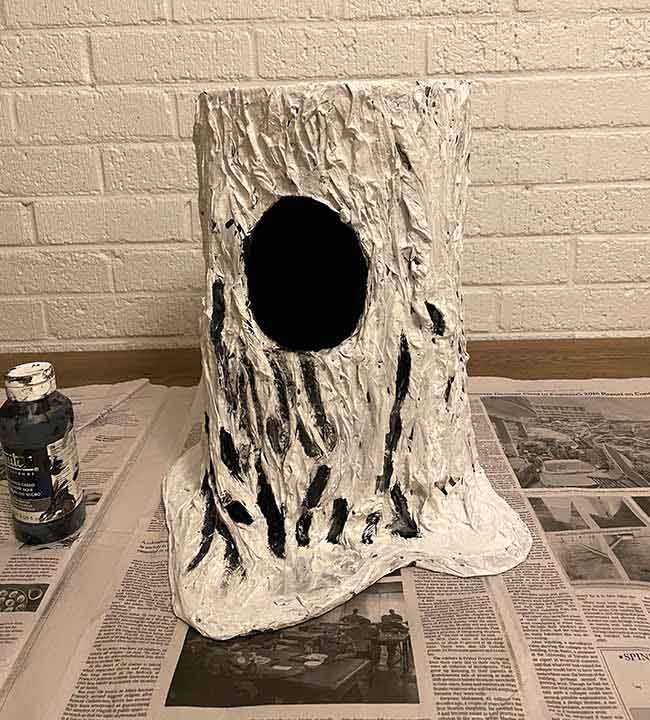
Prime your Halloween Candy Bowl with Gesso
First prime your paper mache tree stump. Why do you use gesso? It provides tooth or a surface texture that allows paint to adhere better. I almost always use gesso for the projects that I paint.
On my first paper mache tree stump, I primed it with white gesso. But I found there was a problem using white gesso - namely all these white spots hidden in so many crevasses. So I suggest that you mix a little brown or black paint with the white gesso so all these spots are not so obvious and hard to cover up.
Paint the Halloween Tree Stump to Mimic Bark
Now here is how I use paint to build up layers of colors.
First, paint black paint in the crevasses on the paper mache surface. This step provides the contrast and depth to the bark surface.
Next, apply a base brown color to most of the tree stump. For this step, I used Walnut Stain Distress Paint. It is a just plain brown color that works well as a base color.
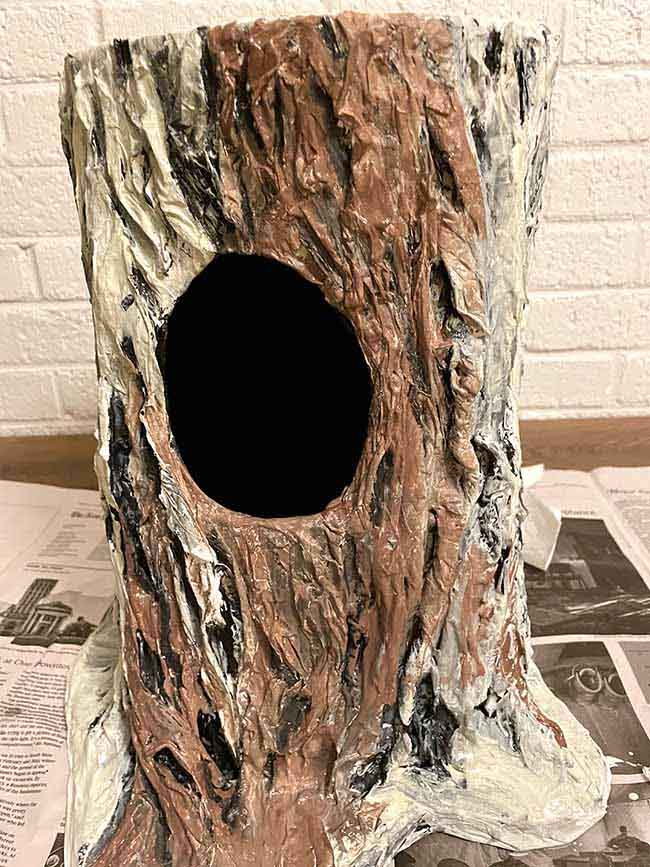
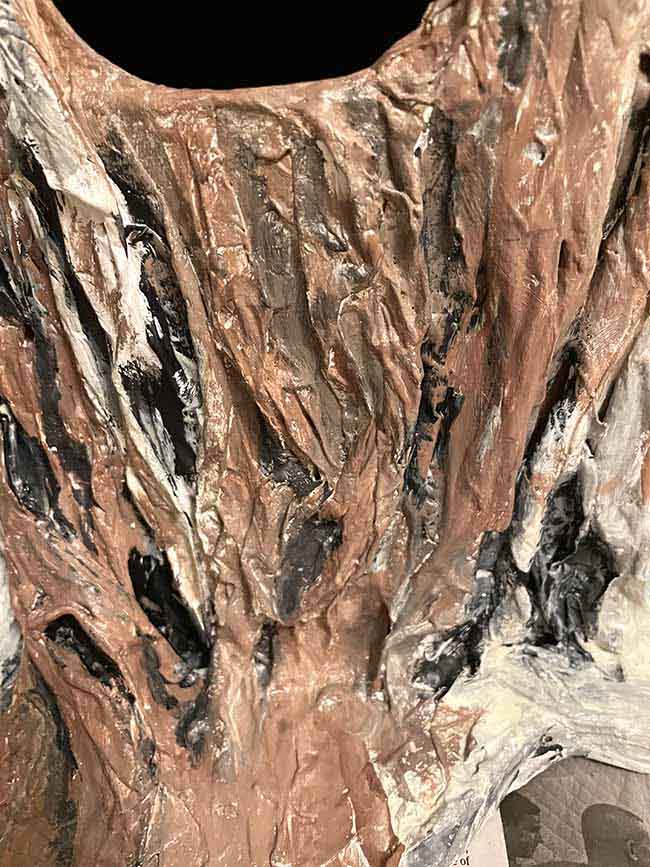
After this choose colors that you like. I use various shades of brown and yellow to mimic the colors I see on tree bark. Just play around with these colors.
Again, you can't mess it up here. If you don't like what you painted, paint over it. It's as simple as that.
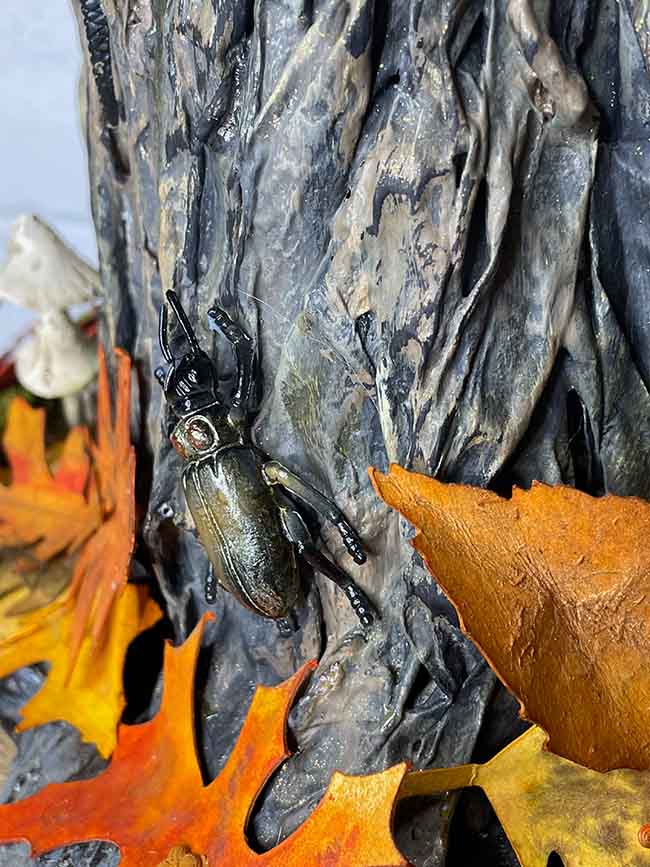
Finally, I spritzed a little mica stain on the surface to add some sparkles of shine on the surface.
Finally, Decorate Your Tree Stump Halloween Candy Bowl
One of the fun parts for this is finding the perfect embellishments to make your Halloween Candy Bowl spooky and as scary as you like. You can find them in craft stores or in toy sections of other stores or even dollar stores. But you can also buy them online.
To glue these embellishments to your tree stump, you can use hot glue if you like, though I used Ranger's Collage Medium which worked very well.
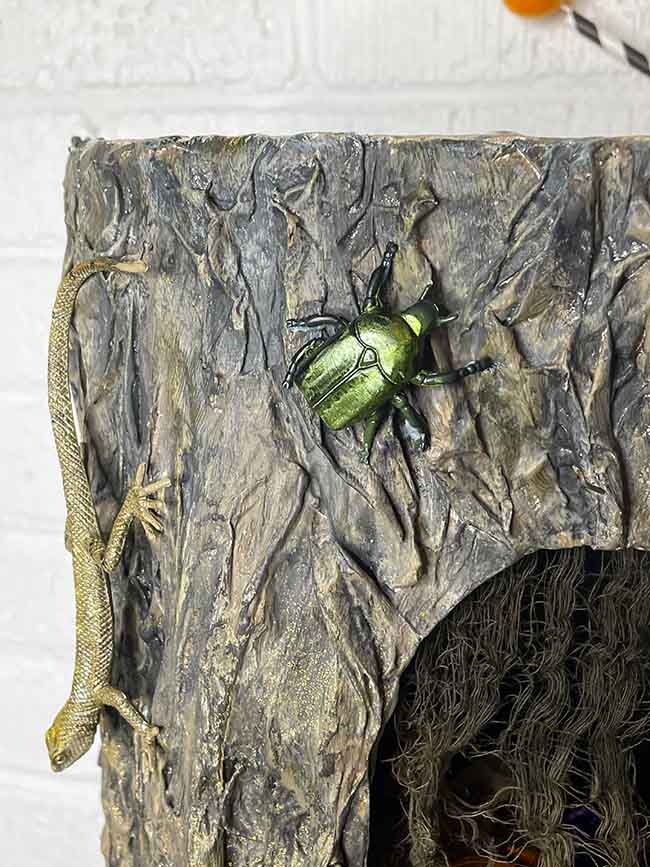
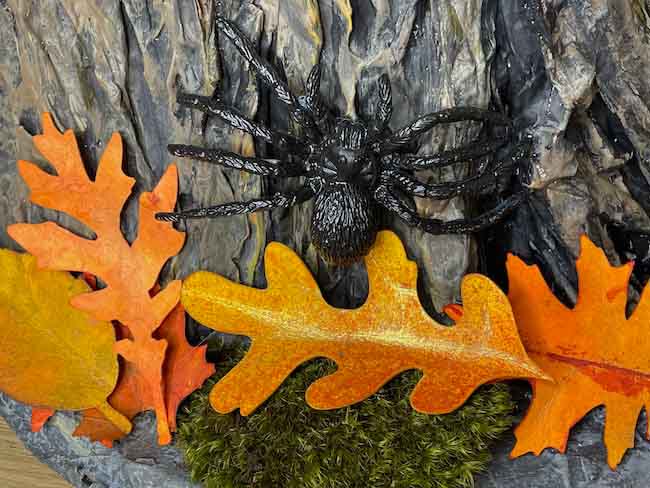
Add Fake Snakes and Insects
Here are some examples of fake snakes and insects that you can purchase:
- Small plastic snakes
- Large plastic snakes - too scary for me
- Fake Insects - mix of lifelike bugs
- Plastic Spiders
- Fake Cockroaches - No, just no. Can't do it, but you might want to
To make the plastic insects and snakes look a little more realistic, I painted some of them with Alcohol pearls ink. I love this effect.
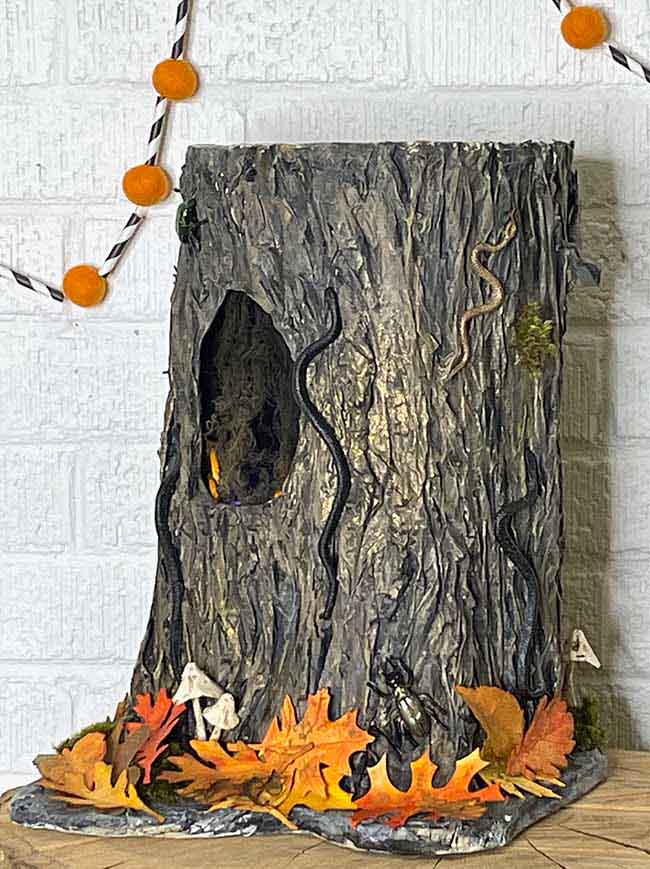
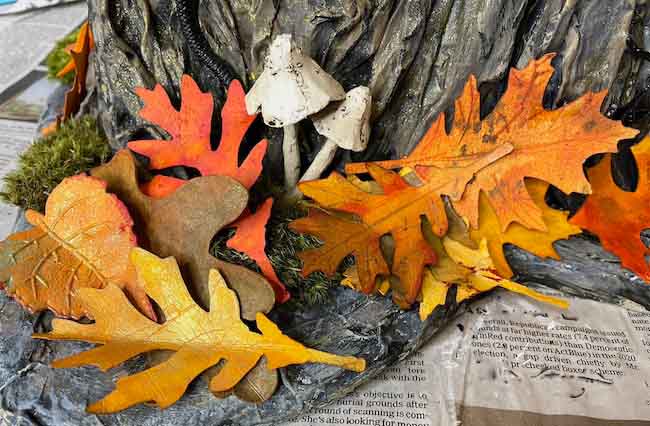
Add Fall Paper Leaves
And I made some beautiful Fall paper leaves for the base of my Tree Stump Halloween Candy Bowl. I think they add so much to the tree stump. What do you think?
But you can also purchase paper leaves if you like:
Still, I like to make my own. Which do you prefer?
What about Mushrooms?
I love these Tim Holtz toadstools. I think they add a nice decorative touch to the base of the tree stump. But there are many other options - make your own with polymer clay or paint wooden mushrooms.
Add Decorative Moss
Moss can cover up any sections you aren't happy with, plus it looks perfect for the base of the tree stump. I found some great moss in my neighborhood, but you can also purchase moss.
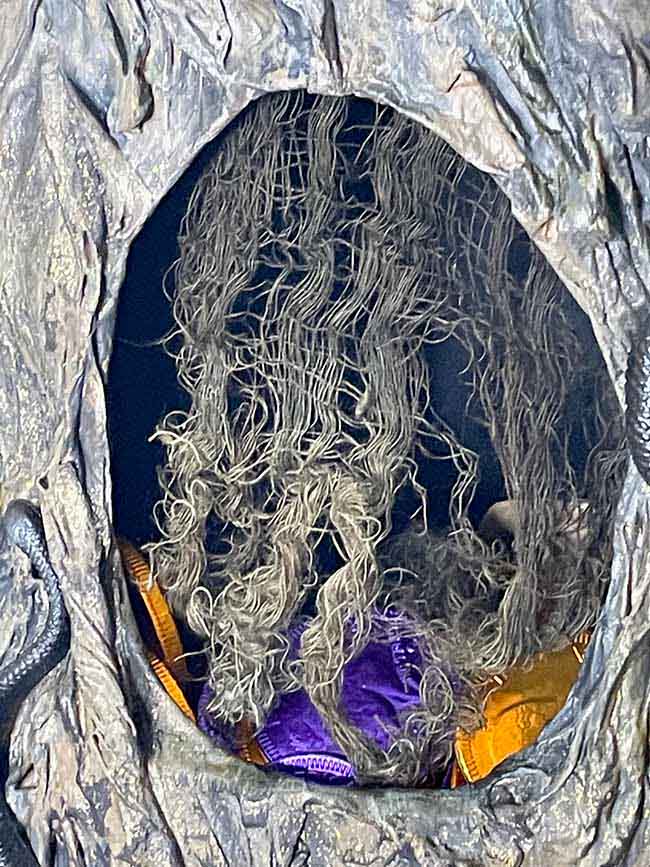
Glue Cheesecloth to the front
This step is optional, but I glued some cheesecloth to the opening in the tree stump so you have to reach through the stringy cheesecloth to get to the candy. Just another spooky detail for the Halloween candy bowl.
And then you can use whatever else you can think of. I am very happy with the way my Halloween Candy Bowl came out.
And that is how you make the slightly Scary Tree Stump as a Halloween Candy Bowl
This year, I am going to set-up a stand in my front yard so anyone passing by can get some candy - if they dare. I think the kids in the neighborhood will enjoy it.
I am joining 2 different online challenges for with this project:
- Funkie Junkie Boutique Challenge which is "De-stress with distressing'. I certainly think this project meets the challenge.
- Simon Says Stamp Monday Challenge which is Glimmer and Sparkle. I think the shiny insects made with Ranger's Alcohol Pearls and Distress Mica stains on the leaves and tree stump count as glimmer and sparkle.
Please let me know what you think. Have fun crafting!!
Lucy
Pin to Your Favorite Pinterest Board
P.S. Remember to pin this to your Favorite Pinterest Board so you can remember where you found it. And feel free to share it on Facebook as well.
Cheryl
Yours is SO much better than Martha's, Lucy! I'm gonna make this for sure, and hope it's half as good as yours. Thank you!
Lucy
Thank you so much, Cheryl. I hope you will make it because it is really fun. And everyone loves it.
Lucy
Jenny Marples
I am so glad you showed how this marvellous tree stump was created as it looks so realistic! And of course it has been enhanced and embellished so perfectly with your leaves and choice of bugs. Thank you for joining us at The Funkie Junkie Boutique blog x
Lucy
Jenny,
I know it's a detailed project, but I think it is worth the time to make it. Mimicking wood is one of my favorite things to do on my crafts.
Thank you so much for your kind words.
Lucy
Lara Struttman
I do prefer your tree stump vase to Martha Stewart’s! Well done
Lucy
Oh, that is such a nice thing to say. I didn't make it quite as scary because I left off the big snakes. I just couldn't do that. But the little snakes will still startle you.
Thank you.
Lucy
Janna Ketchum
Wow! What a fantastic idea, love the beautiful leaves around the tree stump. Thank you for joining the Funkie Junkie Challenge.
Lucy
I love the leaves too. You don't even have to make it scary, it's perfect as just a fall decor.
Thank you so much.
Lucy
Laura Gilhuly
This is awesome! Great work! Thank you for joining us at The Funkie Junkie Boutique!
Lucy
Thank you so much. I love your shop. It's my favorite place to find my supplies.
Cathy Royal
This is absolutely great! I Really love it .
Lucy
Thank you, Cathy. I am so happy at the way it turns out. I will film a video today and try to post the video on how to make it this week.
Tera
Fabulous!!!! Tha you for joining the Frilly and Funkie challenge !!
Lucy
Thank you, Tera.