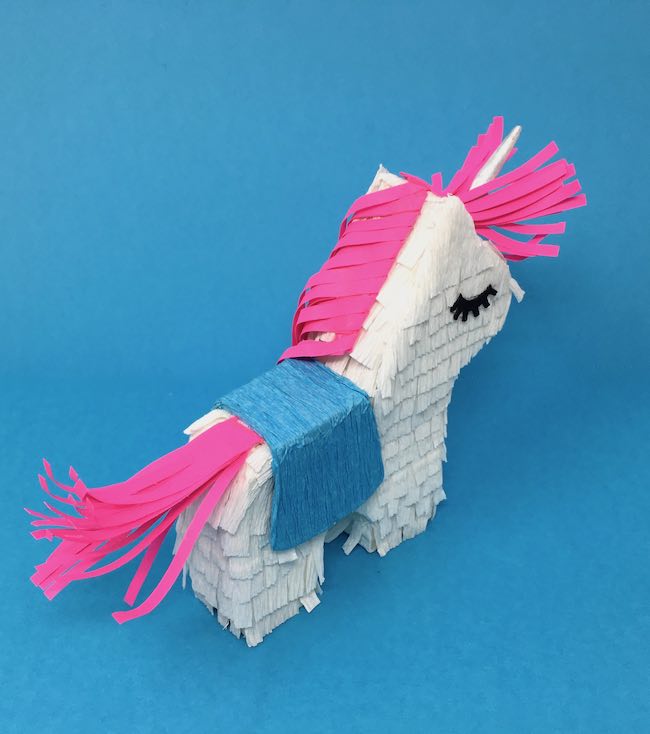
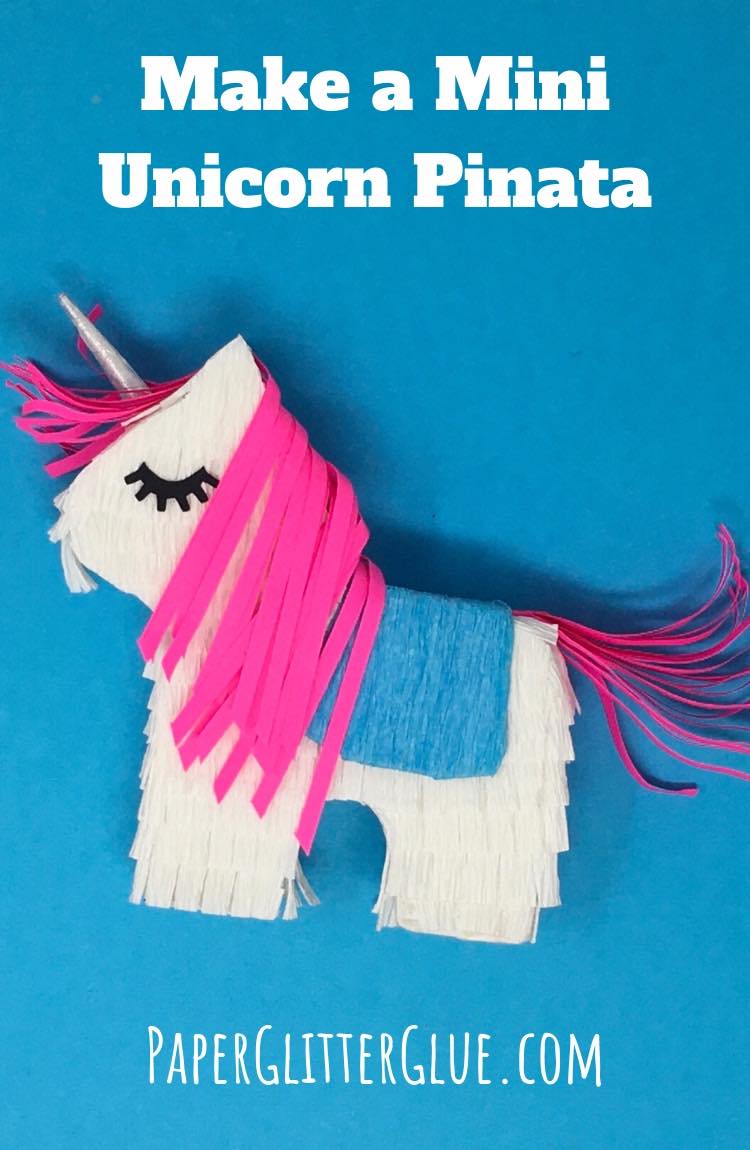
Want to make your own Winnie the Mini Unicorn Piñata?
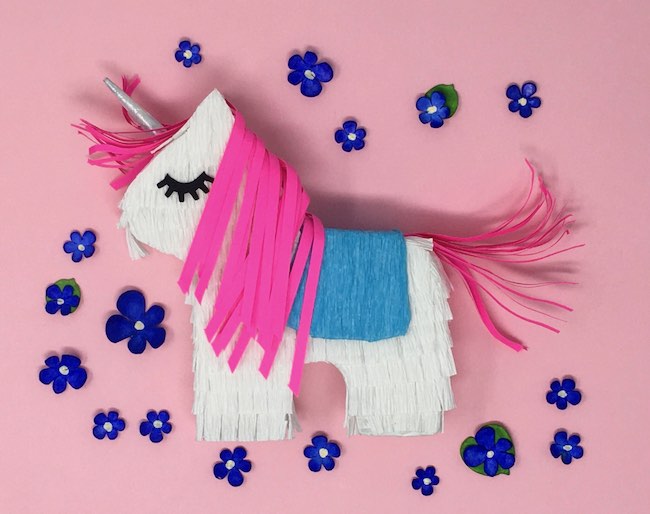
Here's how to make a Mini Unicorn Piñata with a secret gift compartment on one side. When you make it this way you don't have to tear up the pinata to get at the treats. So you get to keep this adorable mini unicorn as a party favor or a gift.
Also, this project is designed to be as easy as possible so even kids can make it. You can even make it as a craft kit that you can mail to kids stuck at home.
I settled on this size because the design fits on one 8.5" x 11" sheet of cardboard. In addition, there are two design changes to help you. First, I simplified the lines around the unicorn to make it easier to make. Second, the side strips are already scored so they fit around the unicorn shape easier.
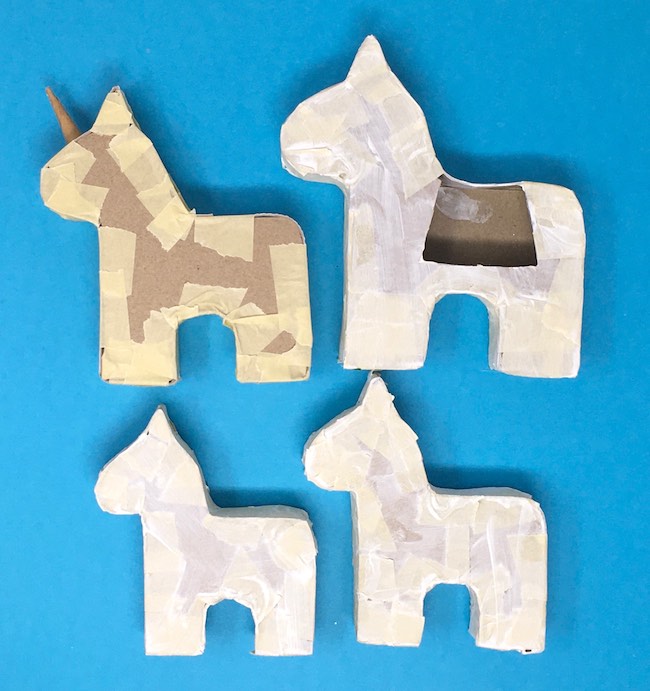
Here are a few prototypes so you can see the evolution of the design. The unpainted one is the size I finally decided on because it is the easiest to make.
And here are unicorns made with different materials such as tissue paper, crepe paper, and colored copy paper.
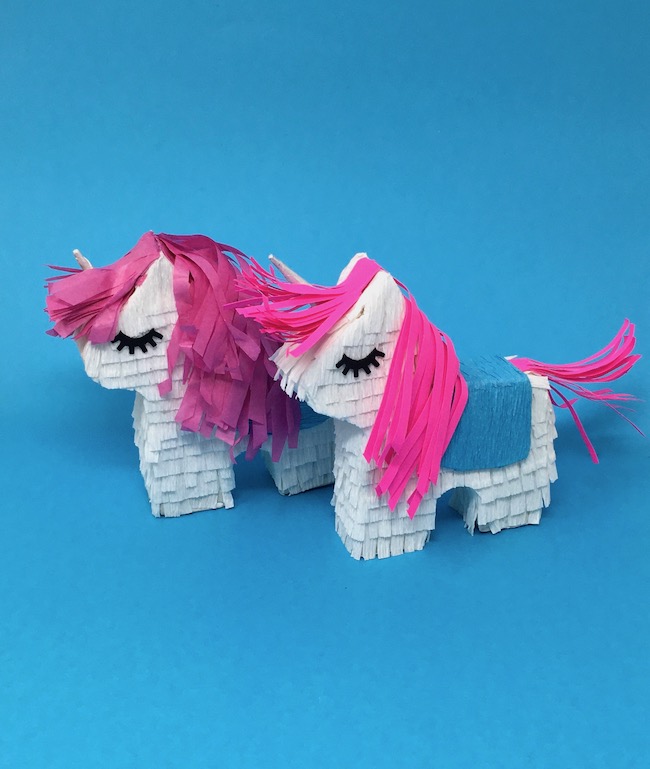
This unicorn has a crepe paper mane and tail.
Let's get started with our unicorn-crafting adventure.
This post contains some affiliate links for your convenience. That means if you make a purchase after clicking an affiliate link, I will earn a small commission but it won’t cost you a penny more. Click here to read my full disclosure policy.
Materials to Make Winnie the Mini Unicorn Piñata
- Cardboard
- Card stock
- Tissue paper or Crepe paper or Colored copy paper
- Masking Tape
- Glue - white PVA glue - I like this Aleene's glue for this project
- Round toothpick
- Mini Unicorn Piñata SVG or PDF pattern - Design No. 83
- A way to cut out the pattern - I use a Cricut to make it.
This little unicorn has both tissue paper hair and fringe.

Instructions to Make this Unicorn Piñata
- Cut out the pattern pieces - Design No. 83.
- Make the unicorn horn (make it first so you won't forget to put it in place later).
- Bend the side strips so they are flexible.
- Tape the side pieces to the solid unicorn body starting with the feet.
- Next, tape the shorter side piece to the top of the unicorn pattern.
- Insert the unicorn horn before you put the top piece on. Glue in place.
- Now tape the top piece to the unicorn body.
- Optional - prime the unicorn before adding the fringe paper covering.
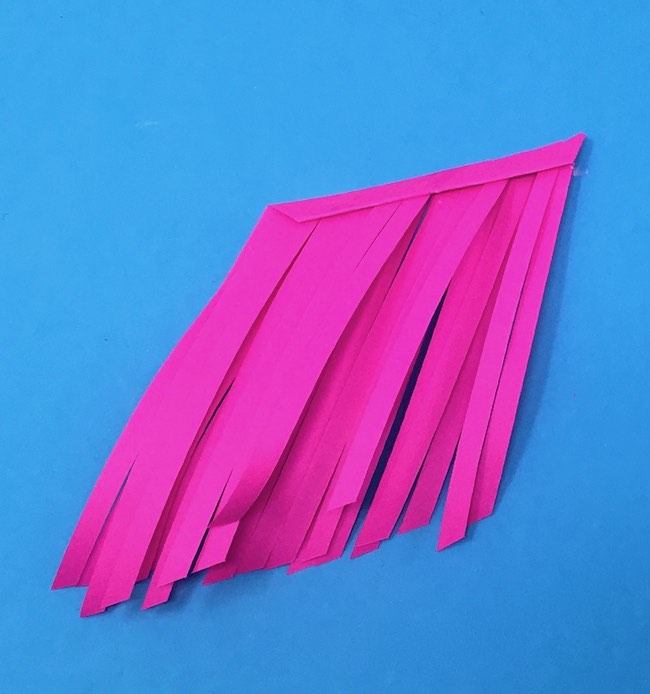
- Cut fringed paper - either tissue paper or crepe paper.
- Apply fringed paper to the cardboard mini unicorn.
- After the unicorn is covered with fringe paper, glue on mane, tail and eyes.
- Paint or cover the saddle and glue on the unicorn piñata.
- Fill your mini unicorn piñata with tiny treats or candy or a message.
Now, read below for more details on how to make Winnie the Mini Unicorn Piñata.
First, cut out the pattern pieces
To get the unicorn pattern, just go to the Paper Glitter Glue library, enter the password and download the zipped file. If you don't have the password, just subscribe to my free craft newsletter with the form below and you will get the password immediately.
All the files are added to my Paper Glitter Glue library in chronological order with the most recent file first.
Here's how the file looks in Cricut's Design Space with the score lines marked on the side strips and the saddle.
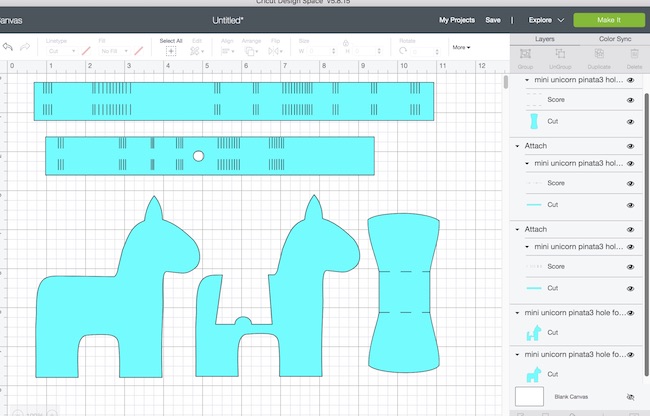
The files are in two formats - a printable PDF file with an instruction booklet and as SVG files - scalable vector graphics that work on electronic cutting machines like the Cricut or Silhouette. Even if you don't use a cutting machine, you can cut these shapes out pretty easily.
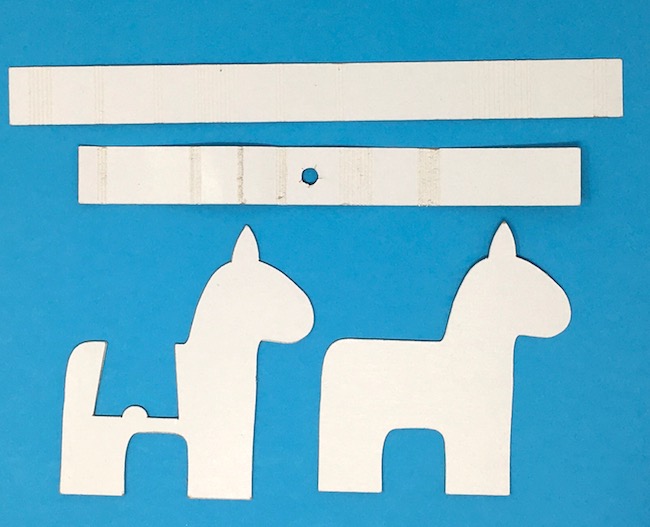
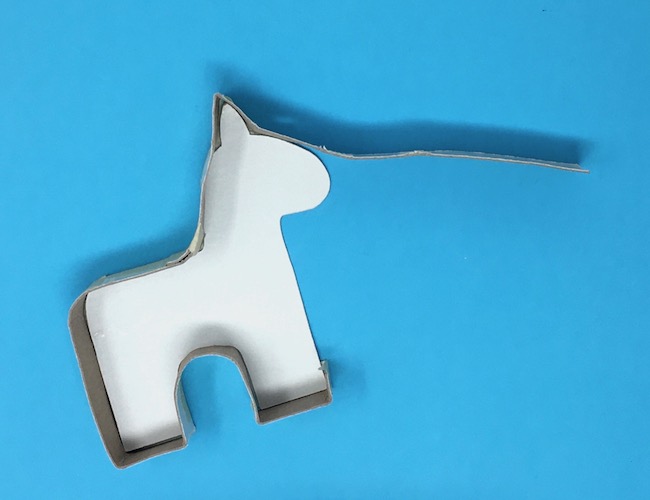
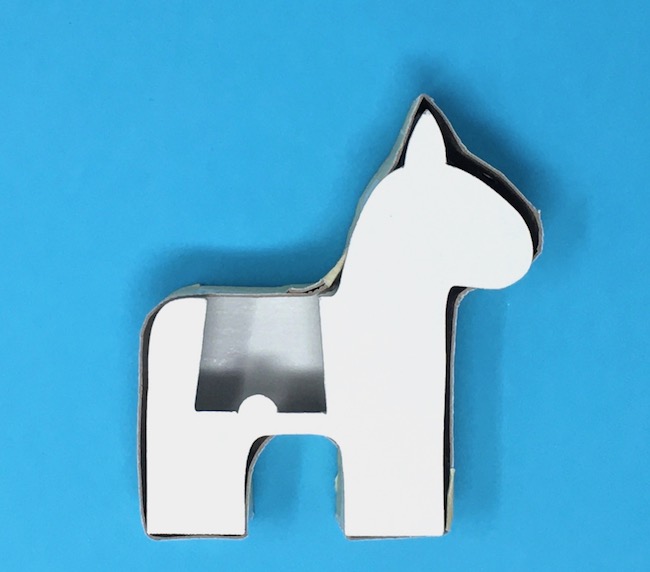
Here are the main cardboard cutouts for the Unicorn body - including the scored cardboard side pieces.
Here are the paper materials I used for each part of the piñata:
- Unicorn and saddle - cardboard
- Fringed covering - tissue paper or crepe paper
- Cardstock for the unicorn horn and the eyes
- Tissue paper, Crepe paper or copy paper for the mane, tail and forelock
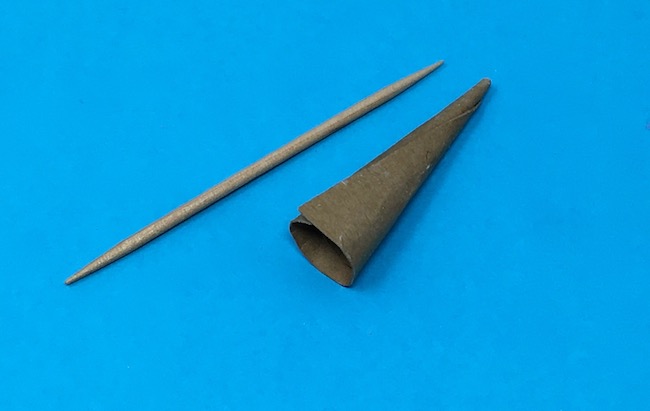
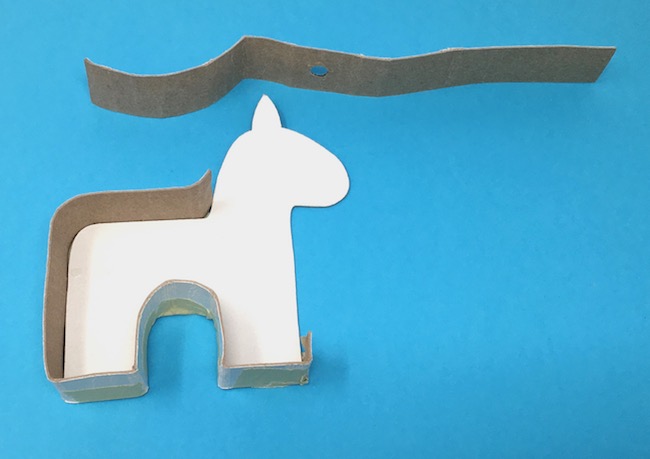
Next, make the unicorn horn
Why make the unicorn horn now? Because you don't want to forget it when you tape the unicorn body pieces together. So you want it already done before you start on the unicorn body.
I experimented making the unicorn horn and found that twisting it around a toothpick was easiest way to make the coiled horn. Also, I found that 65# cardstock works the best for flexibility in making the tiny cone. And one other piece of advice, make a few of them because they get easier as you practice making them.
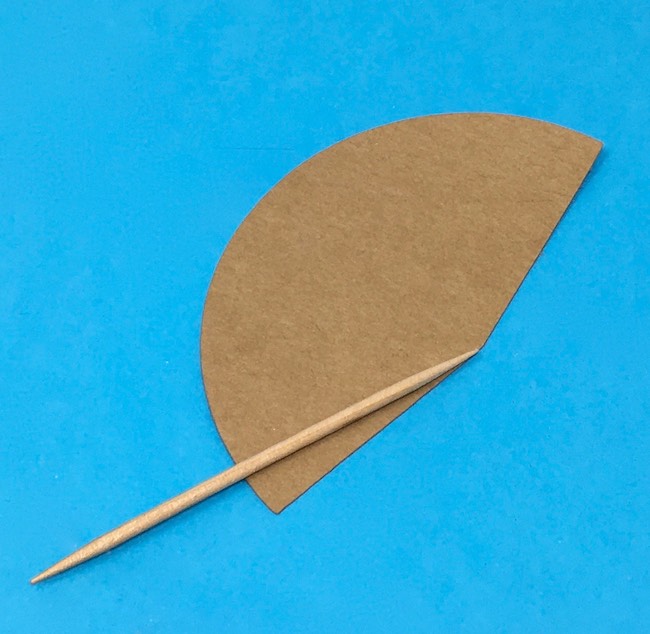
Coil the card stock around the toothpick.

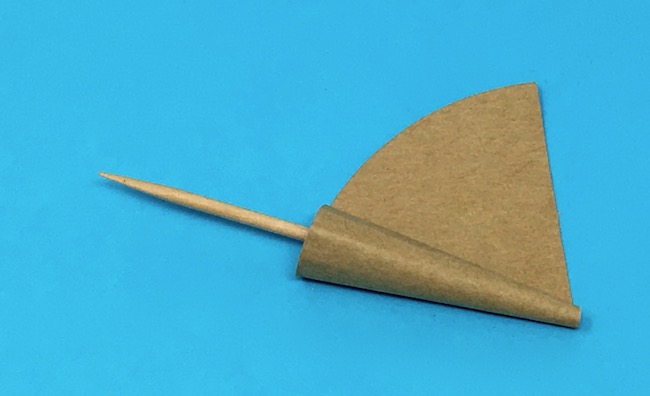
Continue to coil the card stock around the toothpick. Try to keep the tip as small as possible. This unicorn horn unwrapped a bit when I took the photo.
After you have the unicorn horn coiled, unroll it part way to apply glue. Here's how the finished unicorn looks.
Bend the side cardboard pieces to fit around the Mini Unicorn Piñata shape
See how the cardboard is curved slightly and then bent to closely mimic the shape of the foot.
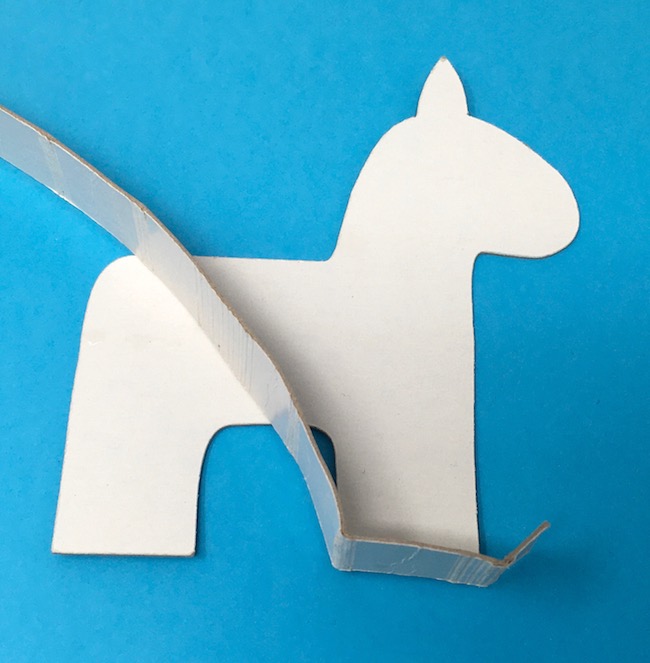
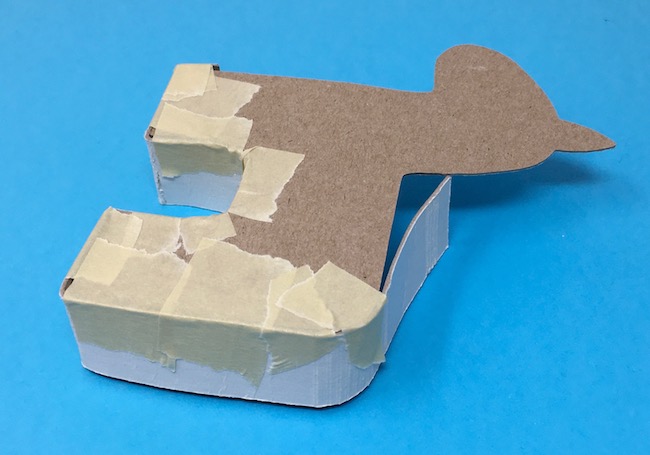
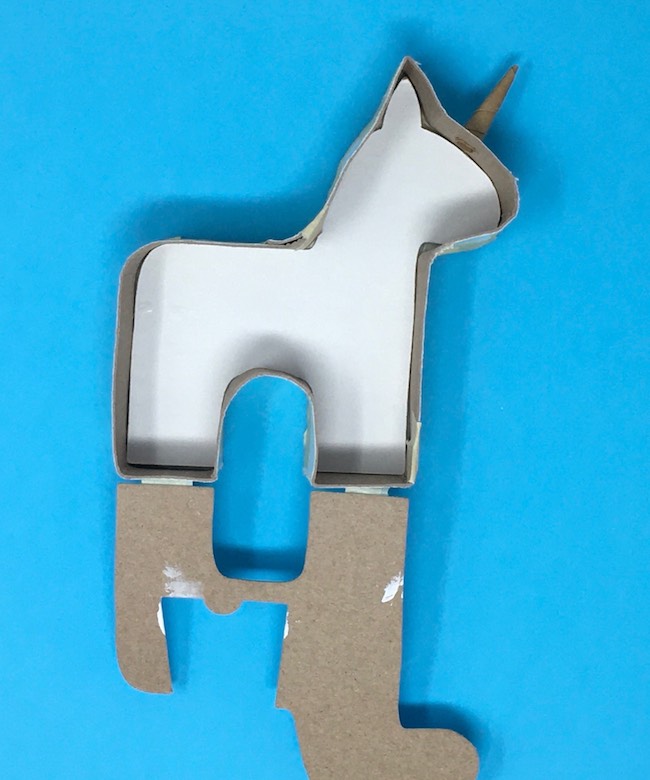
Tape the side pieces to the solid unicorn body starting with the feet
Match up the score lines and start with the feet. I think it is the easiest place to begin. Using masking tape, tape the side strip in place.
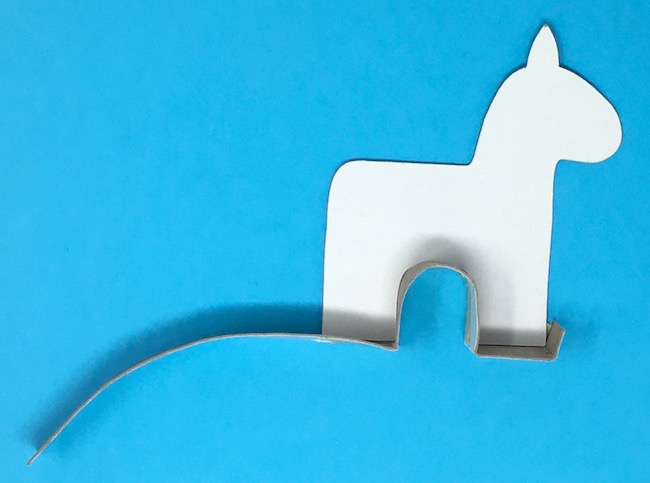
The back side of the unicorn looks like this as you work your way around with the masking tape.
Curve the side piece around the rear of the unicorn.

The score lines help you make the curve on the rear of the unicorn piñata shape.
Note the slight curve with score lines at the base of the neck as well.
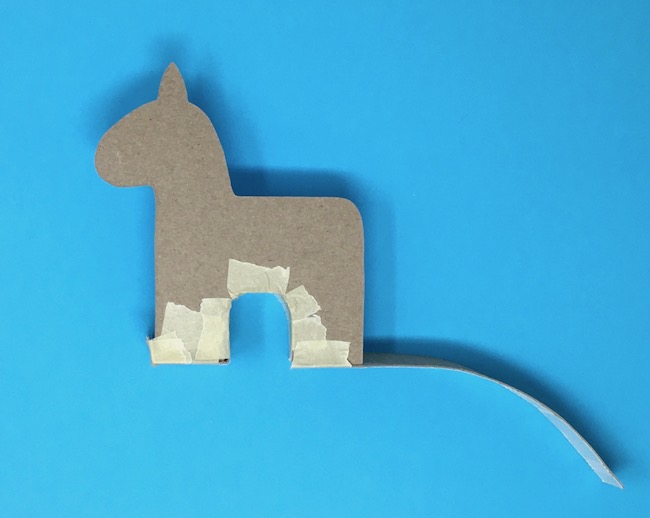
Pull the second shorter cardboard piece so that it is flexible and will fit around the curves of the unicorn head. There are score lines for these curves as well.
Match up where the ear goes and start taping on the back of the neck or the ear.
Continue taping around the head.
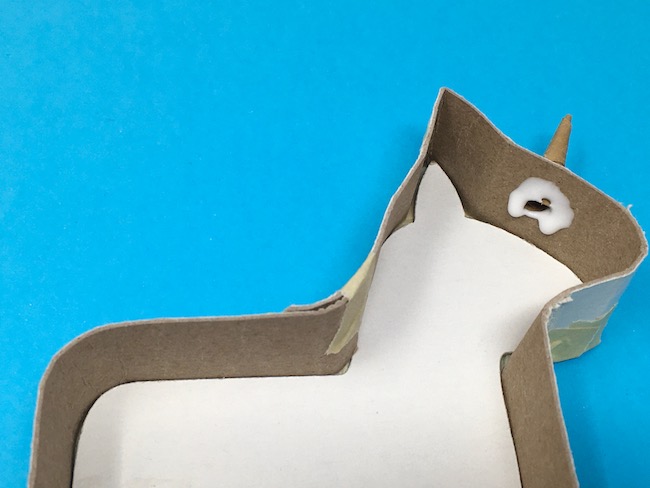
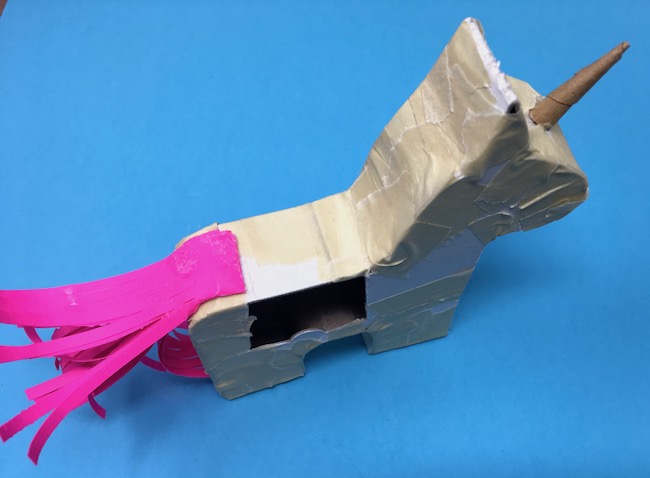
Insert the unicorn horn before you put the top piece on
I kept forgetting to do this step. Try to remember to put the unicorn horn in place before you start taping the back piece on. You can glue the unicorn horn on top of the unicorn after you have finished the body of the unicorn, but it is not as secure if you do that. When you insert the horn through the hole, it stays in place so much better.
Apply glue to help secure the unicorn horn.
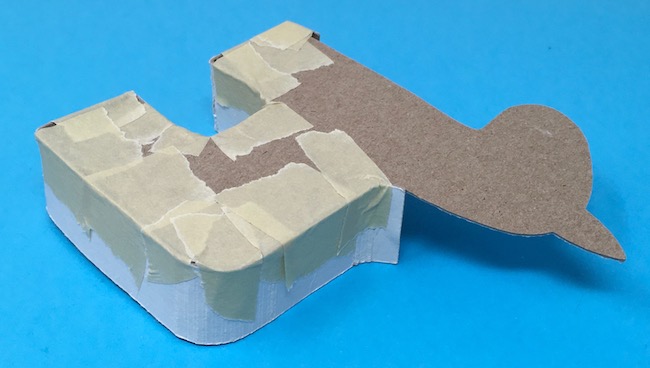
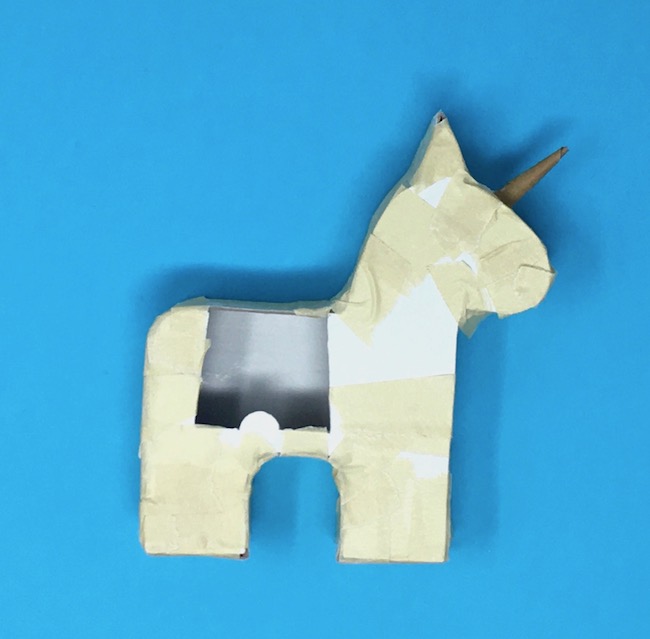
Now, tape the top part of the body to the unicorn shape
Match areas such as the feet and legs and put a few pieces of tape there when you add the top piece to the unicorn.
Work your way around the unicorn to tape the top piece on. Ease the cardboard side pieces in place if they don't exactly match. The fringe covers any mistakes.
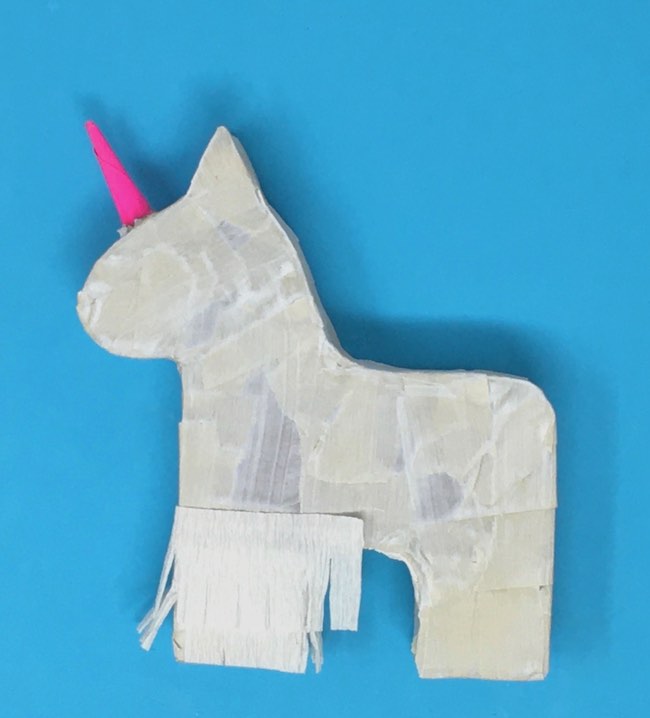
Your little unicorn looks like this when you have the top piece added.
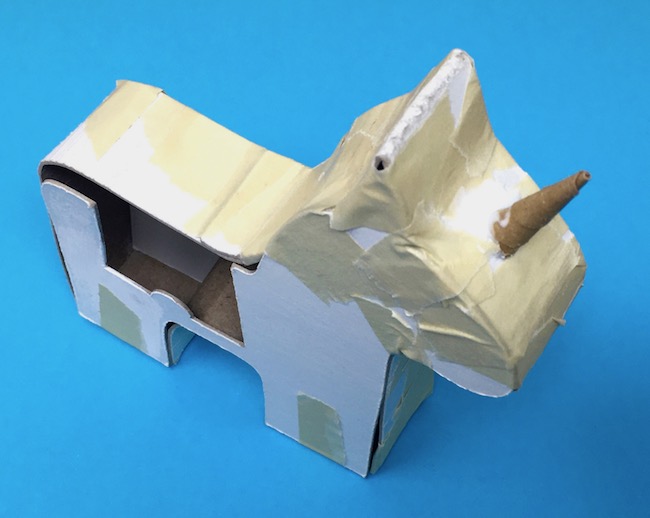
Optional step - Paint the unicorn with white primer to cover up the masking tape
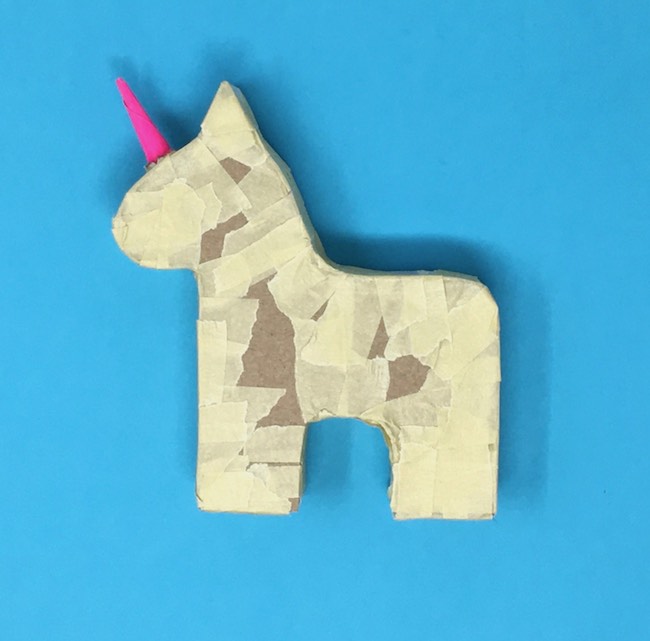
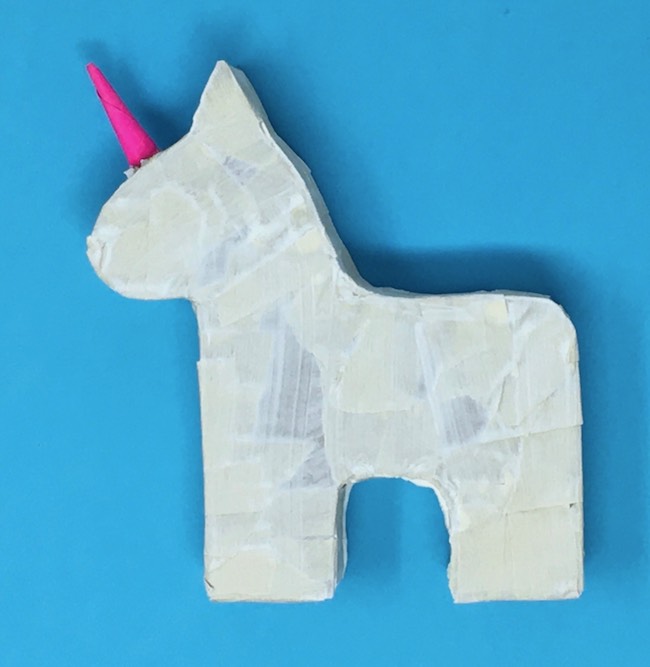
When you use white fringe it looks better to have a white layer underneath.
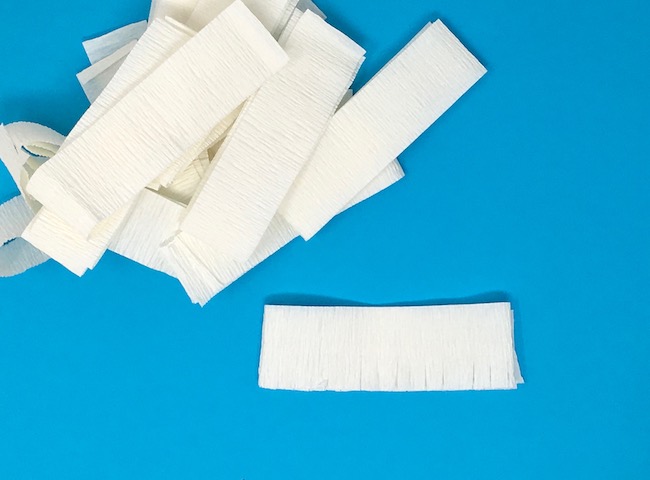
Next, cut some white fringe to cover the Mini Unicorn Piñata
Generally, piñatas are made with either tissue paper or crepe paper. I like crepe paper better. And my favorite crepe paper is a thick paper that I order online because it's not available at my local craft stores. It just has such nice body.
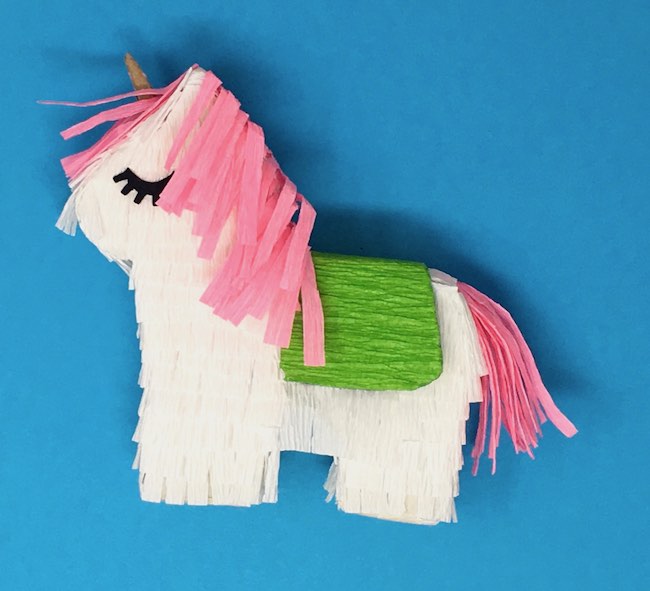
For this project, I did make one mini unicorn with crepe paper. I call her Wildfire because her tissue paper mane and tail are so wild.
I think the hair looks good, but the tissue paper on the body doesn't hold up as well.
Apply fringe paper to the body of the unicorn pinata
Start at the bottom and glue the fringe around the legs working your way up the body.
Glue fringe starting at the bottom of the leg. Work your way up the body of the unicorn. Trim the fringe around the face to maintain the shape of the head.
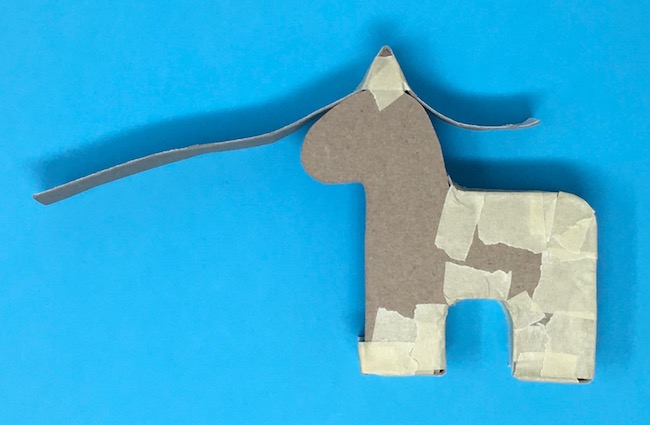
After the unicorn is covered with fringe paper, glue on mane, tail and eyes
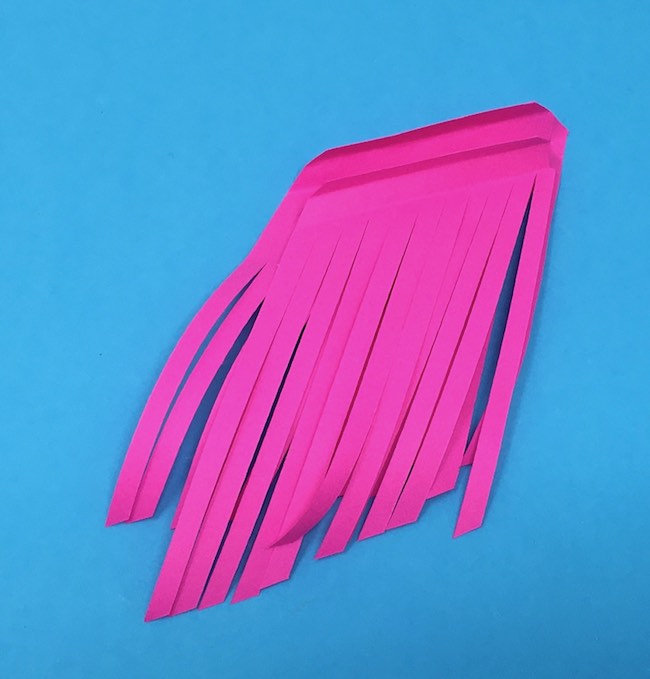
Next make the mane, tail and forelock for the unicorn. You can use the paper of your choice:
- Regular colored copy paper is nice because you can curl it and is fairly durable.
- Crepe paper holds its shape very well and will last the longest.
- Tissue paper is easy to cut and fairly easy to glue on, but it does stick to your fingers a bit. Also it is not as durable.
If you cut these decorative parts with tissue paper or crepe paper, I recommend cutting them by hand. It is easier than trying to cut tissue paper with a Cricut. The copy paper is easy to cut with the Cricut or another electronic cutting machine.
In general, I use 2-3 layers of paper for the mane to make a thicker mane.
First fold the top down on the mane.
Glue the two pieces together.
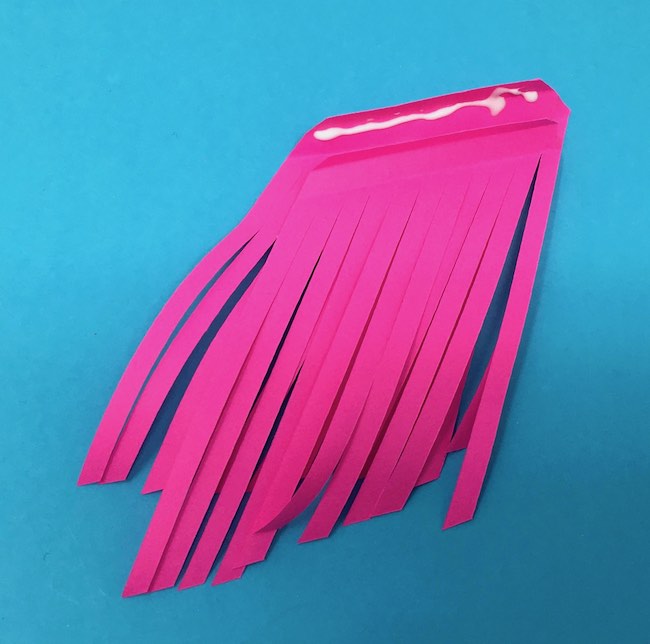
Fold again. Glue this folded side down to the back of the unicorn neck so the folds don't show.
Here's how the back of the mane looks on the unicorn.
Here's the location of a tail. Glue the fringed paper on first so you can integrate the tail into the fringe.
This little unicorn piñata needs more hair in the front so I just glued an extra layer on top of the existing hair. Use the same pattern as the tail, just trim it to length.

Paint or cover the saddle with tissue paper or crepe paper and glue on the back of the your mini piñata
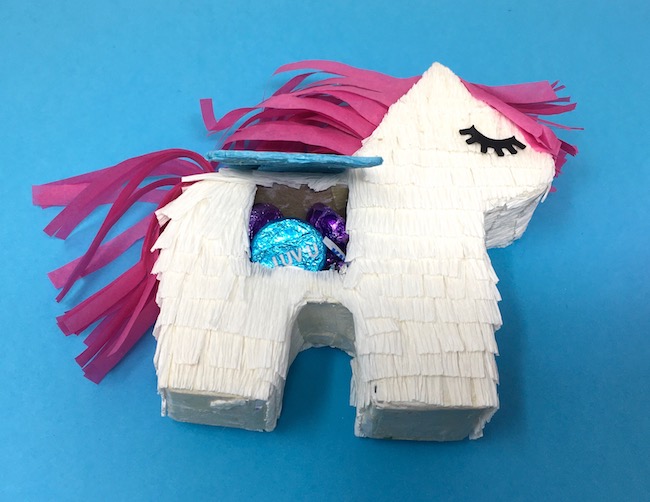
Finally, cover the saddle piece with crepe paper or paint. Glue to the back and side of the piñata leaving the open side without glue. You can add a velcro dot to keep it closed better if you like. I've done that on a number of my little piñatas.
Also you can decorate the piñata with tiny flowers, pom poms, ribbon, or rickrack. I just left them plain.
Fill your mini unicorn piñata with tiny treats or candy or a happy message
If you have any questions, just leave a comment or you can email me at [email protected].
And if you like Winnie the Mini Unicorn Piñata as a gift box, you might like to make the Mini Llama Piñata as well.
If you have any questions, just email me at [email protected] or leave a comment here. Thank you for stopping by.
Lucy
Be sure to pin to your favorite Pinterest board. Also if you would like to join a community of paper crafters, you can join my private Facebook group here.
Leave a Reply