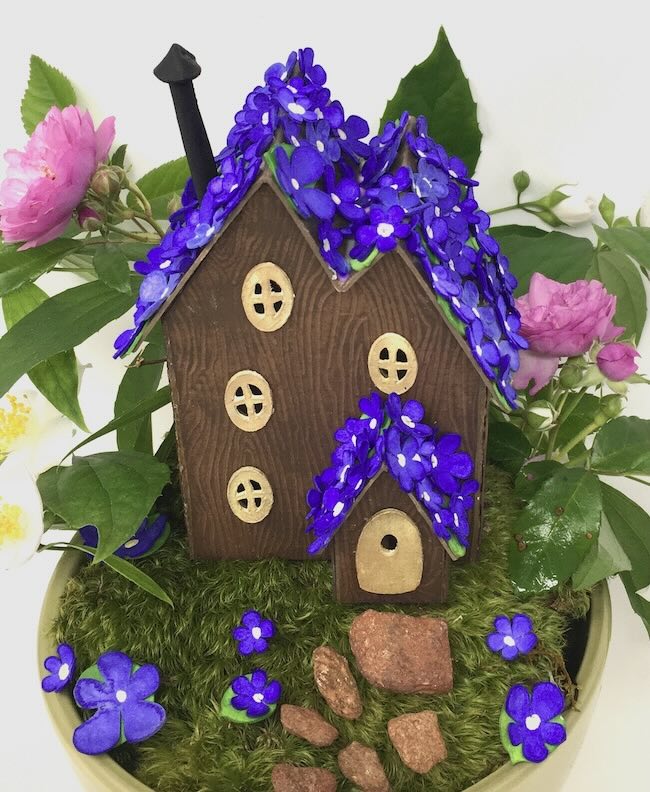
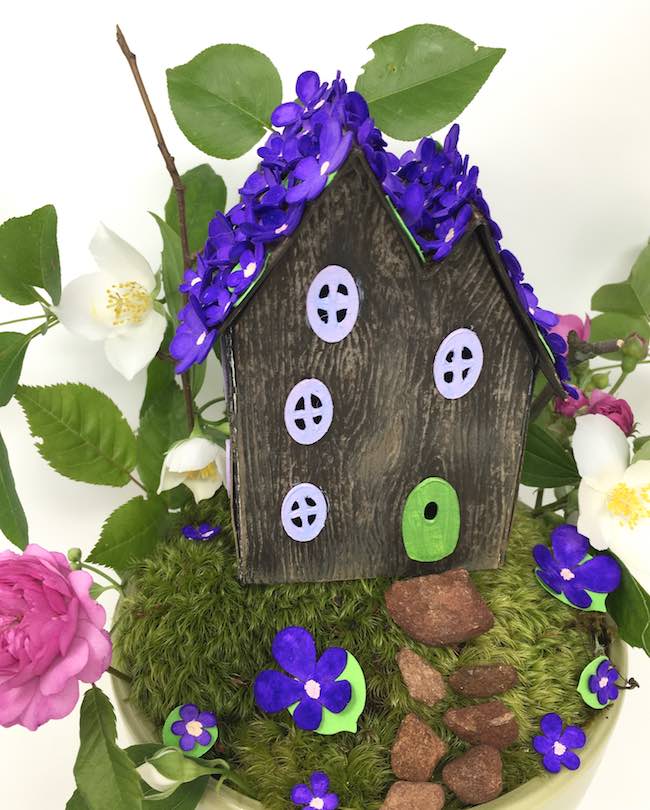
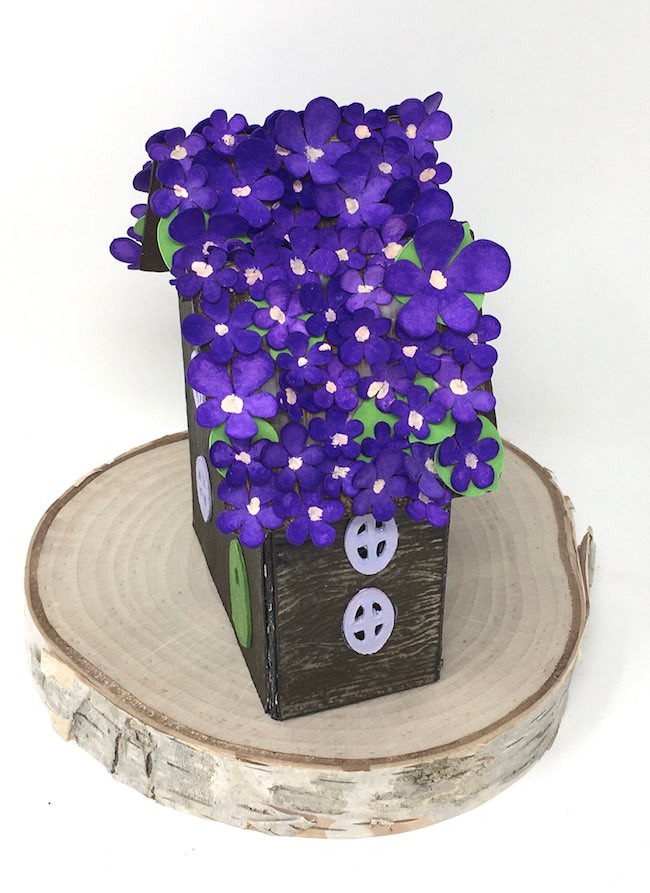
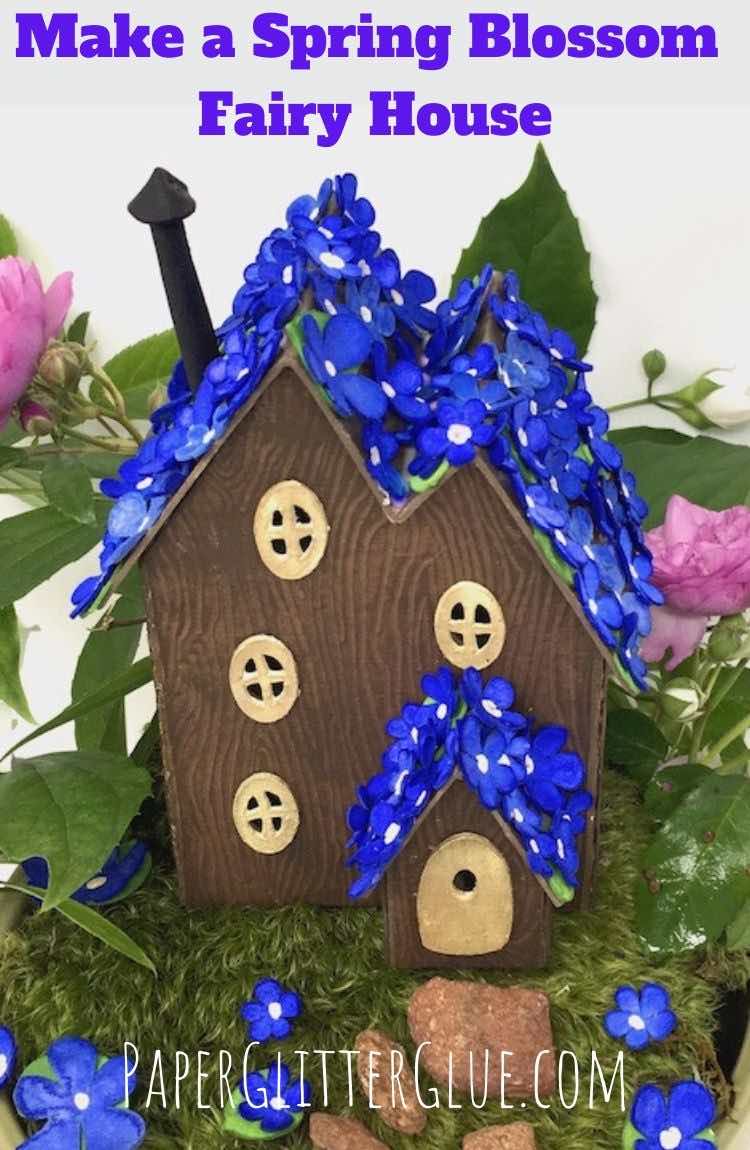
A couple of days ago I posted on how to make the wood grain surface with the Cricut deboss tool, so today you get the pattern for this Paper Fairy House. This version is called the Spring Blossom Fairy House because it is covered with violets on the roof. I just love wild violets. The little blossoms are beautiful and so welcome after winter is over.
Be sure to subscribe to my newsletter so you can get all my crafty ideas.
For more information on making Paper Fairy Houses, see the Whimsical Fairy House Challenge for 12 Free Fairy House Patterns and ideas.
I did make a Fairy House once upon a time.
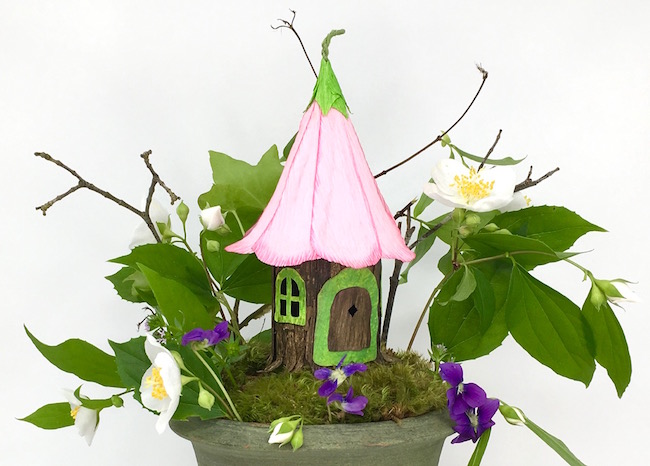
That was when JenniferMaker asked me to guest post on her blog for the first time. People responded so enthusiastically to that post that I knew I had to make another fairy house for you.
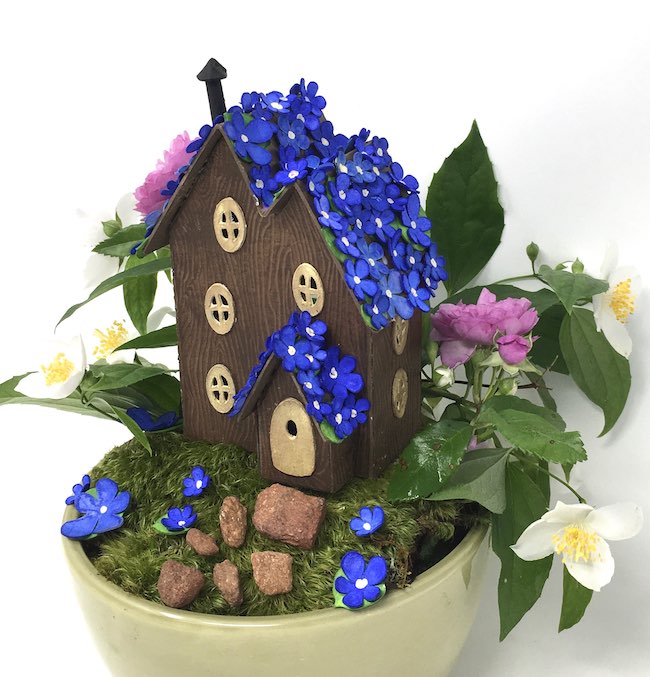
And here's how you make the Spring Blossom Fairy House - Design No. 82 in the PaperGlitterGlue library
This post contains some affiliate links for your convenience. That means if you make a purchase after clicking an affiliate link, I will earn a small commission but it won’t cost you a penny more. Click here to read my full disclosure policy.
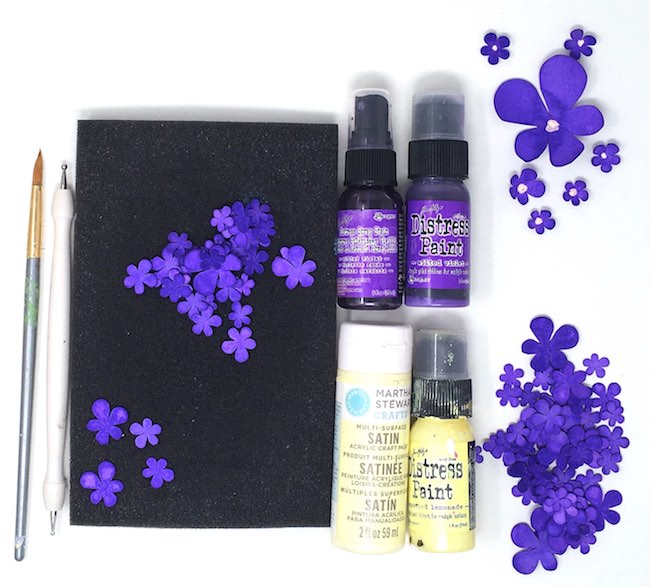
Materials to make the miniature paper Fairy house - Design No. 82
- Wood grain embossed paper cut out in Fairy House shapes (Design No. 81 in the free Paper Glitter Glue library)
- Cardboard
- Glue - I like this one for gluing the house together
- Paint
- Watercolor paper
- Spray stains - Wilted Violet and Blueprint Sketch
- Cutting materials - now I use a Cricut Maker or Cricut Explore to cut out my houses
- Pattern template - Design No. 82 - for the Spring Blossom Fairy House from the Paper Glitter Glue library
You can get the pattern for the Spring Blossom Fairy House from the Paper Glitter Glue library. If you already have the password, just go to the library and enter the password. If you don't have the password, just subscribe to my newsletter with the form below and you will get the password right away.
Instructions to make the Spring Blossom Fairy House
- Cut out the Fairy House pattern template - Design No. 82 - in cardboard
- Prime the cardboard pieces especially on the corners
- Glue the wood grain embossed paper to the fairy house template
- Paint the roof, windows, and door
- Glue the windows and door on the cardboard house
- Make the stovepipe chimney (optional)
- Adhere the structure together
- Glue the roof to the fairy house
- Make the violets to decorate the Spring Blossom Fairy House
- Glue the violets on roof
- Make a base for the Spring Blossom house
Next, let's go into more specific details about making these houses.
First, cut out the Fairy House pattern template in cardboard
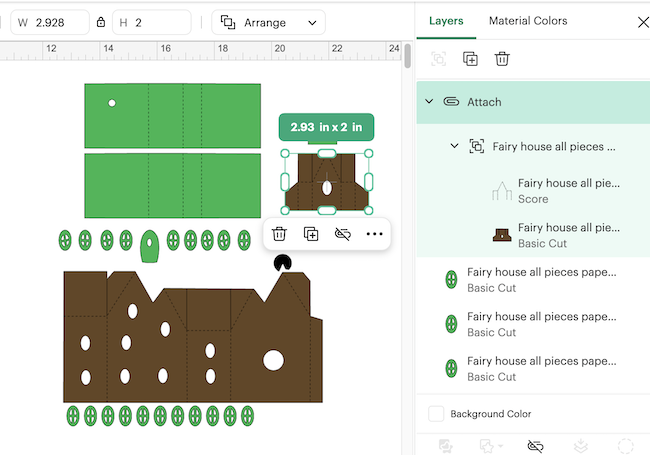
If you cut your pattern with an electronic cutting machine, then upload the pattern to your design software. There are 4 sets of lines that you must change from cut lines to score lines. There are 3 vertical lines on the roof piece, then the score lines on the house, the front extension and one score line on the extension roof. After that, be sure to attach the score lines to the pattern piece it belongs to. The photo below shows the attached score lines on the Fairy House pattern piece.
This is a pretty easy pattern for making a little house. The roof flaps and roof tabs look a little funky on the pattern template, but they do help hold the house together. I'll talk about that a little more when we glue the house together.
Cut out the debossed wood grain house pieces
Also if you are going to make the debossed wood grain paper discussed in a previous blog post, then you need to cut out the pattern pieces as well. Here are the steps to do that.
- First, deboss the cardstock with wood grain pattern from the Paper Glitter Glue library - Design No. 81
- Leave the wood grain cardstock on your cutting mat because it should be well-adhered to the mat after all that debossing
- Next, upload the pattern for the Fairy House to your cutting machine.
- Ungroup the project.
- Delete the pieces you don't need - the roof pieces. You may want to delete the windows and door because I found they often didn't cut very well. Maybe cut them separately after you have the main pieces cut out.
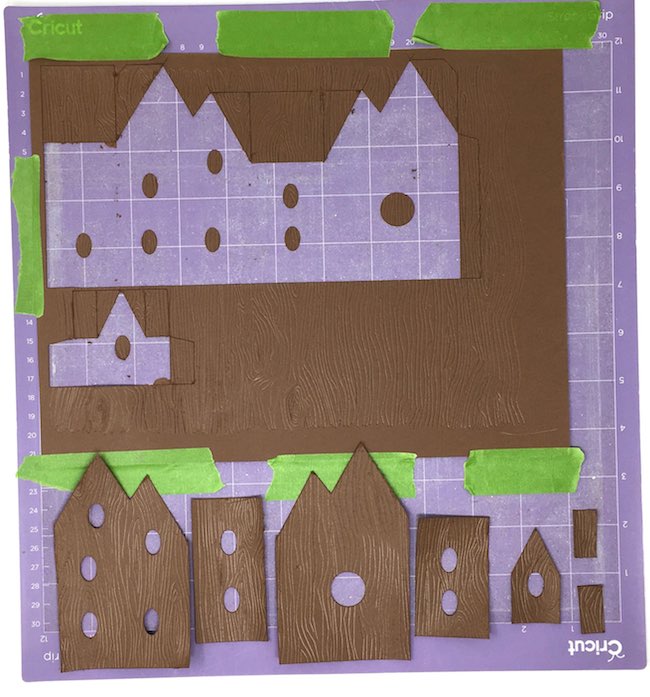
- Next, cut the house out. But the nice thing is that you don't have to choose score lines or attach lines because you actually want each piece to be separate.
- Remove from the cutting mat.
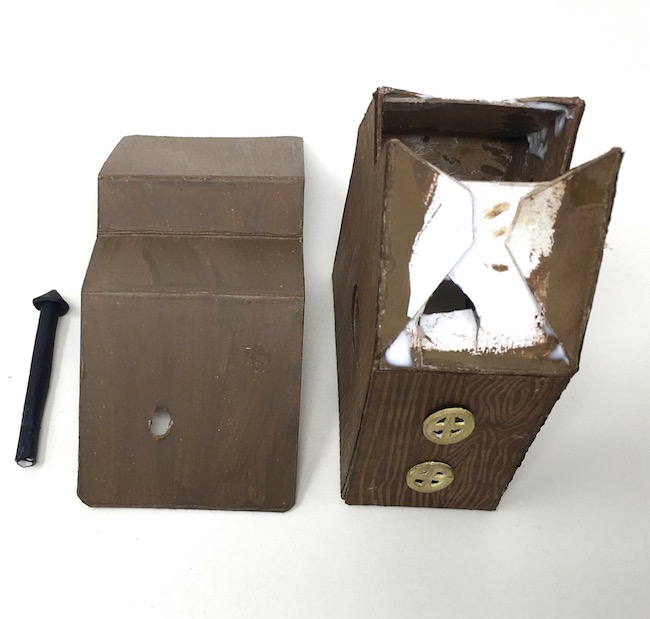
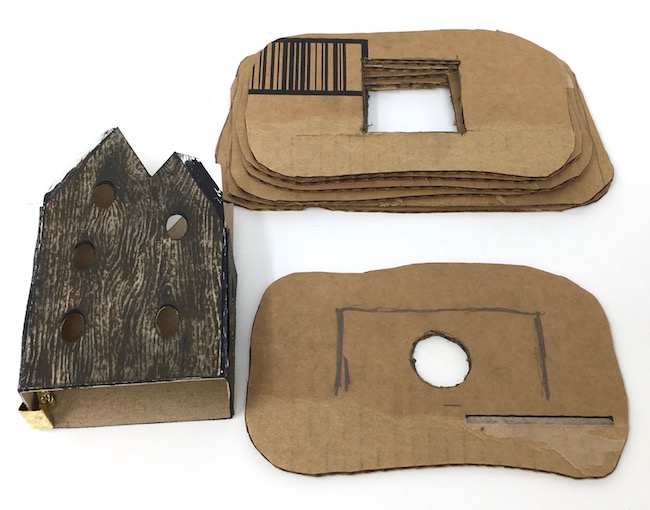
Here's what you have after that step.
Prime the main house cardboard pieces especially on the corners
Since this house is going to be covered with wood grain debossed paper, you need to paint the corners so the underlying cardboard edges don't show up.
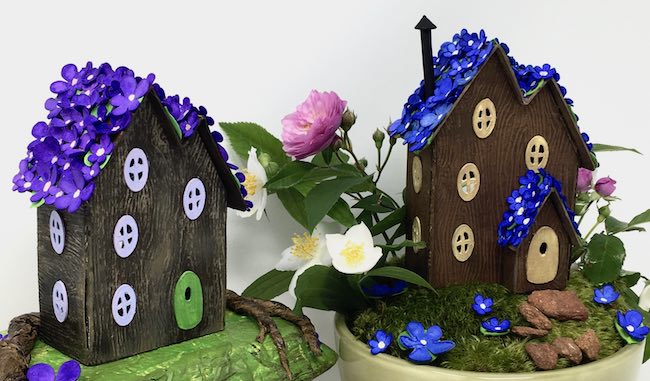
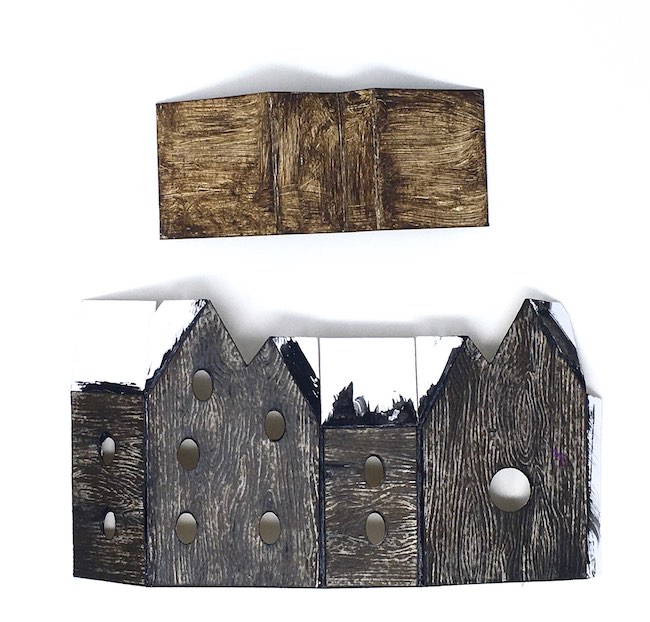
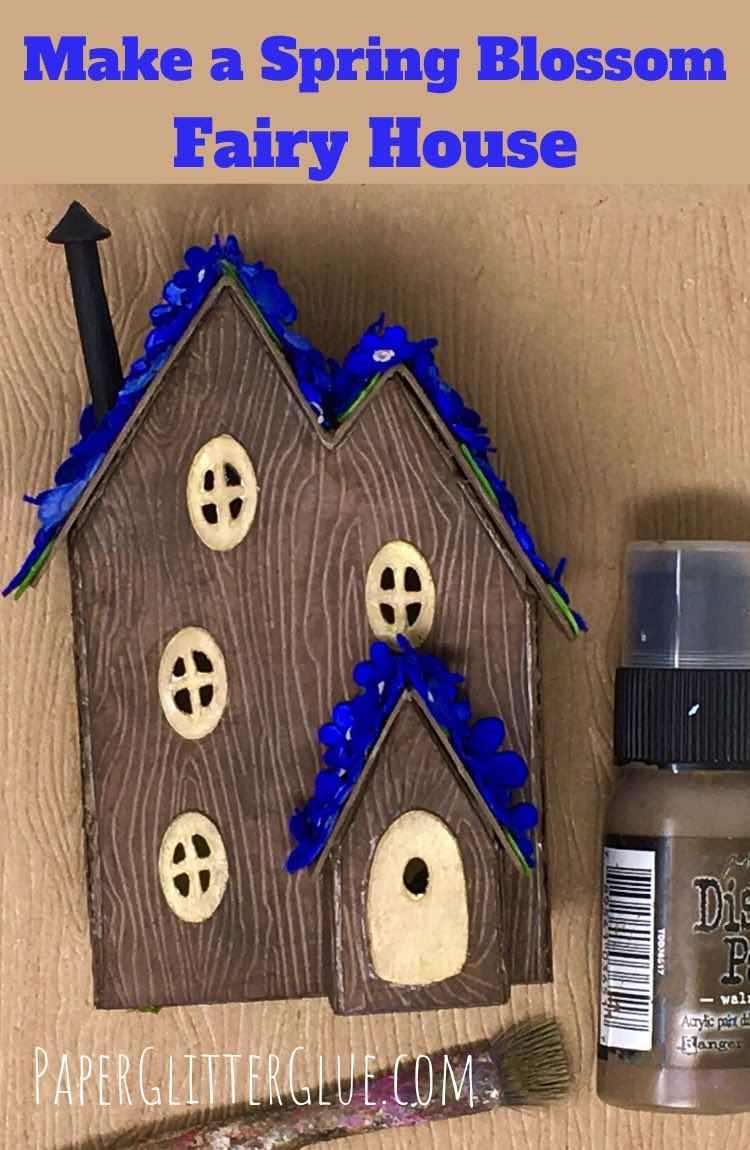
Below is the little house with the darker wood grain watercolor paper. See how all the edges were painted before the paper was adhered. Pretend you don't see that I cut the paper wrong and that the grain is lined up wrong on both side pieces.
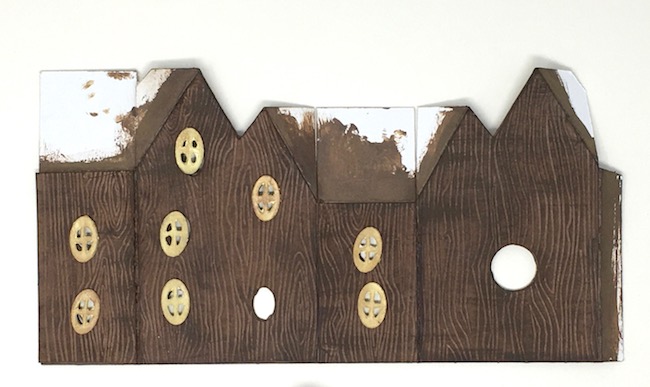
And I did the same thing on the brown Fairy house, but I did a better job orienting the wood grain. This house is made with brown card stock overpainted with a darker brown paint.
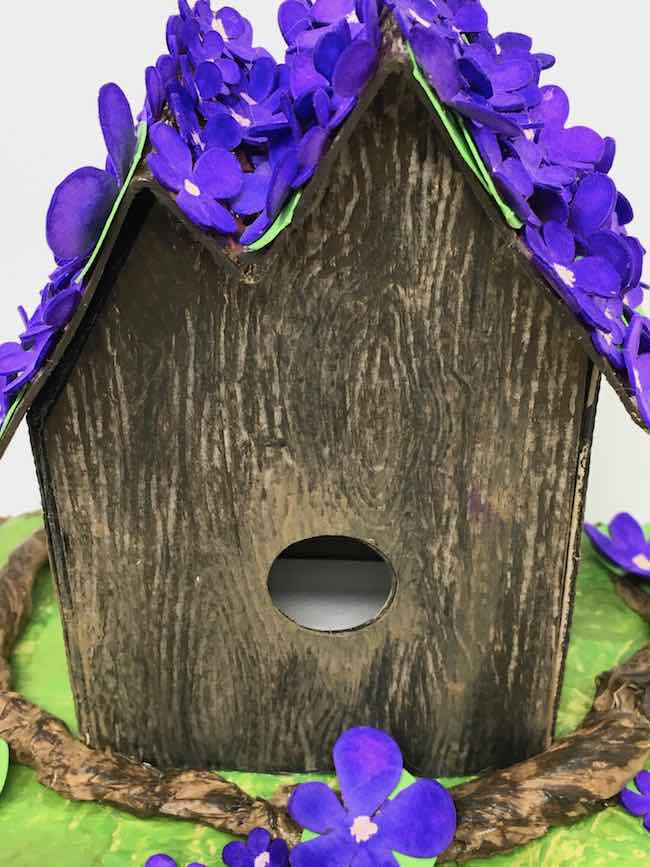
Also prime or paint the roof. If you cover it with violets choose a background color either brown or green because some of it will be exposed. Paint the underside edges just a little bit because that shows as well. I chose brown as my roof background color. You don't have to do very fancy painting here because most of the roof will be covered up with paper violet blossoms.
Glue the wood grain embossed paper to the Spring Blossom Fairy House template
Next, glue the wood grain embossed house pieces to the main cardboard structure of the house. Many people make their houses out of card stock. I do that on occasion, but when I want to make a sturdy little house that will last, I always use cardboard as the basic construction material.
Please note, you need to trim the edges just a tiny bit so they don't overlap at that corners. For each of these pieces, I trimmed just a sliver of card stock so they would fit well on the main cardboard structure of the house.
Also, remember to apply glue very well at the edges of the paper. You can see on the darker Fairy House where the paper didn't adhere well on the left front corner. Somehow I'll squirt some glue in the gap and get it to adhere better, but I haven't done it yet.
Paint the roof, windows, and door
Choose a contrasting color for the windows and the door. For this step, I think it is fine to use card stock, but I still like cardboard for the extra dimension it gives.
Glue the windows and door on the cardboard house
Before you glue the house structure together, glue the windows and door to the cardboard pieces. I find that I can line them up better when I glue them on at this step.
How to make the Stovepipe Chimney
This is an optional, but it adds a fun detail. On the pattern you see a little circular shape with a portion missing. That's the top of the stovepipe chimney. I made mine out of cardboard when I cut out the house, but it's not very flexible. Really, card stock is better for this purpose.
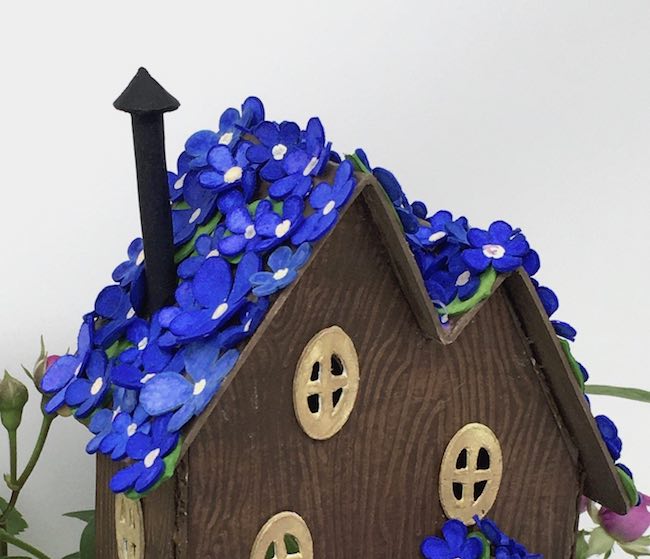
Next to make the pipe portion, simply roll a piece of black card stock to mimic a pipe. Mine is about 1.5 to 2 inches long. Some of the length goes through the roof. The details for that step are below.
Adhere the cardboard house structure together
Ok, now the house comes together. Glue house together along the glue tab in the back. Next, glue the roof tabs to the roof flaps. Whenever I can use this roof flap and roof tab design in making a house, I do it. It makes the house so much more sturdy.
This photo is from a miniature log cabin house, but it shows the roof tabs (on top) being glued to the roof flap below. The roof flap holds the front and back gables at the top in line with the house.
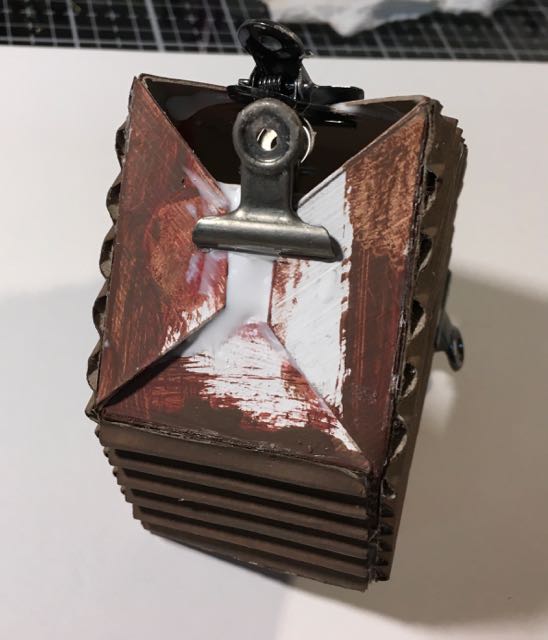
And here is a messy photo of the roof tabs and roof flaps with binder clips to help hold them in place while the glue dries. Binder clips help a lot.
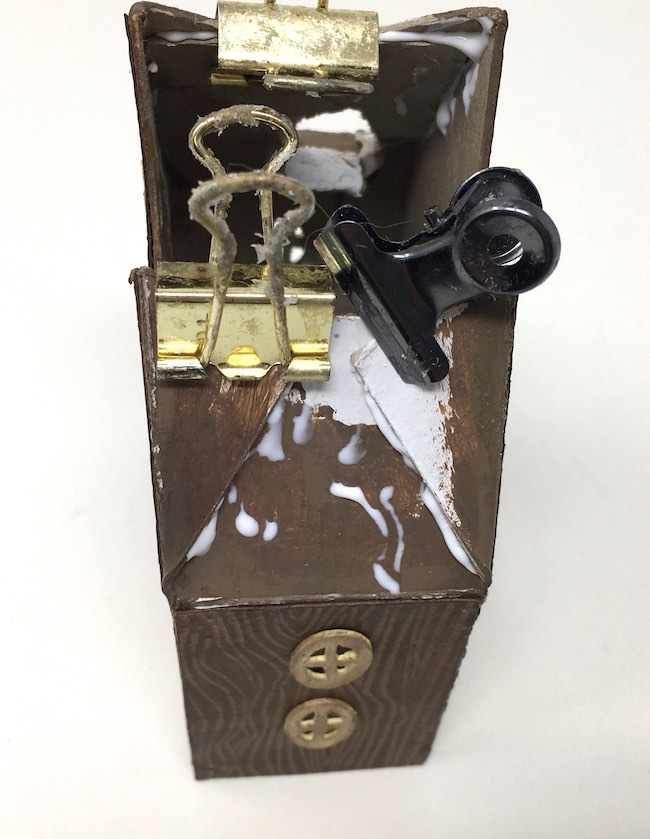
If you are adding a stovepipe chimney, you need to make some adjustments before you glue the roof on. First, draw a circle where you want the chimney on the roof. Next, cut it out and enlarge it into an ellipse so the circular piece will go through. It must be shaped as an ellipse because when the circle is on an angle it becomes elongated into an ellipse shape.
Next, mark where the hole in the roof matches the roof flap below. Cut out a section of the roof flap so the chimney can fit through. You can see in the photo that I made very rough cuts, this isn't going to show at all. Before you put the chimney in place on the roof, glue the roof on the house itself.
If you want to include the front extension with the door on it, glue it to the house now.
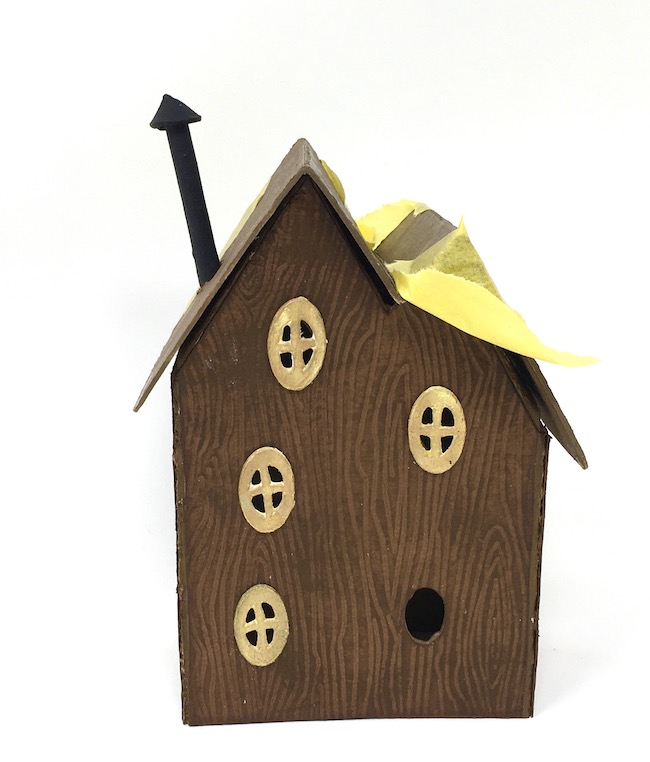
Glue the roof to the Spring Blossom Fairy House
Now glue the roof to the Fairy House. Apply a thick layer of glue to the edges of the roof on the house itself. Wait just a minute to let it get tacky, then adhere the roof. Hold in place or use some painter's tape to help hold it while it dries. I smushed it down by hand for a little while to get the edges to hold.
After you adhere the front extension to the house, glue the simple roof to that part as well.
Make the violets to decorate the Spring Blossom Fairy House
Ah, another fun step. It was messy for me, but very fun. You can be much neater about it than I was. And you have several options for making your spring blossoms or violets for the roof. For example, you can use a flower paper punch and punch them out easily. I did that for my very first violets on the roof house, Violets on the Roof. You can use your automatic cutting machine to cut out the SVG file I've provided for you. Again purple or a blue card stock is an option for the violets or use stained watercolor paper.
What is the messiest technique? Stained watercolor paper, of course. Naturally, that is what I chose.
1. First, here is how the Violet SVG files look in Cricut's Design Space.
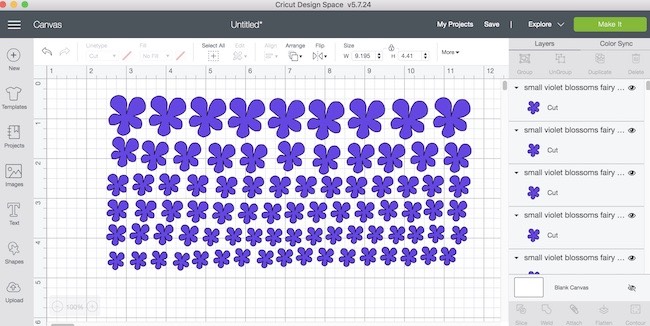
The nice thing about these files is that you don't have to do anything except cut them out. I did delete a few of the larger violet blossoms because I didn't need that many of the big ones.
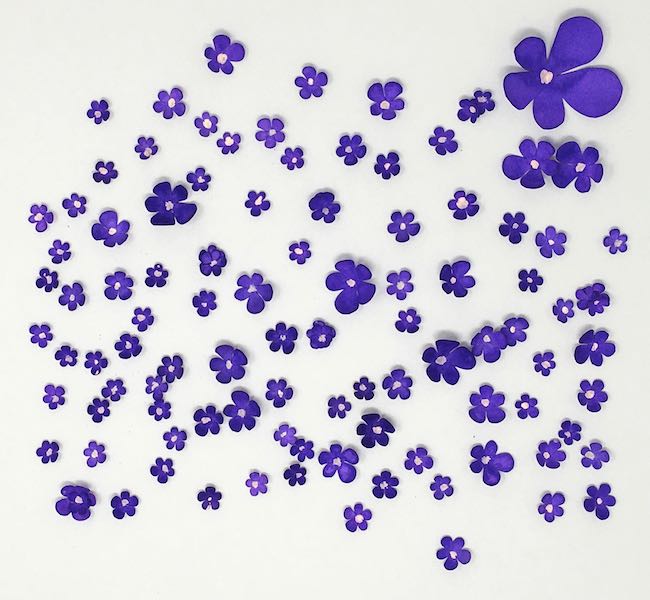
2. Next, cut out the paper flowers and stain or paint.
I used a beautiful purple spray from Ranger and Tim Holtz appropriately called "Wilted Violet". It is such a lovely deep purple.
That's where it gets messy. I put the plain white watercolor paper flowers in a cup and sprayed the stain. Well, to get the stain to cover the entire paper, I stuck my hand in and smeared the stain all over the flower pieces. As you can imagine, my hands turned purple and stayed purple for days.
The other color for the second Spring Blossom Fairy House was Blueprint Sketch - another deep, rich color.
3. To give dimension to the violets, I used a foam pad and an embossing tool to depress the centers.
4. Finally, apply a drop of yellow paint in the center of each violet.
Glue the violets on roof
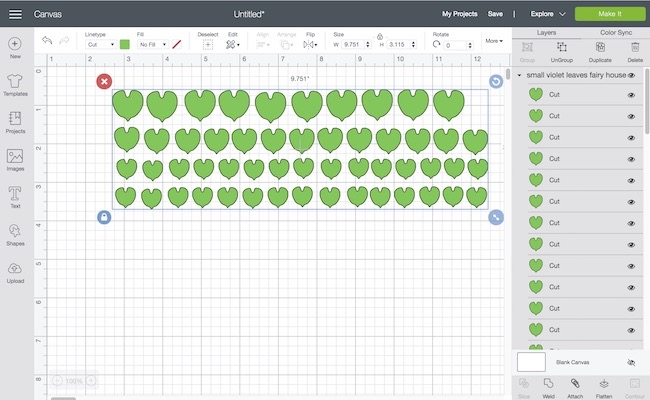
Now that you have made all the paper violets, glue them to the roof in a random fashion. Some violets have leaves glued to them, some do not.
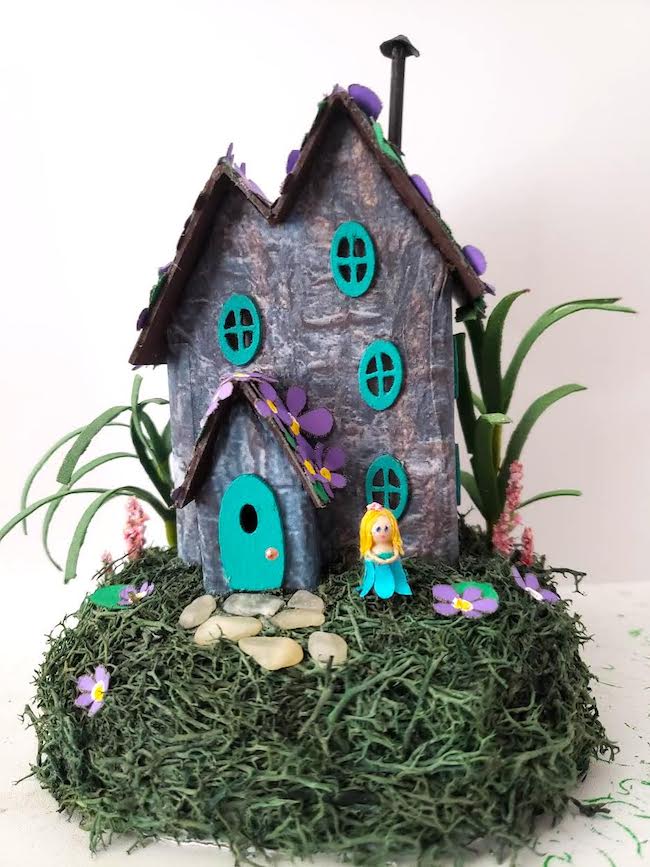
Make a base for the Spring Blossom house
The final design decision is how to make the base for your house. For one of the fairy houses I made a cardboard base, but for the other I placed the house in a bowl with florist foam covered with moss. You can read about how to make cardboard bases in a number of previous posts. This is probably the best one on how to make a cardboard base for your little houses.
Here's the another view of the completed base for one of the fairy houses.

That concludes today's house-making tutorial. I hope you will try this little house. It's easy in the paper house scheme of things, but most importantly, it will make you smile. At least, this house makes me smile.
Do you have any questions? If you do, please email me at
[email protected] or you can leave a comment.
It's always fun for me to see your projects so if you want to mail a photo to me, I love that. Or you could join the Paper Glitter Glue private Facebook group and share you paper crafts there.
Here is an example of the Fairy House that Carol made.
Lucy
Hanet V. Miller
Lucy,
I can't believe I forgot the password. I am a subscriber and I love your work and I need to make a fairy house while stuck in my own house. Can you send it to me. I'll write it down this time.
Lucy
Hanet,
Even if you have already subscribed, you can subscribe again and you will get the password immediately. But I found you email on my newsletter list so I will send you the password right away.
Lucy