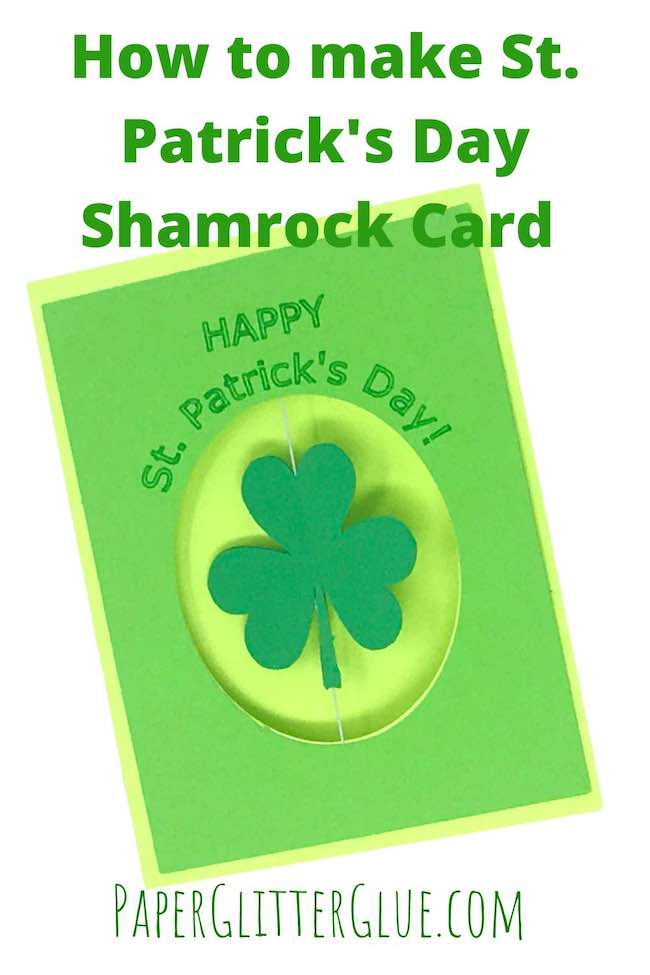
Learn how to make a quick, easy, and cute Shamrock Spinner Card for St. Patrick's Day to share the luck this March.
I've been working on this free Shamrock card design so you make a cool card for your loved ones quickly and easily. Really and truly you can make this card in about 5 minutes (after cutting). The free pattern even includes a blank piece so you can add your own clever Irish sayings.
The free pattern is in my library as the first project in March 2021. Also, check out the Leprechaun House if you like St. Patrick's Day projects.
This post contains some affiliate links for your convenience. Click here to read my full disclosure policy.
What materials do you need to make the Quick and Easy Shamrock Spinner Card for St. Patrick's Day?
- 3 Green shades of card stock 8.5" x 11" - this is the set that I used
- Thin glue like Art Glitter Glue (which doesn't have glitter despite the name) or even a glue stick will work
- Elastic thread or strong thread
- Scor-Tape or other scrapbook tape
- A way to cut your card out - I used my Cricut to cut and customize the card
- Free pattern - Design No. 113 - from the Paper Glitter Glue library
Steps to make the Shamrock Spinner card for St. Patrick's Day
- Download the pattern - Design No. 113 - from the library
- Cut out the pattern pieces
- Optional step - personalize your pieces if desired
- Glue the shamrocks together with elastic string in the middle
- Center and tape shamrocks to the front of the card
- Glue the front overlay on the card
- If using a personalized inside piece, glue to your card
- Make an envelope (personalize if desired)
- Twist the shamrock suspended on elastic thread so it spins when opened
- Insert in envelopes and mail to your friends and loved ones
Ok, now let's get started. Read below for more details how on exactly how to make the
First, download the pattern from the Paper Glitter Glue library
The free pattern for this Shamrock Spinner Card is available in the Paper Glitter Glue library in two formats - PDF printable patterns and SVG cut files.
To get the pattern, just type in the password on this library page. What? You don't have the password. Well, that is easily remedied. Just subscribe to my newsletter with the form below and you will get the password right away. And I will never send you any spam. Also you can always unsubscribe at any time if you like.
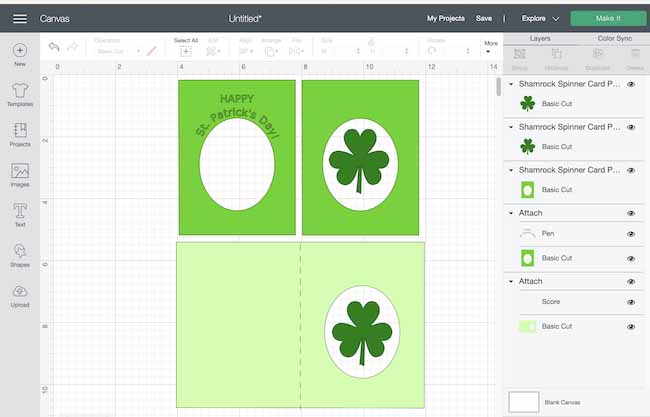
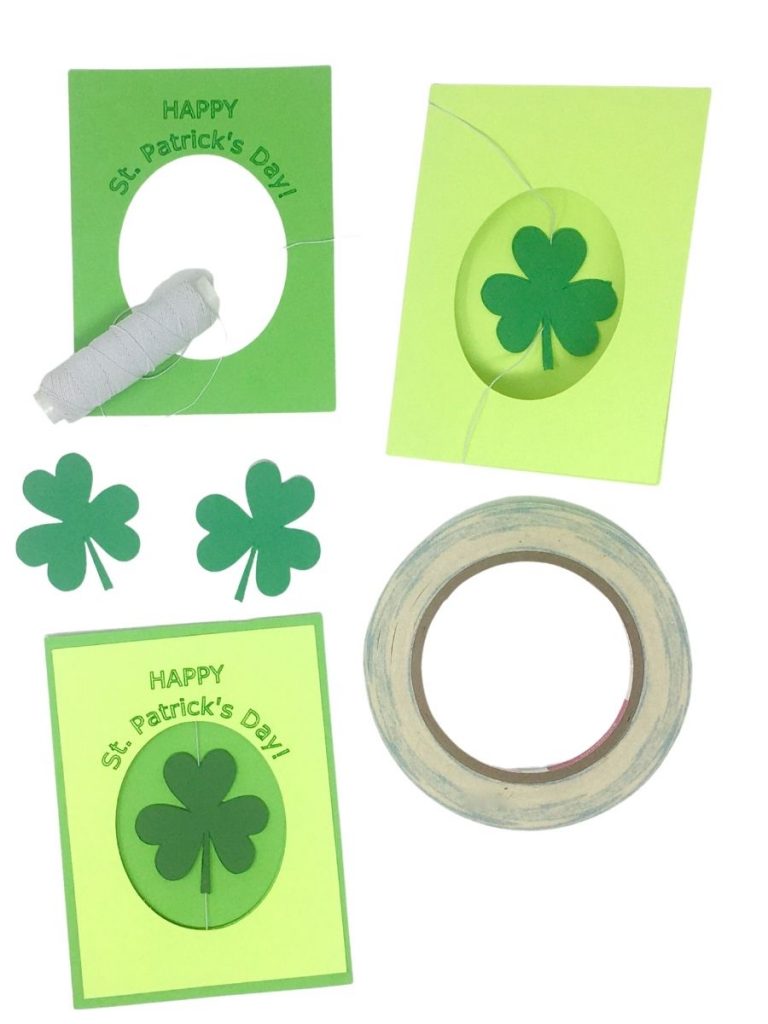
There are 5 different pieces for this pattern:
- Main folded structure of the card with front oval cutout
- Front overlay with "Happy St. Patrick's Day"
- Two shamrocks
- Optional inner overlay to personalize
- Envelope which can be personalized as well
You can see all of the pieces below except for the envelope.
Cut out the pattern pieces
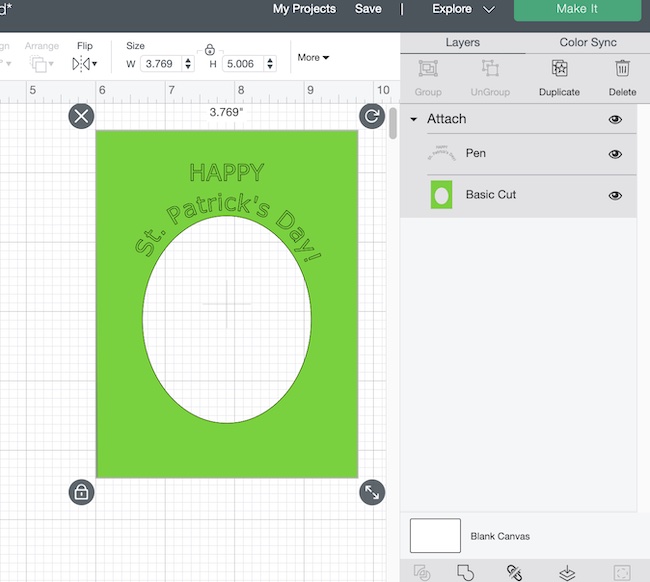
These pieces can easily be cut by hand. I moved the oval lower on the card so I could add "Happy St. Patrick's Day" to the top of the oval. If you want to make your own greeting on the front, then use the blank overlay and personalize it. I'll go into that on the next step.
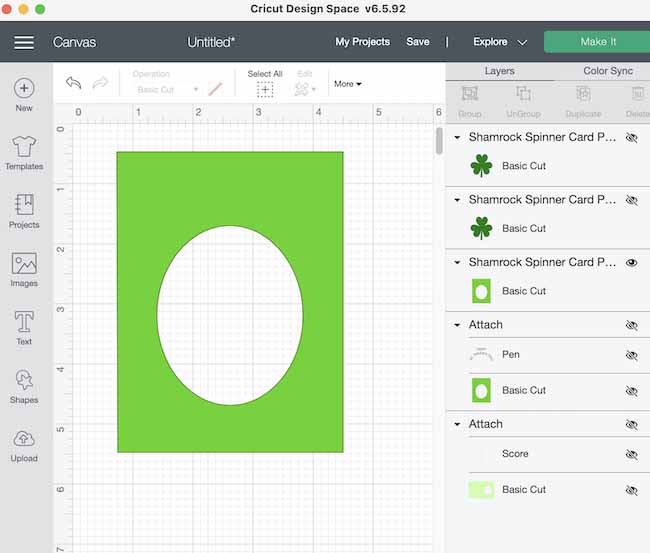
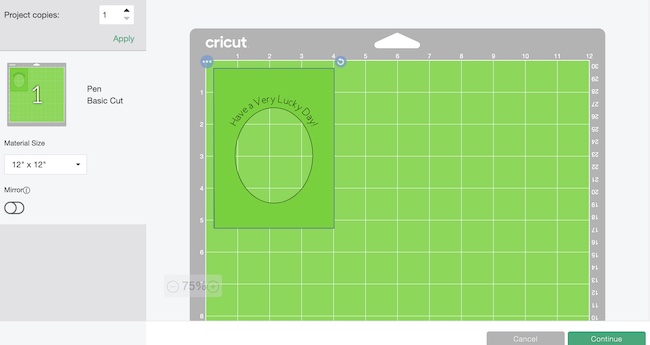
If you are using Cricut's Design Space, the score line for the main structure of the card is already marked and attached. Also, the Happy St. Patrick's Day words are already designated that they are drawn and attached. You can see that below.
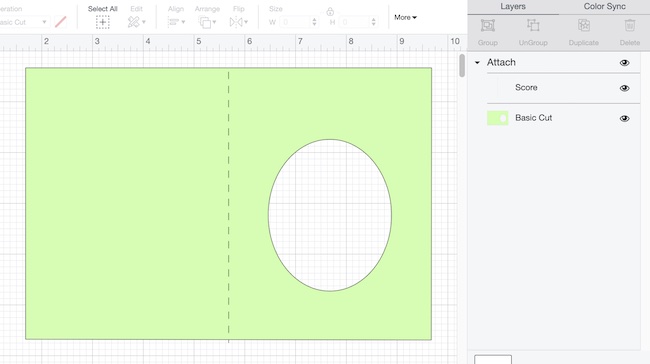
And here is how the basic structure of the card looks. Again you can see that the score line is already selected and attached for you in Cricut Design Space.
And here are all of the pieces cut out.
Optional - Personalize Your St. Patrick's Day Card with Cricut Design Space
For this step, you can use the blank overlay to personalize either the inside or outside of the card.
Here's a video showing you the steps involved.
In addition, here are the steps to write a personalized message using Cricut's Design Space.
First, select the blank overlay card stock to personalize
I hid the other aspects of the card for these series of photos. So the only piece selected is the blank card stock overlay.
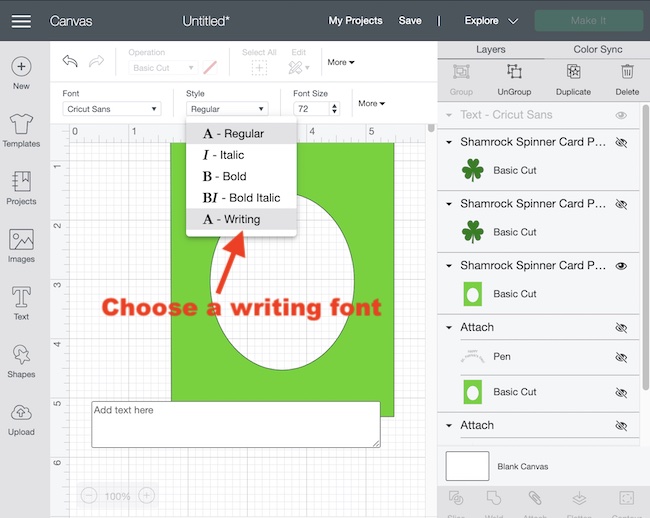
Next, click the text icon on the left side of the Cricut Design Space
Choose the text icon on the left side of the Cricut Design Space canvas. You'll see the text box appear below.
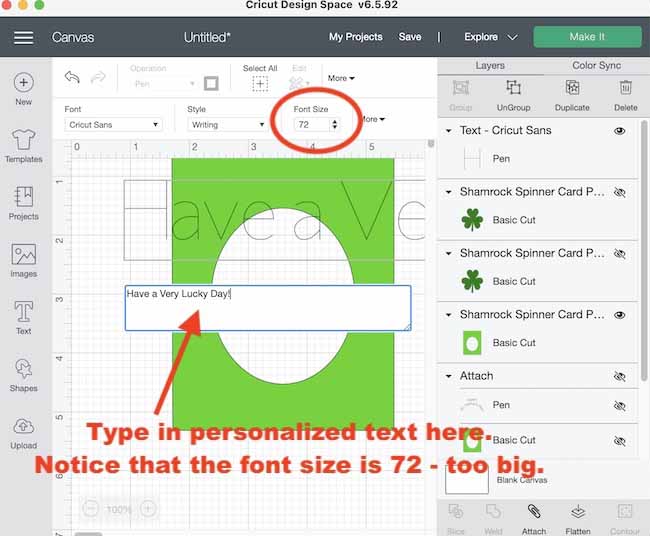
Type in your text in the text box
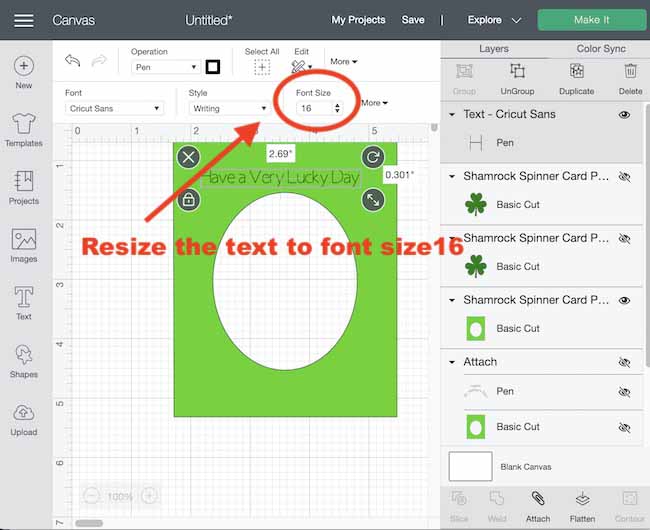
The text comes in at 72 points way too large for the card. That's ok. We'll change the font size using the Font size box in the top middle of the screen. I found that 16 font size fit the size of the card well.
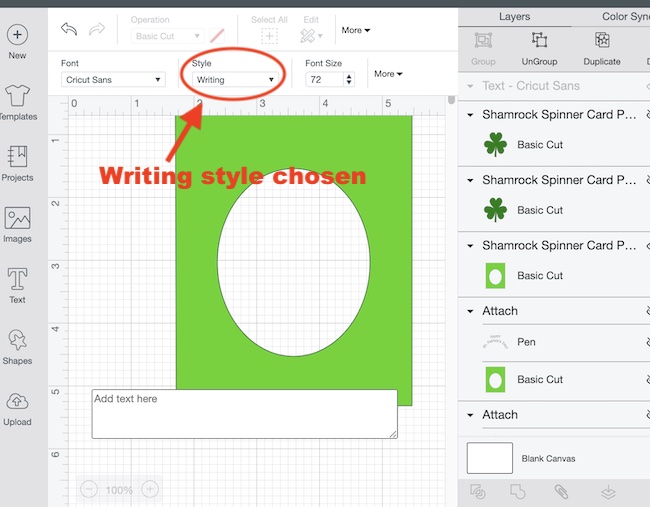
Type the font in the text box
It will show up at the top in the Design Space as well. Notice that it comes in at 72 point font size.
Change the font size to 16 to fit the card
See how that font size works to fit on the card stock overlay.
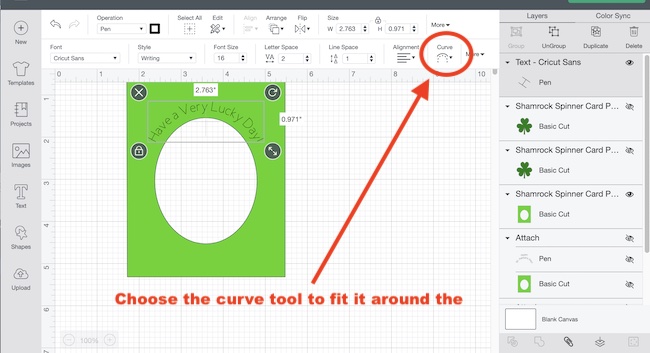
Choose the circle function to curve the text
To make the text curve around the oval, click on the curve icon. Move the slider to the right to make the curve downward. If you want it to curve upward, slide it to the left.
Attach the text to the card stock
Select the text and the card stock piece and click attach at the bottom of the layers panel.
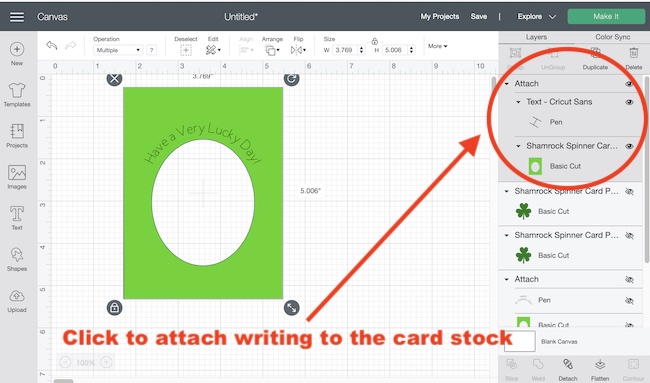
Check to make sure things are correct on the mat
This looks good on the mat in Cricut Design Space.
So that's how you make a personalized message in Design Space. You can do the same thing with the envelope when you cut it out.
Now back to making the St. Patrick's Shamrock Spinner card itself. The video below shows the construction of the card after the shamrock halves have been glued together.
Glue two shamrocks together with thread in the middle
First, make the shamrocks so they will spin by gluing to two shamrocks together with a thread in between. I used elastic thread for this spinner card and found that it works much better than regular thread. But a thick buttonhole thread will work as well.
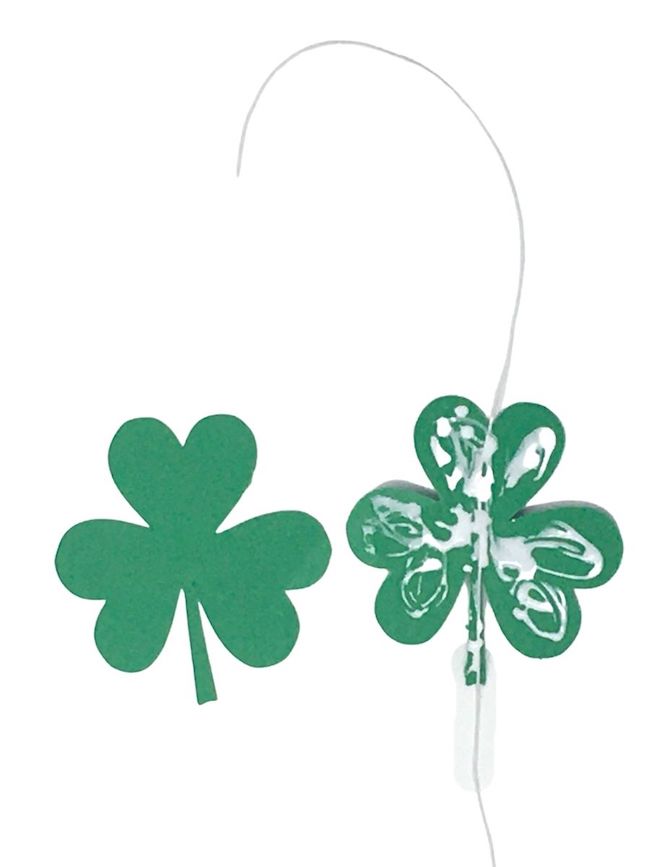
This is how the shamrock looks with the thread in between.

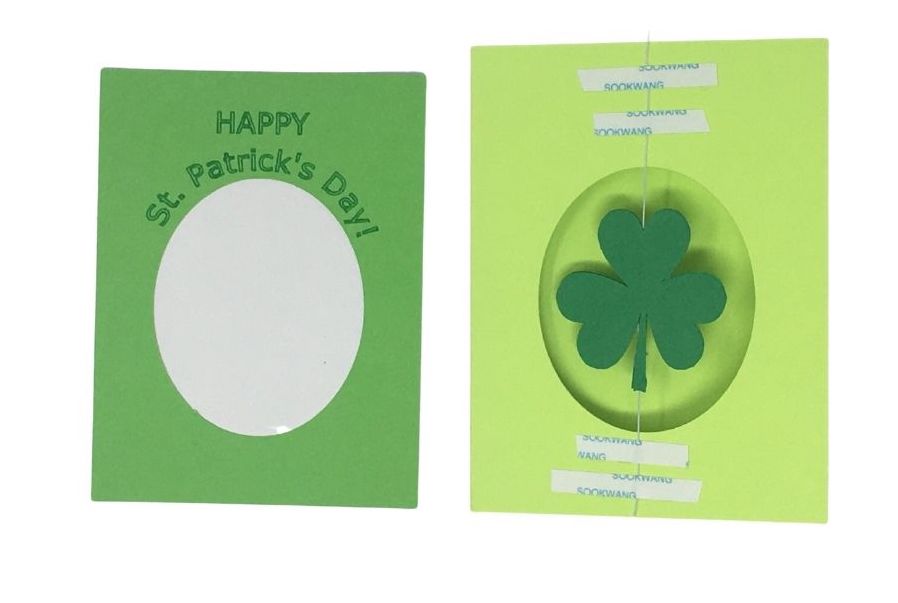
Next attach the suspended shamrock to the front of the card
For this step, use a strong tape like Scor-Tape to suspend the shamrock on the front of the card.

Apply glue to back of the overlay to adhere it to the card
Apply a fairly light layer of glue to the back of the overlay. Next, remove the paper on top of the Scot-tape. Adhere the front overlay piece to the card.
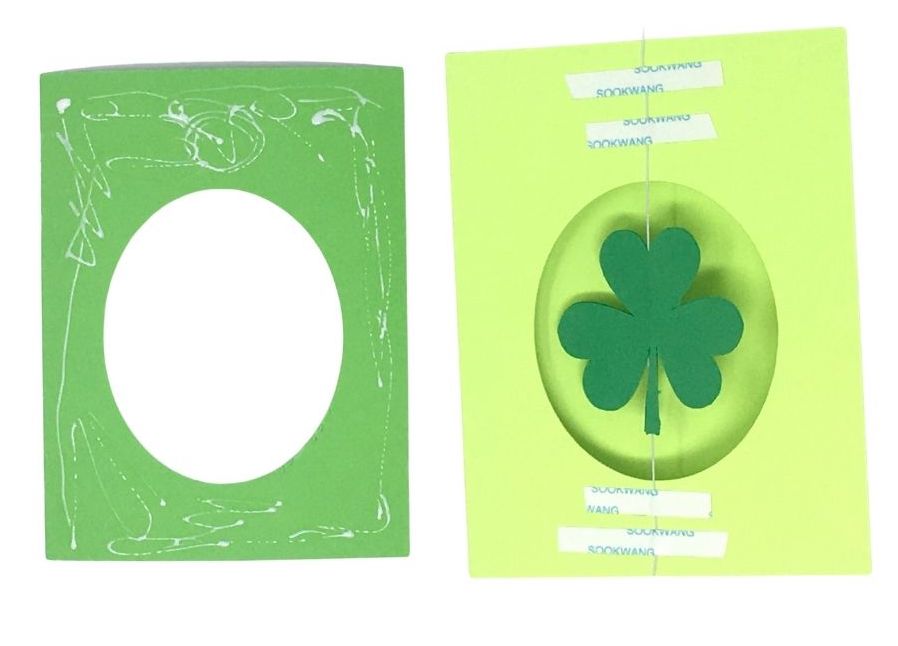
If using a personalized inner piece of card stock, glue that in place
Now is the time to glue the inner personalized card stock. Remember that you can use your personalized overlay on the front.
And that's how you make the Shamrock Spinner card for St. Patrick's Day.
Let me know if you have any questions. Just email me at [email protected]. I am always happy to hear from you.
Leave a Reply