How to Make a Great Sandy Beach Scene for Your Putz Houses
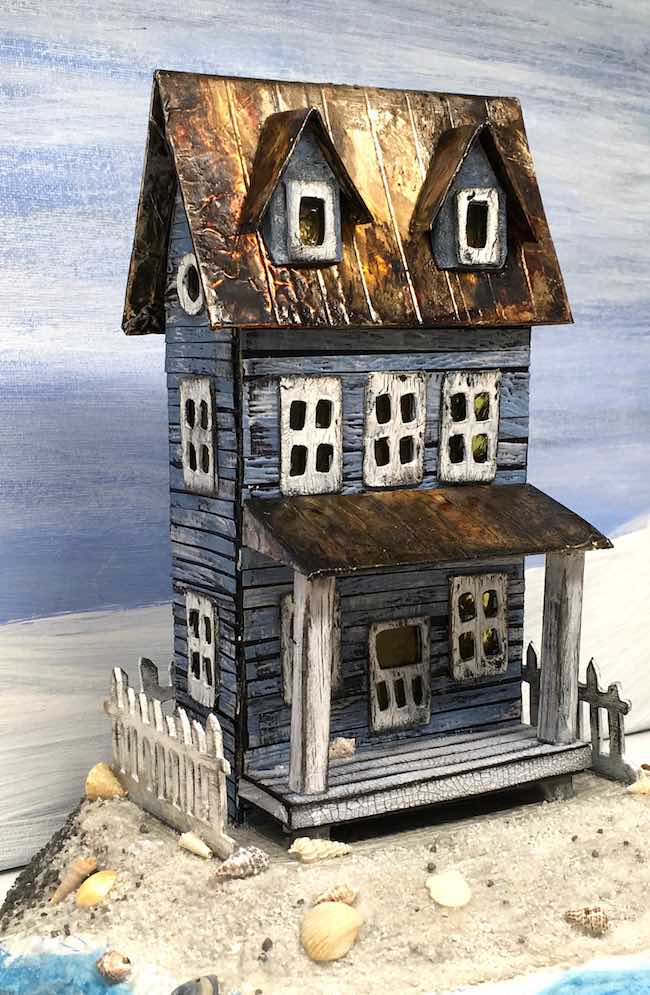
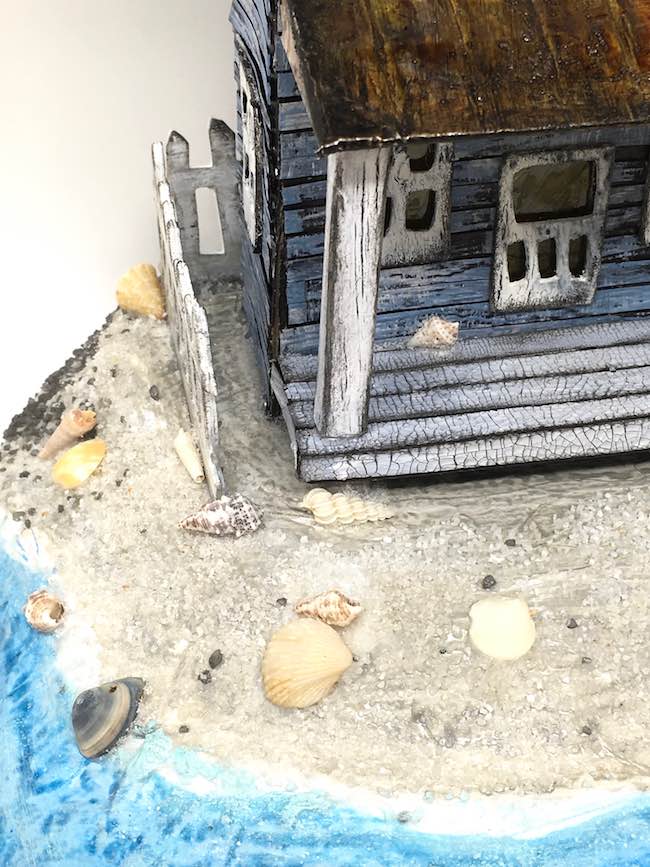
For starters, here are the instructions to make the cool sandy beach cardboard base for the little cardboard house based on the Sea-Worn Beach House. I call this particular house - the Sea Mist. I just love the little beach scene with the sand, the sloping beach and the seashells. The seashells are special because I found them in a glass jar my mom saved from 50 years ago. It's appropriate to use them on Mother's Day. She loved the beach so much.
So let's get started on the sandy beach cardboard base for the Sea Mist beach house. (I'll get the tutorial for making the Sea Myst version of the Sea-Worn Beach House up later today.)
Materials to make the Sandy Beach Cardboard Base
- Corrugated Cardboard (I used double thickness corrugated cardboard)
- One sheet smooth cardboard
- Craft Knife
- Mod Podge
- Aleene's Tacky Glue
- Hot Glue Gun
- Recycled Brown Packing Paper
- Gesso
- Acrylic Paints
- Decorative Sand
- Rock Candy Glitter
- Fence die
- Tiny Seashells
- LED tea lights
Instructions to make this Little Beach Scene for Your Miniature Beach House
- Download the printable PDF pattern from the PaperGlitterGlue library
- Trace the pattern onto cardboard
- Cut out each layer of cardboard with angled cuts on the beach side
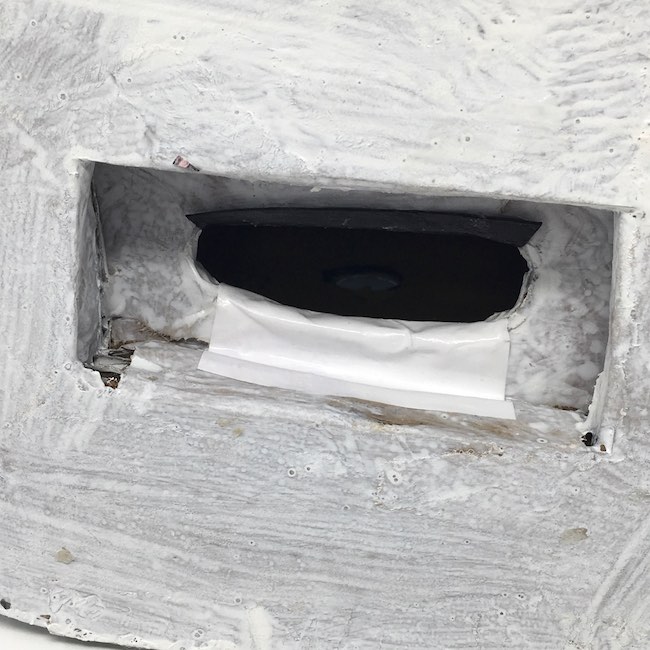
- Next cut out the spaces for the LED tea lights to fit
- Glue the smooth piece of cardboard to the bottom layer of cardboard to make it sturdier
- Using the hot glue gun starting with the largest bottom piece, glue all the layers together
- Tear and wrinkle brown packing paper into strips
- Paint a section of the cardboard base with Mod Podge
- Adhere strips of brown packing paper to the edge of the cardboard base
- Paint the cardboard base with gesso primer
- Now paint the water line in the front and the land in the back and on top
- Draw a rectangle where the beach house fits on the base
- Apply Mod Podge where the sand goes, but skip the area where the house sits
- Glue the house in place
- Decorate to complete your beach scene
Download the pattern for the cardboard base
Now you can find the PDF file for making the Sandy Beach Cardboard Base in the PaperGlitterGlue Library. If you are a subscriber to my newsletter, just type in the password after you click the link in the middle of the page. Almost always, I put the password at the end of one of my newsletters.
If you are not a subscriber and would like to be, then fill out the form below to subscribe. You will get the library password immediately after you subscribe.
Trace the pattern onto cardboard
For this project, I used double wall or double face corrugated cardboard which is basically two sheets of corrugated cardboard glued together. It's very sturdy. If you don't have that, then regular single wall corrugated cardboard works fine. You just have to cut 6-8 layers rather than 4.
First I cut out the pattern by hand. It's easy so I didn't make a pattern for the cutting machine.
Then trace the pattern onto your cardboard.
Cut out each layer of cardboard
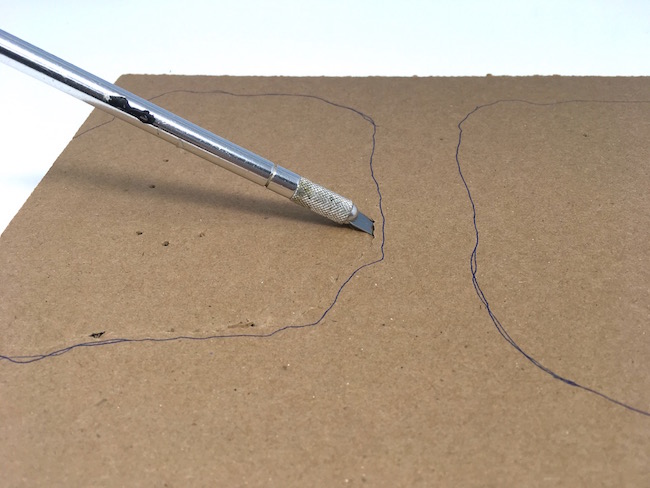
Here is the first unique step in making the sandy beach cardboard base. Because I want the beach to slope, I cut the cardboard at an extreme angle in the front.
You can see the angle of the knife in the photo. I couldn't take a photo and make the cut at the same time, that's why the knife looks like I stabbed the cardboard. Really, it's an intentional cut.
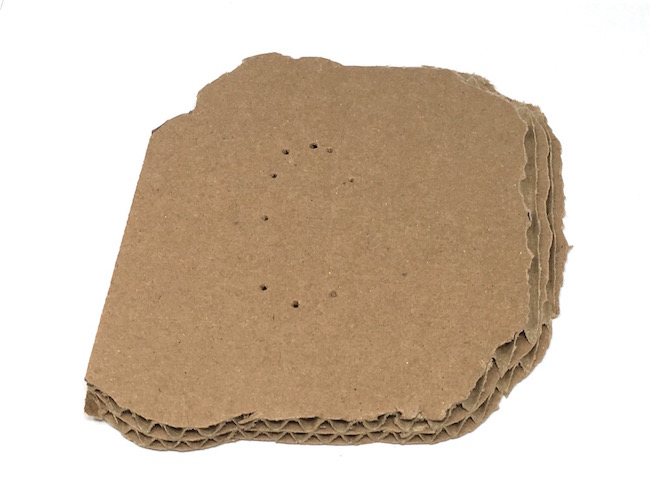
With the double wall corrugated cardboard, I cut 4 layers.
Next cut out the space for the LED tea lights
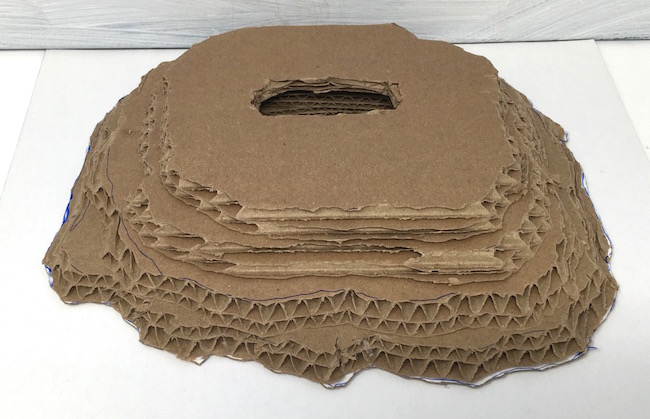
Now cut out space for the LED tea lights. Because the width of the house is the same width as the tea lights, I made the opening on the top layer more narrow. It is only wide enough for the bulbs to extend through but it won't show on the edges of the house.
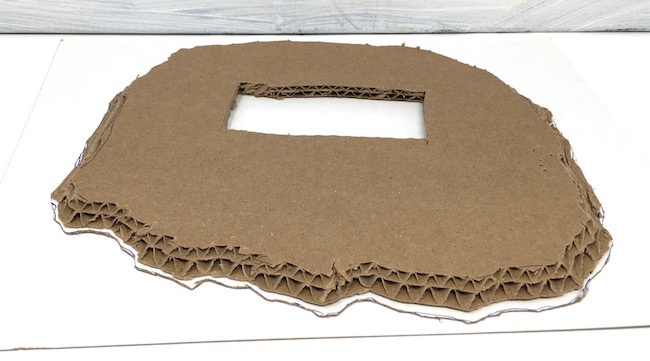
Glue the smooth piece of cardboard to the bottom layer of cardboard to make it sturdier
Even with double layer corrugated cardboard, it is pretty flexible. To keep the edges from curling, I glue a plain piece of cardboard to the bottom piece of the beach cardboard. It helps a lot to keep the base flat.
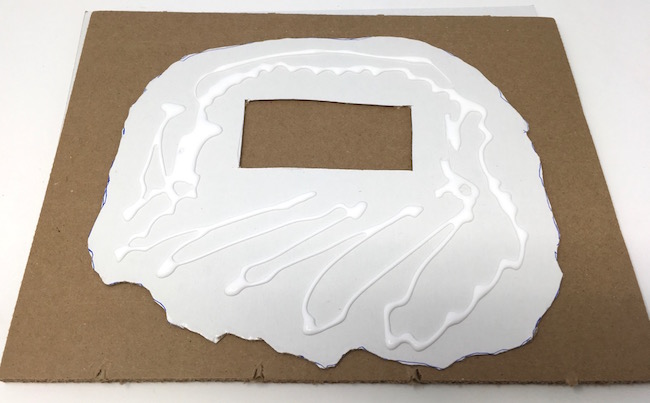
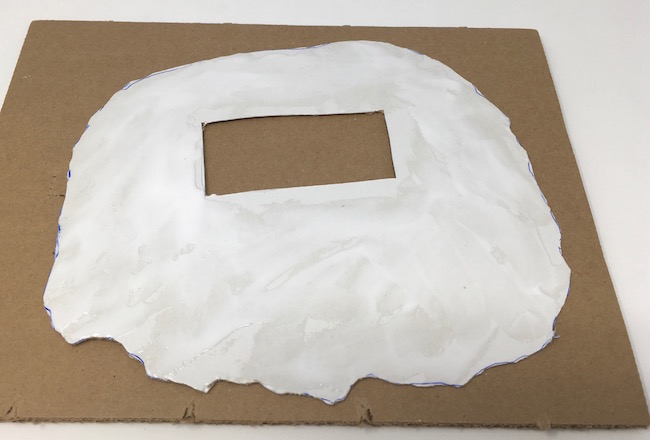
And to keep those two pieces flat, I used Aleene's glue and smeared it on the cardboard so it would adhere well. Don't use a glue gun here because that can be lumpy. It works in the next step, but not here.
I smeared the glue all over the cardboard so it would adhere completely to the corrugated cardboard layer above it.
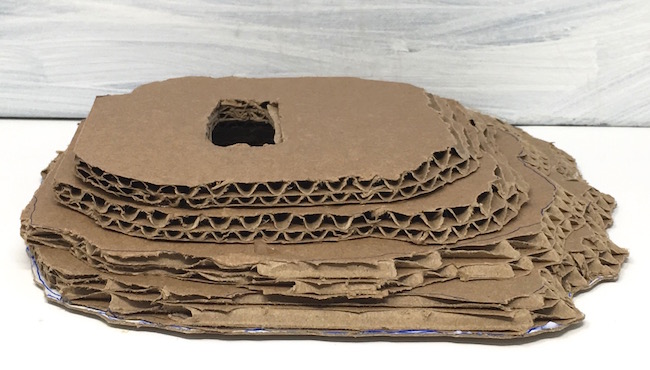
Using the hot glue gun starting with the largest bottom piece, glue all the layers together
Next use the hot glue glue to adhere the layers together. It's easy and fast. If these edges curl a little bit, it doesn't matter because you are going to cover all of these edges up with your recycled paper.
Tear and wrinkle brown packing paper into strips
Tear your recycled paper into strips. Wrinkle it as well. You want it to be a little rough because, after all, the beach isn't smooth.
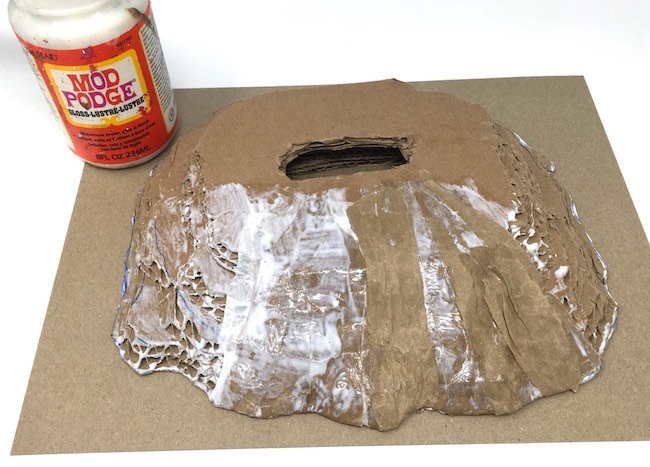
Paint a section of the cardboard base with Mod Podge
Now paint a section of your cardboard base with Mod Podge. It's the easiest way to layer the glue on the cardboard.
Adhere strips of brown packing paper to the edge of the cardboard base
After that, adhere strips of brown packing paper (or recycled newspaper or whatever you are using) to the edges of the cardboard base. This step is messy. That's why I have craft shirts specifically for glue and paint.
Often I wrinkle the edges to make little crevasses along the edge.
Go all around the base. Then add some to the top. You can add to the bottom as well if you want to make your cardboard base more resistant to moisture.
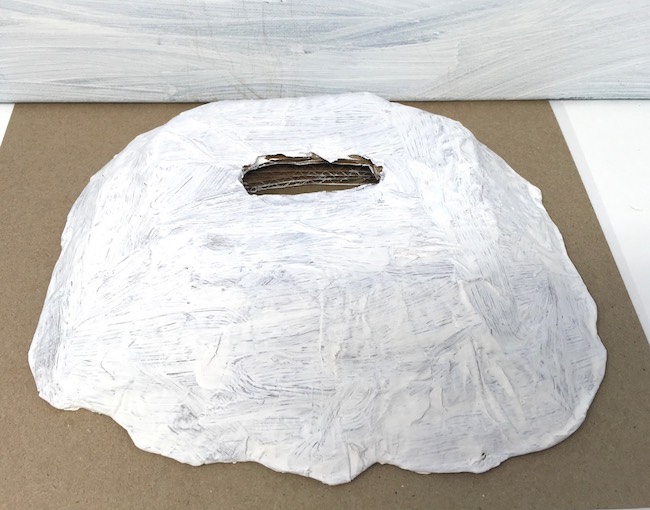
Paint the cardboard base with gesso primer
Next paint the cardboard base with gesso primer. I think this step is important because it always makes the acrylic paint layer look better and adhere better.
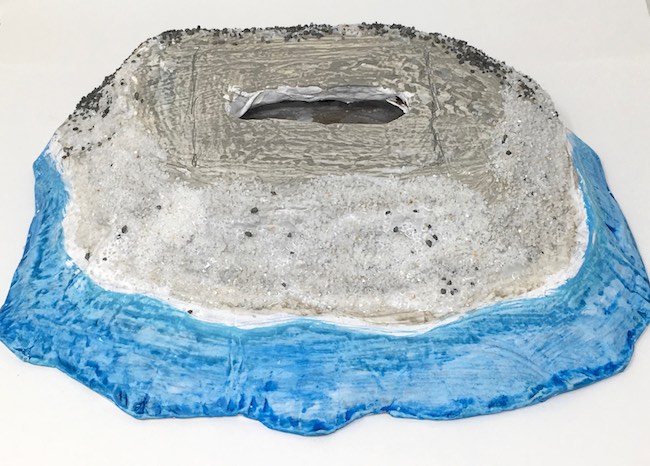
Now paint the water line in the front and the land in the back and on top
Finally one of the steps you have been waiting for - making your odd-shaped piece of cardboard look like the beach. For this step, I painted the water first. I used a darker shade of blue called Salty Ocean from the Tim Holtz Distress Paint line. Then I mixed it with a shade called Tumbled Glass. I added some water to make the paints a little more translucent.
I left a white line between the sand and the water which is supposed to simulate that white edge of waves and foam when the tide comes in and out. I'm not sure that is very successful though. On my next sandy beach cardboard base, I will experiment with merging the sand and water better.
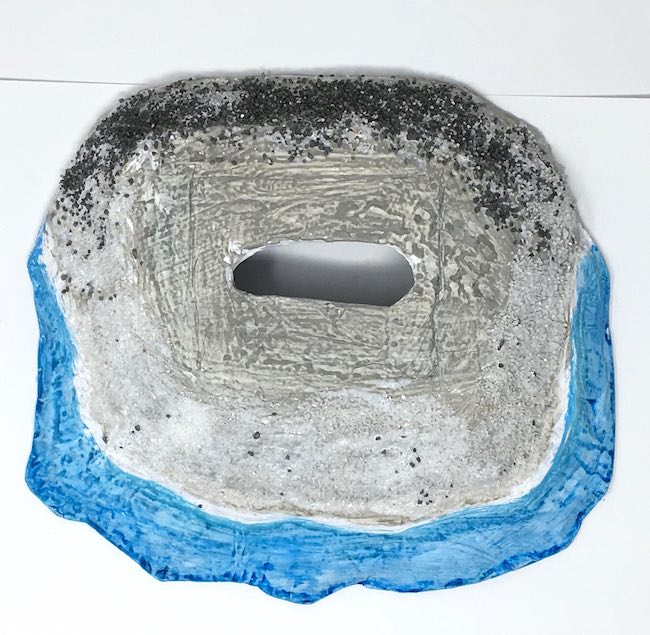
For the sand color I used a light color - Tim Holtz Pumice stone. The decorative craft sand I have is a pretty light color so I didn't need to use a dark color underneath. One the back of the house I used a darker, coarse sand.
Draw a rectangle where the beach house fits on the Sandy Beach Cardboard base
Before you add the sand, you need to mark off where the little beach house fits on the cardboard base. It won't sit right or stick to the base very well if you try to glue it on top of sand. I drew a very faint line around the house to avoid gluing sand there.
Apply Mod Podge where the sand goes, but skip the area where the house sits
Now paint Mod Podge where you want sand on your beach scene. Again skip the area where the house sits. You can add more later once you glue the house in place. But before you do that, leave that space open.
It's just easier to apply the sand and shake off the excess without the house in the way.
Glue the house in place
Now glue the house in place with a thick line of glue. This is where I use my favorite glue - Aleene's Fast Grab because it is so thick. You have to be patient with this step and let it dry or at least not shake about too much or the house will pop off.
Often I reinforce the house with some paper than I fold around the base and extend to the house. I put lots of glue there. That provides a bigger surface area to adhere the house to the base.
Decorate to complete your beach scene
And finally when your little cardboard beach house is secure on the base, you can decorate. I added a distressed rickety fence around the Sea-Worn Beach house. And I glued down the tiny seashells about the sand and next to the fence and house. You know how people often have a conch shell outside their beach houses? That's why I put one particularly beautiful little shell on the porch.
In addition, I added a little bit of Rock Candy glitter to the water just to give it some more sparkle. There's a little bit on the sand as well.
Well, tomorrow I will finish writing the post on how to make the Sea Mist - the latest version of the Sea-Worn Beach House. And I hope to have another one made. Since I like to name my little houses, the next distressed beach house is called "She's Seen Better Days". I think you will like that one.
If you have any questions about making the Sandy Beach Cardboard Base, just email me at [email protected].
More cool crafts soon. Happy Mother's Day.



Victoria L Rumsey
I love your houses!!!! I hope mine will be that cute someday before I'm gone!!!!!
Lucy
Victoria, I know yours will be just as cute. I've seen houses that other people make with my patterns and they have been adorable. Even better than mine.
Thank you so much for the kind words. Lucy