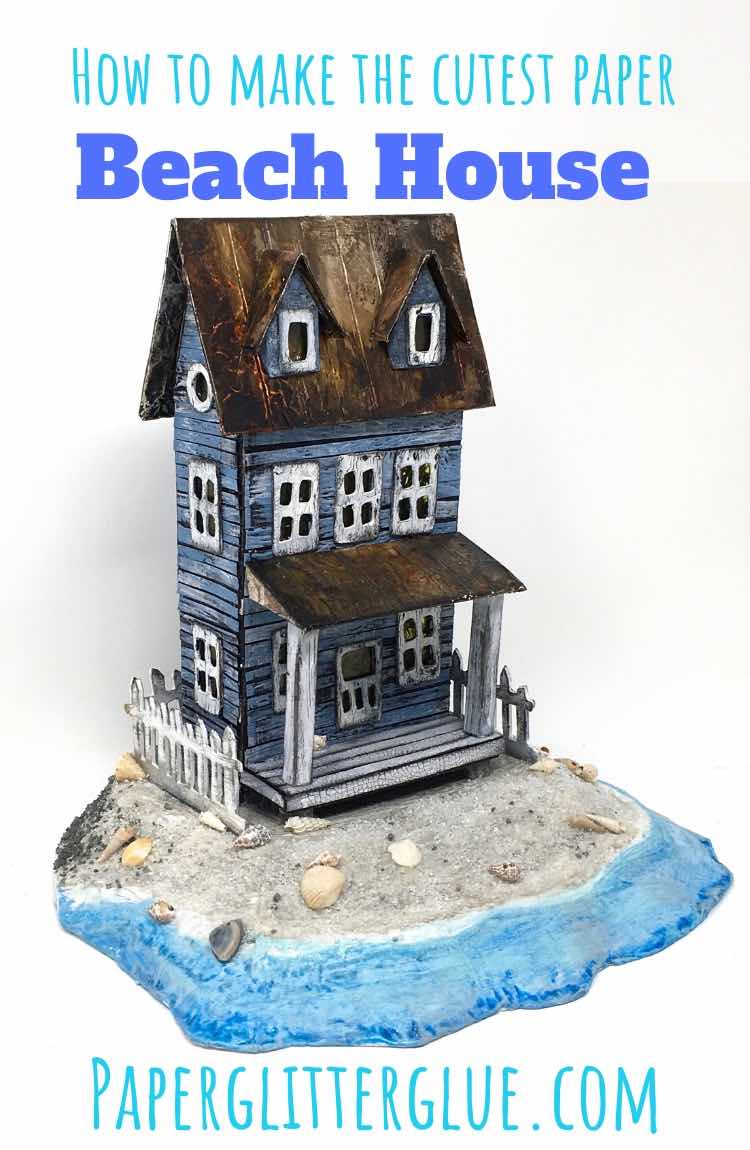
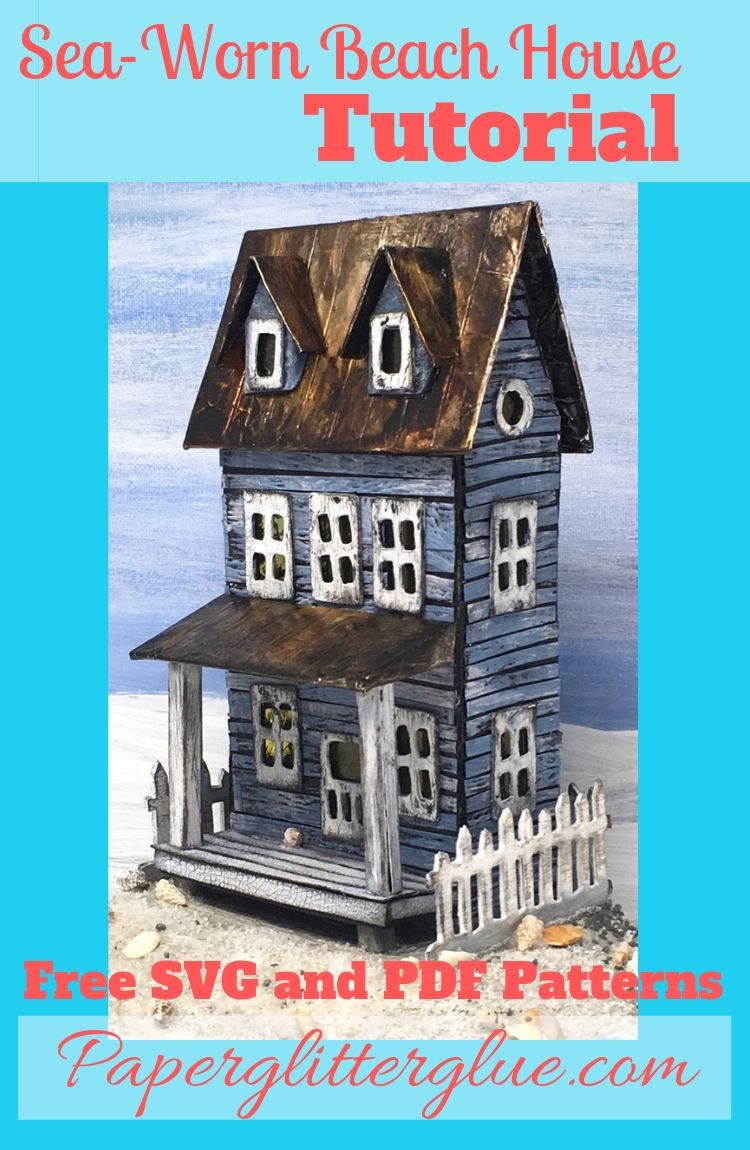
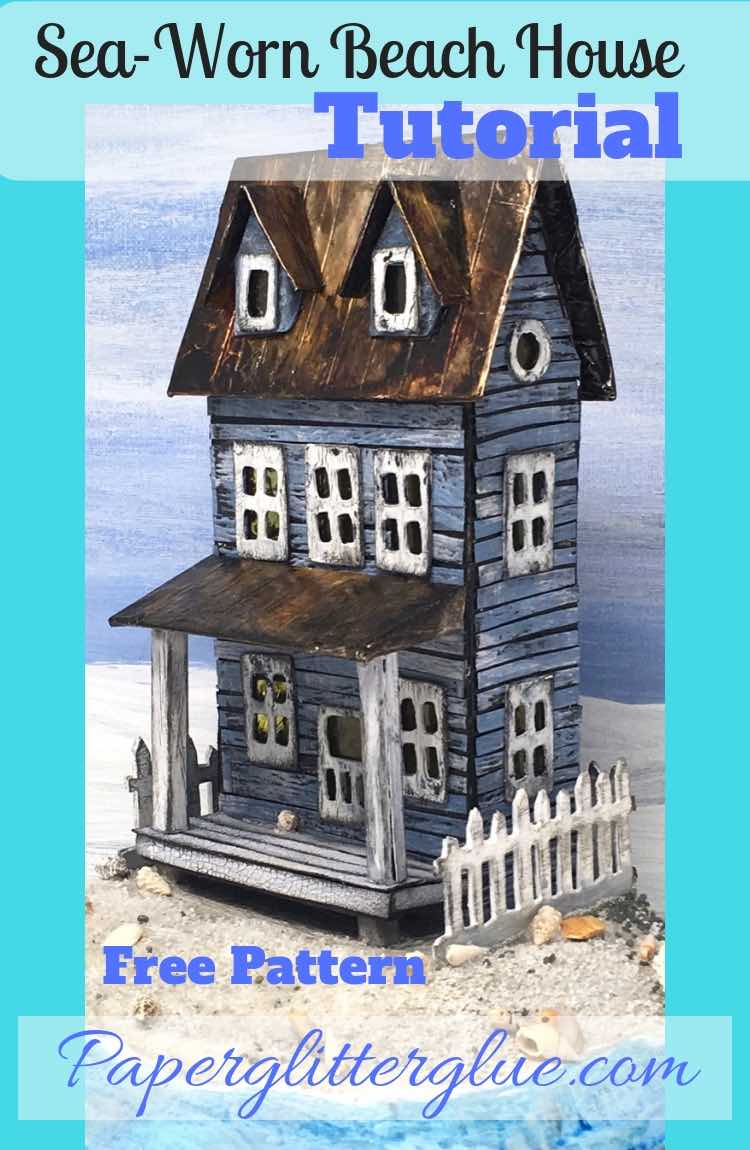
How to Make the Sea-Worn Beach House - a little cardboard house by the Sea
Finally, here it is - the pattern template for the Sea-Worn Beach House. It's a pattern of a distressed little cardboard Putz house on a base coated with sand and seashells. A perfect summer home decor house. This cardboard version of the Sea-Worn Beach House is called the Sea Mist.
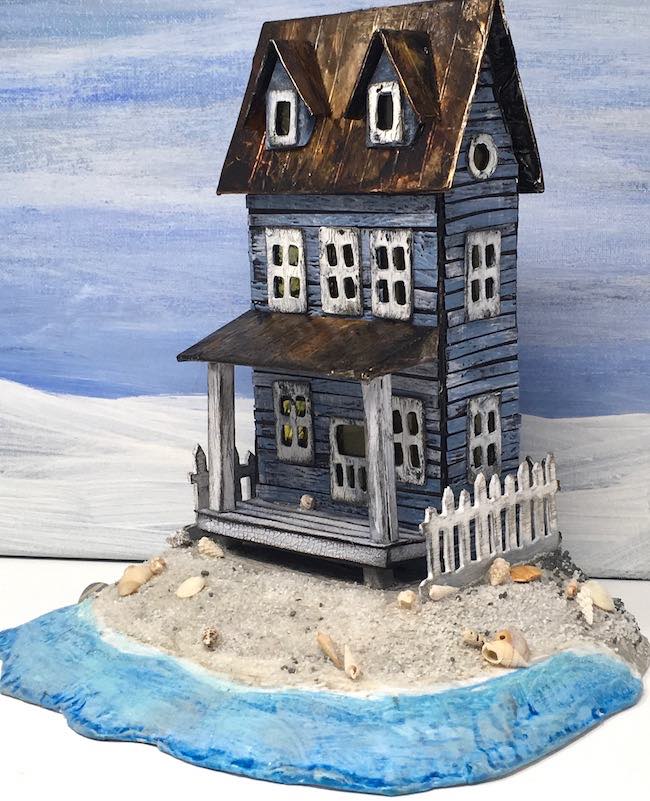
To make it different from the first Sea-Worn Beach House, I placed it on a sandy beach with a waterline that extends ½ up the sloped base. I wrote about the sandy beach cardboard base in a separate tutorial so I could go into detail easier.
This tutorial is for making the old distressed Putz beach house itself.
So how do you make the Sea Mist, the latest version of the Sea-Worn Beach House? Well, I've outlined it below listing materials you need first, followed by a summary of the steps involved and then detailed instructions for each step. It's everything you need to know so you can make your own distressed beach house for your home.
Let's get starting on this cool little cardboard beach house - the Sea Mist
This post contains some affiliate links for your convenience. Click here to read my full disclosure policy.
Materials for Making the Sea-Worn Beach House
- Cardboard - Design No. 53
- Black cardstock 110 lb.
- Wood embossing folder
- Glue - Aleene's Tacky Glue (here and here)
- Glossy Accents
- Gesso - black primer
- Plastic acetate for the windows
- Alcohol Inks - like these
- Metal duct tape
- Ranger Grit paste
- Crackle medium
- Acrylic paints - this is my favorite brand
- Painter's tape
- Binder clips
Summary of how to make the Sea-Worn Beach House
There are three main steps in making the house:
- Download the pattern and cut it out - Design No. 53 - in the library
- Paint and prepare the components for the house
- Glue the house together, then glue the components on the house
Here are the specific steps to making the Sea-Worn Beach House:
-
- Download the pattern template from the Paper Glitter Glue library - Design No. 53
- Cut out the paper house pattern on cardboard
- Prime the pieces for the little cardboard house
- Prepare the distressed paper siding - emboss and paint
- Stain plastic acetate windows with alcohol ink and glue on house template
- Make the rusted roof - main roof, dormer roof pieces, porch roof
- Prepare smaller pieces, glue together - porch components, dormers, windows and doors
- Cut strips of distressed paper siding and adhere to cardboard house
- Apply windows and door to the little house
- Glue the house together
- Glue the main body of the dormers to main roof before you glue the roof on the house
- After the dormers are dry, glue on the dormer roof pieces
- Next glue the main roof on the house
- Adhere the porch floor to piers
- Glue the porch to the house
- Add the porch columns
- Glue the porch roof on the house and to porch columns
- Finally, glue the house to your completed base
Related Links:
- Rusted Roof Tutorial
- How to make crackle paint easily
- Sea-Worn Beach House I - the original distressed beach house
- The Sea Shack - a shorter version of the Sea Worn Beach house
- Little Putz House by the Sea - another variation of the Sea-Worn Beach House
- How to make a Sandy Beach Cardboard base
- How to cut out windows with an Arbor Press
- Paper Glitter Glue Library to download the pattern for the Sea-Worn Beach House
Download the free pattern template from the Paper Glitter Glue library
First step is to download the free pattern from the Paper Glitter Glue library. It's Design No. 53. If you already have subscribed to my newsletter, you have the password to the library. If not, you can subscribe with the form below and you will get the password immediately and in an email.
Click on the orange button in the middle of the About the library page and it will take you to the page where you type in the password. Type in the password and voila! you are in the Paper Glitter Glue library. All of the patterns are free for you to download. The most recent patterns are first.
Most of the patterns are in zip file format which means they are compressed to make it easier to download and save. Once the file is on your computer, you have to UNZIP it so you have access to the real, functional file. Then you can get started.
The file for the Sea Worn Beach House is listed in May 2019 section of the library. Remember It's design no. 53 in the library.
Cut out the paper house pattern on cardboard
Now cut out the pattern of your little house on cardboard. I use a recycled cardboard from work that is about the weight of poster board.
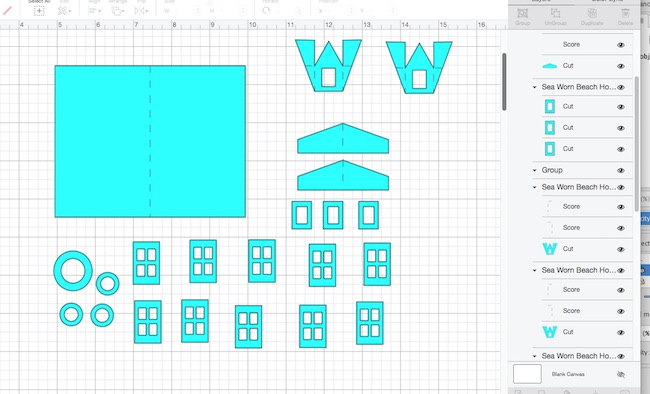
Cut out on an automatic cutting machine
When I cut it out on my Cricut Explore Air 2, I use a custom setting and usually I have to run it through twice to make sure all the cuts are cleanly through the cardboard.
At one time, Cricut allowed us to designate score lines for you, but they no longer allow that. That means you have to select the score lines and convert them to score under the operations menu, then be sure to attach them to the piece they are grouped with.

And here are the porch pieces in Cricut Design Space with all the pattern pieces scored appropriately. The strip at the bottom is 2 piers for the porch and 4 columns. I only used 2 columns for mine.
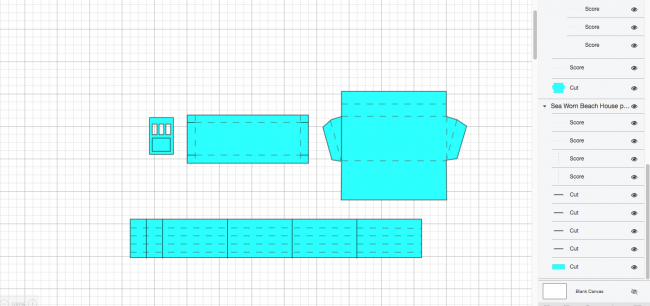
Here are all the windows, the dormers with their little roofs, and the main roof for the Sea Worn Beach House.
Cut out the pattern pieces by hand
One thing I try to do on all my patterns is make them easy to cut out by hand because that is what I had to do for years. So often the main house pattern is a big rectangle with a tab on one side. It is so easy to cut out. I simplify the pattern as much as possible for that reason.
Also you can choose how many windows you want to cut out because windows are hard when you cut them by hand. That's why I actually bought an Arbor press for cutting out windows and doors and the circle in the back for lighting. You can read about using an arbor press for cutting out small pieces here.
Prime the pieces for the little cardboard house
Once you have all your pieces cut out, you need to prime them. If I was just going to paint the house and make it look pretty, I would prime with white gesso. But because I want this house to look like it's been at the beach for many years it needs to be distressed. So I prime with black gesso. That way the spaces between the siding and on the edges of the house are black and in shadow.
I prime all the pieces including the windows and the door black.
Prepare the distressed paper siding - emboss and paint
Now you know I love this step - the actual distressing to age the little cardboard beach house. Every time I make something I try to simplify the steps - especially for you, the reader. I want you to love to make this stuff like I do. Most of the time when I make crackle, distressed siding, I paint a sheet of paper or cardboard, distress it and then cut into strips. But that involves cutting tiny strips to fit around the windows and doors.
This time I came up with a new plan. Cut out the paper FIRST in the shape of the house. Then distress it, then cut it into strips that fit perfectly around the windows and doors. That way you don't have to measure the tiny strips that go between the windows, for example. It also fits better around the circular windows and the light hole in the back.
It worked so much better. I have different trick that I will show you on the "She's Seen Better Days" distressed pink beach house in the next post.
Back to how to distress the paper siding for the Sea Mist Sea-Worn Beach House
After I cut out heavy weight black cardstock in the shape of the house, I cut it into sections - front, back and sides. Then I ran that through my wood embossing folder to give it texture. The photo below shows the bark pieces I used on the Fairy House, but you can see the texture on the embossing folder.
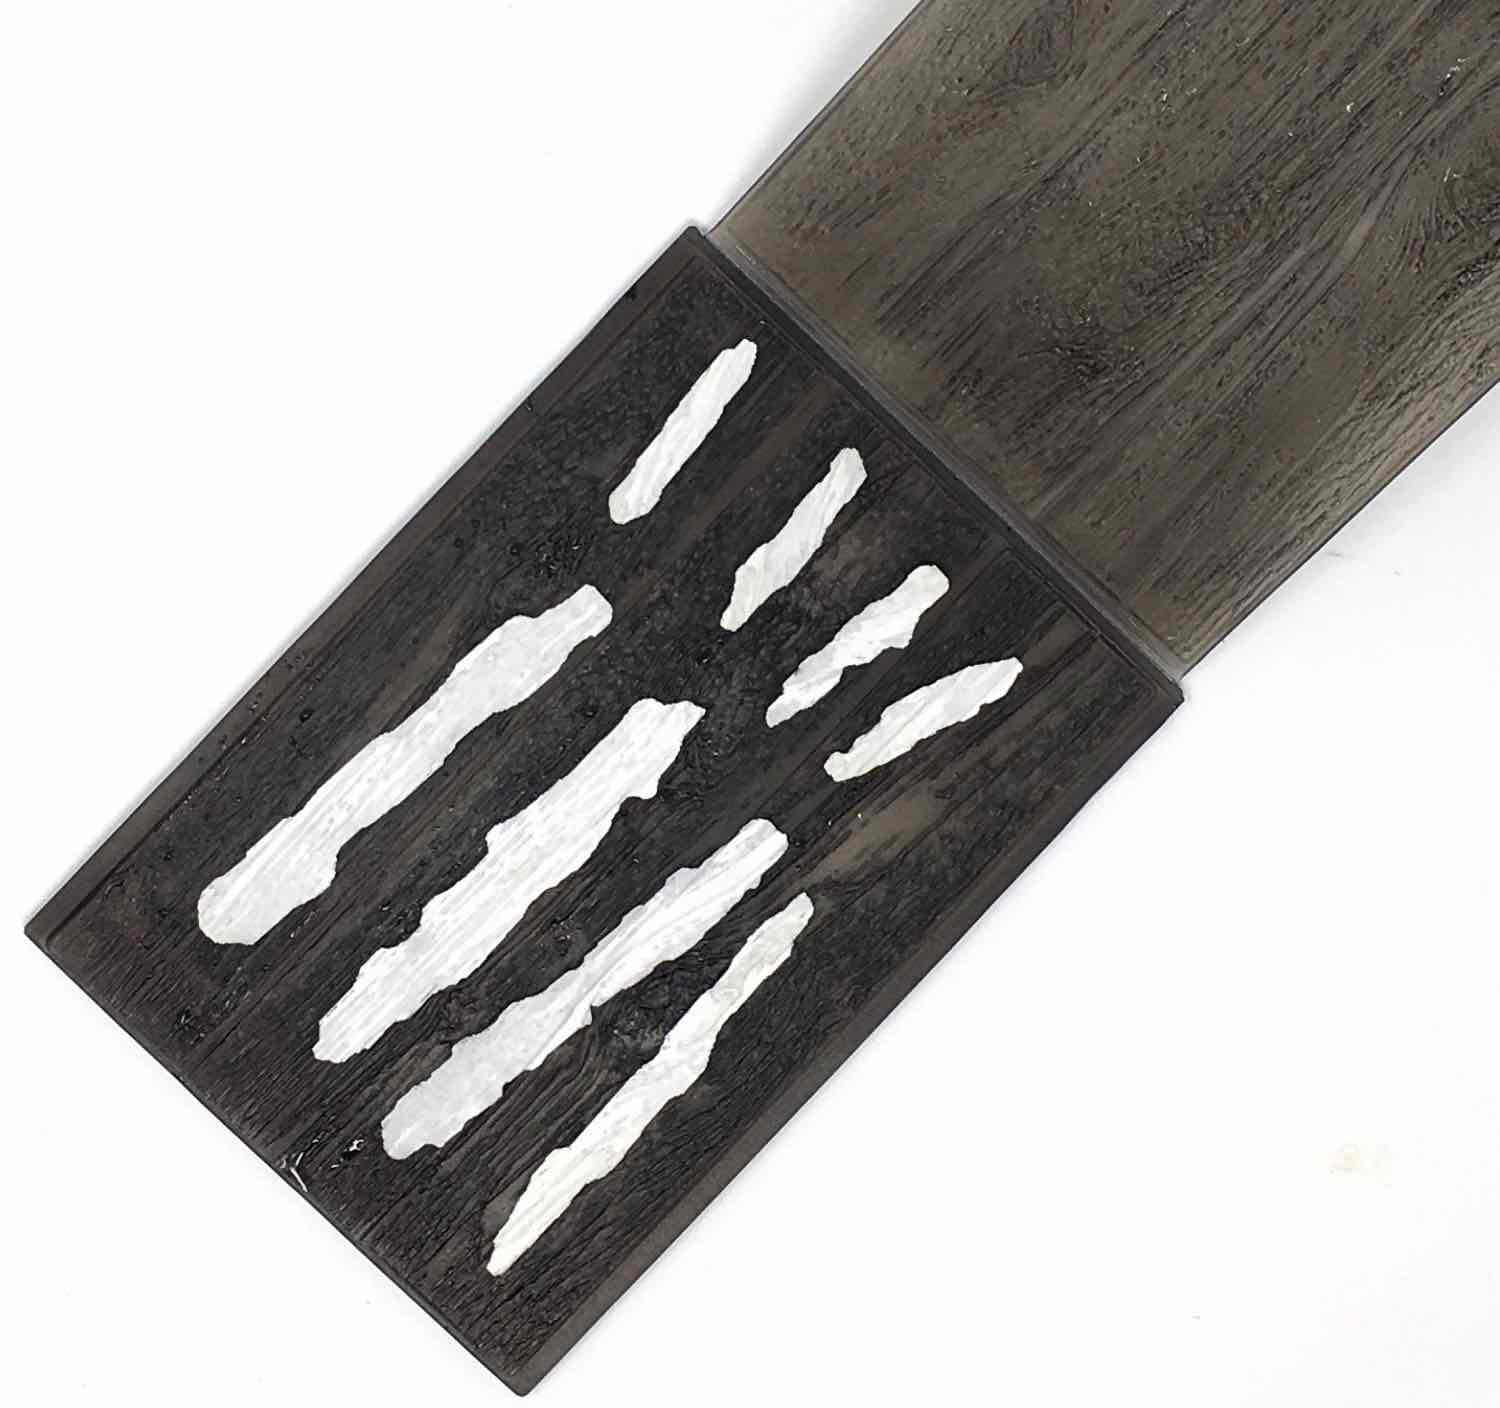
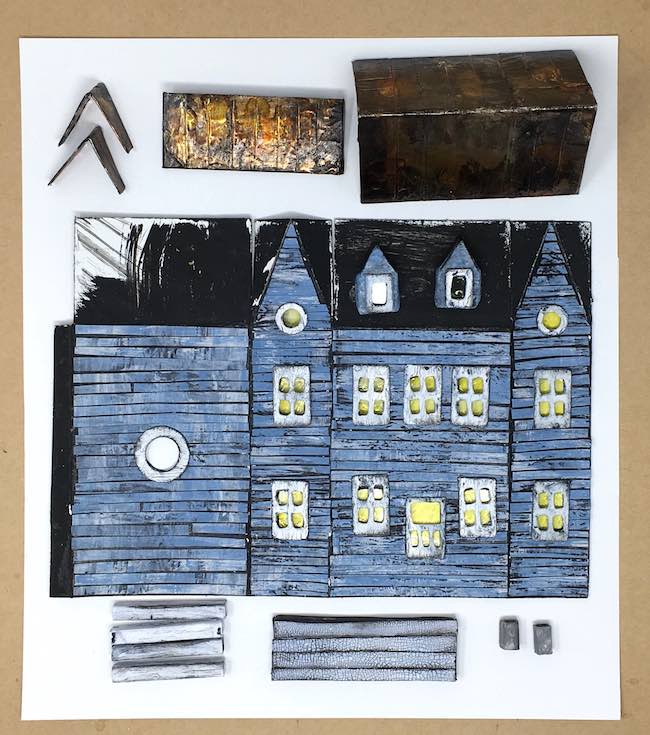
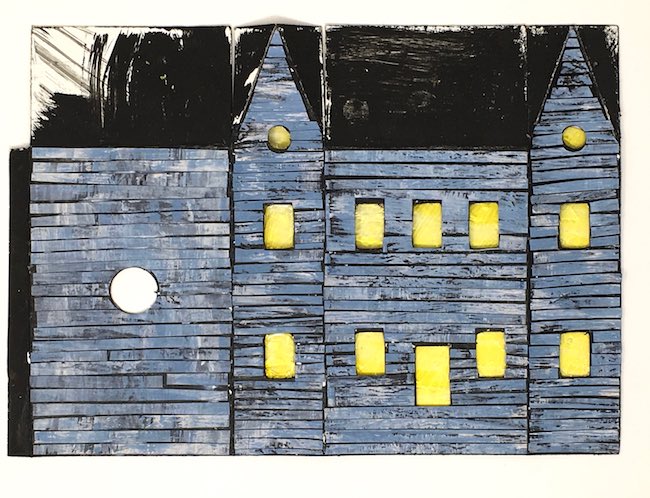
After the black paper cardstock has a wood grain texture, I painted it. First I used shades of blue - Weathered Wood and Stormy Sky and Faded Jeans. Then I streaked some white paint, Picket Fence, across it. And finally I smeared a little black on it as well. I love the way this distressing looks. And it was easy too.
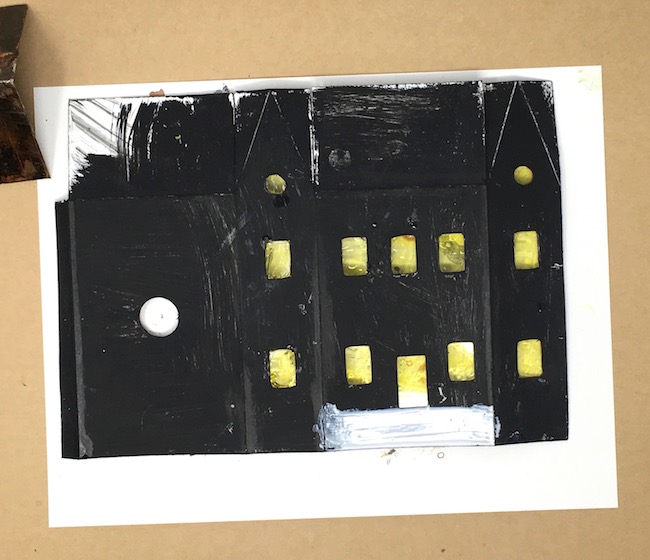
Stain plastic acetate windows with alcohol ink and glue on the house template
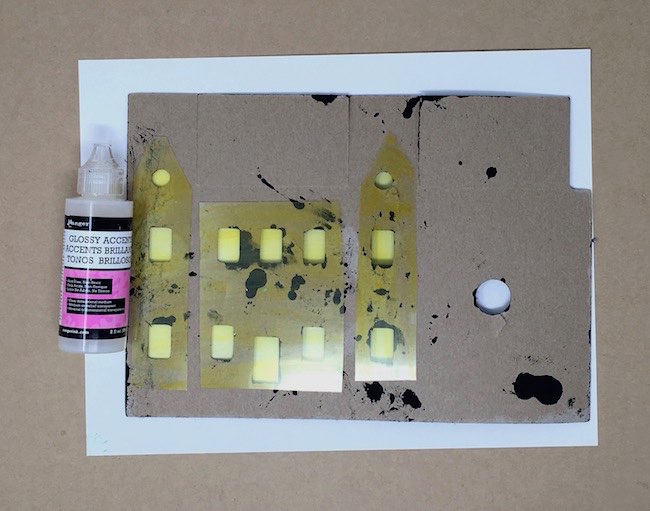
For the window material, I use plastic acetate packaging that some of my crafting supplies come in. I like the little windows to have some color so I usually color them with alcohol ink. I used a yellow color for this window material. Just cut it to fit behind the windows and glue in place with Glossy Accents glue. Generally I smear some glue on the windows so they will be translucent and a little wavy. It adds to the distressing.
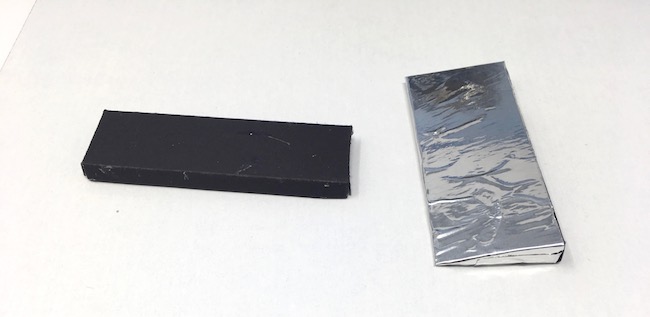
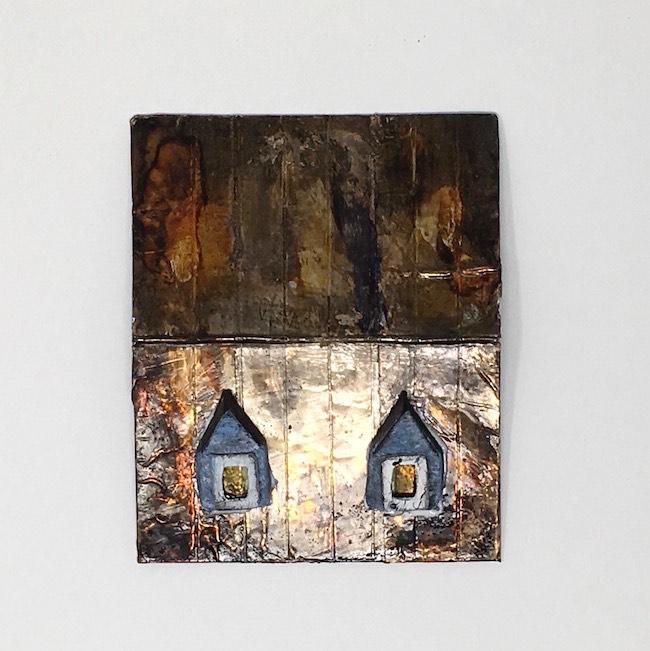
Make the rusted roof - main roof, dormer roof pieces, porch roof
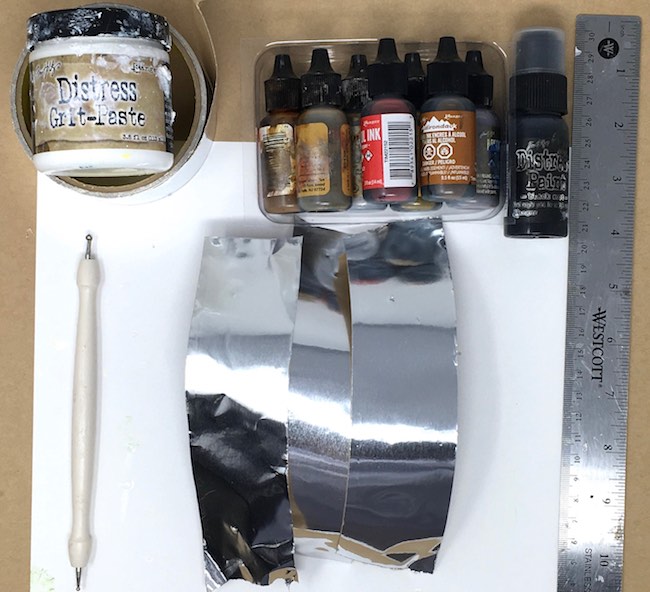
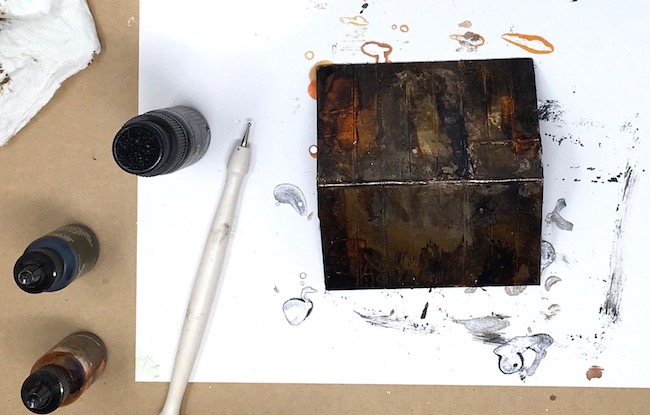
Here is one of my very favorite techniques - making a rusted roof for my little houses. I wrote an entire blog post about how to simulate rust on a roof. Mainly you use metal duct tape - an aluminum tape. Tape it to your cardboard roof piece. Score the roof like a standing seam metal roof. Apply some grit paste for texture. Then start coloring with alcohol inks. You can't mess it up.
Prepare smaller pieces, glue together - porch components, dormers, windows and doors
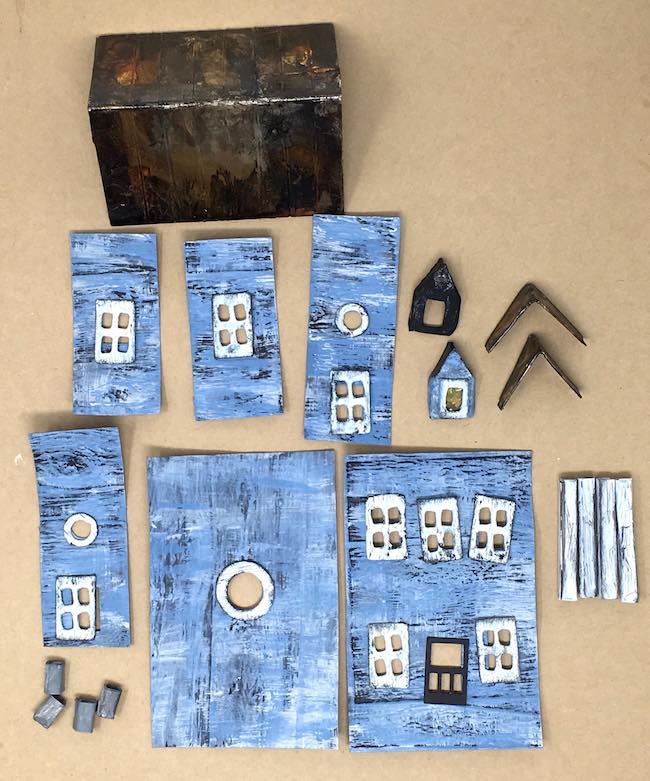
There are a fair number of components outside of the main house and roof for the Sea-Worn Beach House. Here's a list:
- One door which you can use in 2 different ways as a screen door or a paneled door
- 9 regular sized windows
- 2 small dormer windows
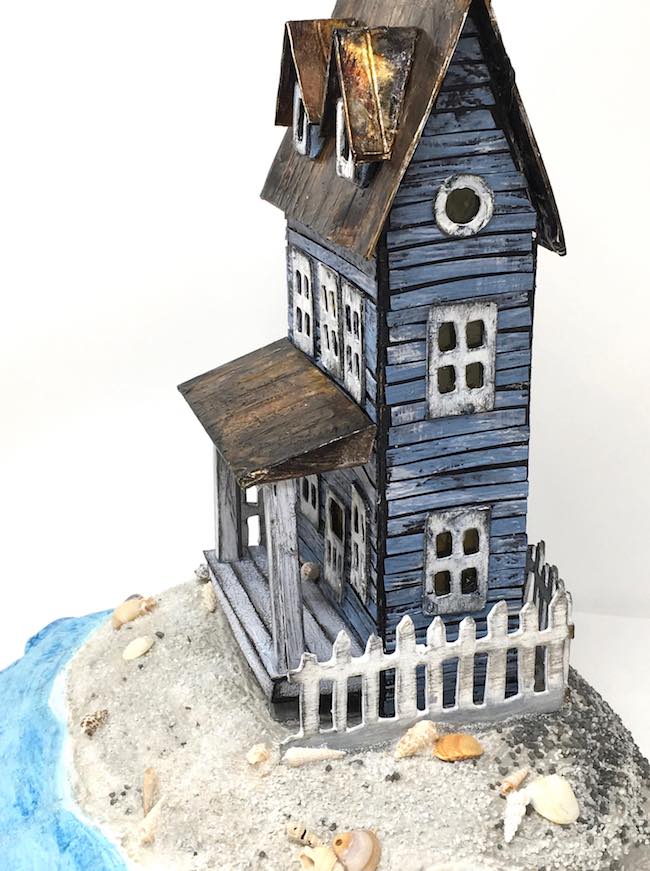
- 2 small round windows
- 1 frame for the light hole in the back
- 2 dormers with dormer roofs
- ½" piers for the porch floor (I used 2 , but you could use 4 if you want)
- 2 columns, but you can use more if you want. Columns are 2 inches tall
- Porch floor
- Porch roof
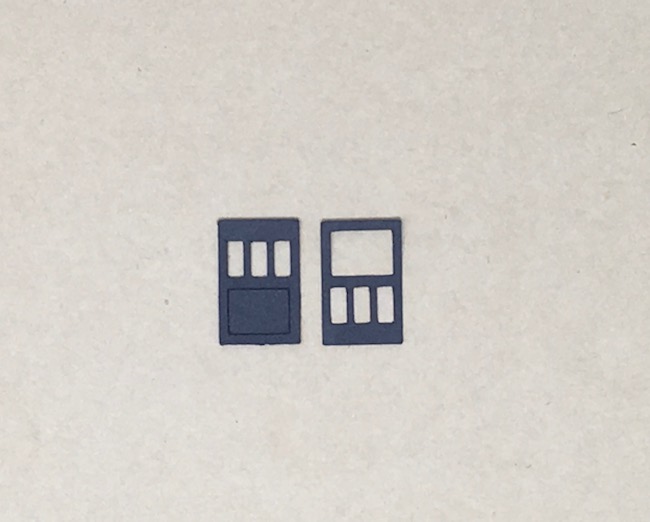
Door Options
First, here are the two options for the door. One way makes a paneled door, but if you turn it upside down it makes a screen door. That's the way I used it on the Sea Mist beach house. The ones below are cut out of black cardstock, but on the house I used cardboard primed black, then crackle medium, then white paint and distressing on the edge.
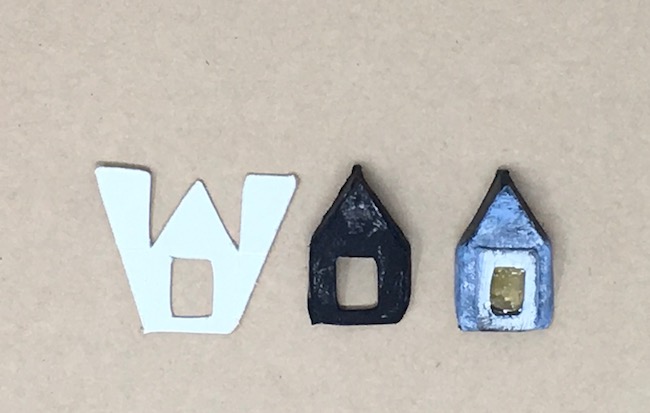
How to make the Dormers for the little cardboard beach house
Now for the dormers. I tried a couple of different patterns to make the dormers and it worked out the the W-shaped piece worked the best for such a little cardboard dormer. It is scored on the side so the angled sides fold back as well as the angled roof support. Just glue the roof support BEHIND the front of the dormer.
Because the dormers are tiny, I didn't glue siding on the dormers, I just distressed them with layers of paint. First 2 shades of blue, then white, then a little bit of Black Soot Distress paint.
Distress the windows and the door
Just like all the other pieces, all the windows and the door were primed with black gesso first. Then coated with crackled medium followed by white paint and a little black paint on the edges.
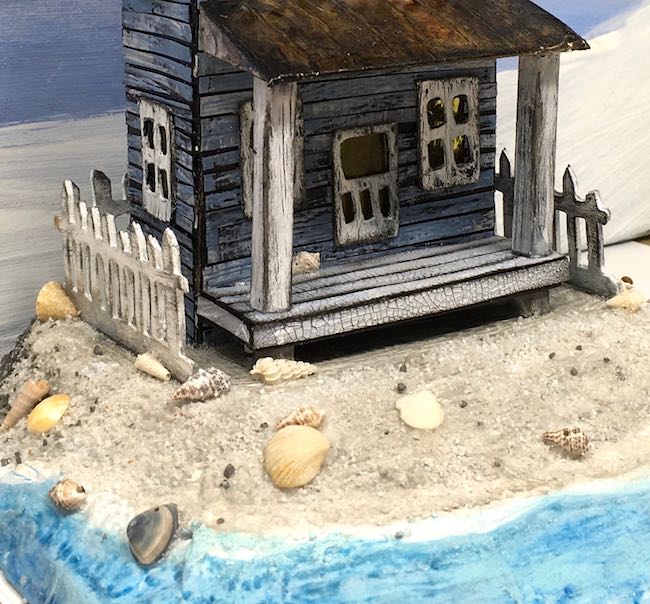
Make the porch components
The regular cardboard I use for the houses doesn't make real sharp creases so when I need something with sharp creases I use a thinner cardboard (like the lightweight boxes tea comes in) or a thick cardstock. For the porch columns, base and roof, I used 110 lb. black cardstock because it folds so nicely. I had some leftover paper with great crackle painting on it so that is what I used to cover the porch floor.
For the porch roof, it works better if you make the back a 90 degree fold so it will adhere to the front of the building better. Mine was not quite right, but with the columns it still hangs on the building pretty well.
See how the back of the porch roof makes a 90 degree angle?
And finally stain the porch roof just like you did for the rusted main roof.
Cut strips of distressed paper siding and adhere to cardboard house
Cut the distressed paper siding into strips and glue them to the cardboard house. I used Aleene's Quick Dry Tacky Glue to adhere the strips. Aleene's Fast Grab is really too thick for this step. It tends to ooze out between the boards and makes a shiny spot that doesn't match the distressing.
Below the glue is applied to the bottom area of the beach house.
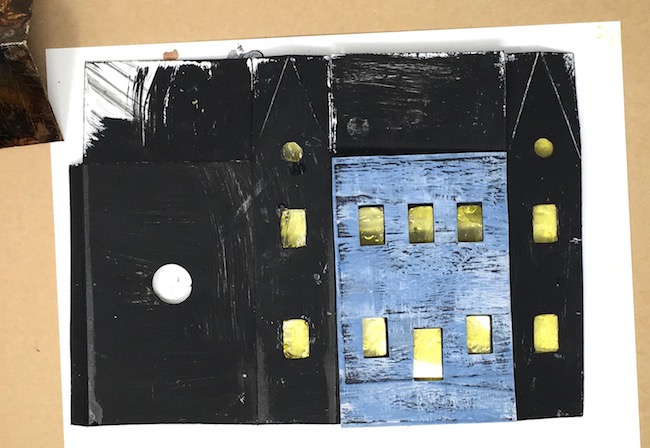
Next, apply the distressed strips of paper until you have covered the entire house.

Doesn't that look cool? For a distressed beach house, I mean.
Apply windows and door to the little house
Now glue on the windows and the door to the Putz house. 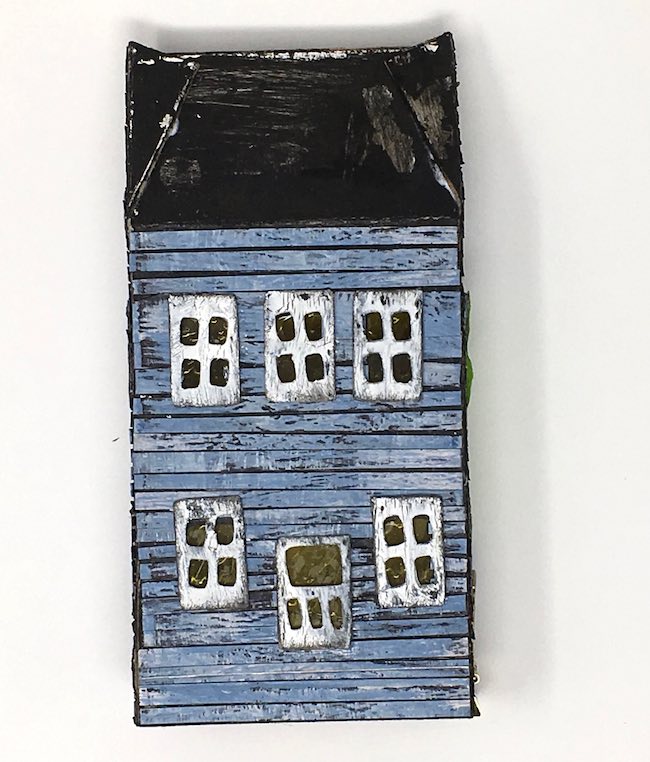
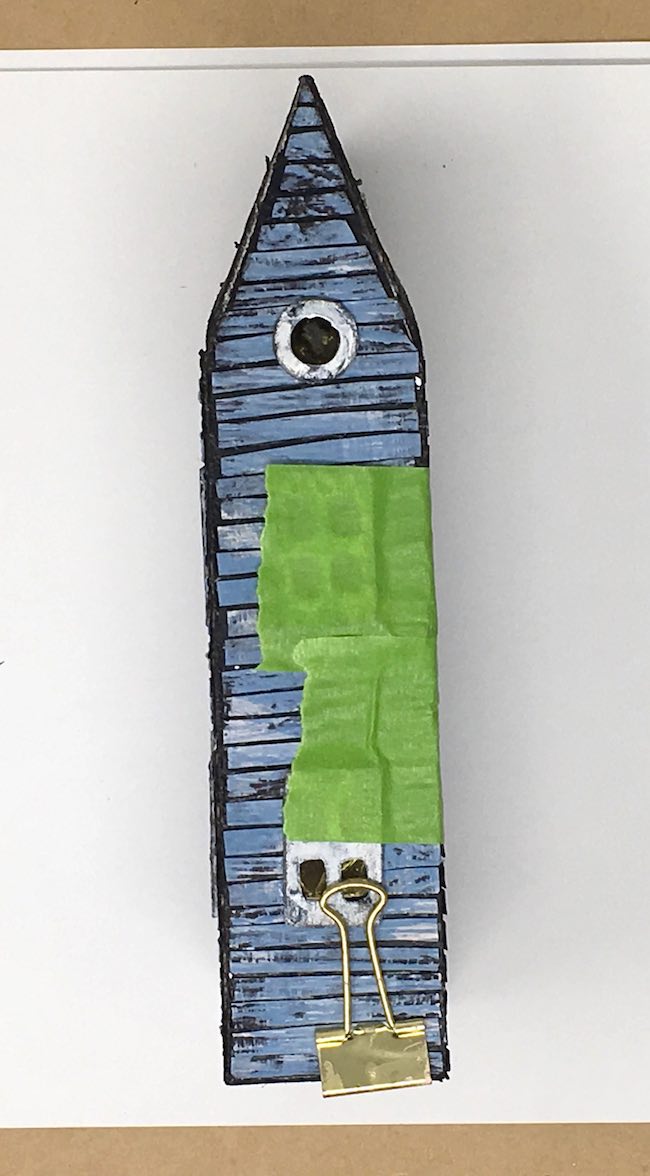
Glue the house together
Next glue the cardboard house together with the strong glue - Aleene's Fast Grab Tacky Glue. Hold the seam in place with easily removed painter's tape and a binder clip.
Glue the main body of the dormers to main roof before you glue the roof on the house
Now here is a tip that makes all the difference in gluing dormers to the roof. Glue them on BEFORE you glue the roof to the house. When I made the first Sea-Worn Beach House, I think I had to hold the dormer's in place by hand for about 15 minutes. Whereas when I glued them on the roof for this house, I just put them in place, added a little bit of tape for security and went about my business. So much easier.
After the dormers are dry, glue on the dormer roof pieces
Now glue on the dormer rusted roof pieces. Reinforce them a bit with some painters tape while the glue dries.
Next glue the main roof on the house
Now you can glue the main roof on the house. Again, painter's tape to the rescue. So you can go continue crafting while the the glue is drying. 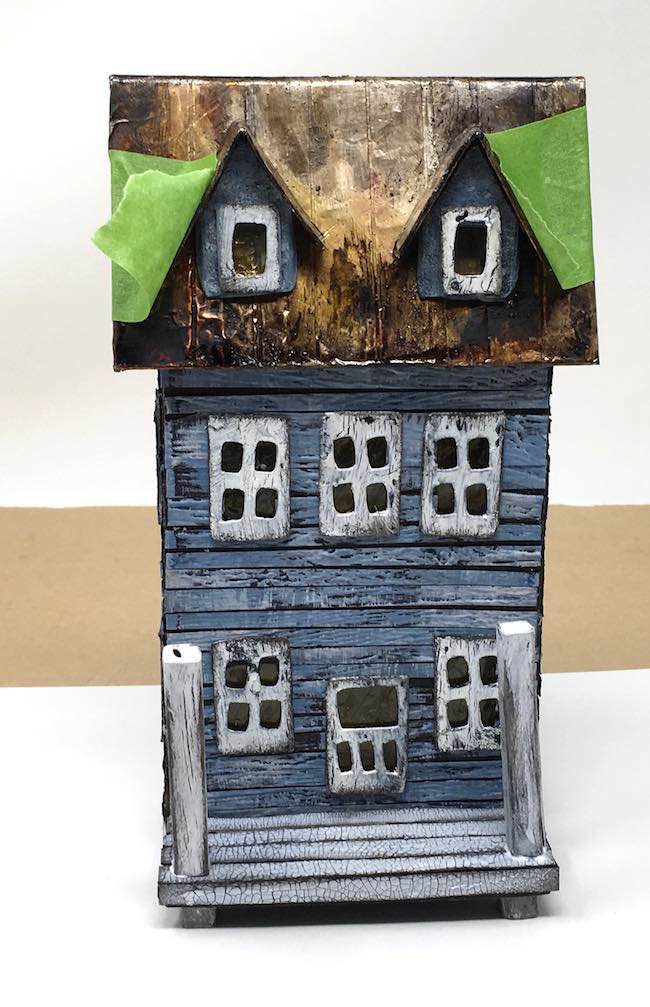
Adhere the porch floor to piers
Glue the two ½ inch piers to the front of the porch piece. You can see them in the photo above.
Glue the porch to the house
Next glue the porch to the house with a nice thick bead of glue on the back of the porch floor.
Add the porch columns
Once the porch floor is secure, glue the columns in place with a thick glue. Let it get tacky at least because when you put the porch roof on, sometimes they move a bit. I like to be able to straighten them out so I don't let them get completely dry before I glue the porch roof on.
Glue the porch roof on the house and to porch columns
Now glue the porch roof onto the house and the porch columns. No one is going to see the underside of the porch roof so you can use a thick bead of glue here as well. Aleene's Fast Grab is the way to go for this step as well. Straighten your columns if they get crooked. Remember it's the Sea Mist, a Sea-Worn Beach House so it is ok for the columns not to be perfectly straight.
You can see where the porch roof is glued to the house. I didn't make the angle a 90 degree angle there. But it still works ok.
Finally, glue the house to your Sandy Beach cardboard base
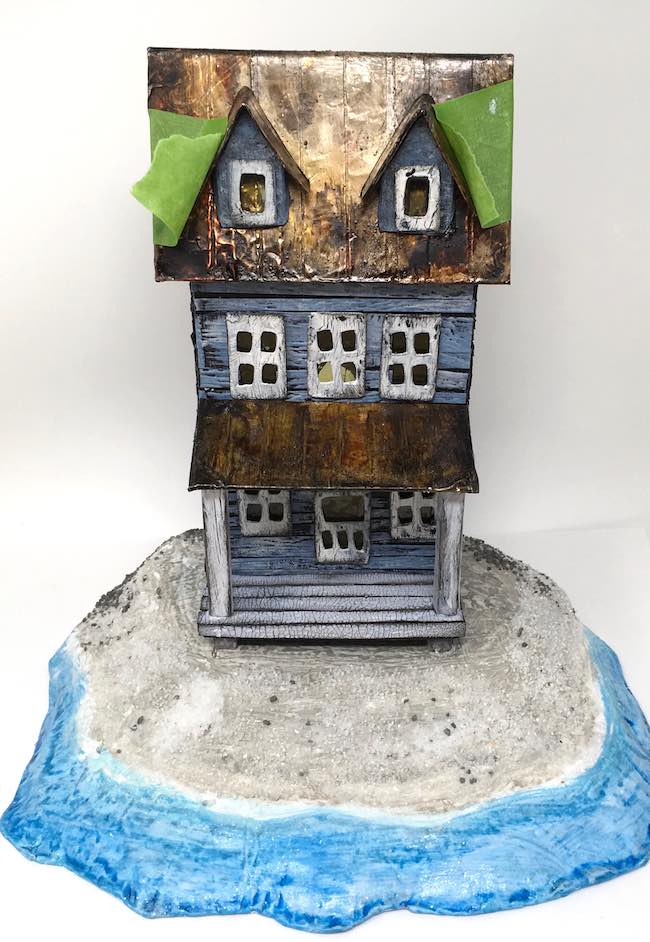
Test fit how you little house is going to sit on the sandy beach cardboard base. Then glue in place. I wrote about decorating the sandy beach in the previous blog post - How to make a Sandy Beach Cardboard Base.
Online Craft Challenges
I am going to share this with one of my very favorite online challenges the Simon Says Stamp Monday Challenge - Add Something Metallic which is of course, the rusted roofs on my little beach house.
And the other online craft challenge that I often enter is the Frilly and Funkie challenge which is "I love it because". This challenge is absolutely perfect for me because you know how I love to make little houses.
If you have any problems or questions about how to make the Sea-Worn Beach house, please let me know at [email protected].
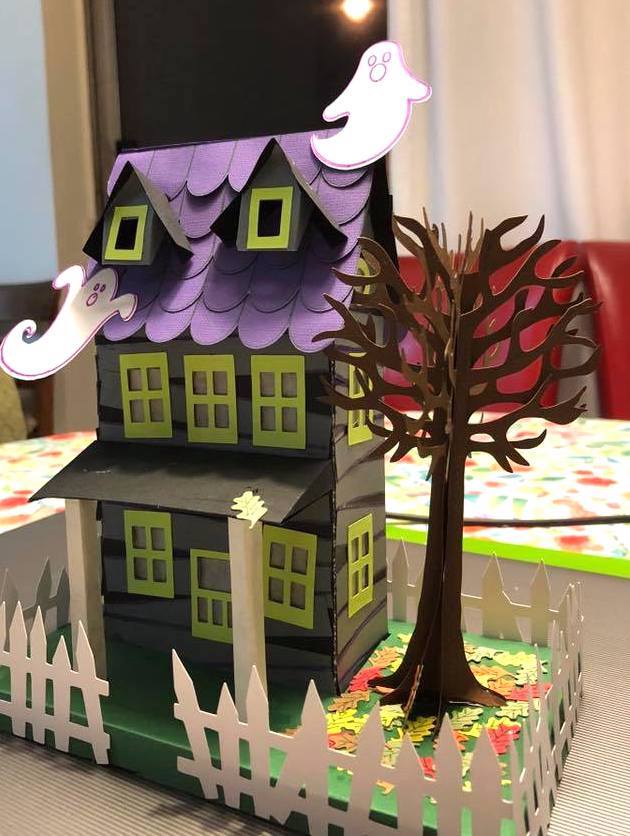
And here is a Halloween version of the Sea Worn Beach House from one of my readers, Vicki. It's a great variation of this miniature house made of card stock.
And here is another house that is based on the Sea Worn Beach House though my friend, Winnie, made it from her own pattern. Isn't it incredible?

So I am writing this on Mother's Day. To all you hard-working, lovely mothers out there - Happy Mother's Day!
Lucy
How to Make the Sea-Worn Beach House - a little cardboard house by the Sea

Bonnie Smith
Love this little beach house!
Lucy
Thank you, Bonnie. It's one of my favorites, too.
Lucy
jane
so pretty but difficult to see because your logo cover half of my screan
Lucy
Jane,
I have tried to figure out what the problem is, but it doesn't look that way on my phone, iPad, or computer so I don't really know who to fix that problem. I am sorry about that. I hope you will still try some of my projects.
Lyla Larimore
This!!!!!
Totally ingenious and incredible!!!
Another thing for my “must do” list!!!
CONGRATULATIONS!!!!
So much FUN!!!
Lucy
Thank you so much, Lyla. I hope you will make a Sea-Worn Beach House because they are fun - especially to decorate.
Lucy
Judy Everett
Congratulations. A very well deserved win in the FF challenge. Lovely. Detailed. Wow.
Barb in kazoo
Congrats on your win with this. It is truly deserved. Your generosity with the design and your tutorial is wonderful. I’ve subscribed to your blog an eagerly will watch for new posts along with your posts at frilly and funkie. Thank you
Lucy
Thank you so much for your kind words. I am grateful for winning the challenge.
Lucy
Jenny Marples
Truly outstanding Lucy!!!! The attention to detail is jaw dropping and the finished beach house breathtaking!!! Your passion for creating houses shines through as ever. Thank you for sharing it with us at Frilly and Funkie xx
Lucy
Jenny, thank you so much. I do appreciate you taking the time to comment. It means a lot.
MAGGI HARDING
WOW, this is amazing, you have really captured the look of a worn beach house. Thanks for joining in The Frilly and Funkie challenge.
Lucy
Thank you, Maggi. I just love to make little houses. Whenever I can, I try to share with the Frilly and Funkie challenge. I was so happy that the challenge was "I love it because" and making a little house fit perfectly.
Melissa
Wow! This is just beautiful! I love your beach house!
stampersuzz
A charming sea-side villa! Lovely design and awesome tutorial! Thanks for sharing your art with us at the I love it because challenge at Frilly and Funkie!
Lucy
Thank you, Suzz. I am so happy you like it.
Lucy
Beulah Bee
Just Brilliant! You have captured the charm of this type of house perfectly. You are very generous to share your knowledge and patterns (so kind) but it will be hard for anyone to match your skill!
Sara Emily Barker
Color me speechless! What is NOT to love about this amazing beach house, other than I'm too big to take a walk through it! This is really sensational from the aged 'copper roof' to the weather worn 'siding'! Fabulous and so wonderful you shared it with us at Frilly and Funkie, Lucy! Big hugs!
Lucy
Sara Emily,
I always love it when you leave a comment because it makes me so happy. Thank you so much.
Lucy